

Tutorials
Using the Pen Tool and Creating a Sky!

Using the pen tool and creating a sky! Tutorial by: Chris Bullen - Element2
The pen tool offers the most flexibility when trying to mask out portions of an image. For this example, we’ll look at replacing a sky using the pen tool to create out selection. We’ll also examine some time saving tips along the way.
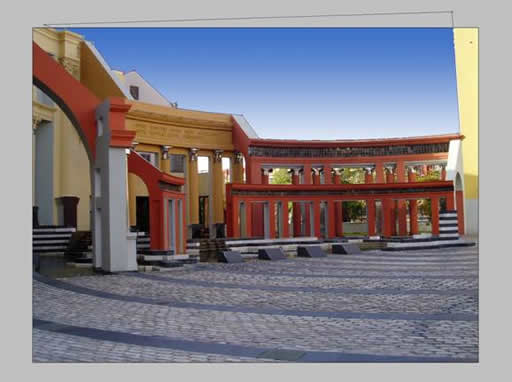
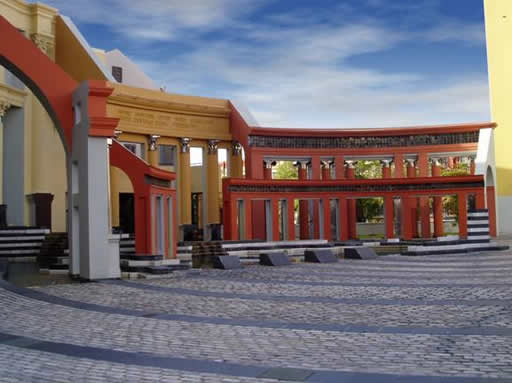
Let’s start with the image.
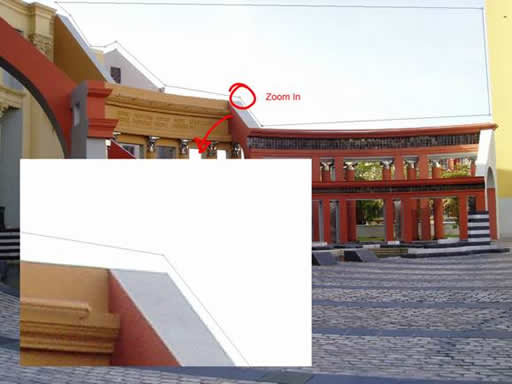
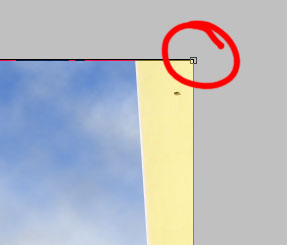
I chose this image from New Orleans because it is a curved structure which would be more time consuming to do with the lasso tool, or by painting a selection. Let’s start by selecting the pen tool. Press “P” to enter the pen tool. You can arbitrarily start at any point in the image where an angle occurs. For example:
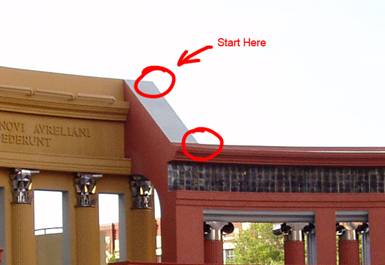
Click on the “corner” where it says Start Here to start the pen tool. Proceed to the next “corner” and so on as shown below. Notice that we don’t have to take a lot of time to be accurate here as we’ll come back to tweak the anchor points later.
Let’s take a look at some key techniques here. When you start using the pen tool, you may at some point inadvertently stop the process. For example, start creating the path again and press the esc key. This will stop the process. If you click again, you’ll start creating a new path. To pick up from where you left off, simply click on the last point you created and it will automatically start where you left off. As a matter of fact, you can choose any open anchor point and click on it to continue creating the path.
Now, let’s look at the advanced features! If you see any of those small anchor point boxes along the path, press esc once to get to the path object level (similar to switching between sub object and object level with splines in 3DS MAX). If you press esc again, you will loose the path you created. You can get that back by using ctrl-z. (Here’s a huge tip, if you need to undo several times use the shortcut ctrl-alt-z to jump up levels in your history)
We’re going to need to select the path we created, so while still in the pen tool press and hold the ctrl key. This will change your cursor to a white arrow which will allow you to select any path. Since you can have several working paths at once, this can be handy! Now when you select the path you’ll see little open boxes at each anchor point. Continue to hold down the ctrl key and select an anchor point. It will become solid indicating it has been selected. You can now drag the anchor point anywhere you wish so long as you continue to keep the ctrl key pressed. Let it go and hover over the same anchor point and see the cursor change to a pen with a minus sign. This will delete any anchor point you click on, but you have to be located directly over top of the anchor point you wish to delete. Now in a similar fashion hold the cursor over any other region of the path and you will see the cursor show the pen with a plus sign. This will add vertices to the path. Go ahead and add an anchor point. You’ll see that by default, this will create a Bezier point, meaning you now have handles in which to adjust the tangencies. Select the new point by holding down the ctrl key and dragging it like so;
Play around by selecting the handles to see how this affects the tangency of the point; don’t forget to hold down the ctrl key, otherwise you’ll start creating a new path.
Before we delete this point, let’s examine some other useful features.
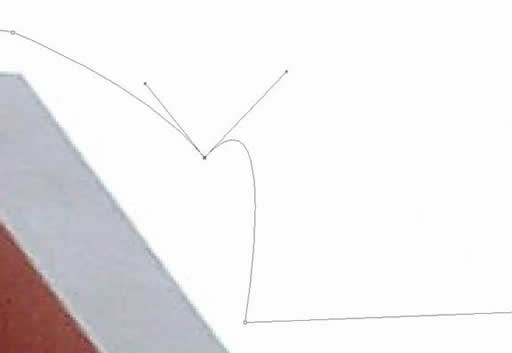
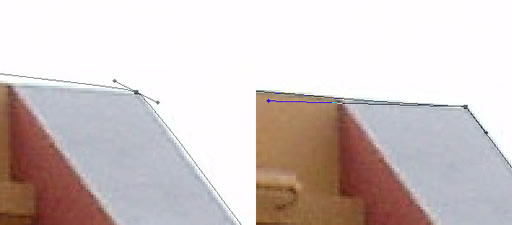
Let’s say we want this point to be a corner instead. You can easily do this by holding down the alt key and hovering over the anchor point. The cursor will turn into the “convert point” icon. When you click on the anchor point it will instantly turn it into a corner. You can also click and drag to create new tangents. Also, if you continue to hold down the alt key, you can break the continuity of the Bezier handle and turn any anchor point into a cusp. See below to understand.
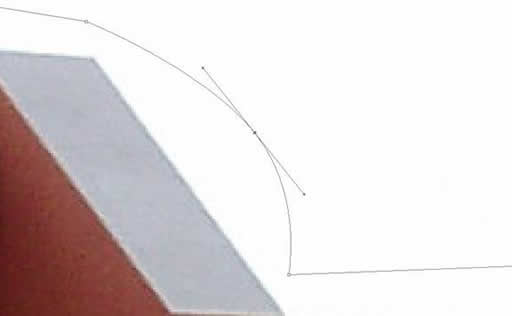
You can also fine tune the amount of the curvature without affecting the tangencies by holding down the ctrl key and dragging any portion of the curve between the anchor points. The image below has increased the curvature by dragging as indicated.
Now delete the point and we’ll use the tools shown above to place the anchor points into position. To do this efficiently, we’ll remain zoomed into the image and drag to view each anchor point. Let’s take a side bar to examine some useful keystrokes!
To zoom at any time in any tool hold down both the ctrl key and spacebar. Then you can either click to zoom in incrementally or drag a window to zoom in. To zoom out, hold down the alt key and spacebar. To pan, simply hold down the space bar and click and drag within the Photoshop window.
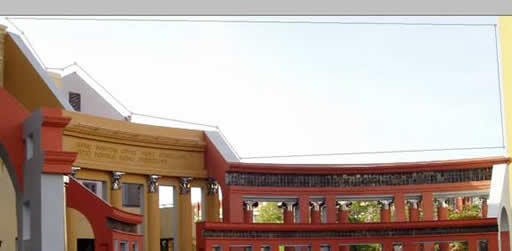
There, now you can easily navigate the image. Zoom into the image as shown below.
After adding some anchor points and moving them into position you should get something like the following Typically, the process is you add a point and convert it into a corner (new points are by default created as Bezier and you need to convert them to a corner to position them). Remember you can come back to change it into a Bezier point or cusp which is precisely what we’re going to do for the curved sections.
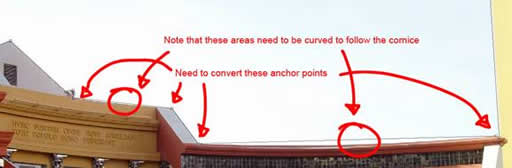
Hold down your alt key and click and drag the points shown above. Don’t drag too far, just enough to create a Bezier point. See the following image to illustrate the creation of the Bezier point, then the conversion to a cusp.
Continue the same process for the remaining three points to get the following.

Now, let’s convert this into a selection. You should still be in the pen tool throughout this whole tutorial, if not, press “P” to get into it again. Simply hold down the ctrl key and select the path we’ve created. Now right click and select the Make Selection option. This will create a selection that follows your path. You also have the option of softening the edges which isn’t very useful for this application, but still is available. Select the 0 pixel radius and click ok. You’ve now created a selection. You can save this selection by switching to your Marquee tool, “M” on the keyboard, and right clicking to select Save Selection. Now you can recall this selection at any time. Similarly, you can save your path by selecting the Paths tab and choosing the Save Path option in the fly out menu.
Let’s de-select by using the keyboard shortcut, ctrl-d. Now make sure you’re in the pen tool and you’ve selected the path. Now create a new layer (here’s another shortcut to create a new layer, press ctrl-shift-n). Now right click and select Fill Subppath. This will fill the path with either the foreground or background color, in our case we’re going to fill it with the default foreground color Black. You should get the following.

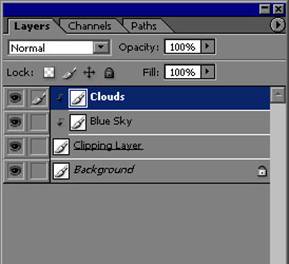
Now, we’re going to use this layer to clip the sky in. Your layer palette should have two layers in it, one being the base image, the other above it being the black shape we just created. Select the top layer and create a new layer called Blue Sky.

Now, select a nice sky blue for the foreground color and a white for the background color and create a gradient from blue to white on the Blue Sky layer.

Now, we need to clip this layer with the layer below, we can do this by holding down the alt key and placing the cursor directly between the Clipping layer and the Blue Sky layer. The cursor will change to a black arrow with two circles. Once this happens, click! This groups the Blue Sky layer with the layer below.
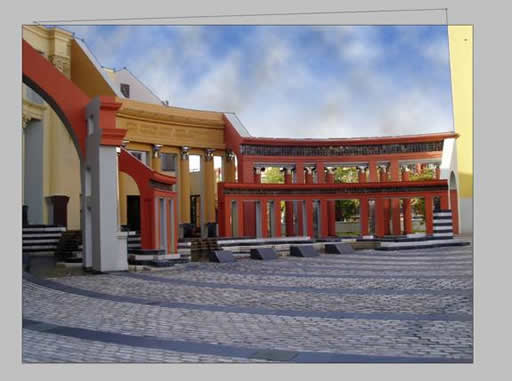
Viola, the sky is replaced.
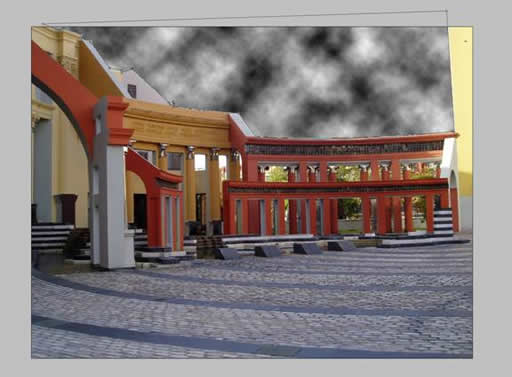
You can now add clouds or other components on layers that are linked to our clipping layer. Here are some quick Photoshop clouds.
Create a new layer as shown below.
Set the foreground and background color to Black and White respectively (press d for ‘default’ colors). Now use the Clouds filter and get the following.
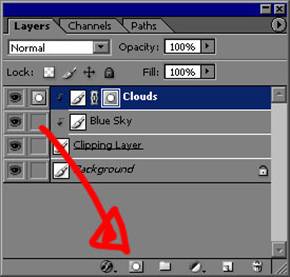
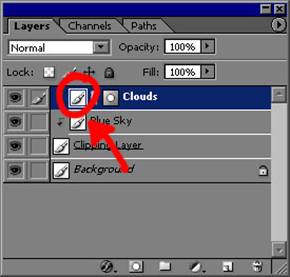
Create a layer mask by clicking the following in the Layers palette.
Now the layer mask is selected, so run the cloud filter again (press ctrl-f to run the last filter used) and you should get the following.

Select the cloud layer (the little brush icon, not the mask icon), and use levels to decrease the black in the layer.
You should get the following.
Before we move on, make sure the path is deselected. You can do this by pressing “P” to access the pen tool, then hit numeric enter on the keypad (not the enter key by the text keys). Press the “V” key to get into move mode.
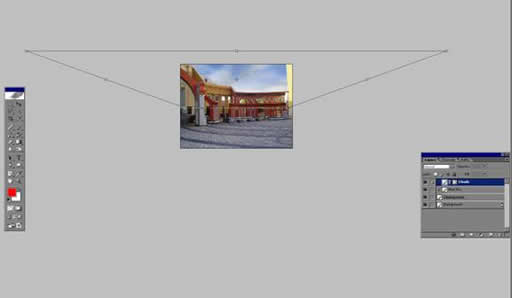
Now, select the cloud layer and do a free form transform by pressing ctrl-t and grabbing the upper right corner of the transform box.
Now press and hold ctrl-shift-spacebar and drag to the right. This does a perspective transform and will create the look for the clouds. Try to match the transform shown below.
Here’s the final result.
Cheers!
You must be logged in to post a comment. Login here.
About this article
The pen tool offers the most flexibility when trying to mask out portions of an image. For this example, we’ll look at replacing a sky using the pen tool to create out selection. We’ll also examine some time saving tips along the way.
visibility1.88 k
favorite_border0
mode_comment0


