

Making Of
The Making of Mediterranean Walkway
The Making of Shy Begleiter's Mediterranean Walkway
Skuba3D – www.skuba3d.com
Hello everyone, thank you for the opportunity to publish my work process in CGarchitect.
Introduction
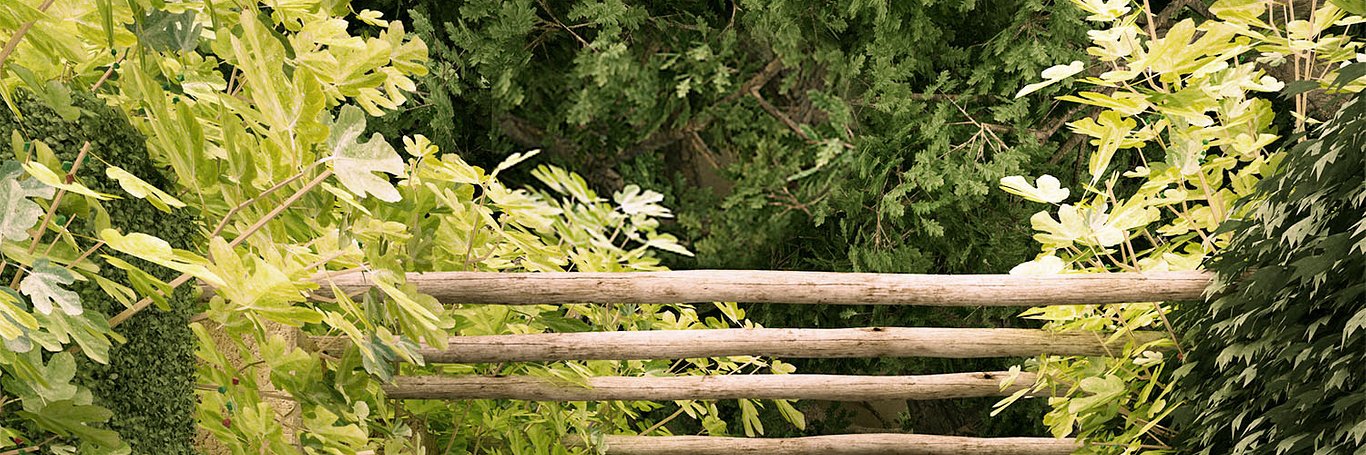
I created this piece quite a while ago. Most of techniques are simple and I would rank this article as beginner level. Nevertheless, there is an important lesson here that I try not to forget: Quality can be achieved with simple tools, and when combined with efficiency, it's of great value. I was doing this piece as a practice to achieve a higher level and quality of vegetation in my renders. To achieve that I decided to keep the other aspects as simple as possible. I first looked around the web for a nice photo to use as a reference. After a short lookup, I found this nice photo:

Simplicity, Efficiency, Quality .
The architectural geometry in the image is simple and straight forward, this let me focus on the nice variety of vegetation. The piece was done during a weekend (no more than 16 hours work) which required me to be very efficient. I'm still getting positive reactions to the final image which I understand as good quality.

Modeling
I used the standard method of loading the reference photo into the viewport background. Established a camera and drew up guide lines. The posts were modeled by creating boxes and wooden poles by creating cylinders.

I chamfered the posts and applied a noise modifier for both posts and poles before copying them.

After copying the objects along the path, I fiddled with the seed of each noise modifier to give them a more random feel. For the poles, I also moved and rotated the UVW map.

The modeling was done with no more than five different objects and three basic materials (ground, wall, wood), getting it ready for the vegetation phase.

Most vegetation assembled are Evermotion models. I altered some of them by trimming, scaling and grouping mostly as VrayProxies, but most important I color balanced the diffuse maps of all vegetation to a harmonious palette by using Photoshop.

Planting the vegetation in place:

Apart from Guruware – Grow Ivy, no external plugins were used (Igrass Itree MultiScatter - weren't available at that time). I grew most of the Ivy with no leaves to give a feel of dead roots and branches along the posts.

To create a nice "grungy" effect to follow the Ivy strands, I used VrayDirt for the wall material with pretty high radius (140 cm).

Lightning and Render setup
I used GI only – VraySky attached to a disabled sun. No Direct light at all. It's probably not something I would do today. It made a nice feel for the closed area but made bumps and displacement less noticeable.

At the time I made this scene, I was working on 3ds Max 2009, V-Ray 1.5 with Gamma 1.0. For this "making of", I reopened the files on Max 2012 with V-Ray 2.0 and it works fine with Gamma 2.2 that is what I use now.

Post Processing
I processed the render in Photoshop in three simple steps: 1. Contrast – by using masked Curve, so as not to affect places I don't need to. 2. Warming – by using Color Balance, pulling it more towards red tones. 3. Desaturation – by using Hue/Saturation, to ease out the colors and to give it a more realistic feel.

And this is the final image:

You must be logged in to post a comment. Login here.

Nitin Kedar
Report Abuse
I like it..its great work
But you hiding some trick from us..........

Ifthikhar An
Report Abuse
Amazing work!
i loved the lights falling on the leaves most!
S
Saab Marseaux
Report Abuse
Good work. Now you should resume it and mimic the lightning from the photo.

Shy Begleiter
Report Abuse
Exactly it, I suppose that in the present, I would have used at least one source of direct light,
J
Jonathan Burkes
Report Abuse
I really like it!
The only thing that bugs me a bit is the lighting.
I can't tell from your render if it's a cloudy day, a hazy sun day, a sunny day, etc.
The lighting is too neutral I think.
So I guess that's why you say you wouldn't use a VraySky alone today :)

Andrew
Report Abuse
everything is simply too close. still a good image, but i cant orientate myself so that's where the dislike would be introduced. good visual. in terms of DOF and perspective marriage it's a clear no. BUT a great learning process non the less, thanks for the tut.

Terry Irawan
Report Abuse
. . great works! . .
Shy Begleiter
Report Abuse
Thanx Roman,
I will check that tutorial soon.
Enjoy Rio
Shy Begleiter
Report Abuse
Hi Dave.
As I stated in the first paragraph : It's a simple and fast scene, no more than beginners level.
At the time (more than 2 yrs back) the idea was to practice the composition of vegetation.
Adding the fact that people like it until today, makes it a successes for my opinion.
There are no new tricks nor technology here, Only pure simplicity.
Shy

AHMED SHAHEEN
Report Abuse
greater than the great
I
ILIA IRANI
Report Abuse
THANK YOU VERY MUCH . VERY USEFUL

OlaRenders
Report Abuse
thanks for this. The final image looks great
roman bruni
Report Abuse
brilliant maestro Begleiter !
at first fast glance and before reading text
I could not find the ''3d additional item'' in what seemed a bad photo!! it is very difficult to achieve this simplicity.
after long staring at final image and knowing the making process
I would say that the wall of leafs at right is a tadbit
man made pattern. andrew kramer of videocopilot in his
127 the jungle tutorial solves this by applying a 'z axis'
gradual desaturation.
thanks a lot for the almost zen techniques it enhances my ability to create too ! cheers from Rio de Janeiro Brazil.

Dave Buckley
Report Abuse
It's a nice image, but I don't really get what you've done other than create a few cylinders and boxes and place some ready made plants?
You say the exercise was to improve your vegetation skills, but you've not made any of it, right?
Forgive me if I'm wrong
About this article
Shy Begleiter from Skuba3d details the Making of this Mediterranean Walkway project.
visibility25.5 k
favorite_border34
mode_comment14


