

Making Of
The Making Of Palais De Justice
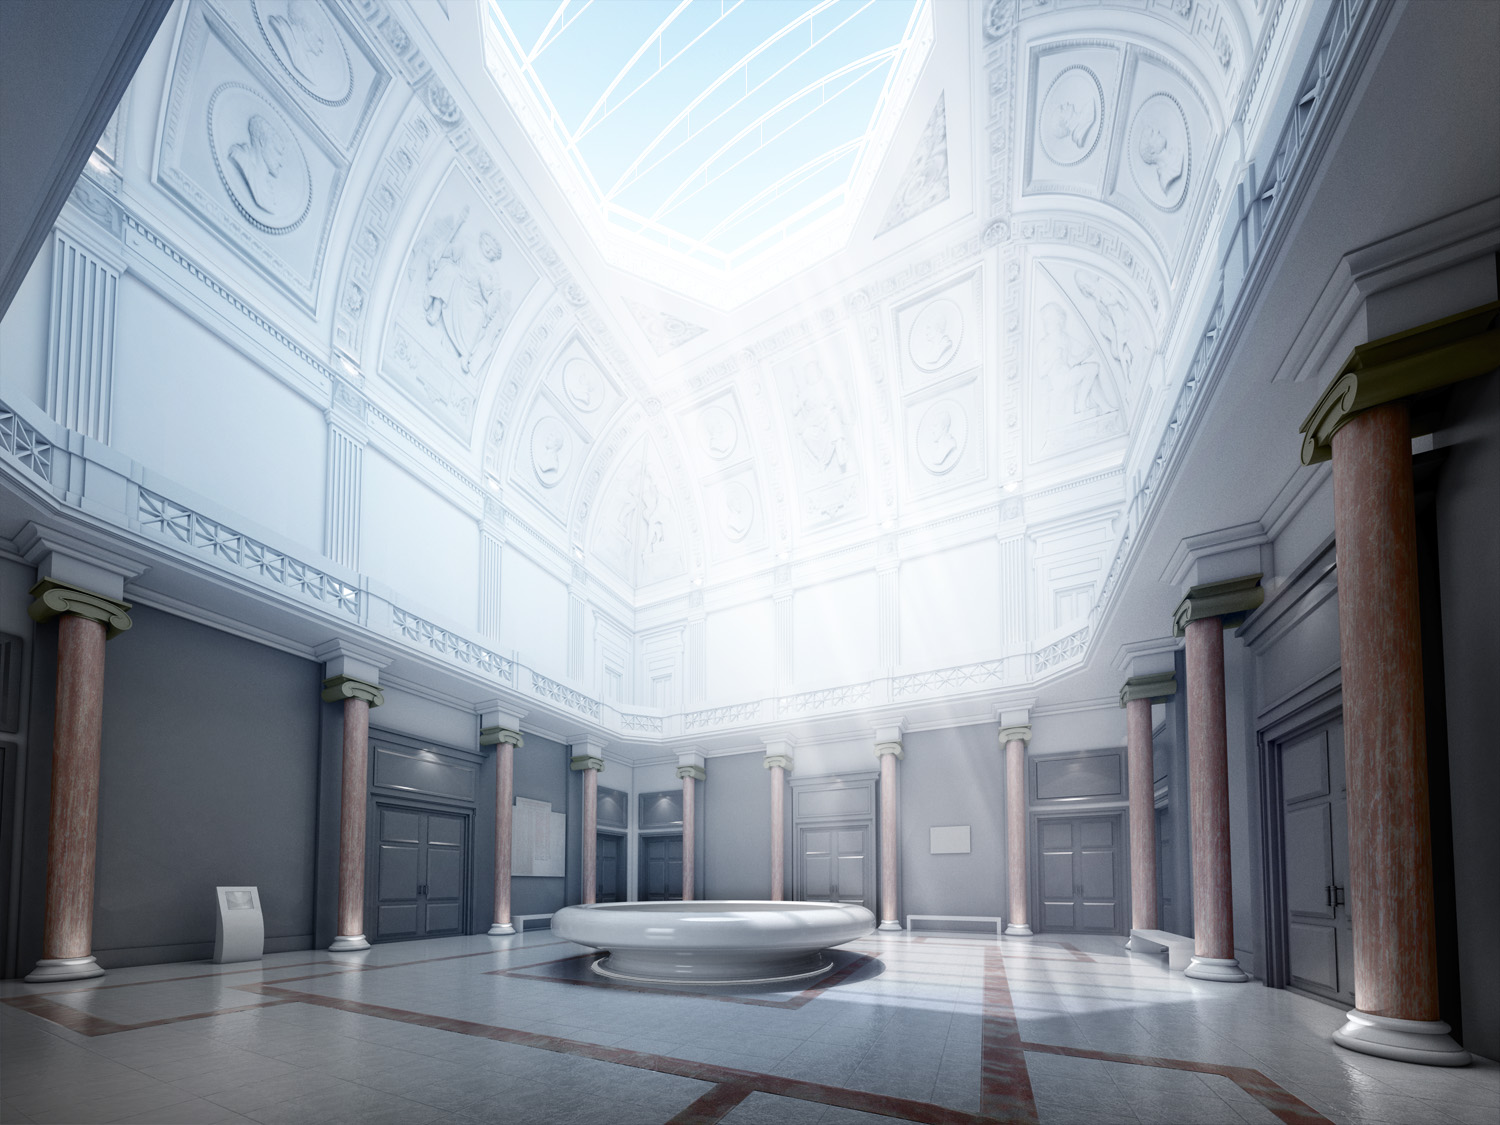
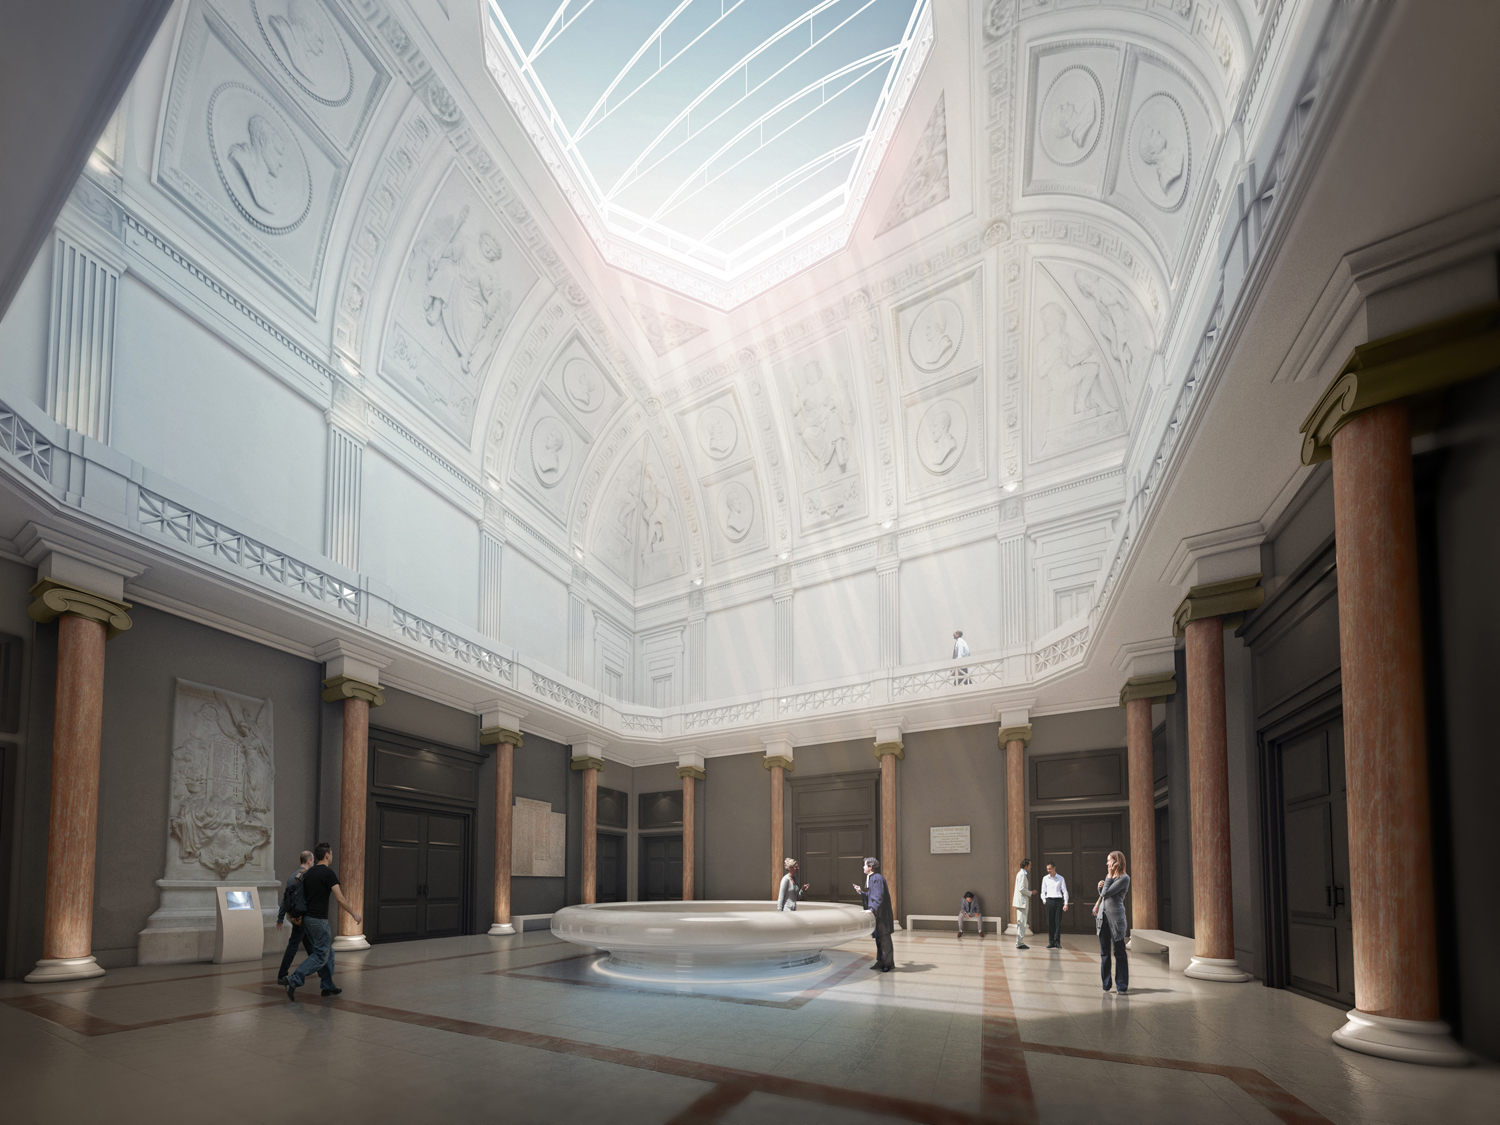
For this first tutorial, we suggest you follow the steps in creating a competition image that we realized for the « Palais de Justice de Marseille » by Tangram architectes.
Modeling
For modeling we used SketchUp Pro 8 for its ease of use and transfer to 3ds Max. This is achieved by exporting the objects in groups in order to simplify texturing in 3ds Max.
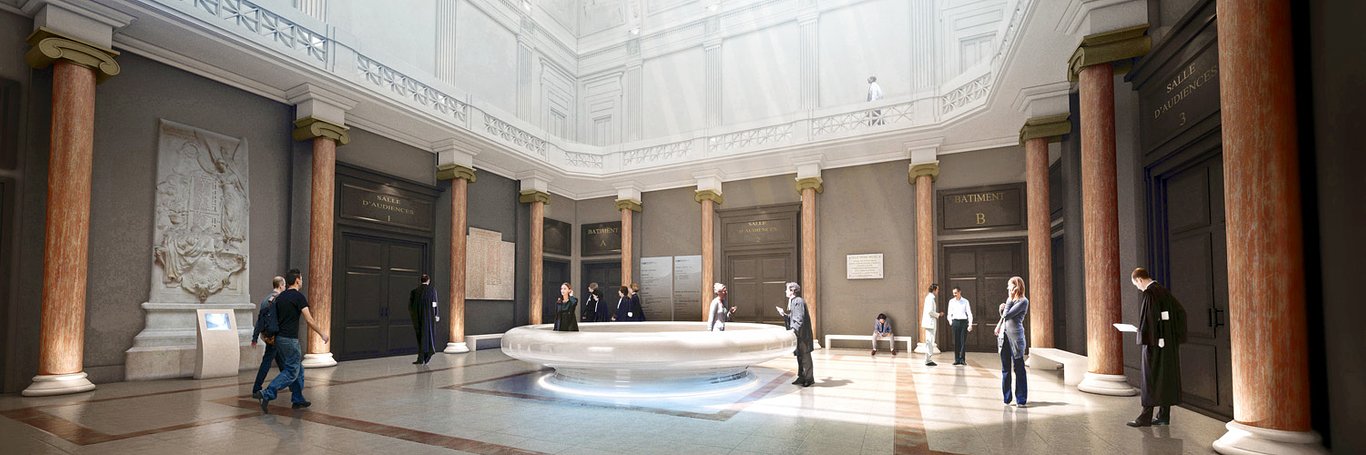
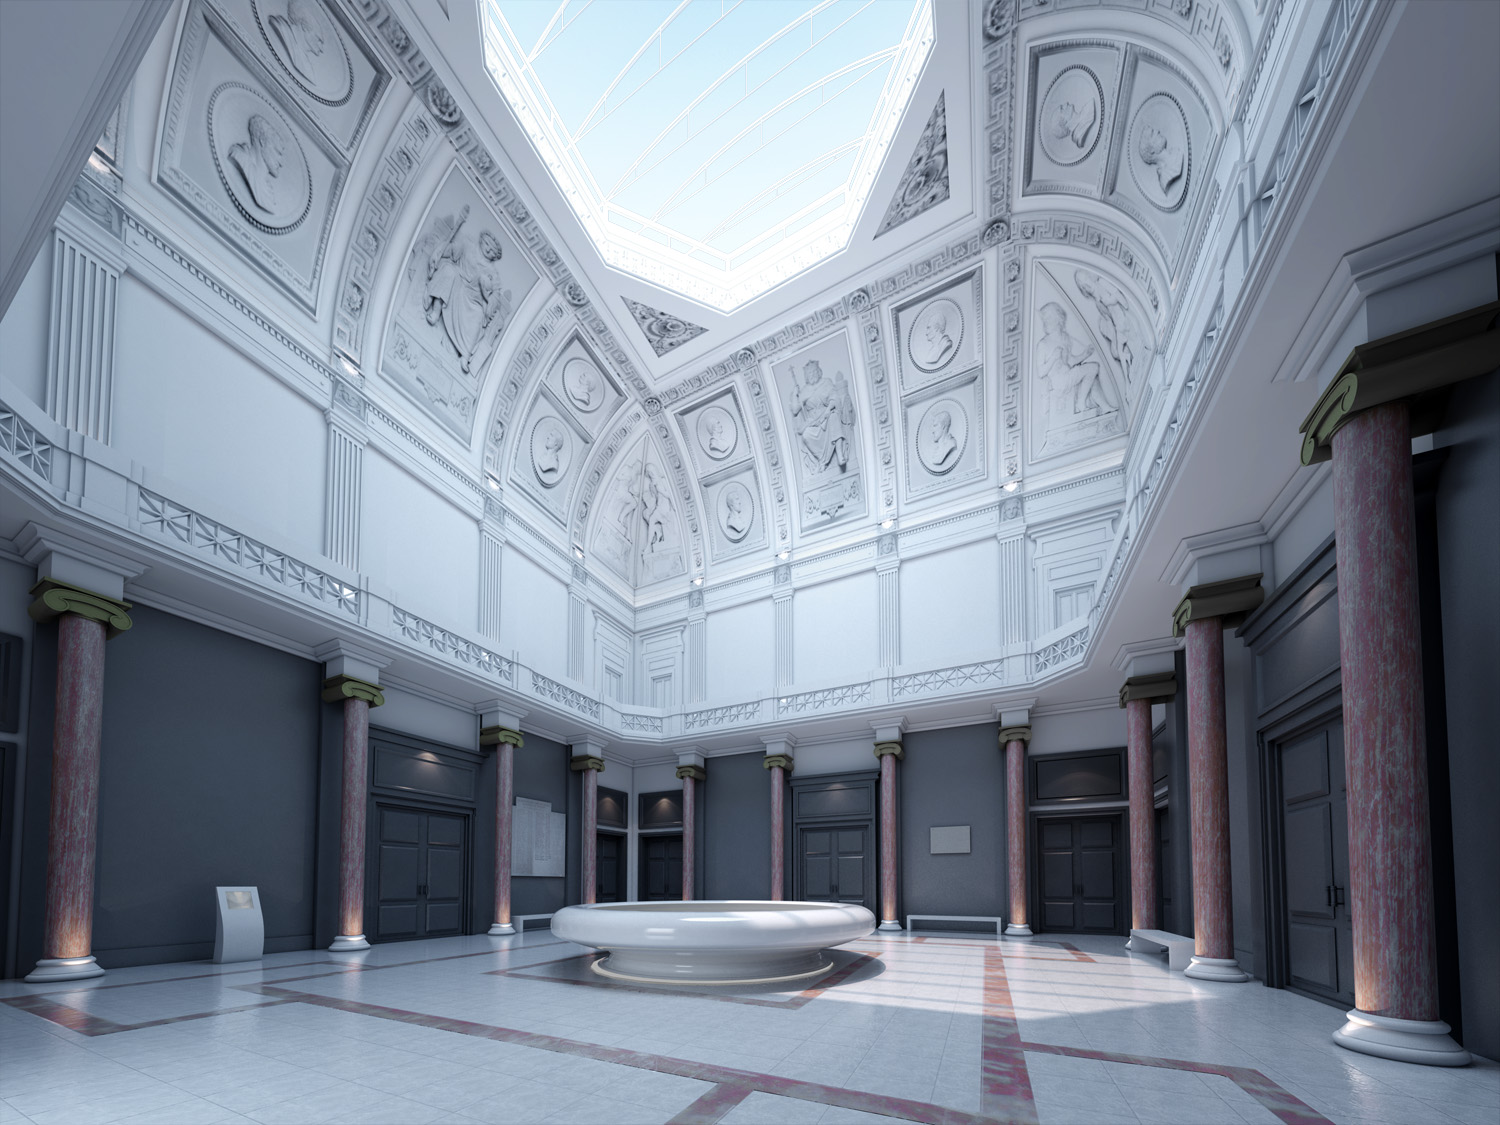
Several steps were needed to create the model of the « salle des pas perdus » with difficult elements such as columns, moldings and arches.

The walls and floor: We extruded the walls and the floor with this drawn pavement in order to apply the texture.
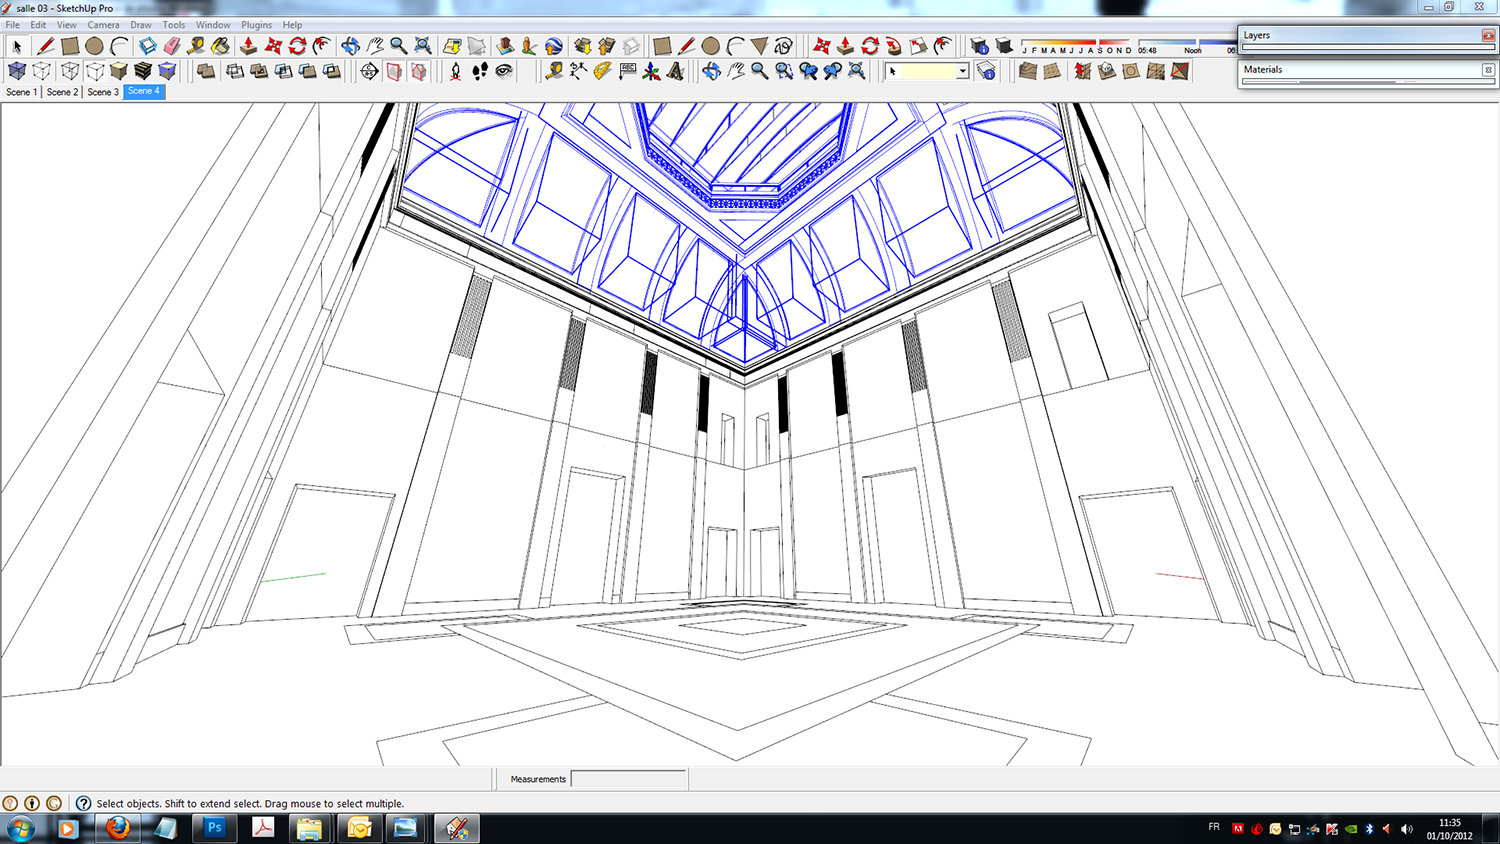
The ceiling and moldings: Each element is designed as a group in anticipation for the texturing.
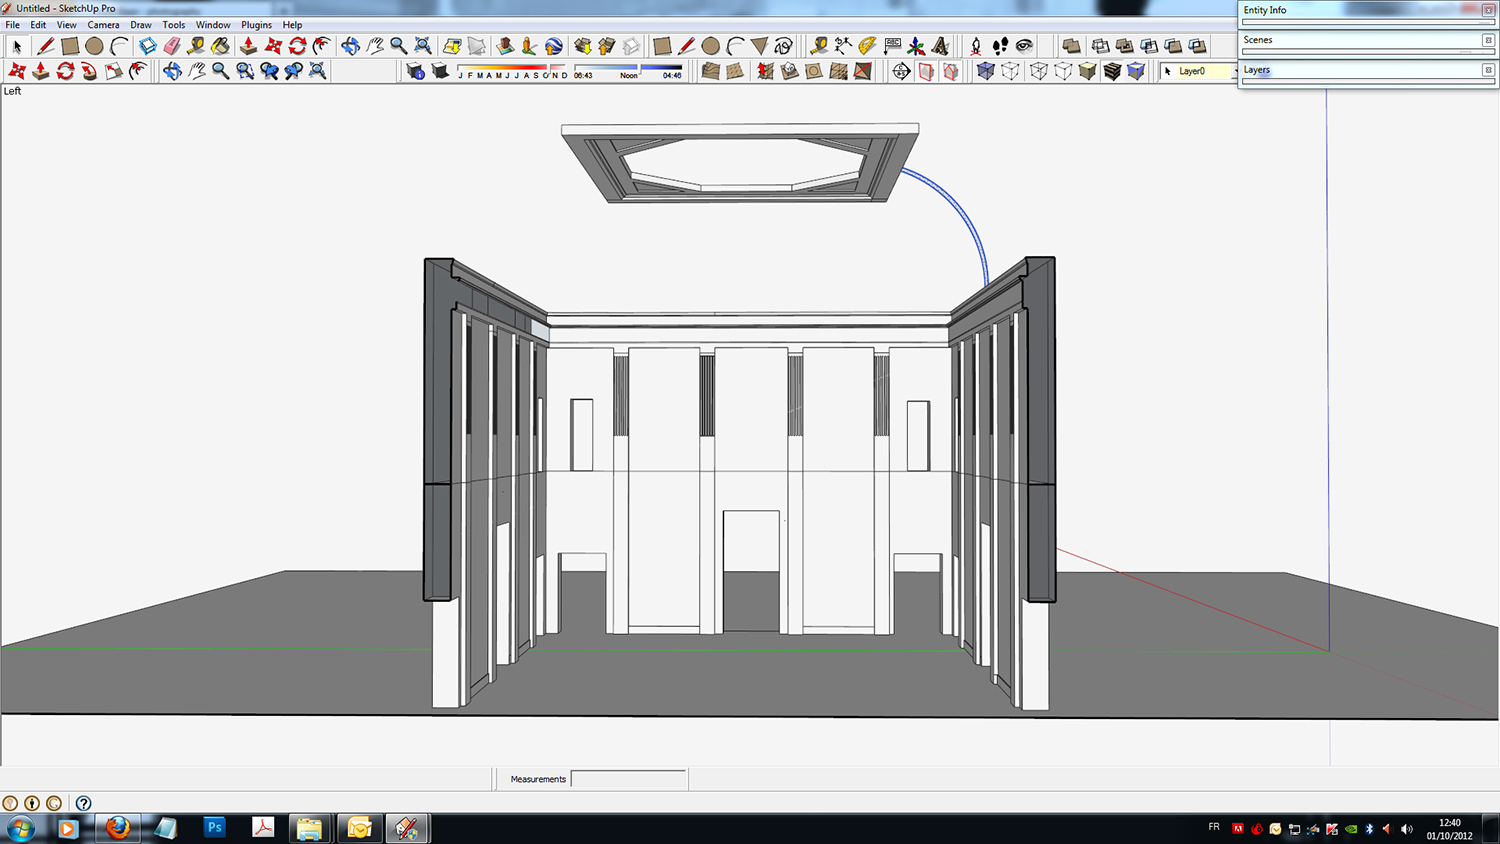
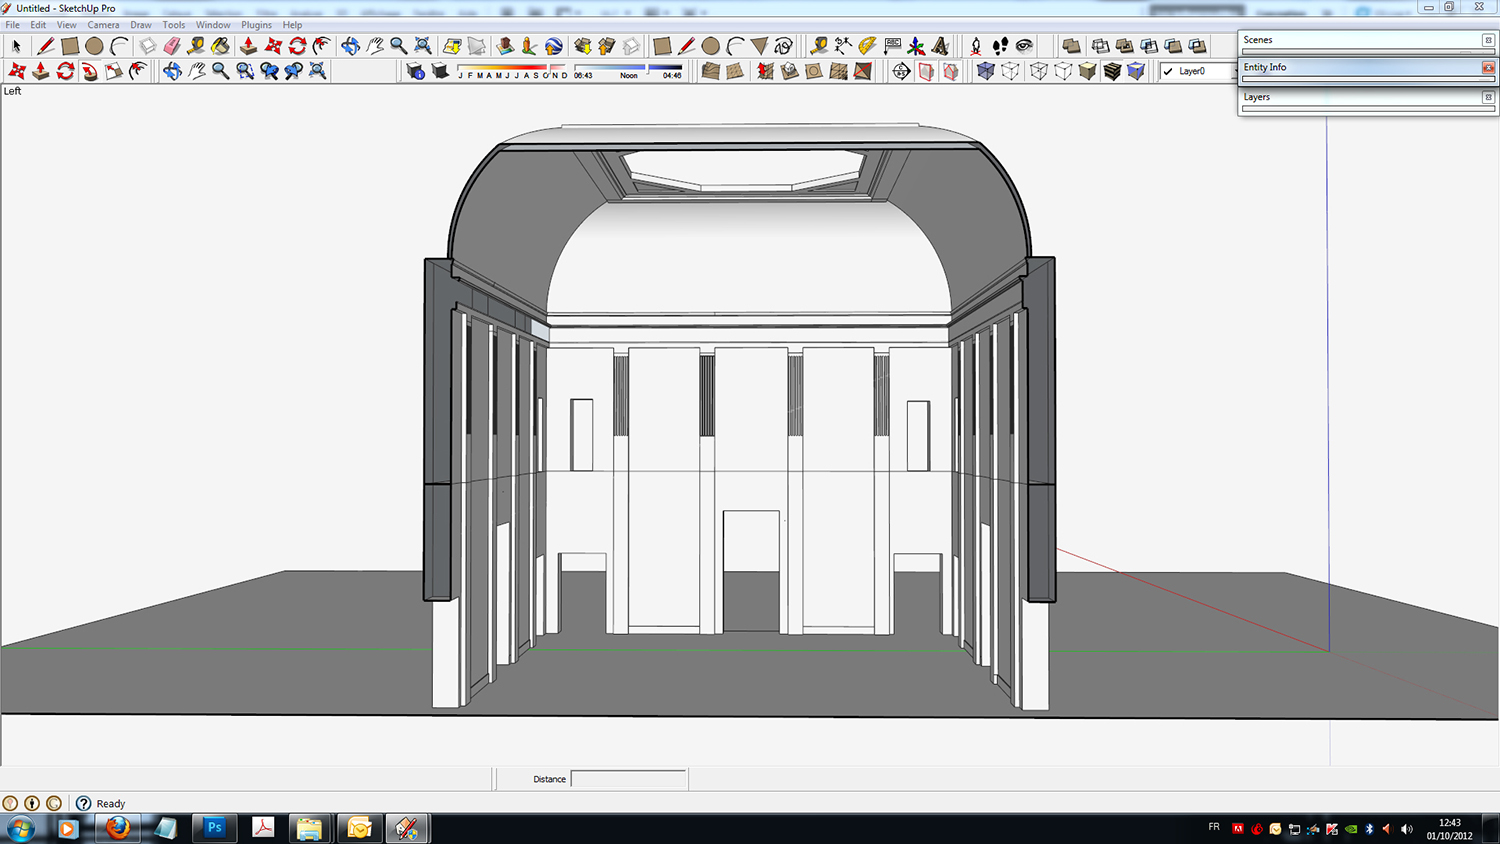
The Vault cornice profile creation uses the extrusion tool "follow me" by defining the extrusion profile and the path to be followed (the ceiling square). It should be noted that in the window «entity info» at the time of the creation there must be enough segments defined. Each face of the object must be "white" because V-Ray does not like blue faces from SketchUp.
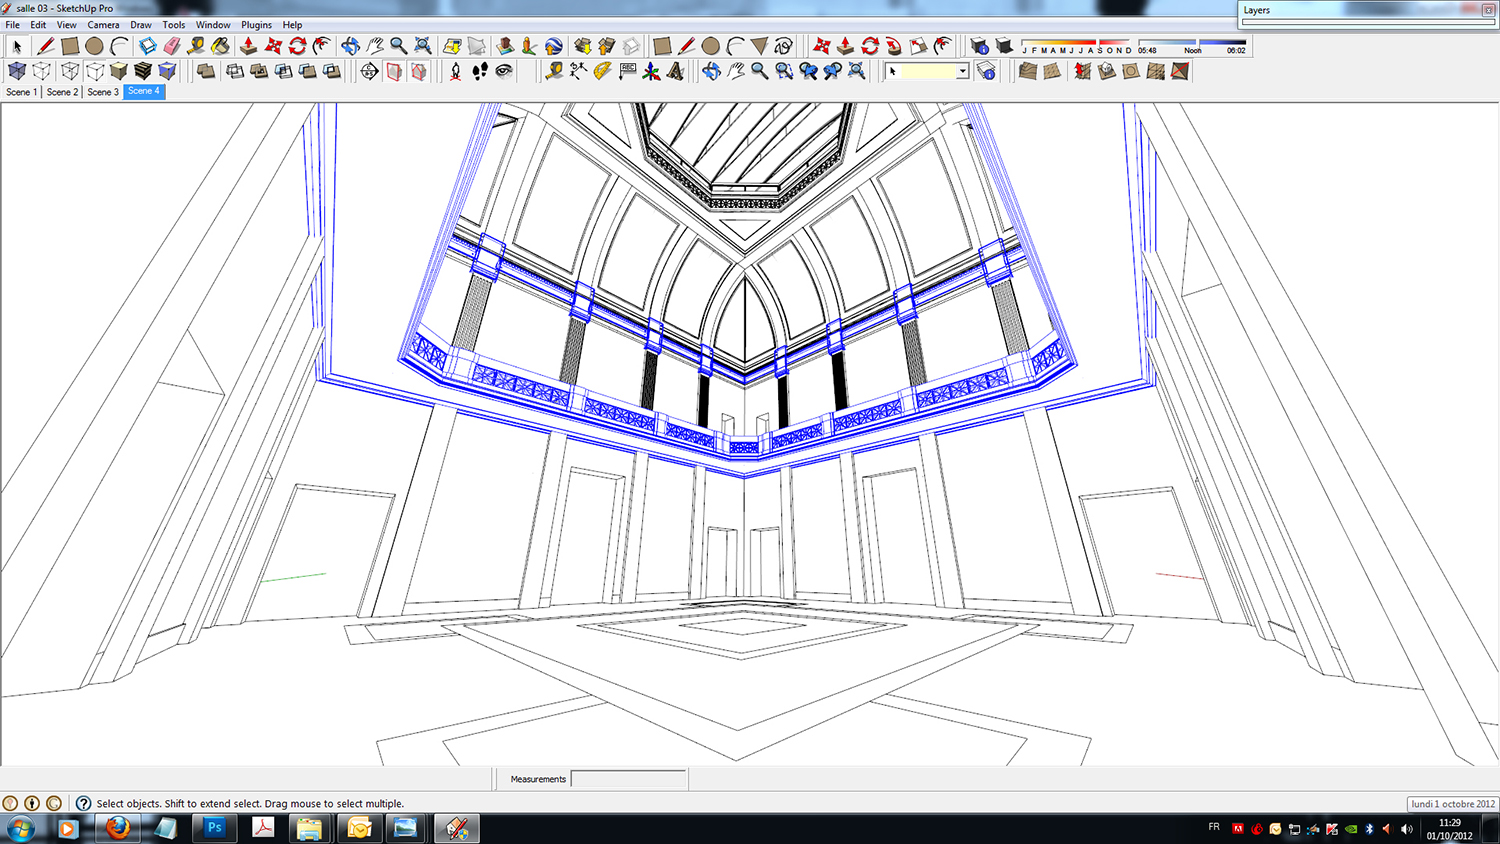
The Mezzanine and moldings : For the balustrades we designed and extruded forms. We created a group and multiplied it by the number required. Moldings were made by another "follow me" with the shape of the profile.
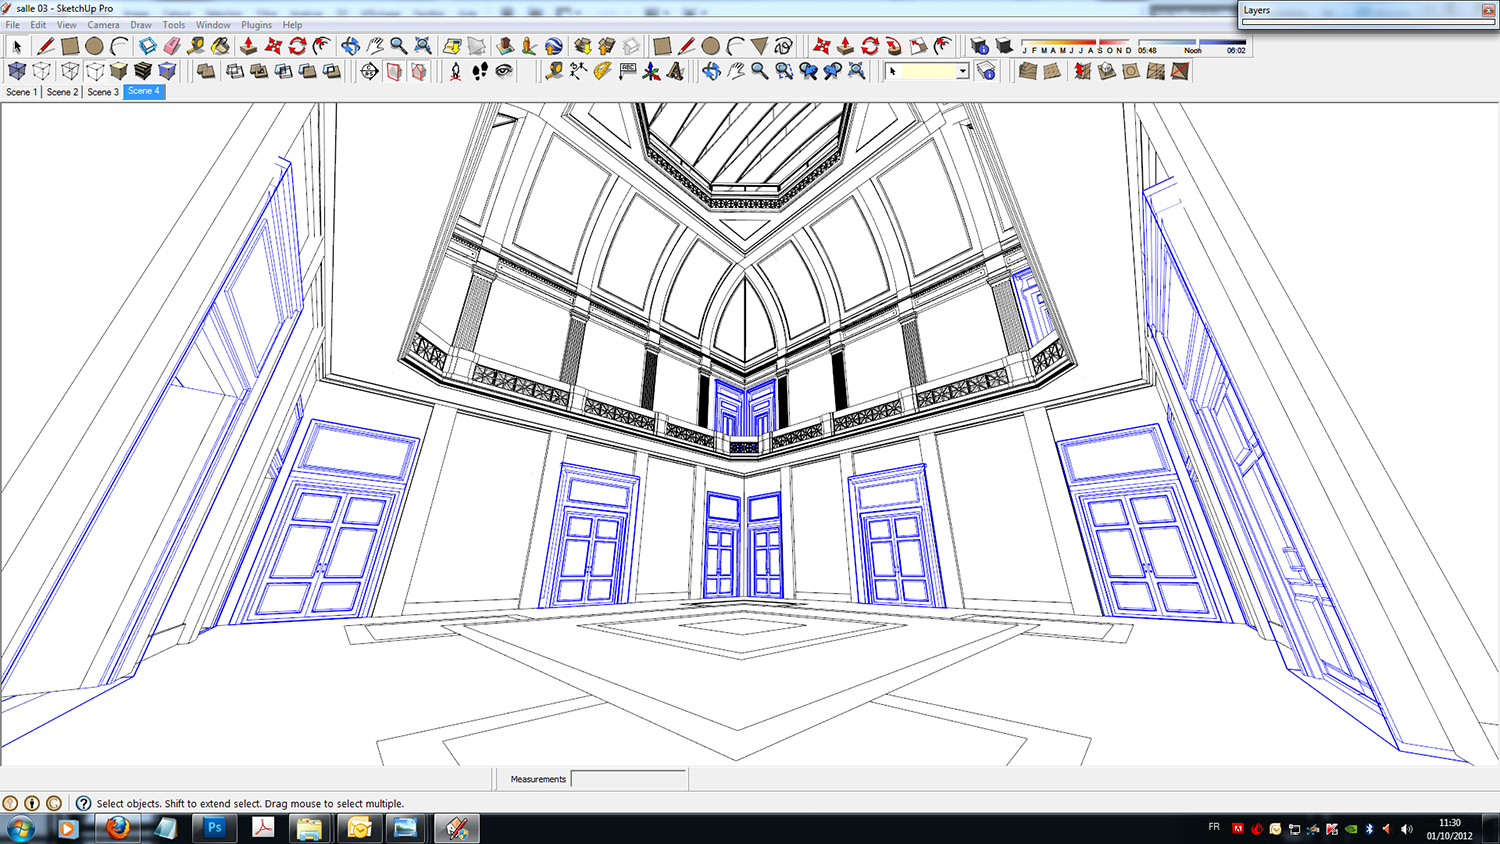

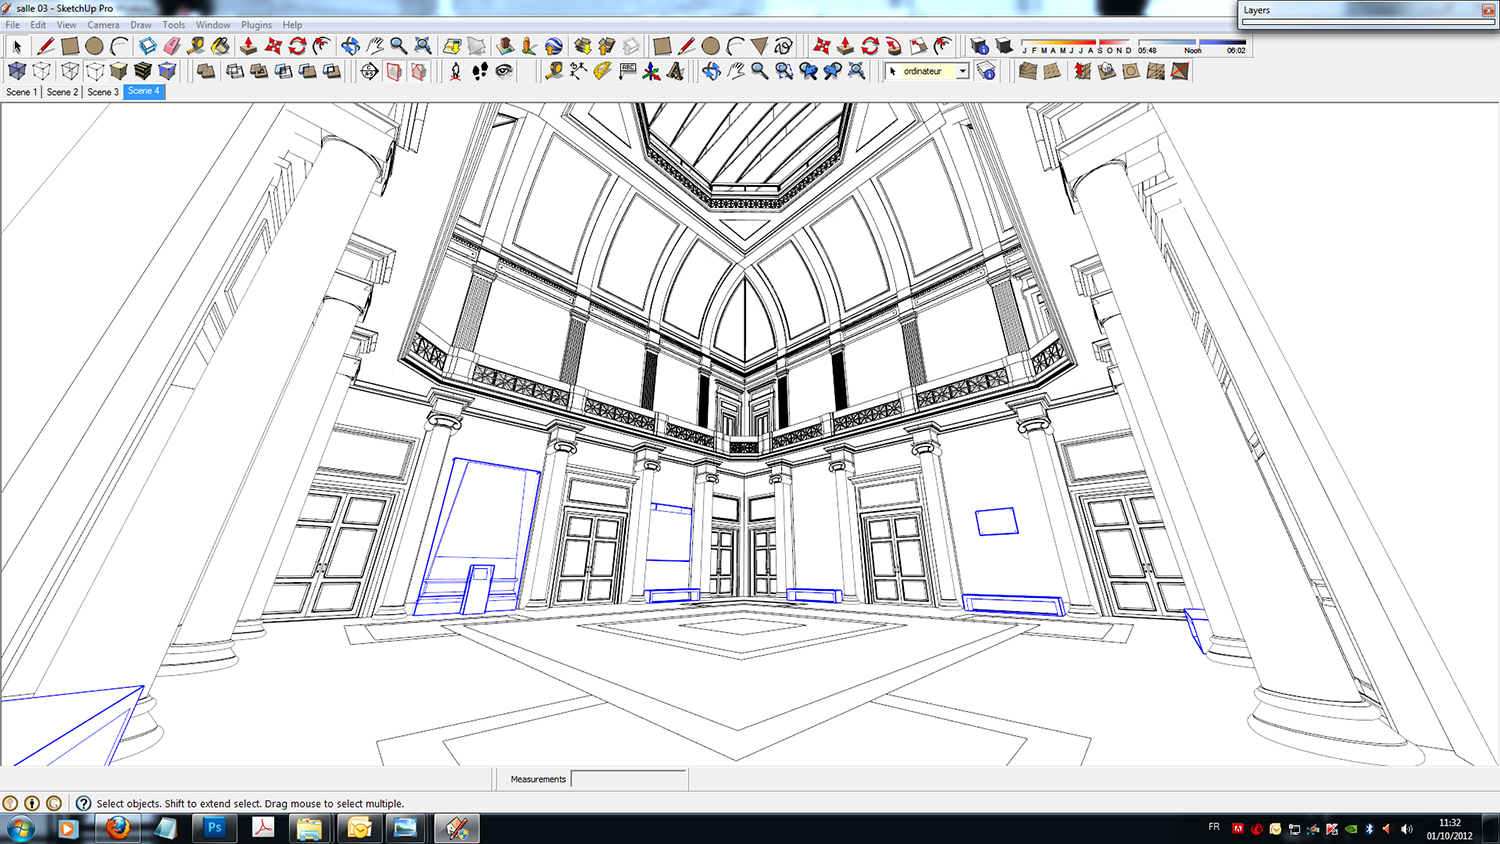
For the rest, we created groups for door elements, columns and furniture.
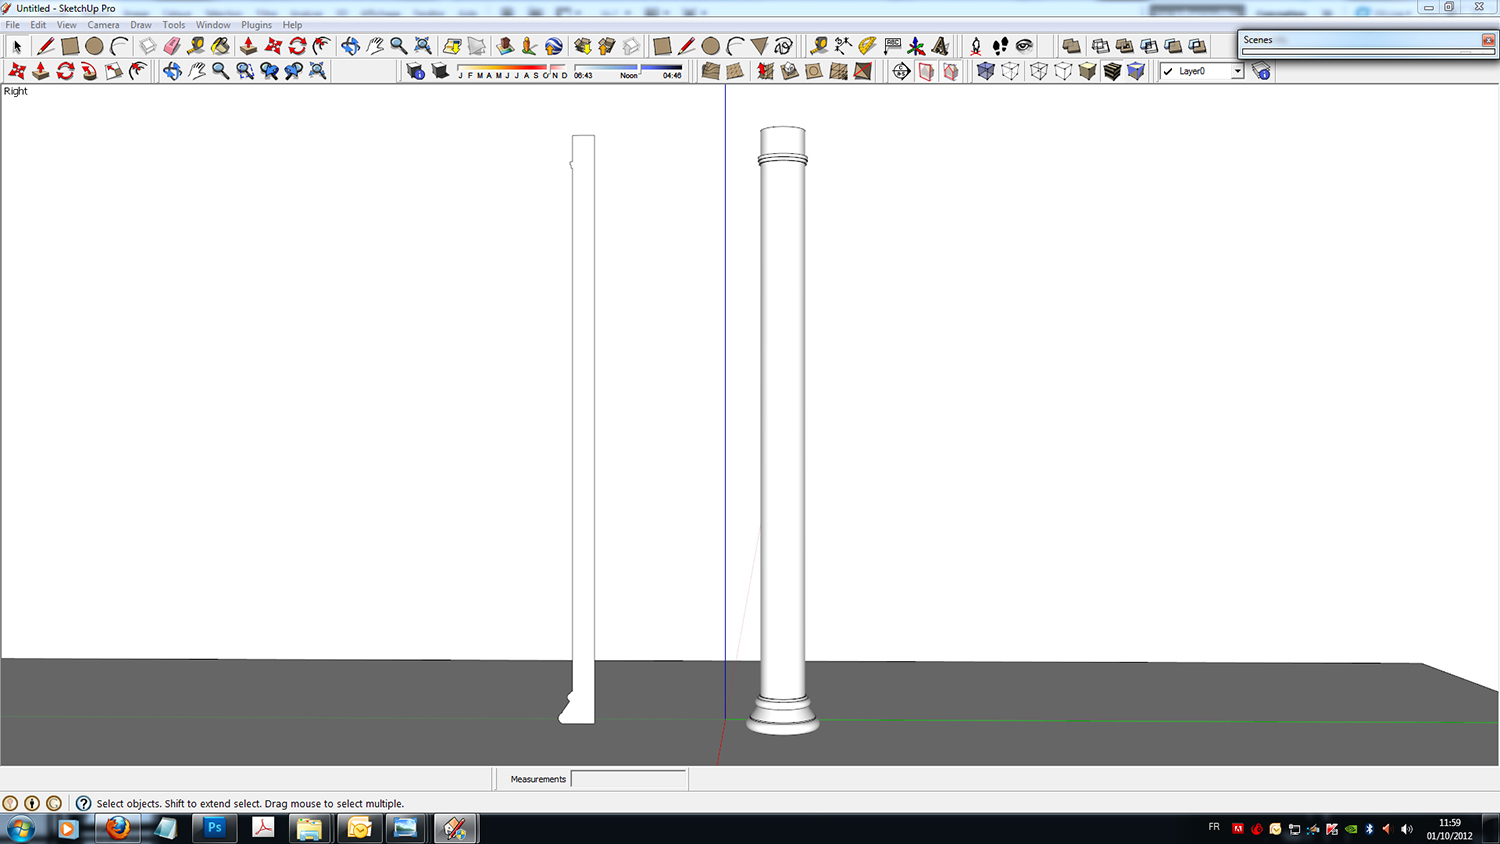
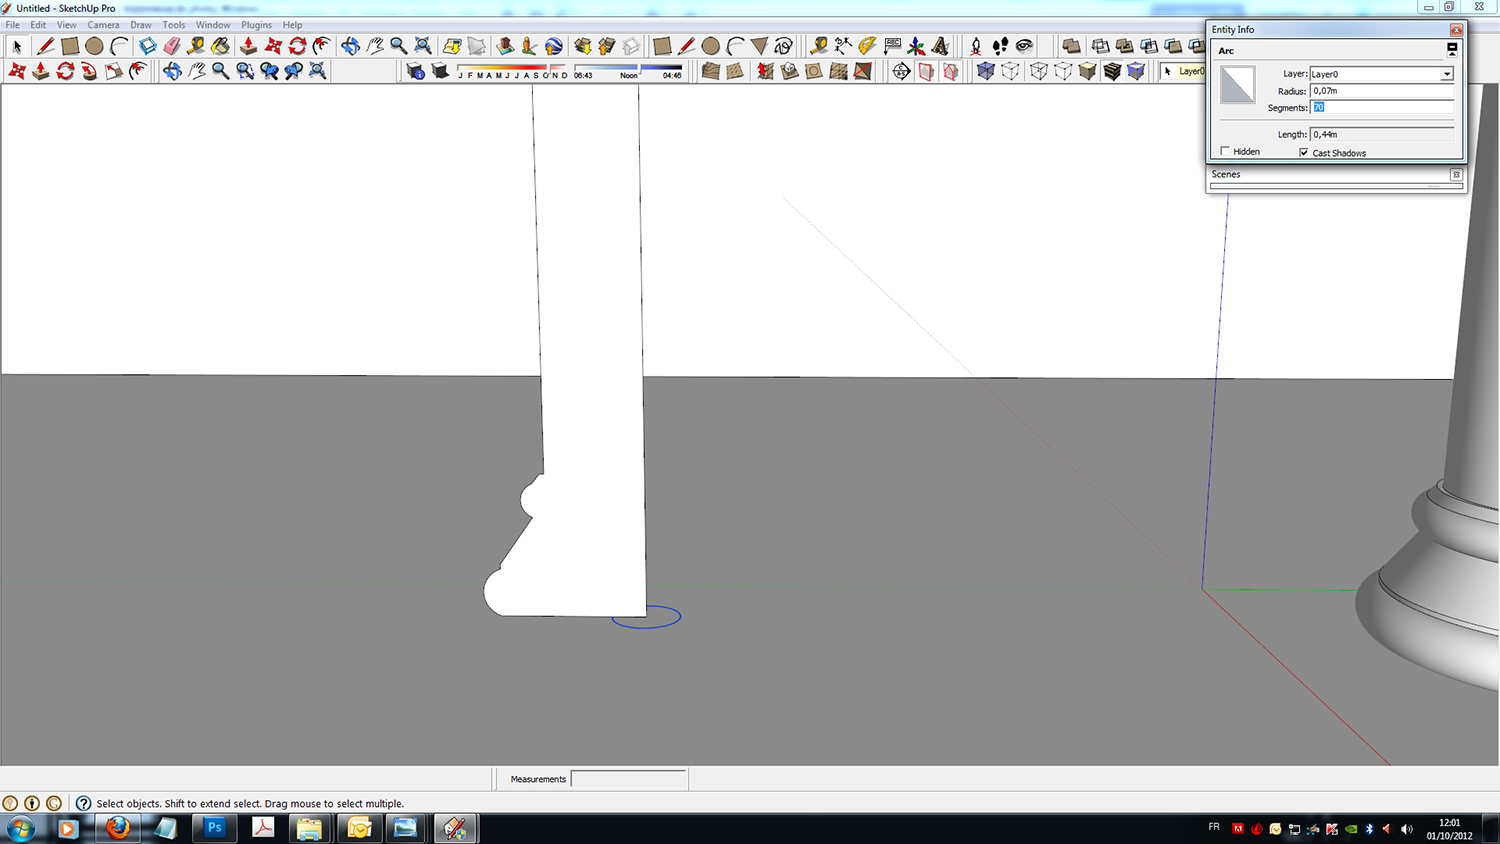
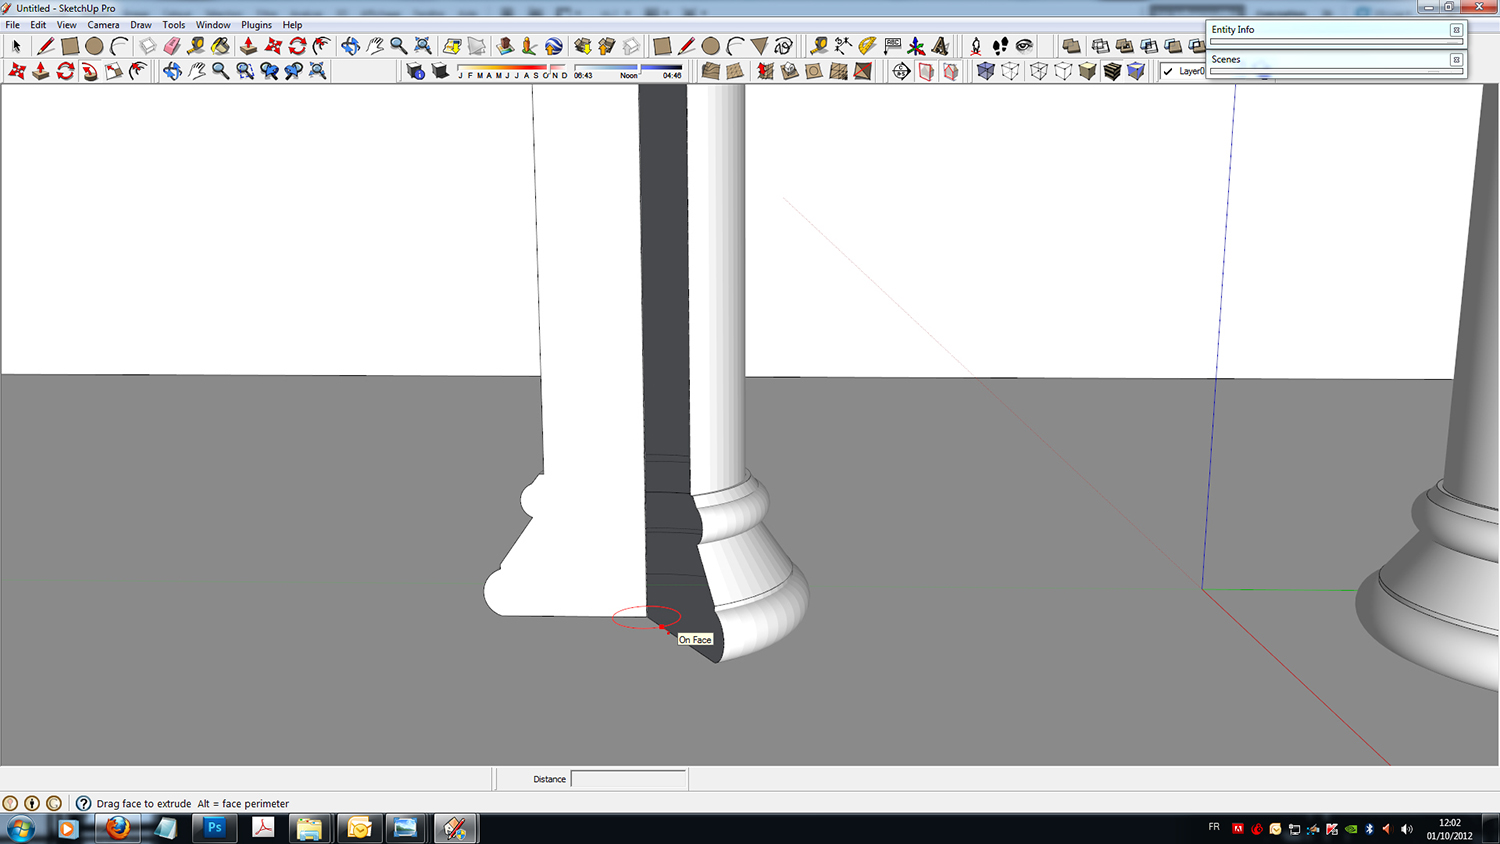
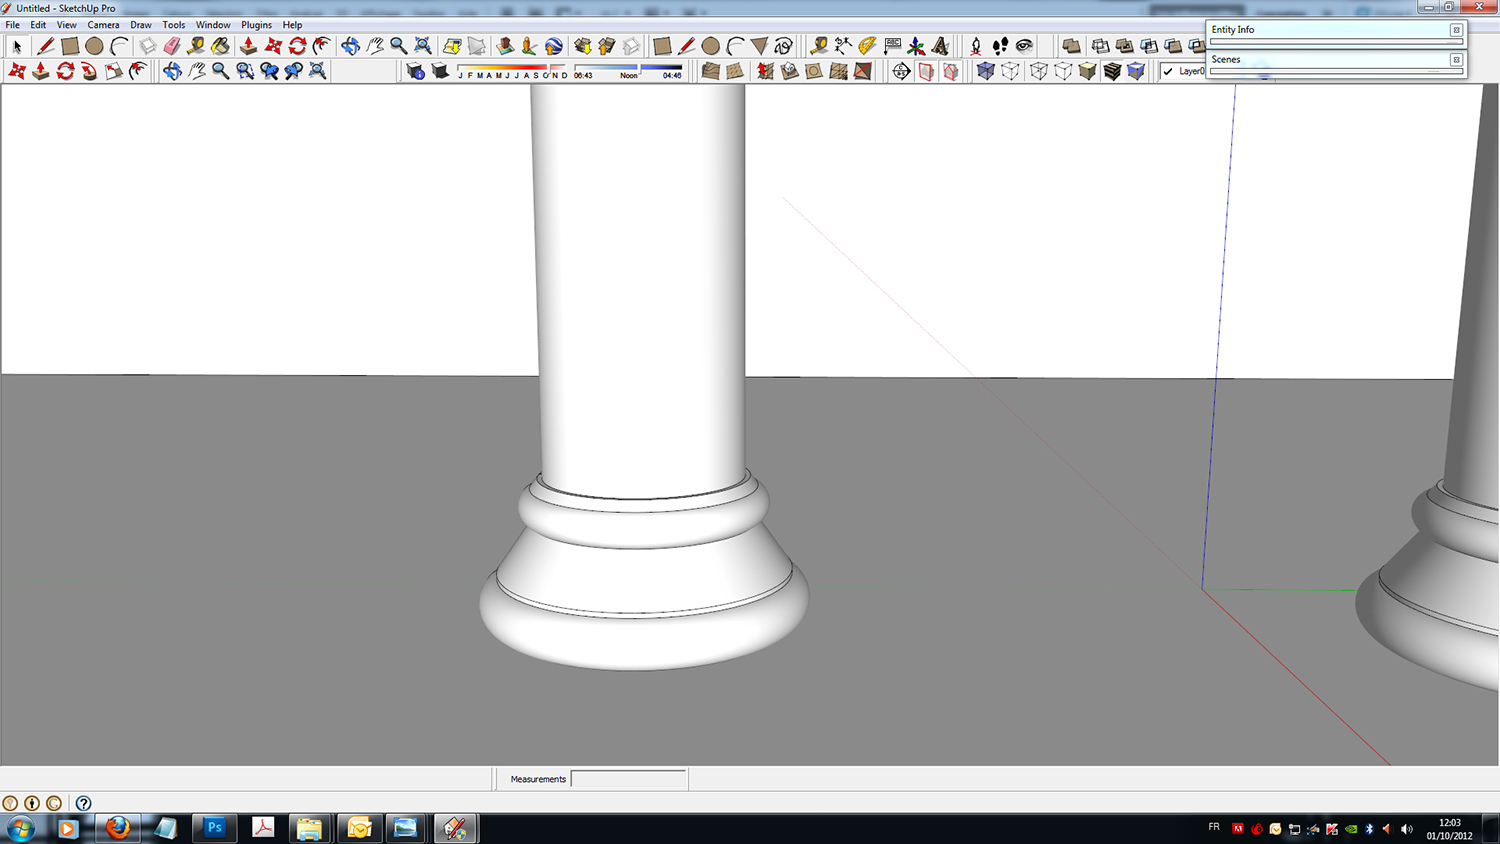
A trick for the creation of columns: We drew half the post section, then drew a circle at the base of the profile by adding segments to the circle, ending by using the "follow me" tool.
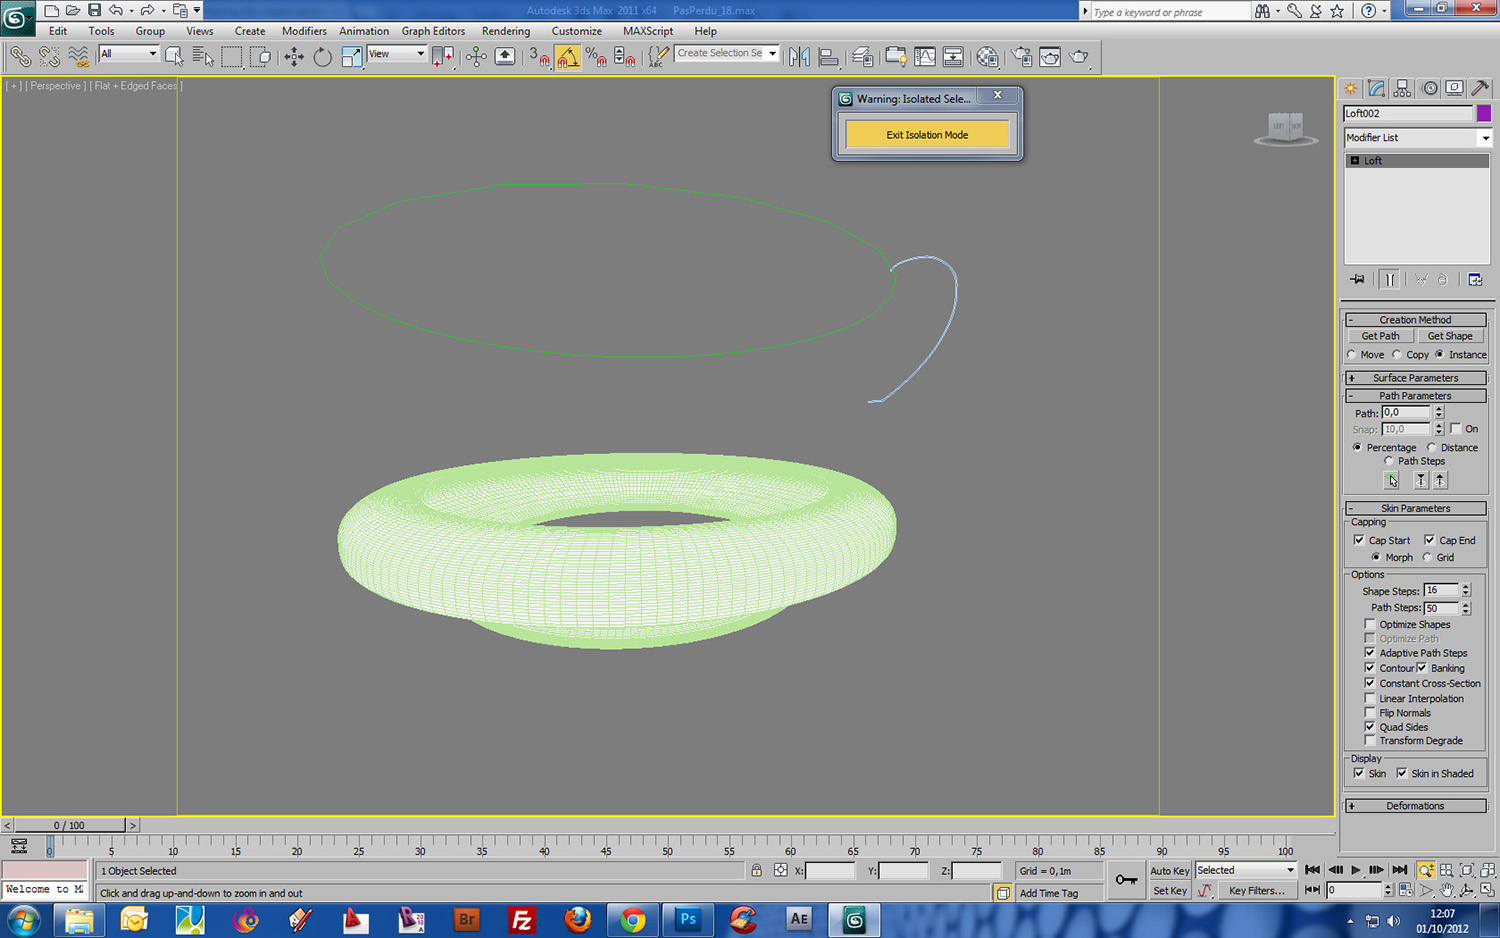
The reception desk: In the tab creation max we used LOFT (in compound object) which allowed us to work with two curves. The first curve is the profile and will be extruded along a second circular line which is its trajectory. The loft tool allows you to subdivide curves with a satisfactory result. Another advantage of the tool is that we simply modify a spline for the object to be redefined. It is useful when the designers do not yet know exactly what they want.
Texturing
Not complicated in terms of materials, apart for the moldings and statues that required some work. We worked with the old material editor in 3ds Max 2011. The textures are not complicated to achieve.
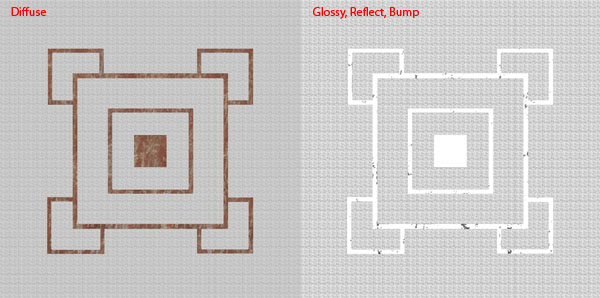
The ground: We use a simple method, a diffuse map tile and marble of 3000 x 3000 and a bump, reflect and glossiness map. For the reflection and glossiness mapping, we entered into the texture output RGB 0.8 to be a little darker.
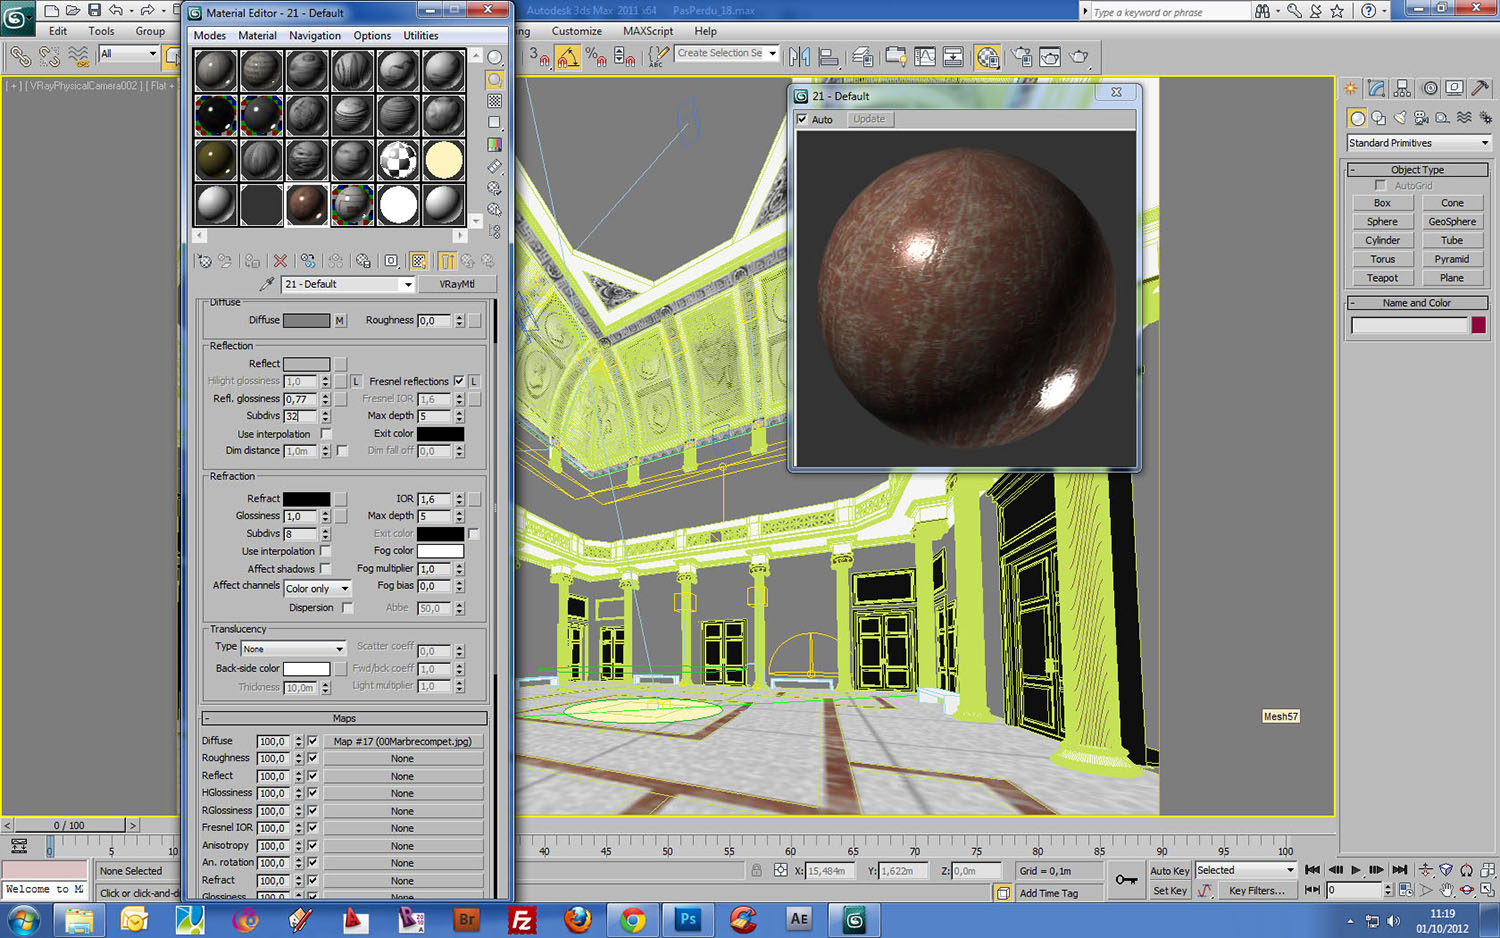
Columns: We used a diffuse/bump map marble (photographed on site) and touched up to be more lively. Note that we tick "Fresnel reflection" for this kind of material. If you want more brightness, the technique is to increase the number of Fresnel up to 2 for example.
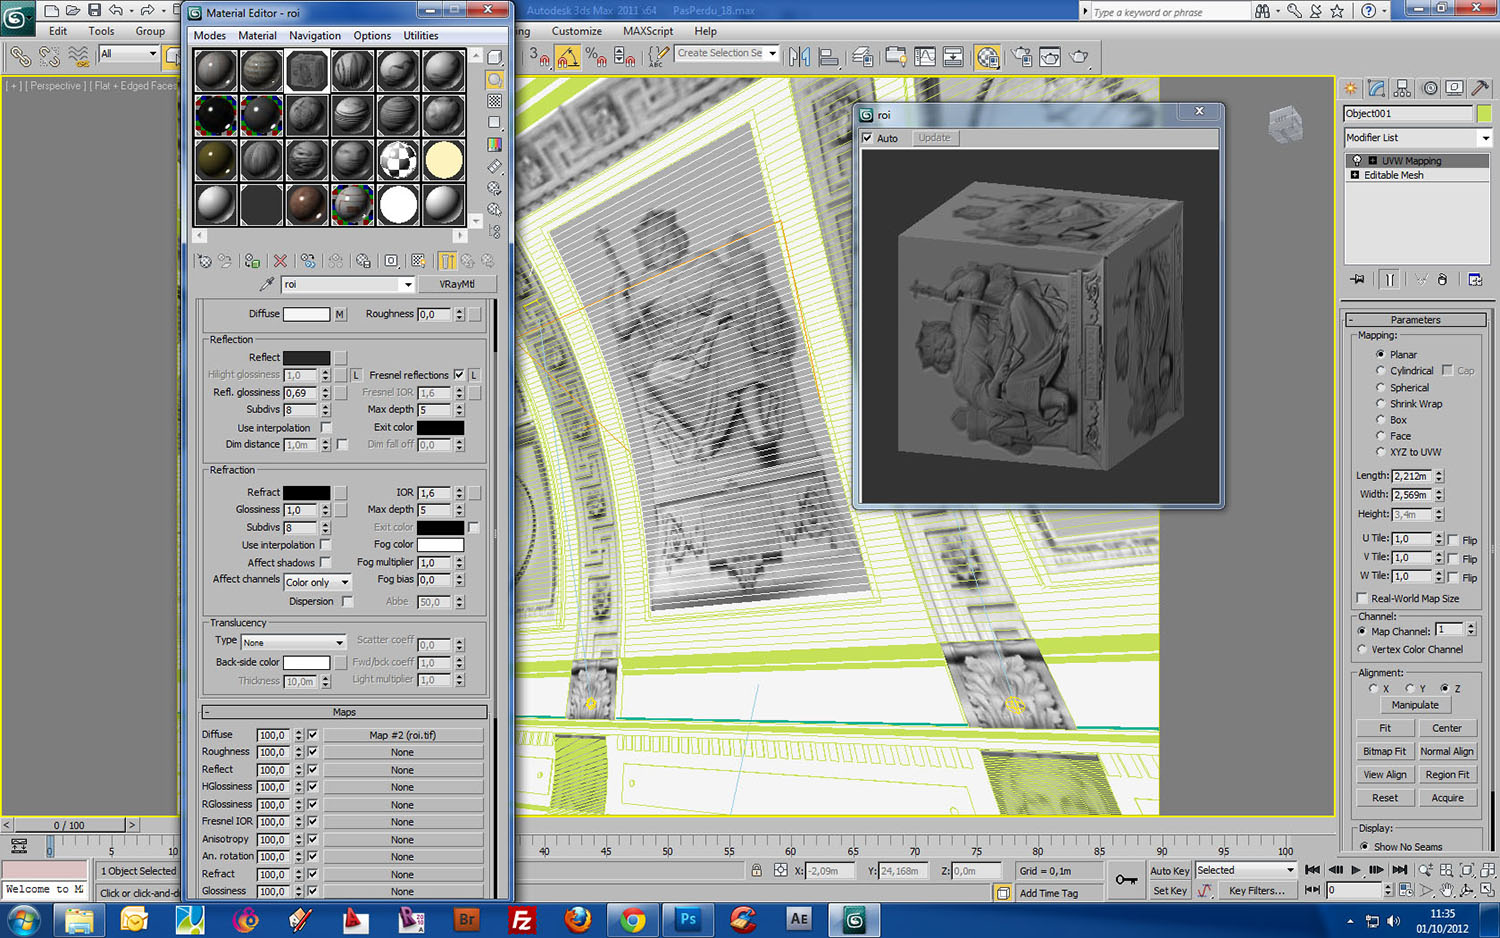
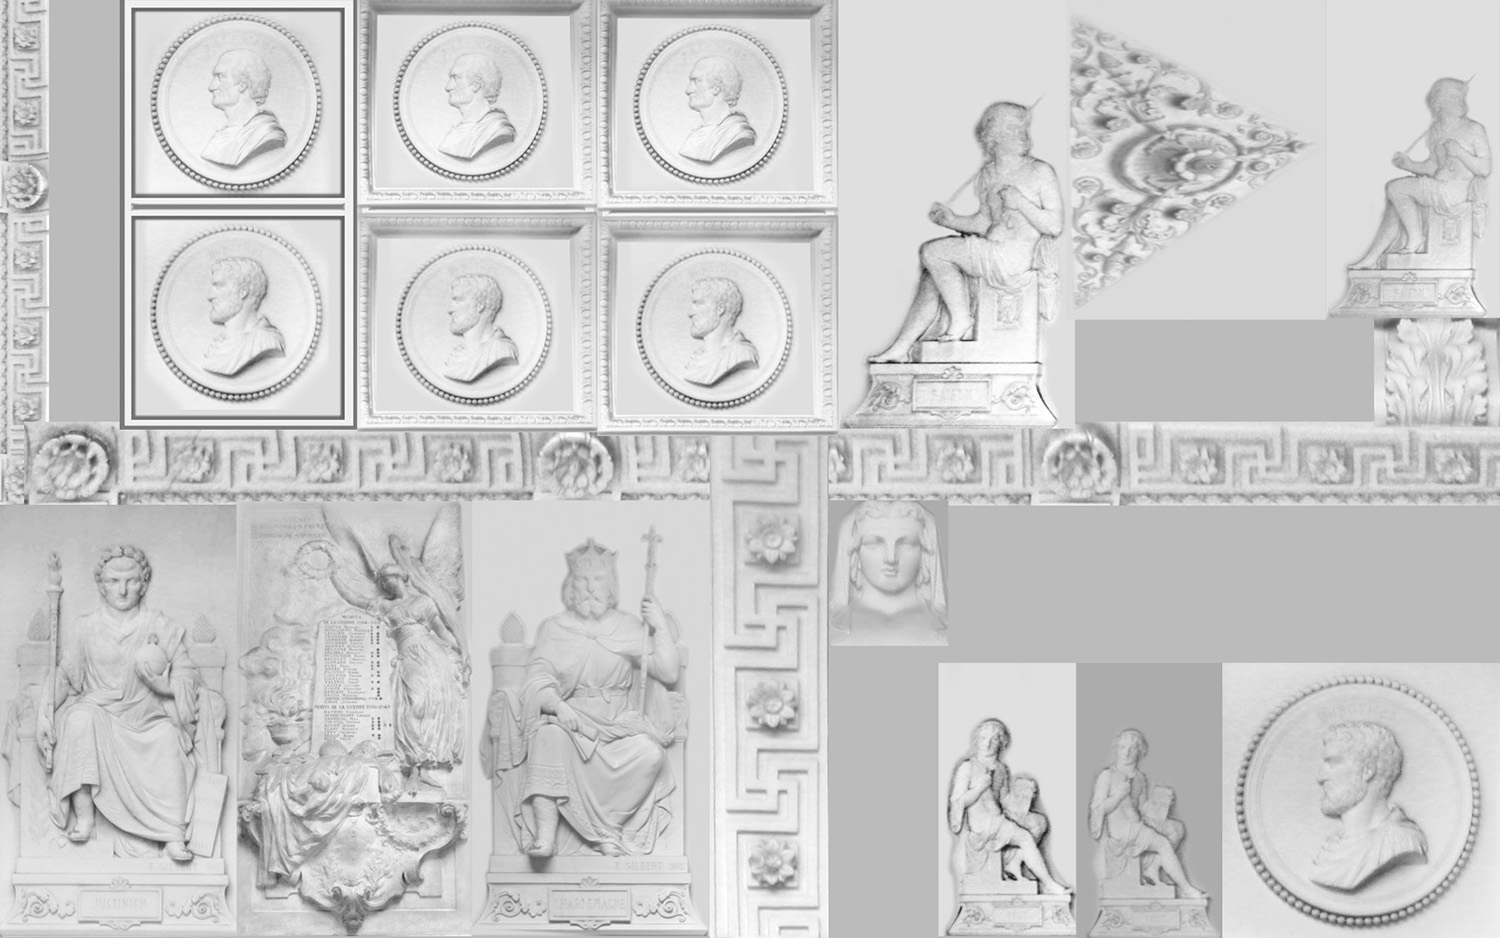
The moldings and Statues: We had 2 choices. First was to model everything but the competition period time was too short. The second choice was adopted by taking pictures and applying UVW mapping for each object. We used a material for each molding and vault, and simple planar or cylindrical UVW mapping, with a diffuse map and a bump map (actually the same but more mixed). We have not used Displacement as it would have been too long to build each map and the time/result saved would not have been sufficiently gainful. Not to mention that at the final rendering, the calculation times tend to extend.
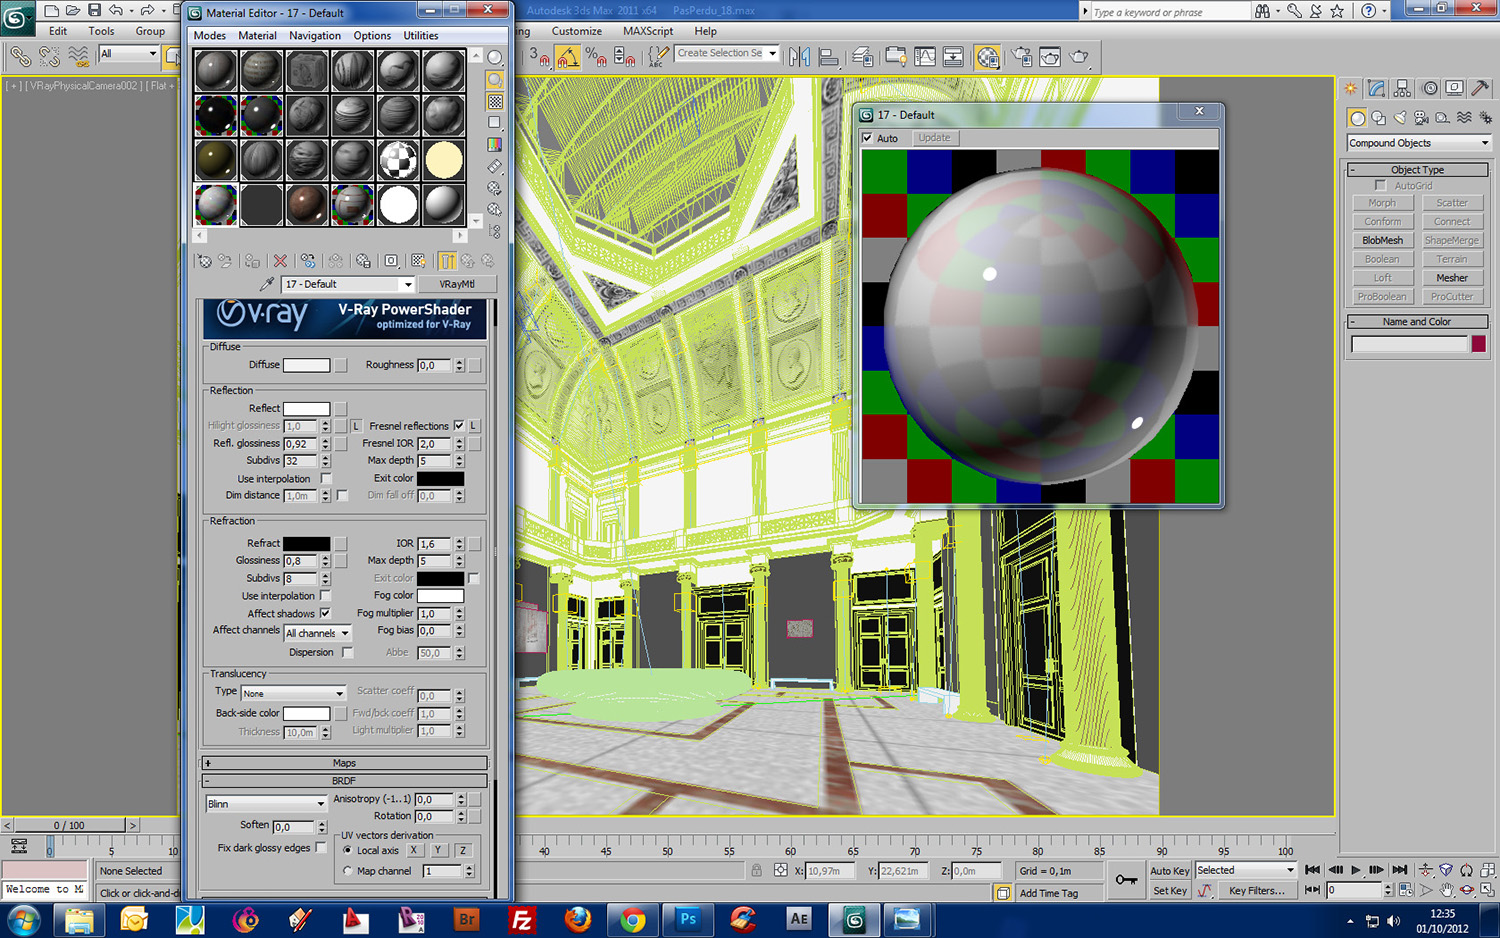
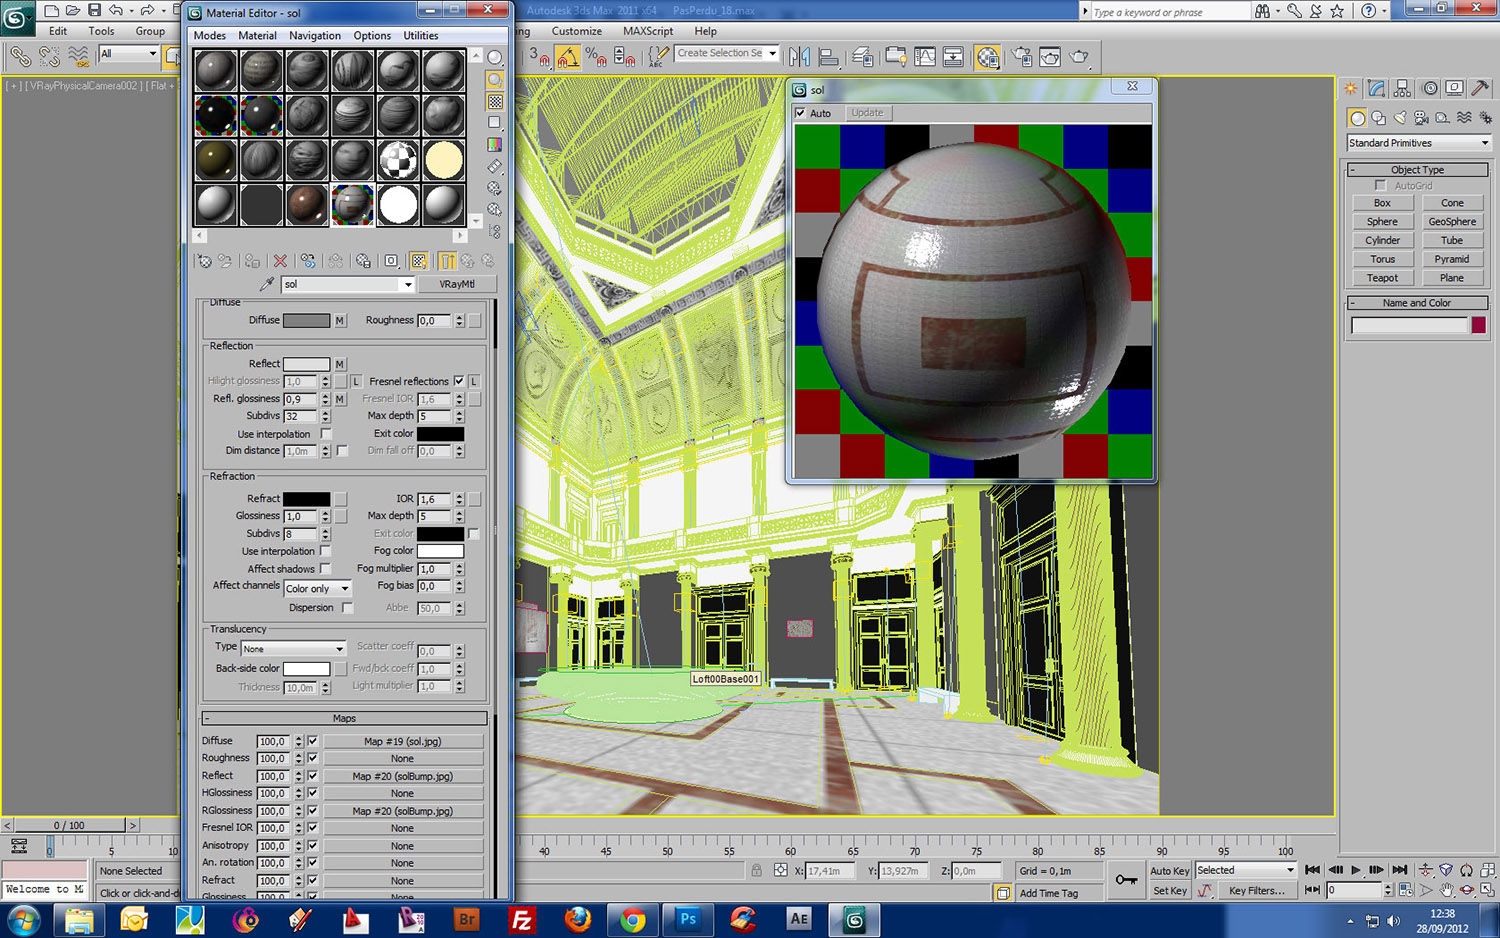
The Reception Desk: The material should be reflective white and slightly translucent. You need to tick in the refraction tab "affect shadows" so that the light penetrates inside the object and the shadows reveal a slight translucency.
Lighting
We used four different types of lighting for the stage.
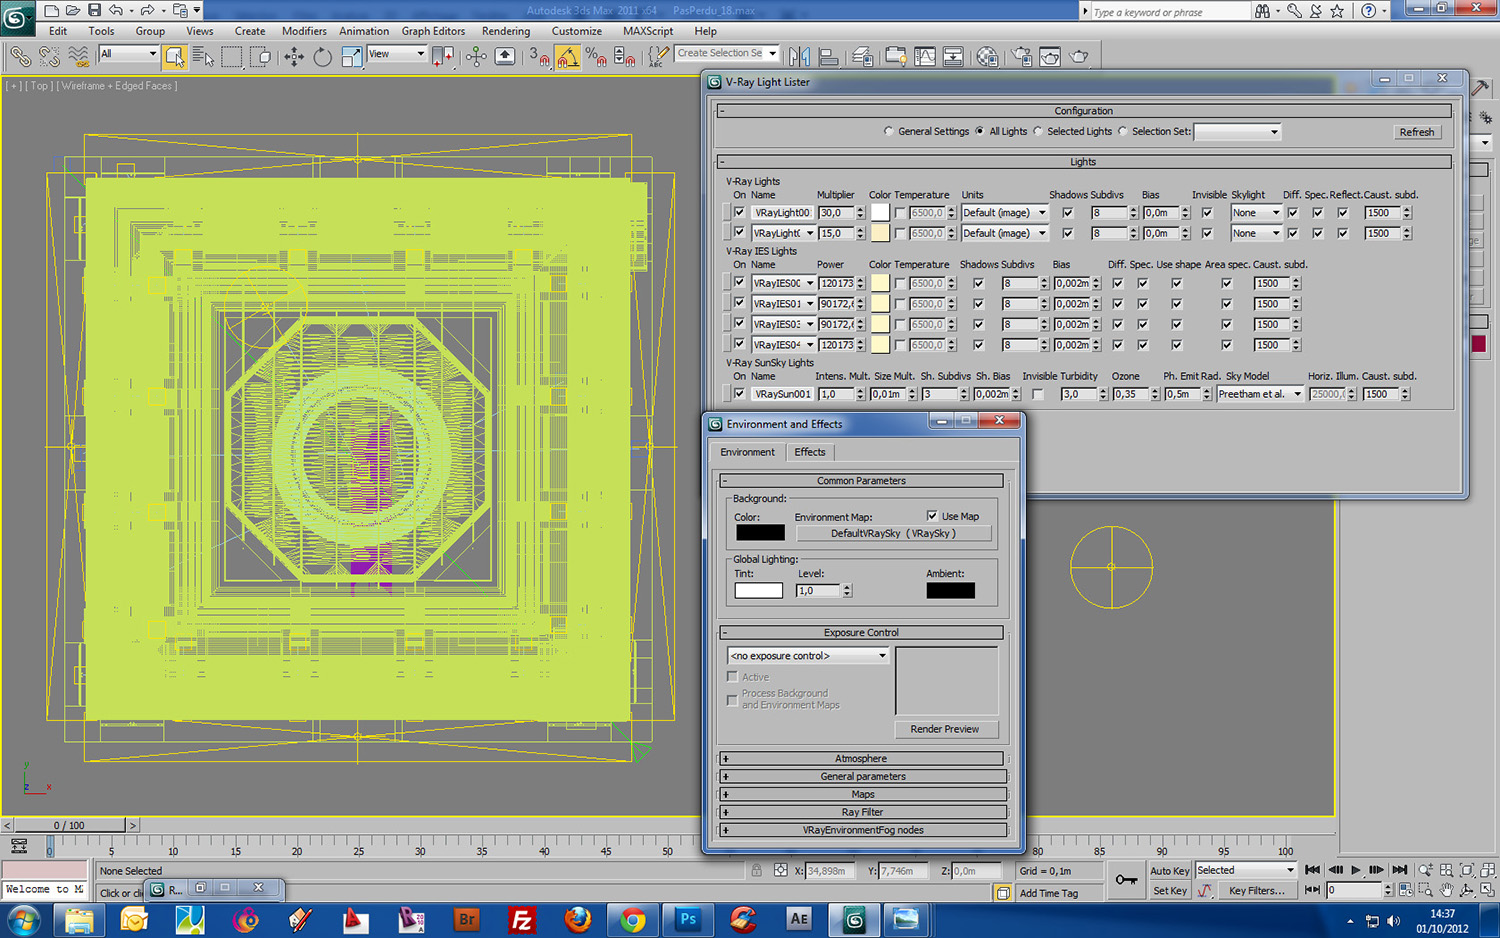
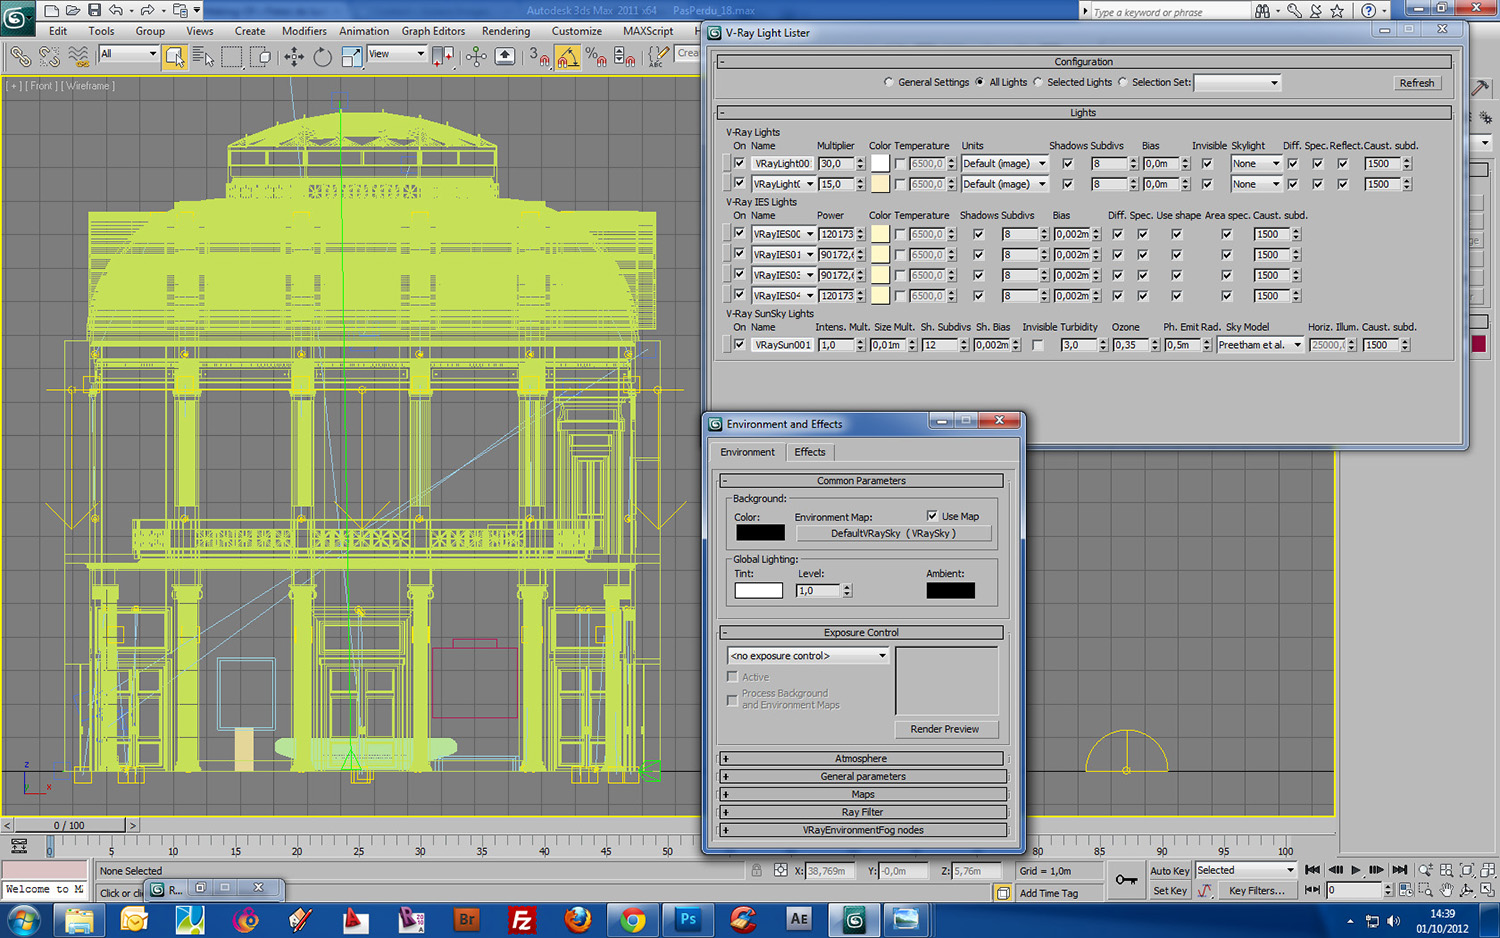

V-Ray Sun with Shadows, subdivisions at 12 for better definition with a VRay Sky in environment.
V-Ray dome light, white with a value of 15 to simulate indirect lighting dome.
V-Ray Lights planes with a value of 30 to highlight molding elements.
V-Ray IES to simulate the spots down the columns, above the doors and along the arches.
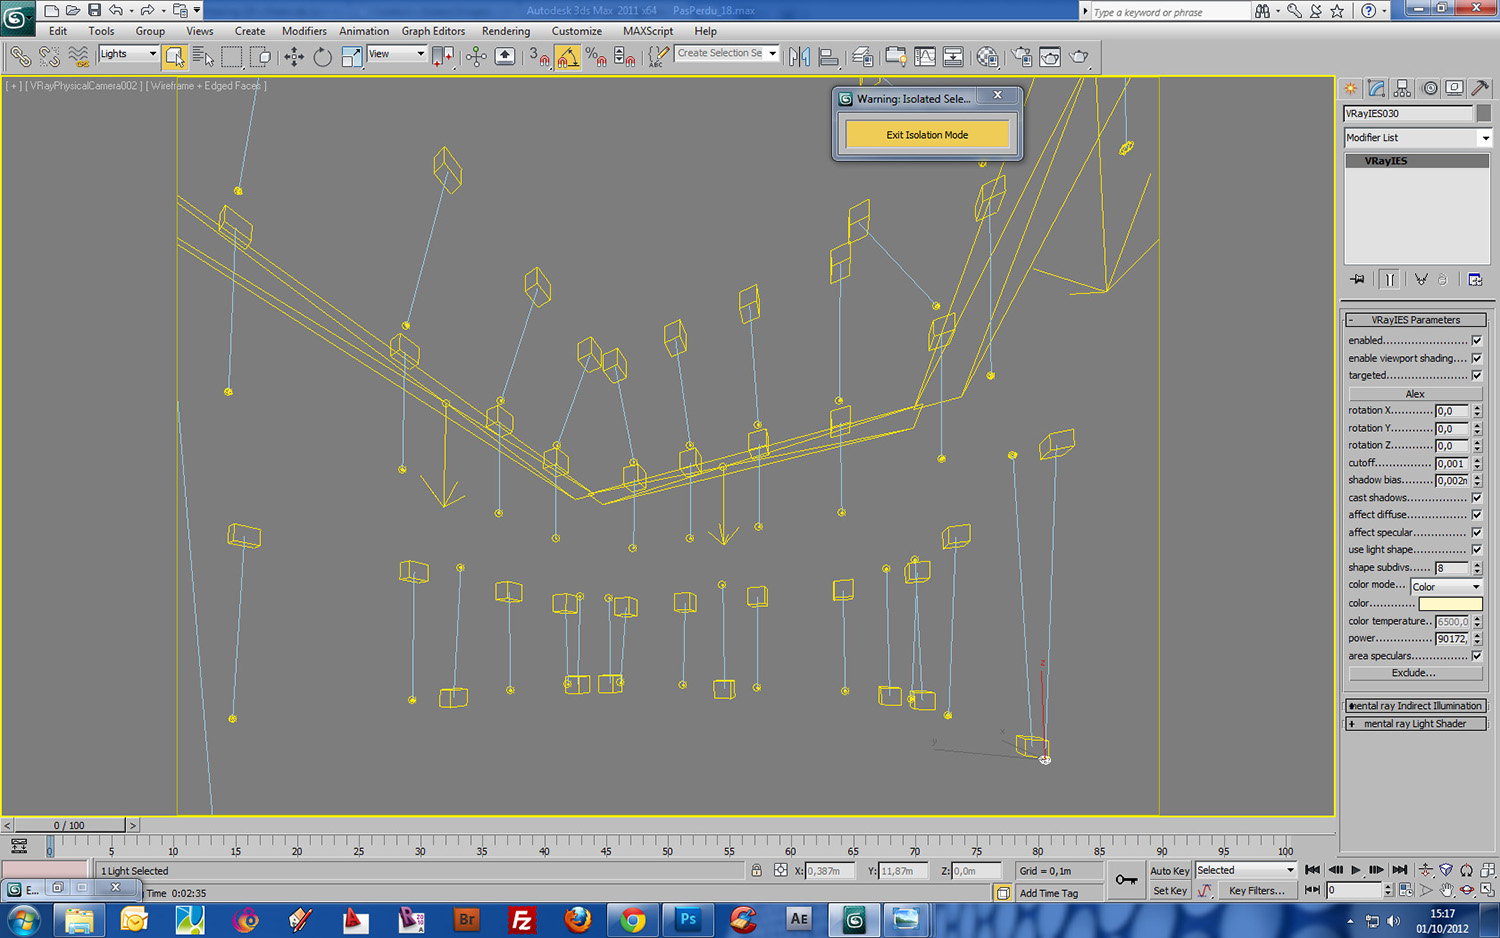
For IES, we have put a light found on the ERCO website.
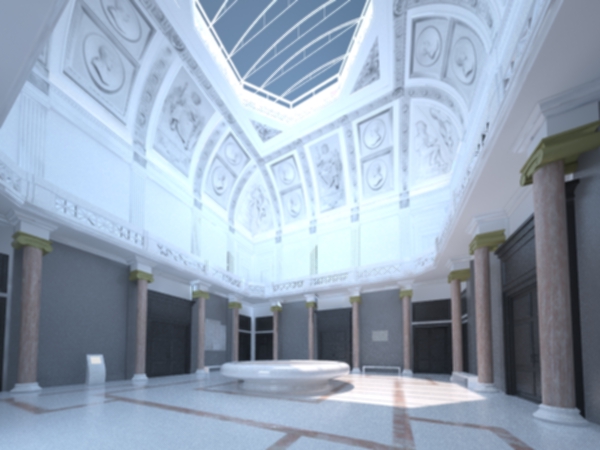
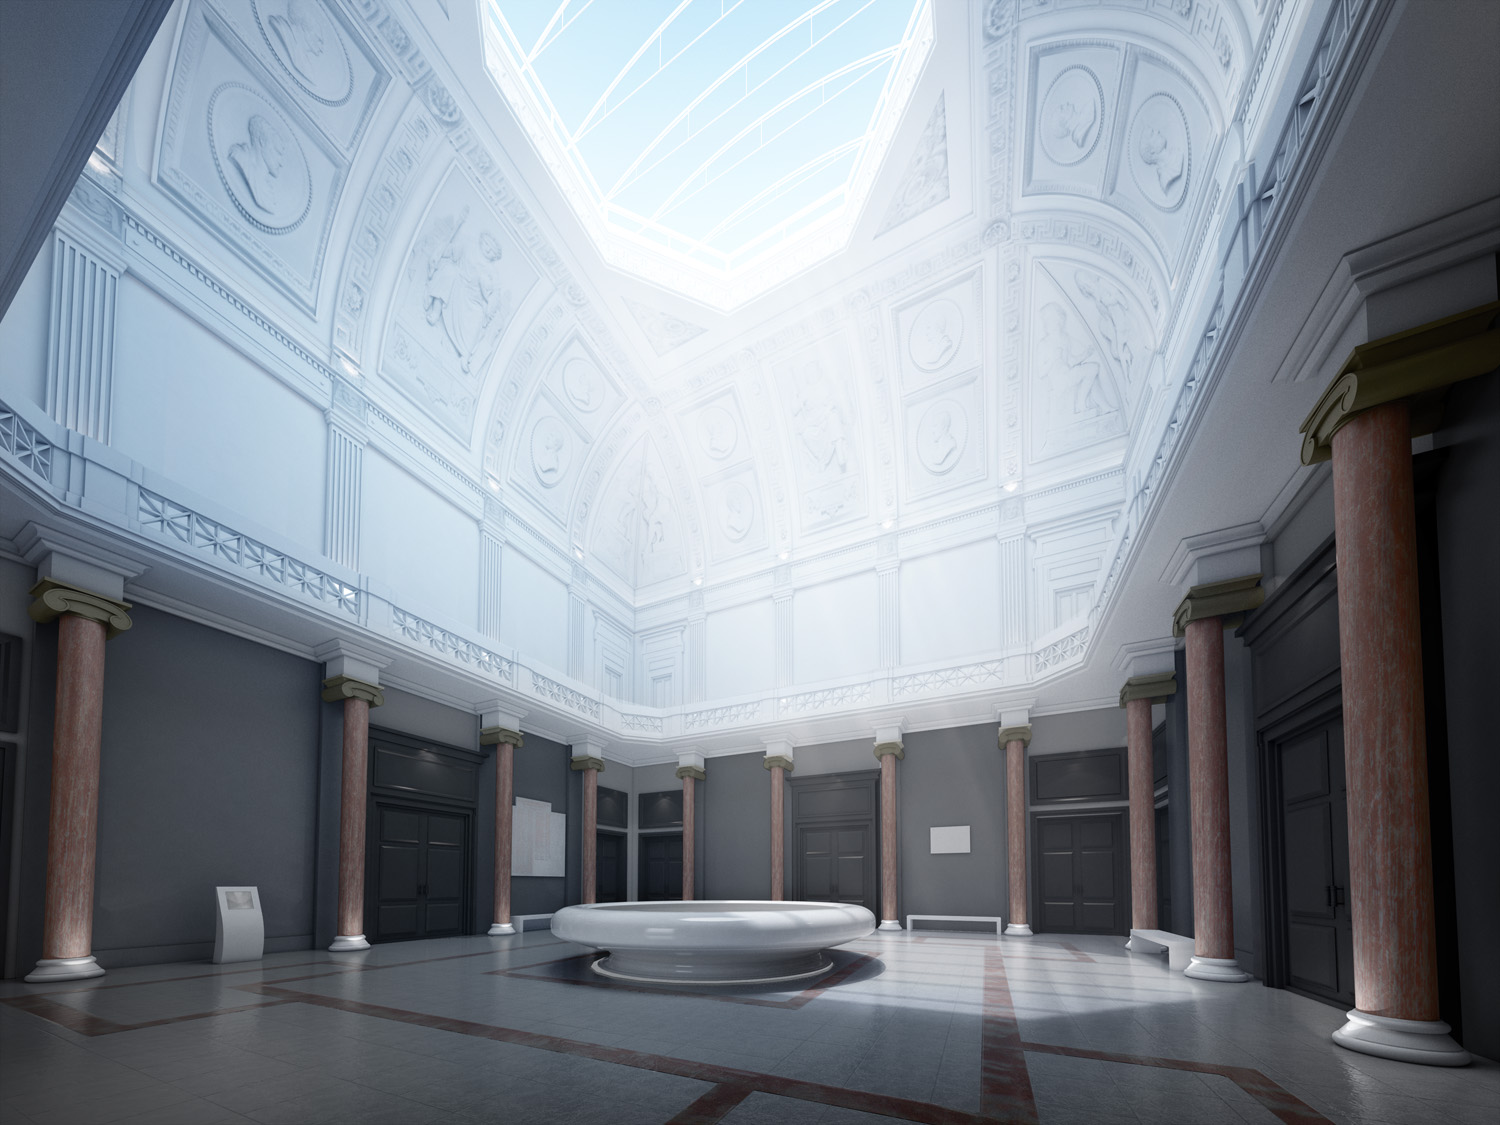
Sun and VRay Dome light.
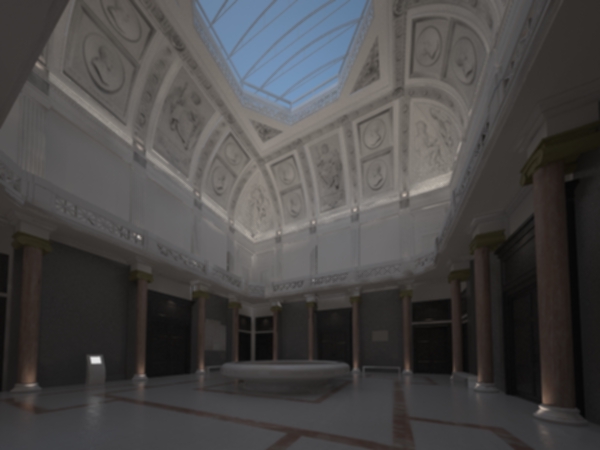
IES Lights and VRay and Planes
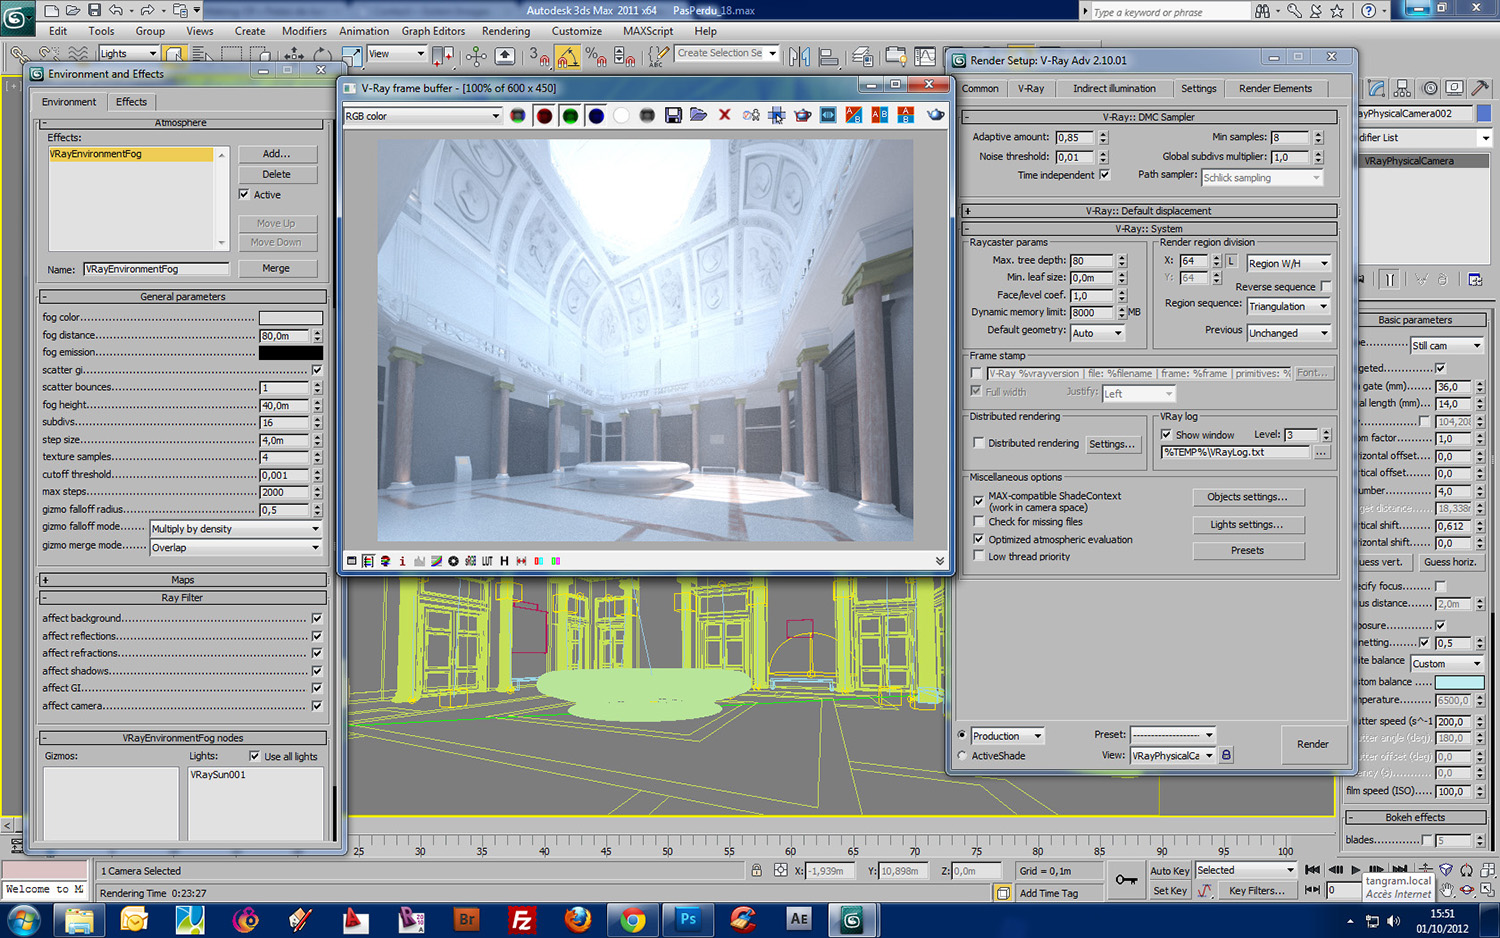
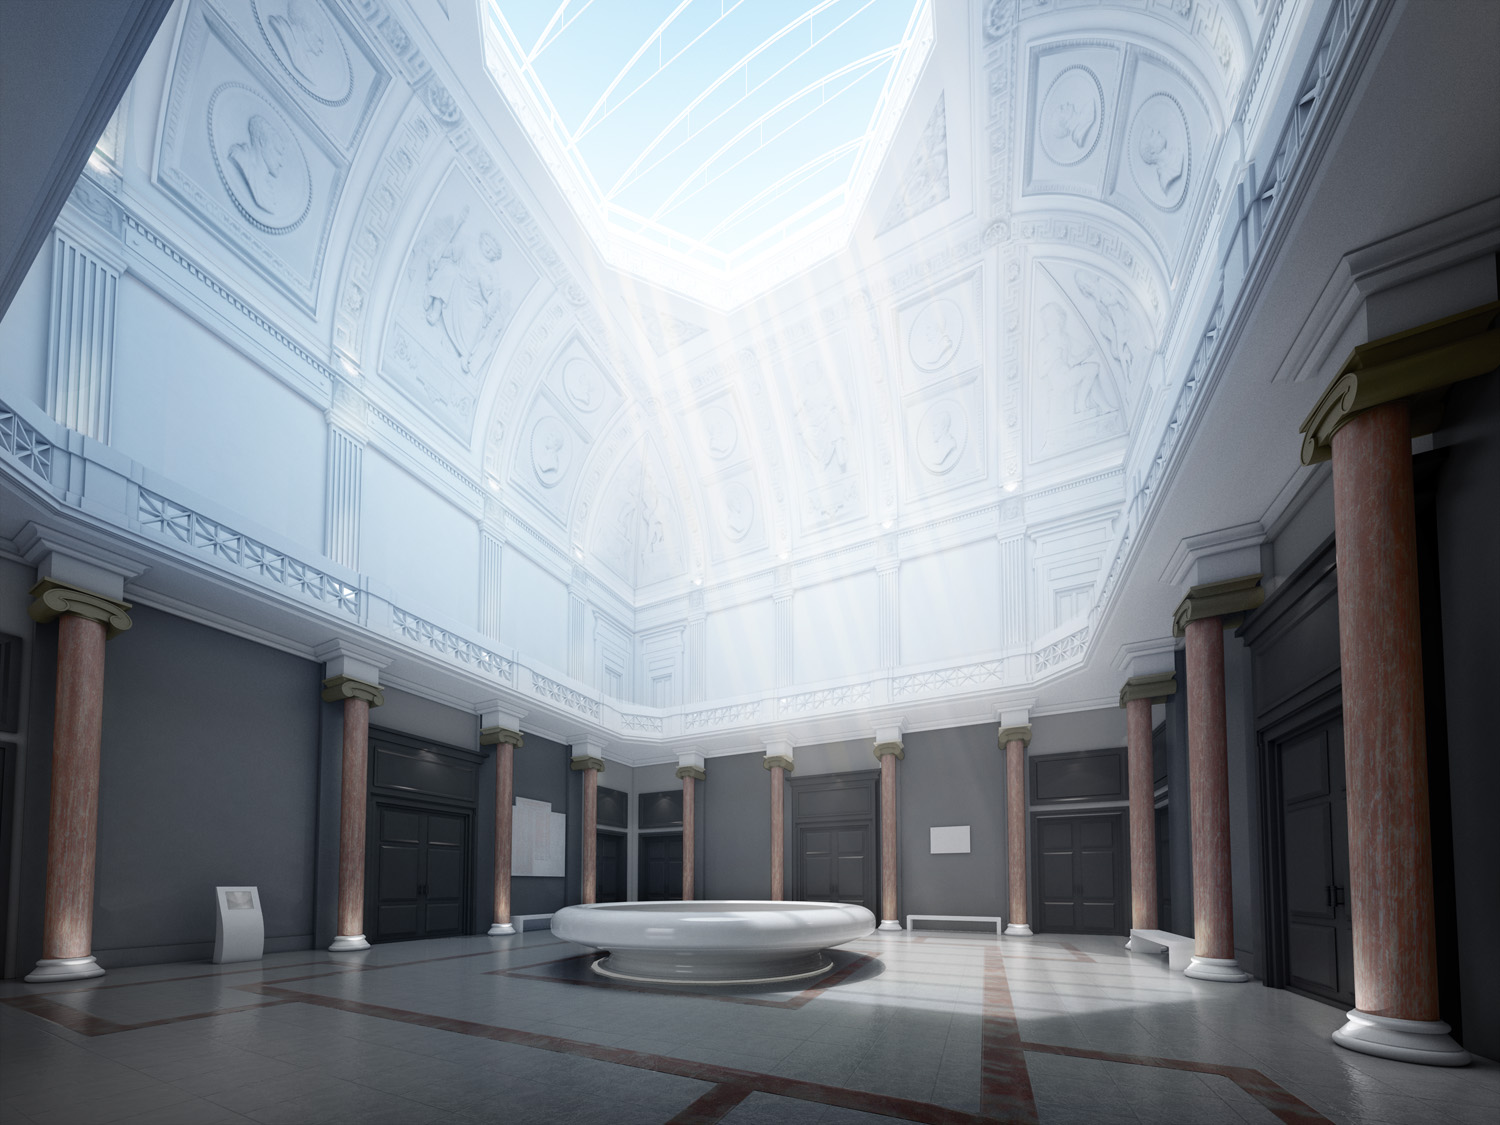
The last thing is to set up a VRay Fog effect in the environment.
Tick in V-Ray settings "optimized atmospheric evaluation"
In the environment window, select VRay fog
Choose the sun as a transmitter and put the right dimensions for the size of the scene.
Tick Scatter GI and subdivide enough for the picture not to be too grainy.
The scene is now ready to be rendered.
Rendering
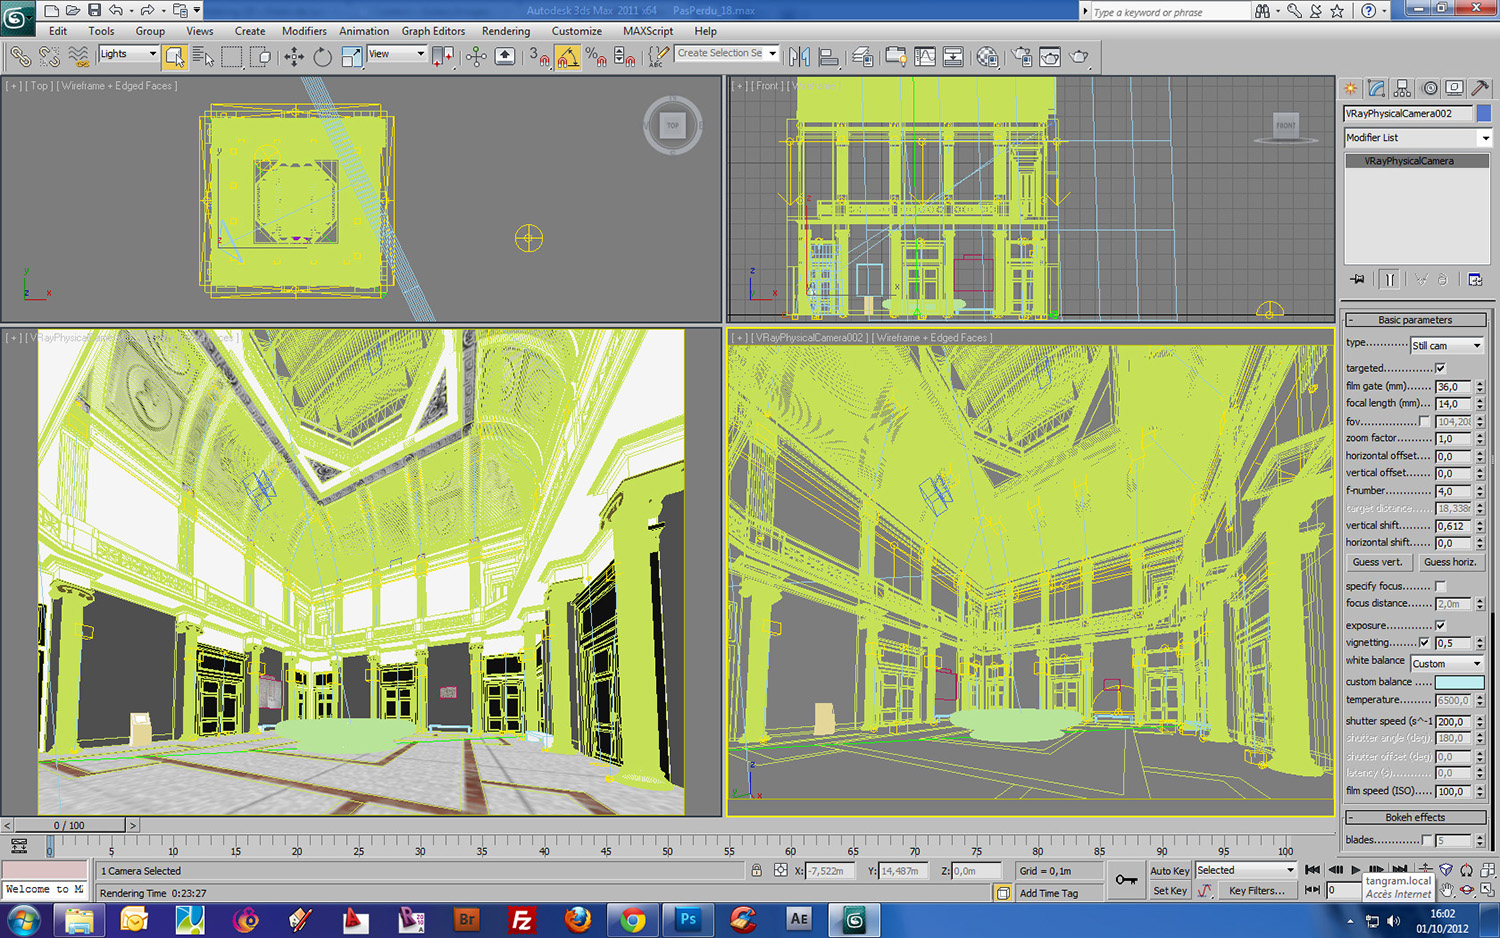
The camera: Use the vertical camera correction and put the f-number at 4 because fog tends to make the picture darker.
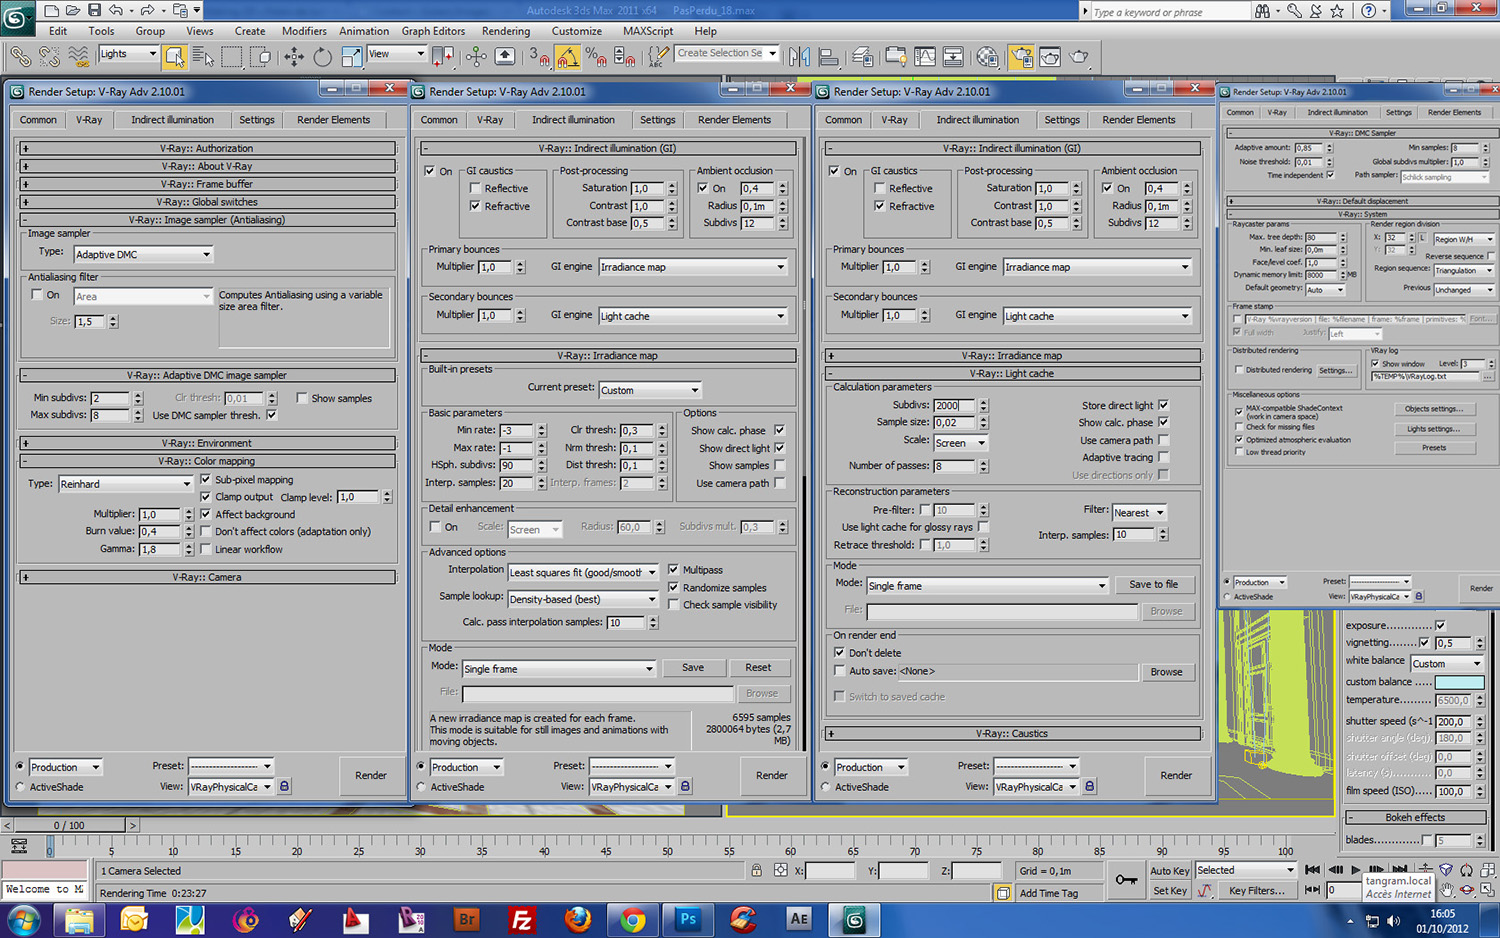
Render settings : Calculated parameters for a computer with 8 cores and 8GB RAM. So, 8 passes light cache and 8000 MB of memory. Notice that we do not use Anti-Aliasing because the adaptive DMC does a fine job with 2 min and 8 max subdivisions (it increases the rendering time a little). No need to do more work with ambient occlusion, the render is just fine (activated in the GI). For the color-mapping, we never use the same thing, we found that the 1.8 was perfect.
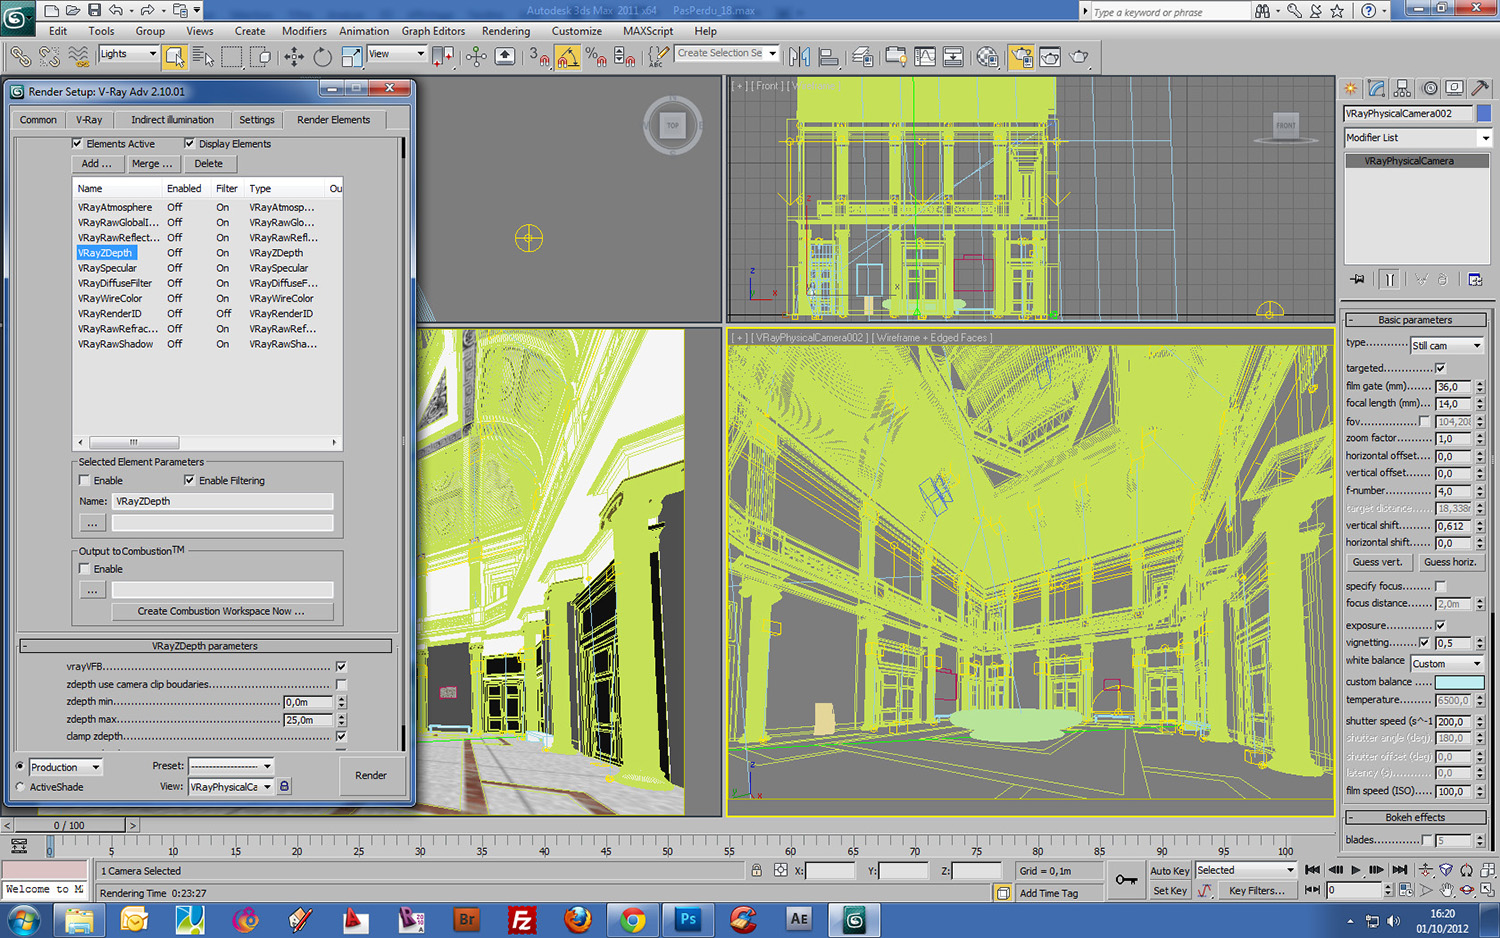
Pass : VRay atmosphere pass is important because it will allow us to manage in post production the volume of light. Wire color pass is practical to select the elements in Photoshop and as we imported groups. We have as many colors as separate items.
Post-Production
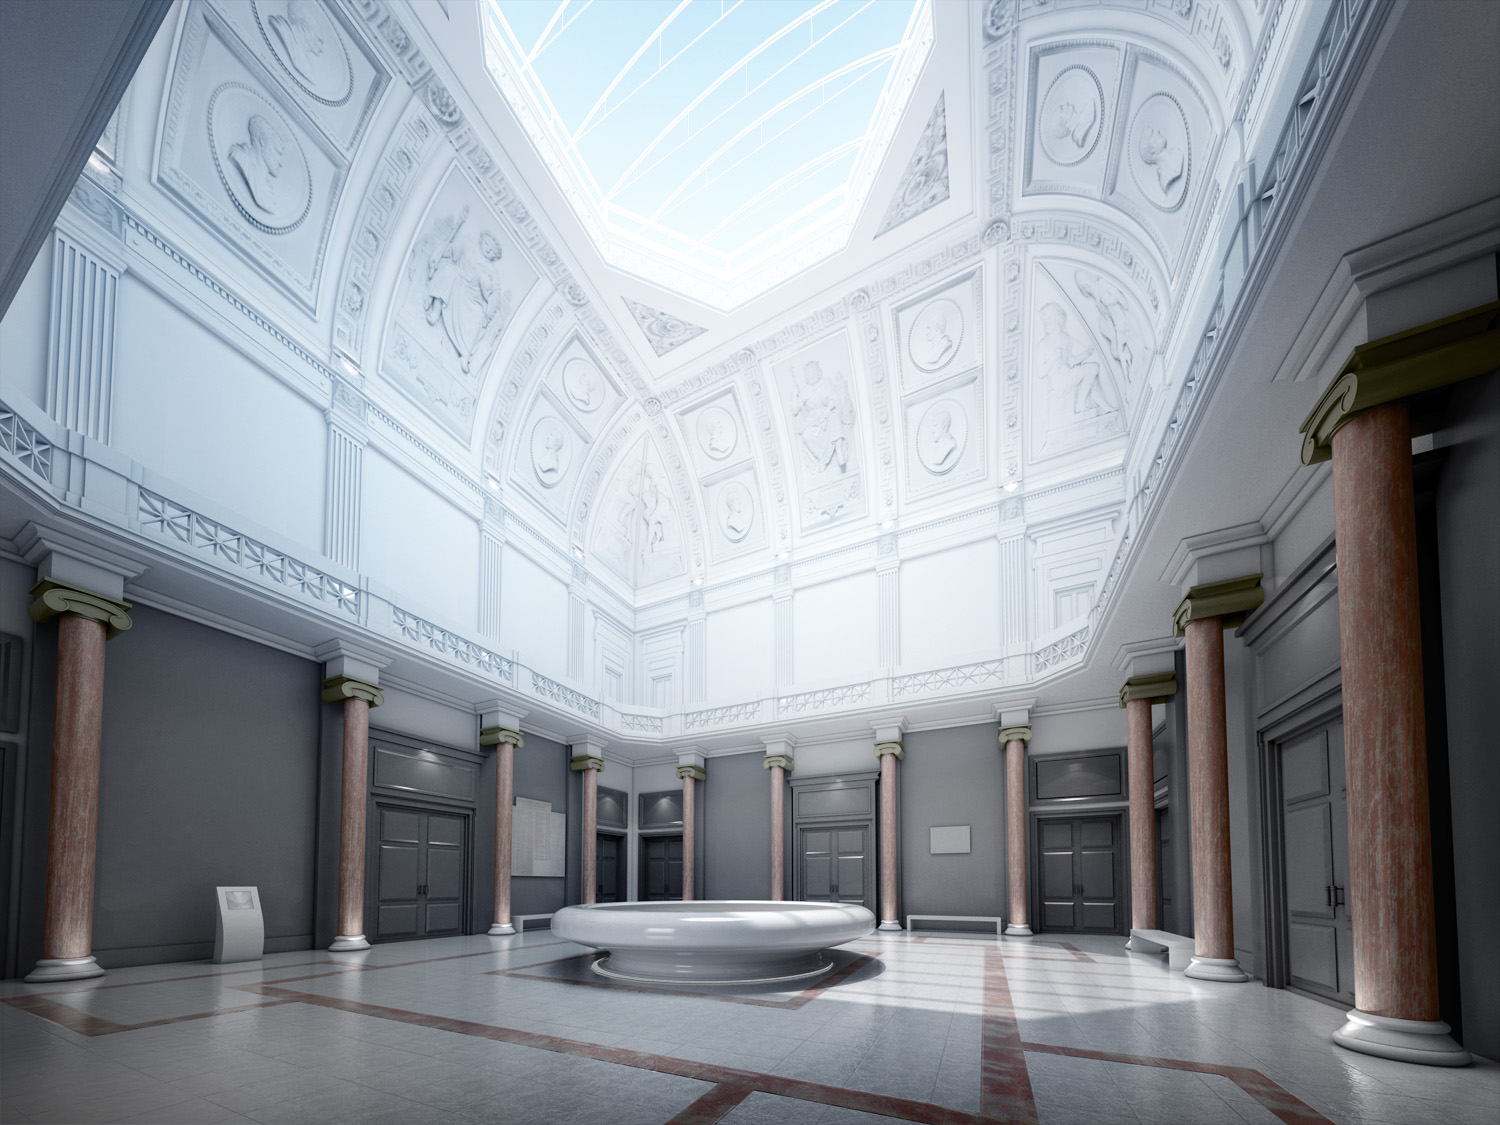
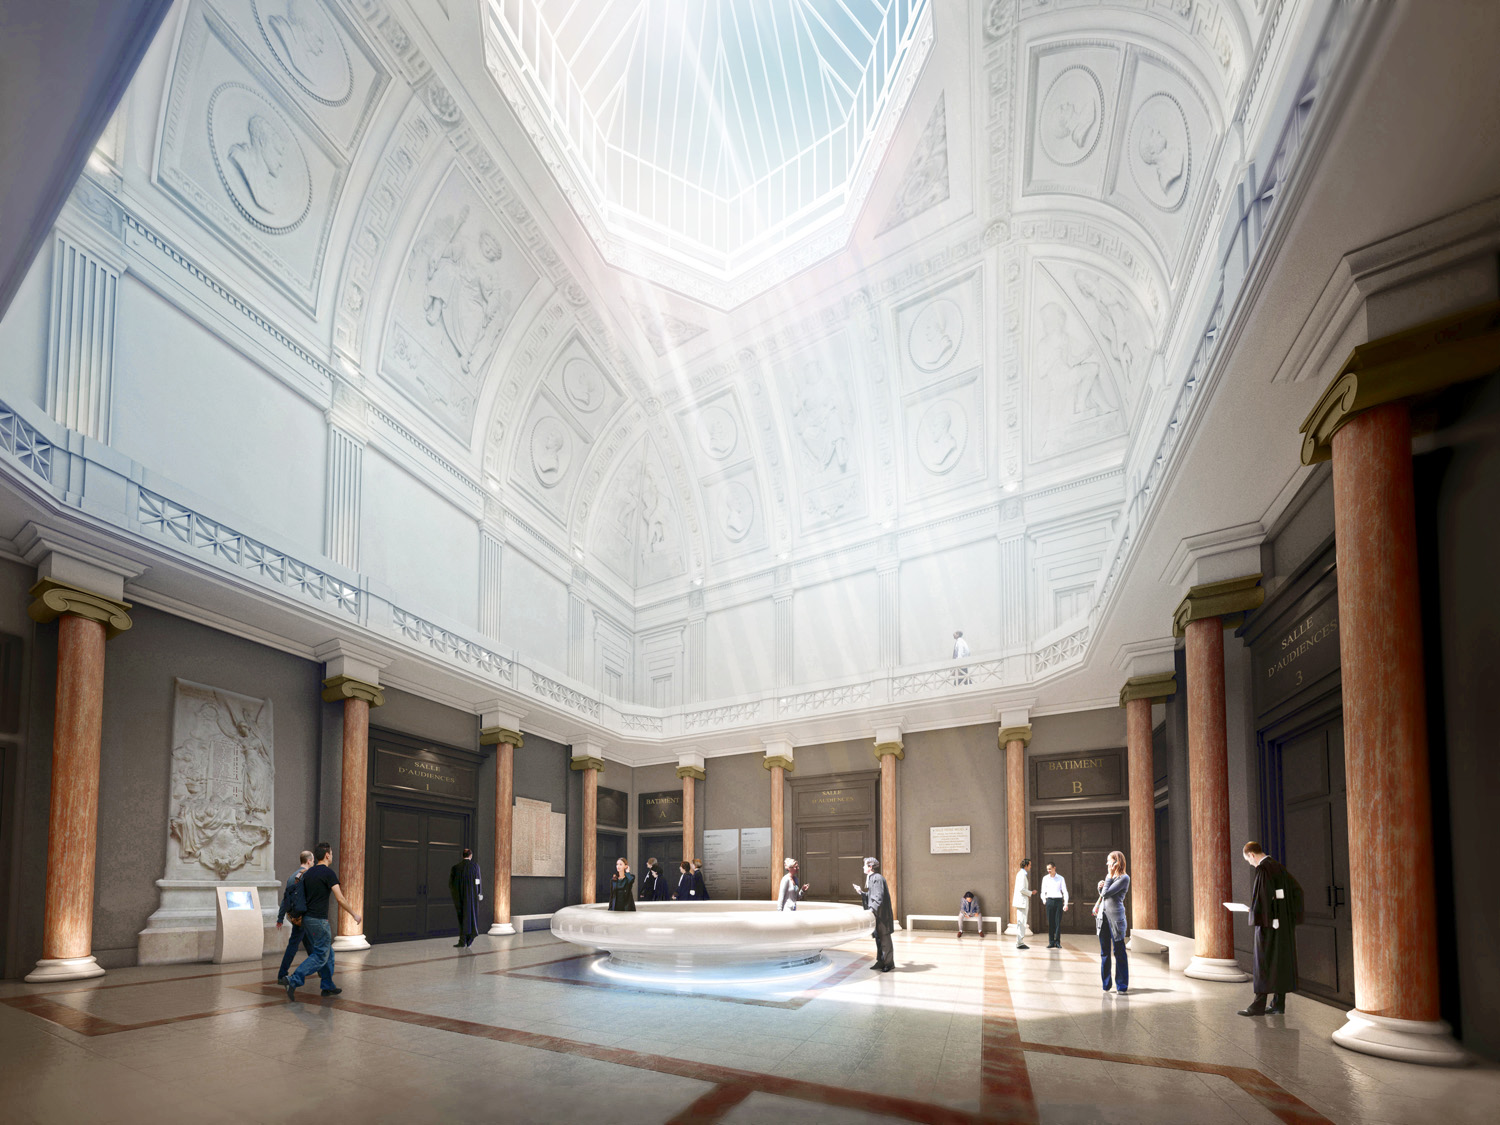
For the final rendering we have created two renders. One render without Fog and an other one with the atmospheric pass activated. The purpose of the operation is to have a better overall control on the image.
Beauty pass without fog.
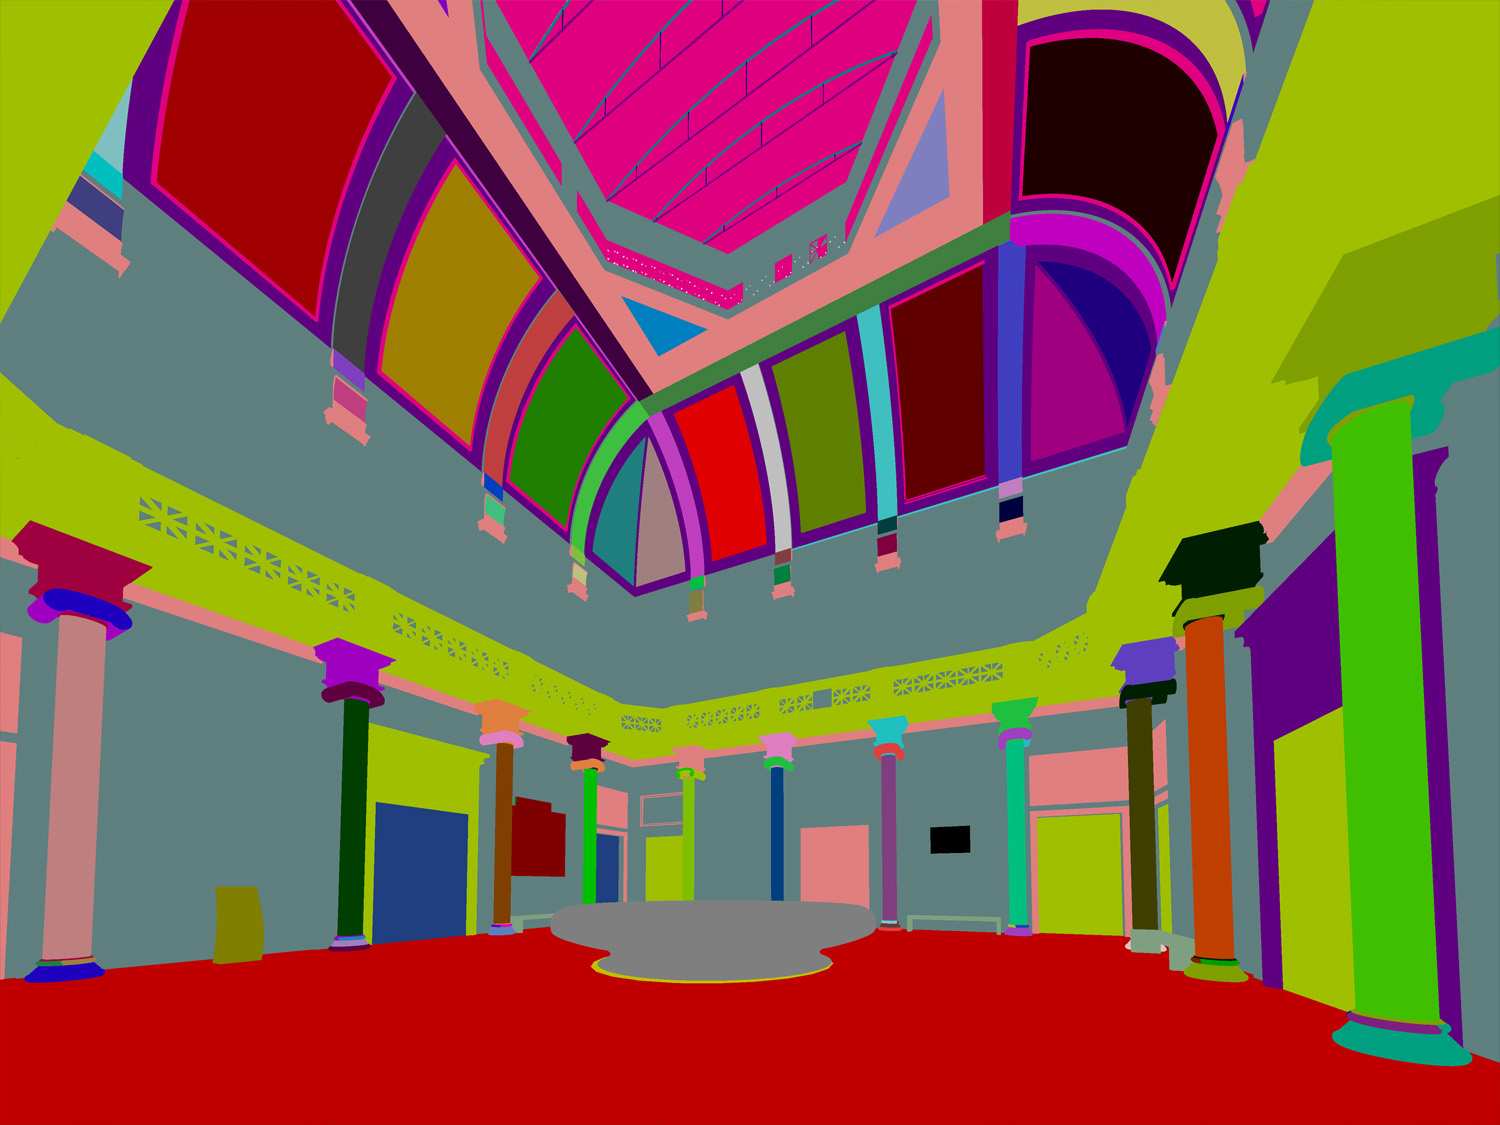
Wire color pass to control the elements separately.
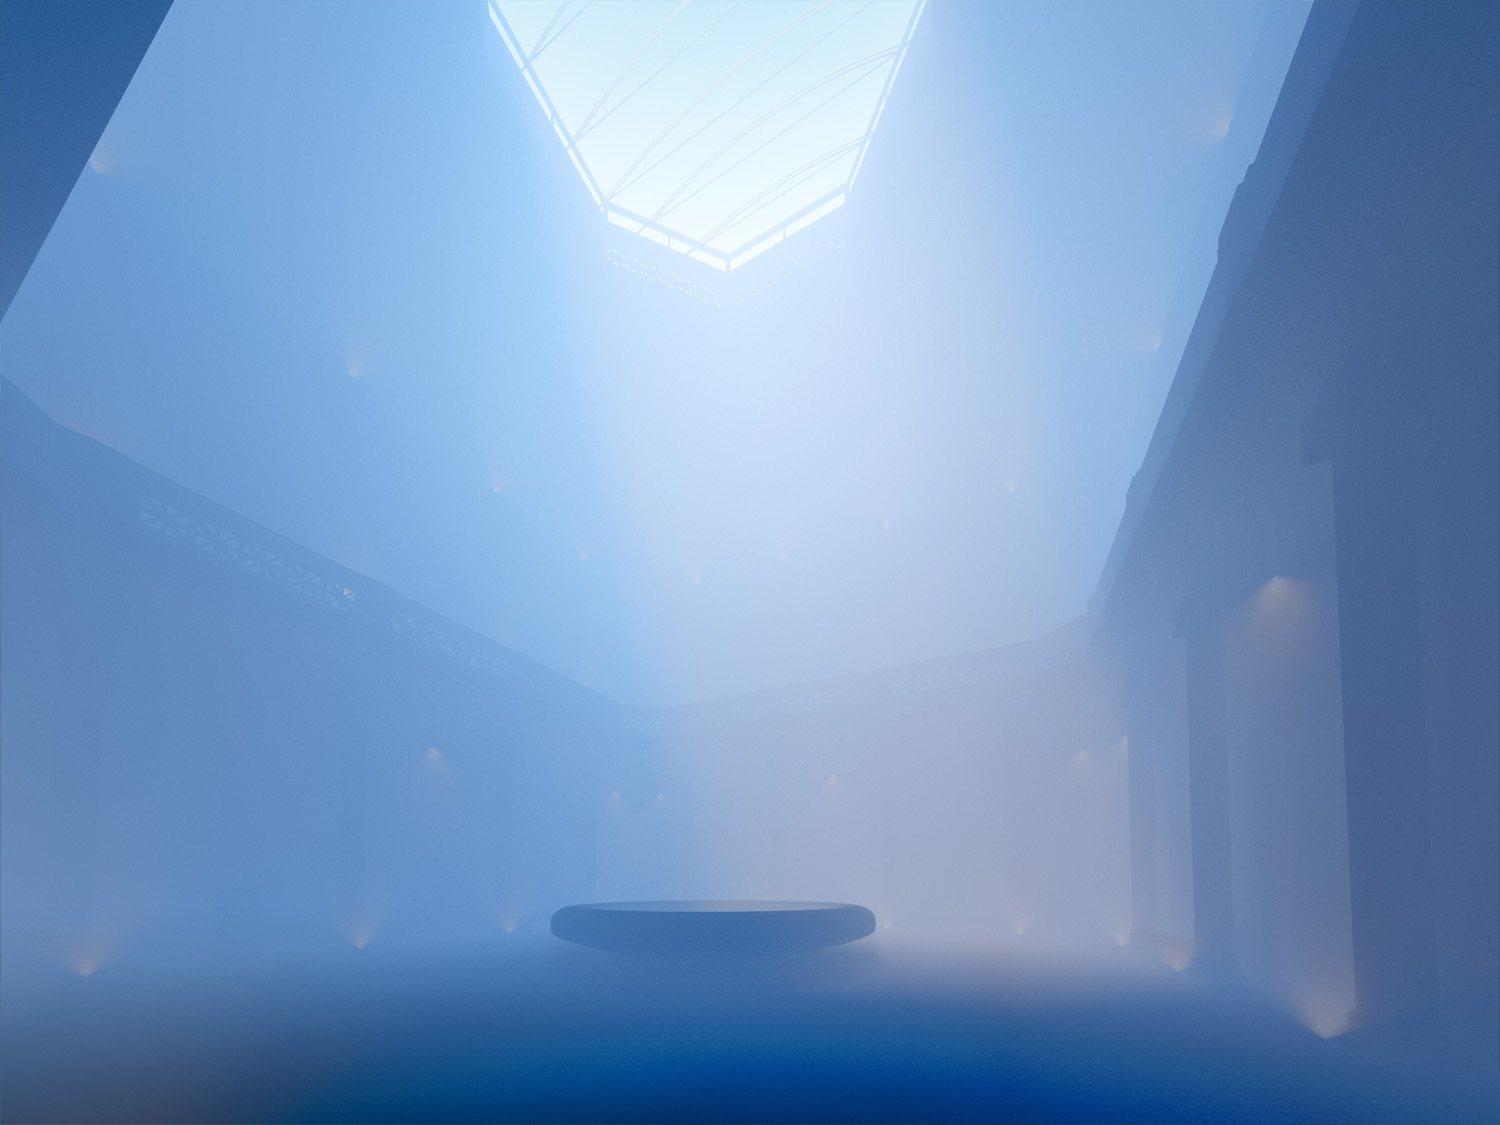
Atmospheric pass.
The result of the addition of 3 passes: Beauty pass + Atmospheric pass in hard light mode + Reflection pass in overlay mode at 15% opacity.
The addition of one Volumetric pass with a shaped sunbeams mask (gradient tool on the mask) in Hard light mode.
Contrast adjustment for the floor and doors.
Effects of light for spots and cornices. Light rays more defined.
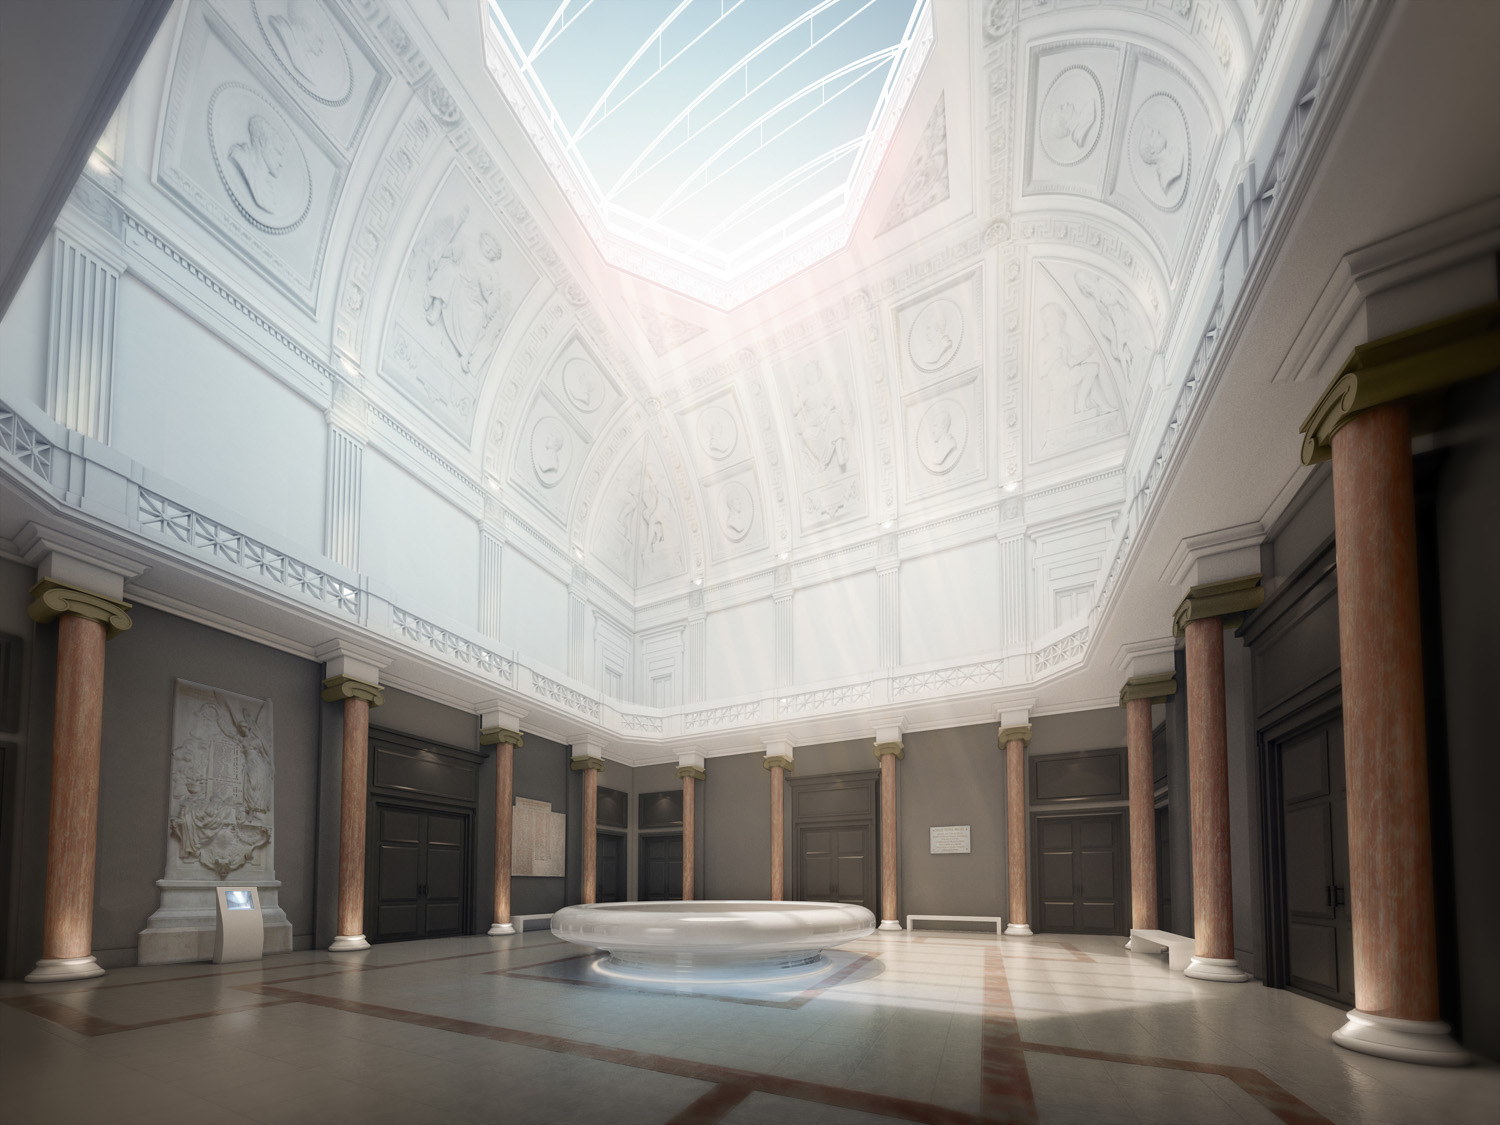
Color adjustment with color balance, contrast, adding elements in 2D and a slight blur of the first plan with a z-depth pass. To do this, we copied the z-depth pass into one channel of the image and then use the lens blur filter.
Adding characters with masks.
Contrast and Glow.
Thank you for reading!
Modeling: Sebastien Mouchetan and Alexandre Martel
Rendering and Post-production: Alexandre Martel and Olivier Voisin
Translation: Amira Mouaki Kasic and correction from Marc Church
Copyright 2012 AM Graphisme - All rights reserved.
You must be logged in to post a comment. Login here.
m
mehdi arribi
Report Abuse
nice work : merci pour le partage

Vizcon
Report Abuse
If I could help you with the volumetric light, made some time ago a tutorial, watch it here!
http://vizcon3d.wordpress.com/tutorials/
N
Niko M
Report Abuse
@Alex: I'd say it's just the other way round. To sketch something in 3D to find the design- Sketchup is great.
And even when you know what you want SU is quick and accurate.
Good poly modeler. But maybe it's what you're better used to. Drinking helps anyway :)
Probably your light intesity is too low or your fog not dense enough.
If your using vray try vrayenvironmentfog, you can find approriate parameters on the web. Distance controls density.
Imo you should try not to render the image again with fog and vrayatmosphere render element on but render a seperate image with an 100% black material in override material slot.
Easier to get the right fog parameters, quicker in render and the same ease in postpro.
Good luck. ;)
V
Vipul Gaur
Report Abuse
can u please explain me about Vray atmosphere pass when i m using it it's showing me black..

martel alexandre
Report Abuse
Thank you for your comments.
Sketchup is good indeed only when you know what you want.
We had just 1 week to achieve this work, so we were so depressed that we drink everything we can during this period...
:)
I think this work, the creating work, is amazing but how to tell architects (i am architect) that we need time.
There is an interview on clog between Mir and Luxigon that explains the difference between doing a picture in 2 days and 1 week... You have to read it!
:) Cheers
Alex
EMY Jean-Marc
Report Abuse
Super boulot! I love the mood!

Anurag Galhotra
Report Abuse
that's it...i give up!
great job, absolutely beautiful [although I do agree with [b]Y P[/b] about the light being perhaps a tad on the much side, but I am not allowed to critique this!]
M V
Report Abuse
Thanks for showing some of the non-believers what SketchUp is really capable of. Awesome work! Can you share your export/import workflow with us?
Vizcon
Report Abuse
Always a fan of vulumetric light, congrats!! well done!

Hami
Report Abuse
Amir jan ,as always nice job pesar.
Really like your work.
Keep up the good work.
C
Chris Chance
Report Abuse
hehehehe :)
No i wasn't aware of that, the only thing i've had issues with this process is sometimes my subtractions and extrusions end up with unexpected results with the "material side" like showing the back-side sometimes when its supposed to be the front... once it gets to 3d studio
N
Niko M
Report Abuse
No, you're not the only one.
And for a good reason ;)
For the case you don't know, Peter Guthrie does so as well
with some of the best results you can find out there..
C
Chris Chance
Report Abuse
Wow thank god im not the only one that uses sketchup for modeling and then puts it into 3ds LOL....
AMAZING quality!
N
Niko M
Report Abuse
Nice work!
Maybe use "guess vertical" option in camera to set ascending lines vertical.
In my eyes the light rays are a little overdone, i'd prefer fog only ;)
It's meant to be a glowing ring below the fountain, right?
You changed the glass structure in the end, good choice.

Amir -H Qashqai-P
Report Abuse
As always an excellent teacher!
About this article
The Making Of Palais De Justice by AM Graphisme.
visibility19.4 k
favorite_border15
mode_comment15


