

Making Of
The Making Of House La Invernada
Hi my name is Evan Mandala. I am one of the founders of 2G Studio and 2G Academy. First i want to say thanks to Jeff Mottle and CGarchitect for giving me this opportunity to create the "making of" house la invernada.
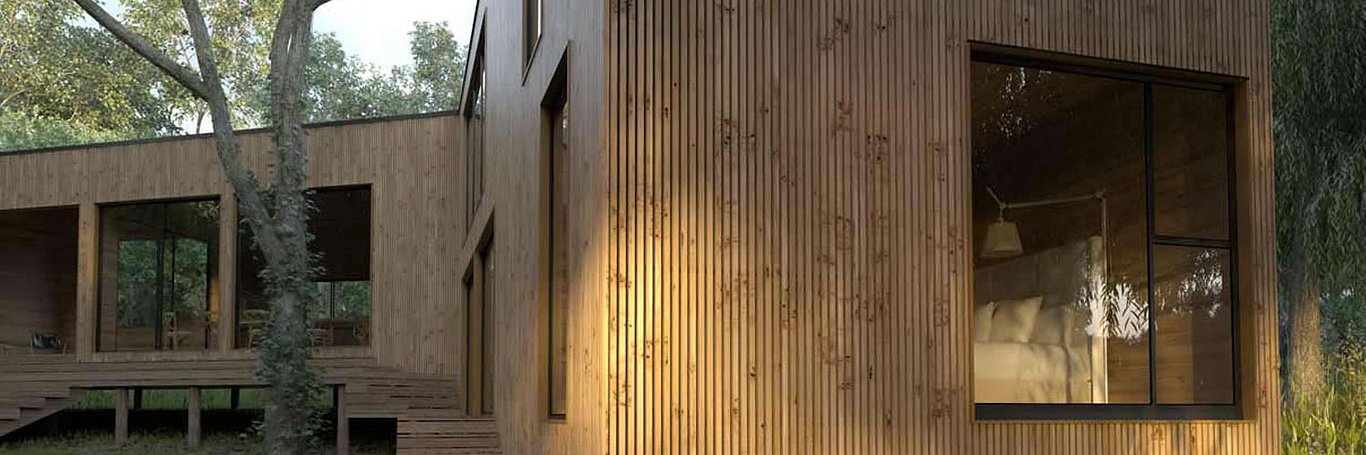
It's really been a while since I made my own personal project as I've been so busy. When I found time I visited archdaily to brainstorm ideas and I saw the house la Invernada by Philipe Montequ and I decided to use it as reference.
For modeling of the building I used SketchUp and camera match to get the proper size of the building.
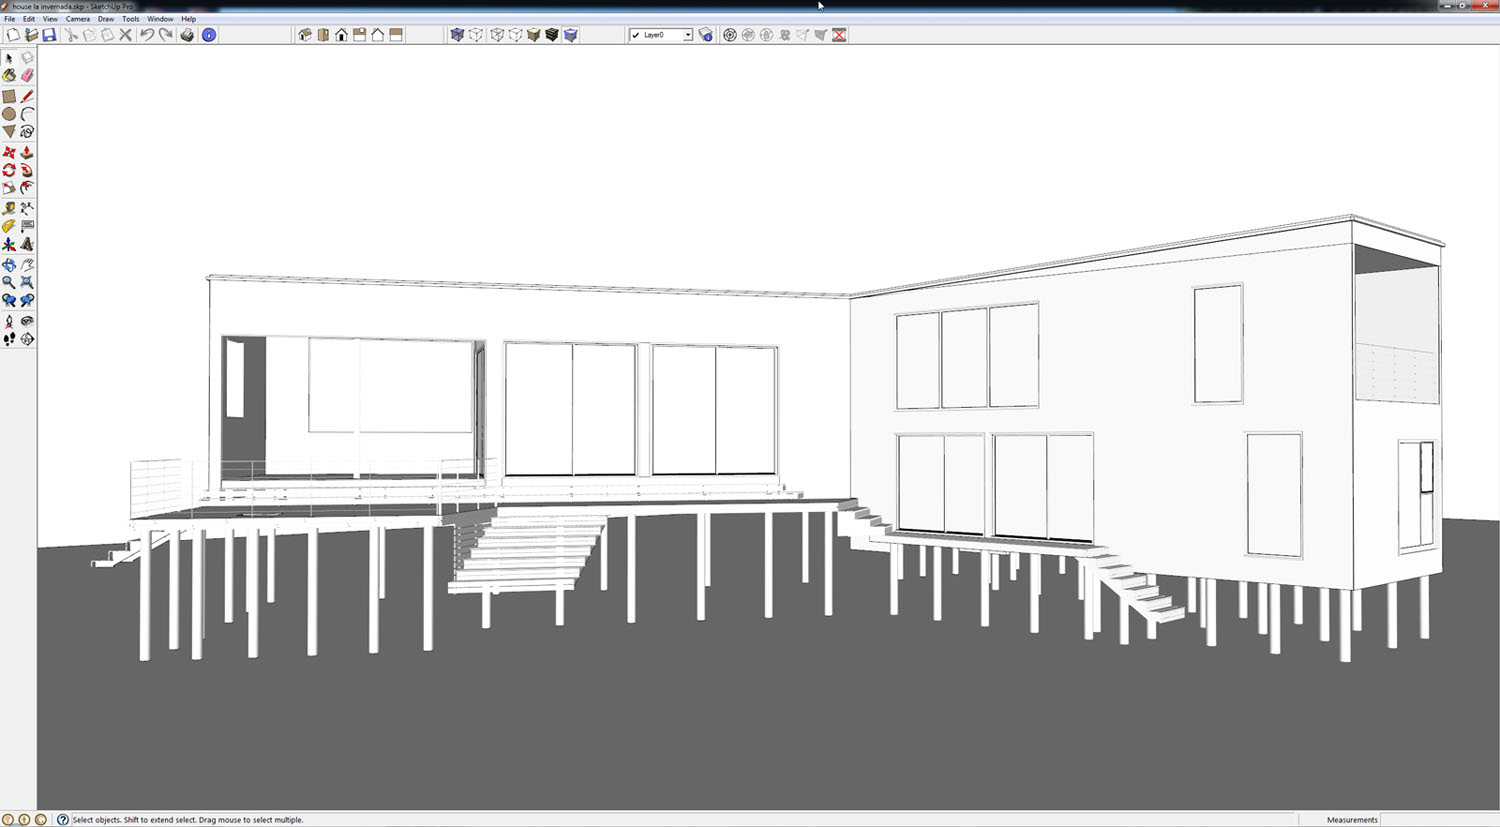
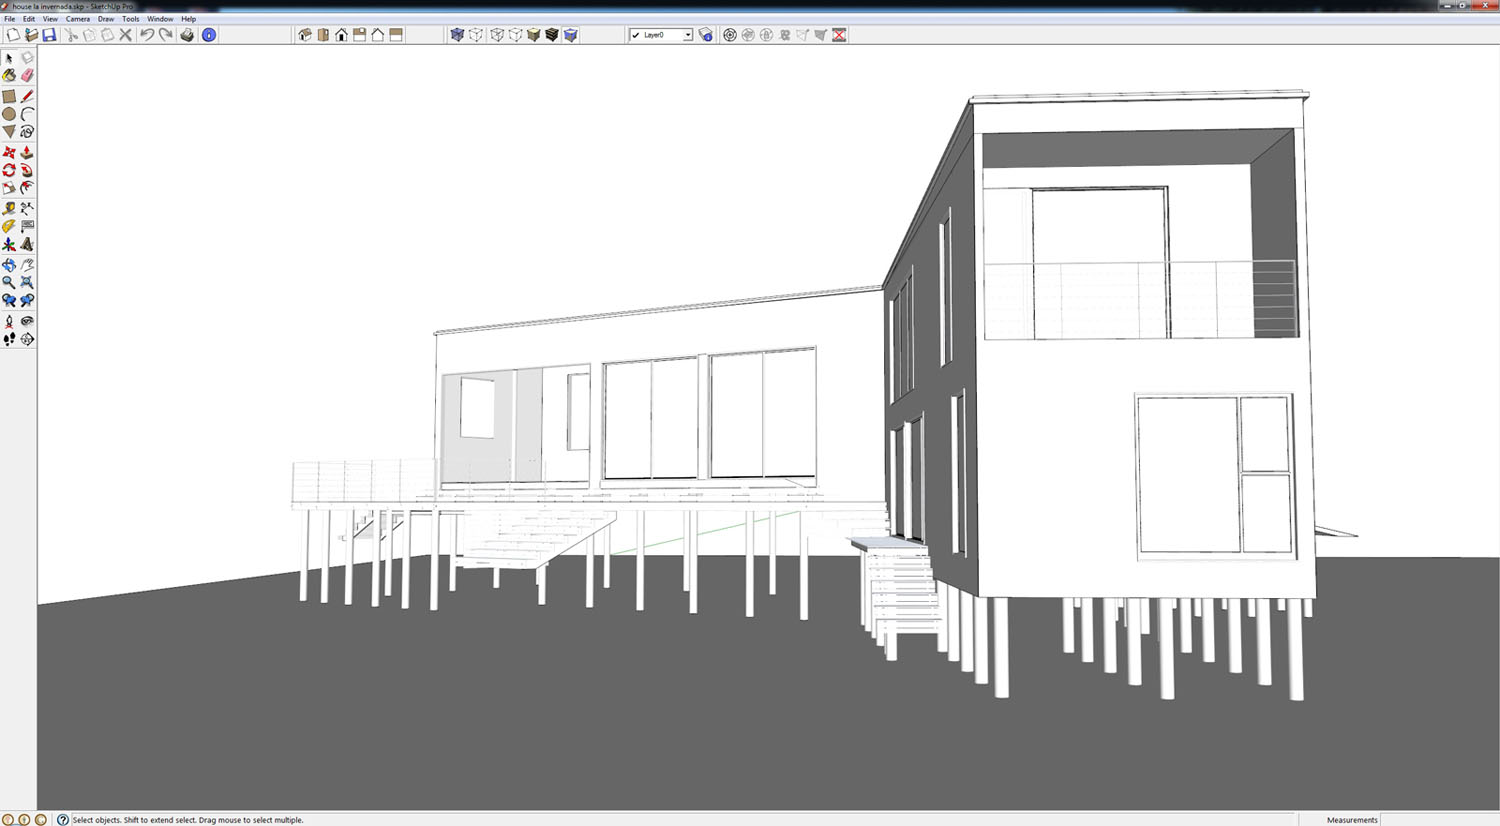
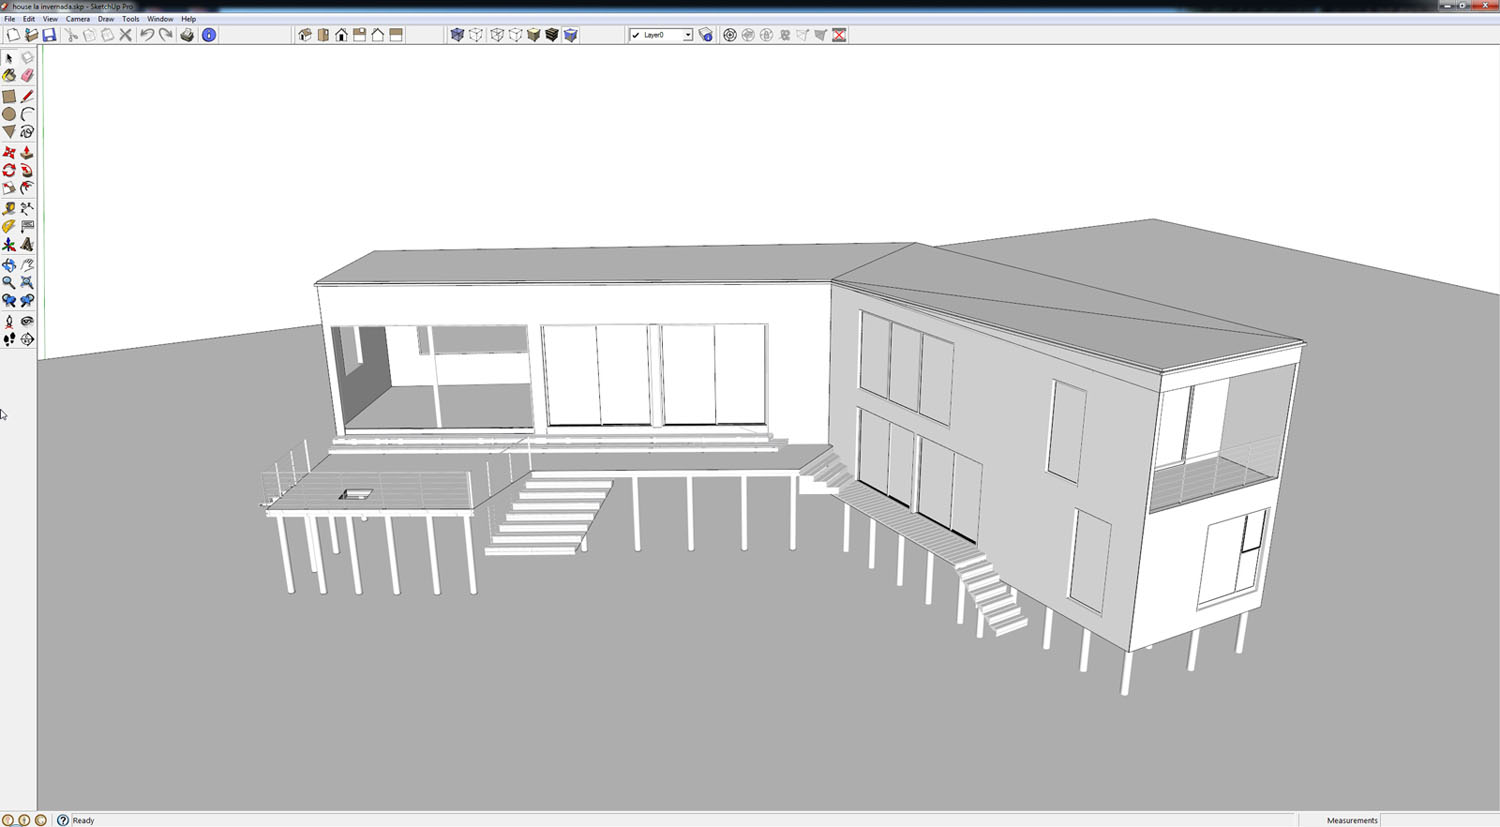
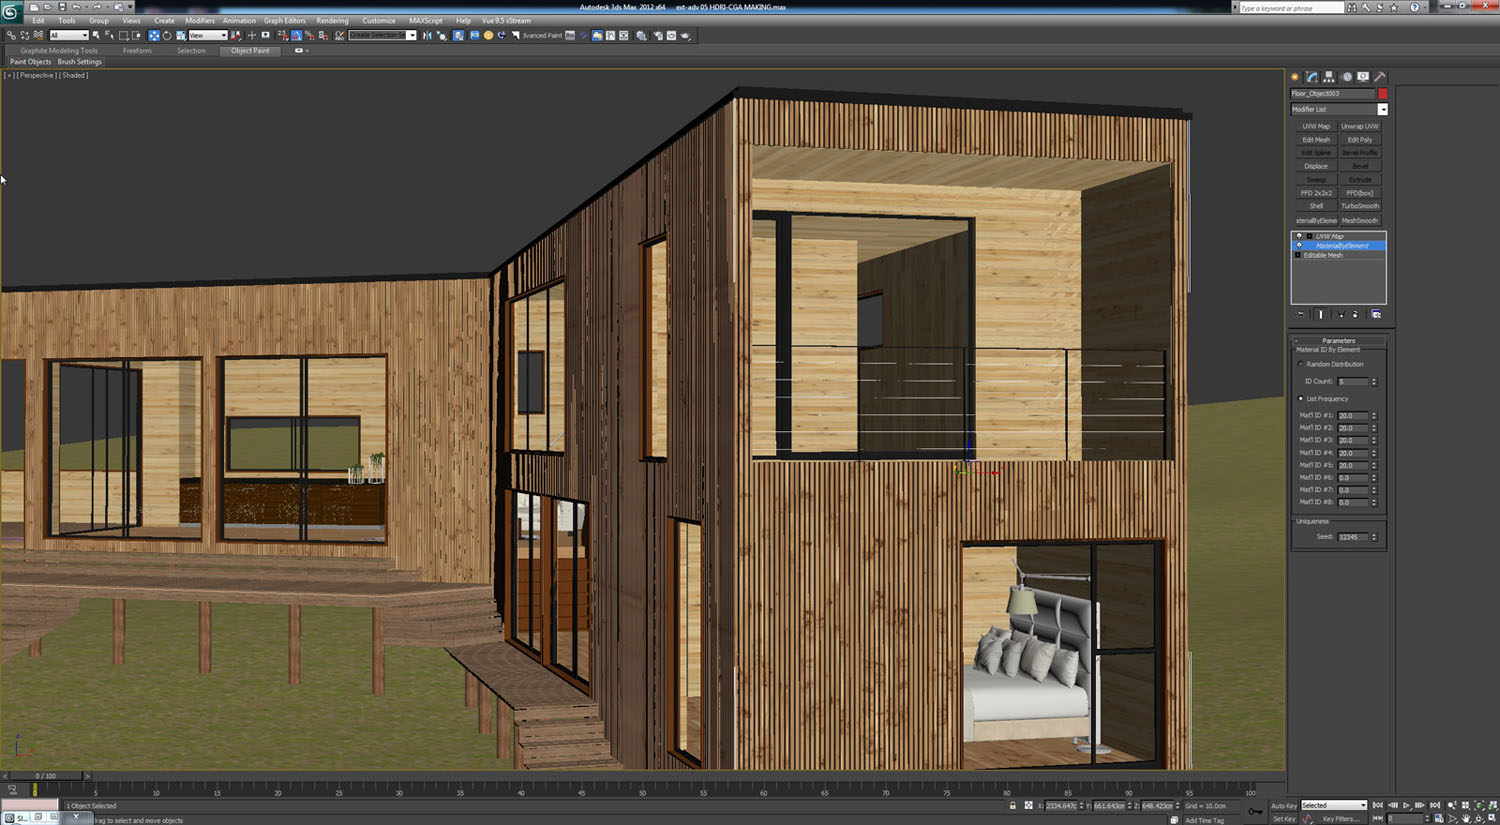
Creating the building was not hard, but the most time consuming part was the wooden planking on the walls and the wooden deck. I created the wooden deck from scratch using SketchUp, but for the wooden planks on the wall I use floor generator. All of the plants are 3d models: the trees using archmodels, the grass using i-cube igrass, the dead leaves were created manually. Below you can see the clay render.

Ok, lets talk about the wooden planks on the wall first. The wooden planks were created using floor generator from cg-source.com. This script really helps to save a lot of time. Its free, and very easy to use but can be a bit tricky. Since the name is floor generator, it won't be able to create vertical planks. So what you need to do is to rest the pattern on the ground and generate using the floor generator. Once it generated, select the object, rotate it, and put it on the wall. You can see the process here:
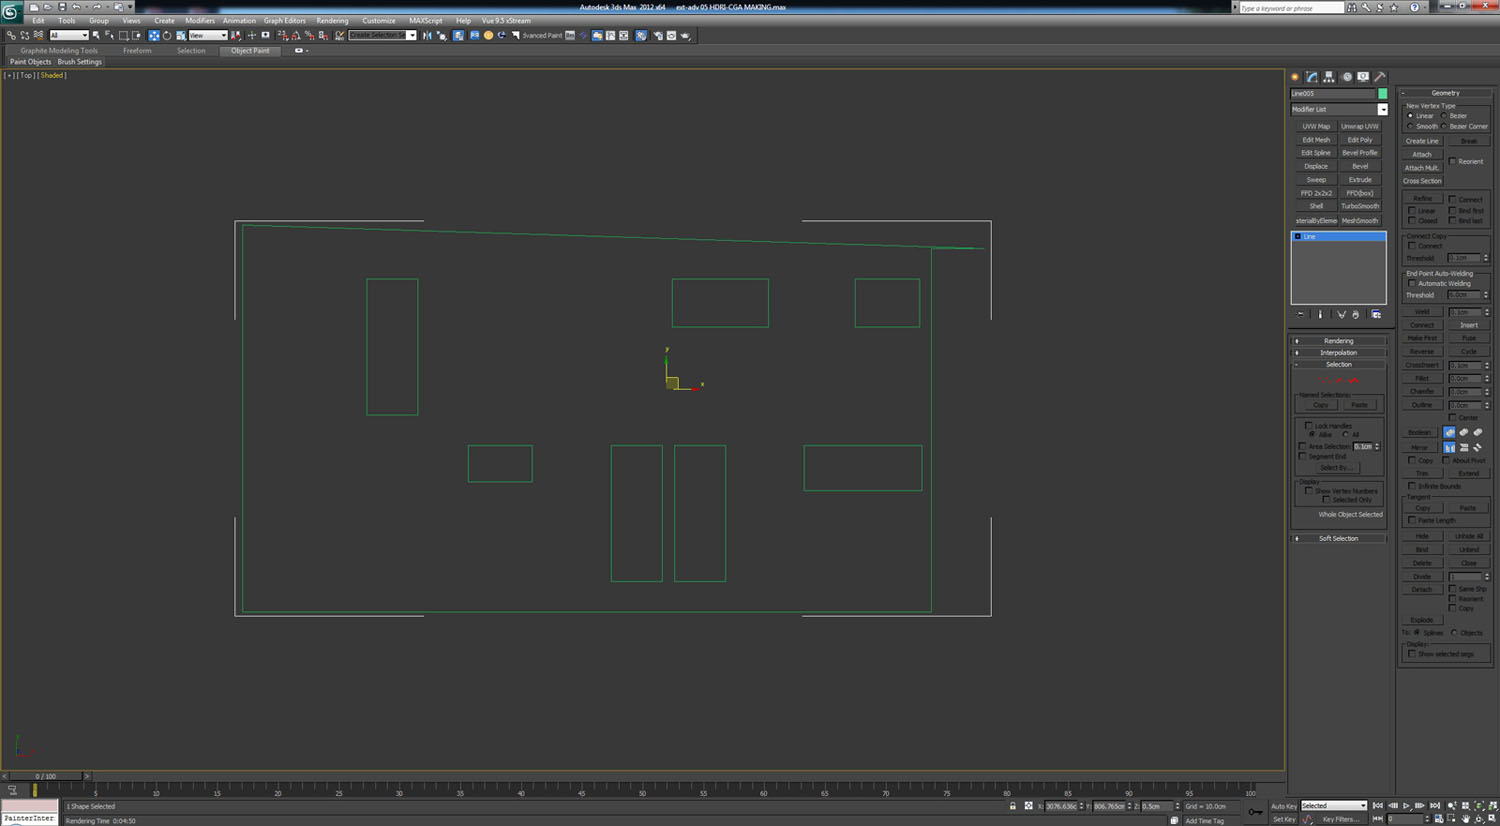
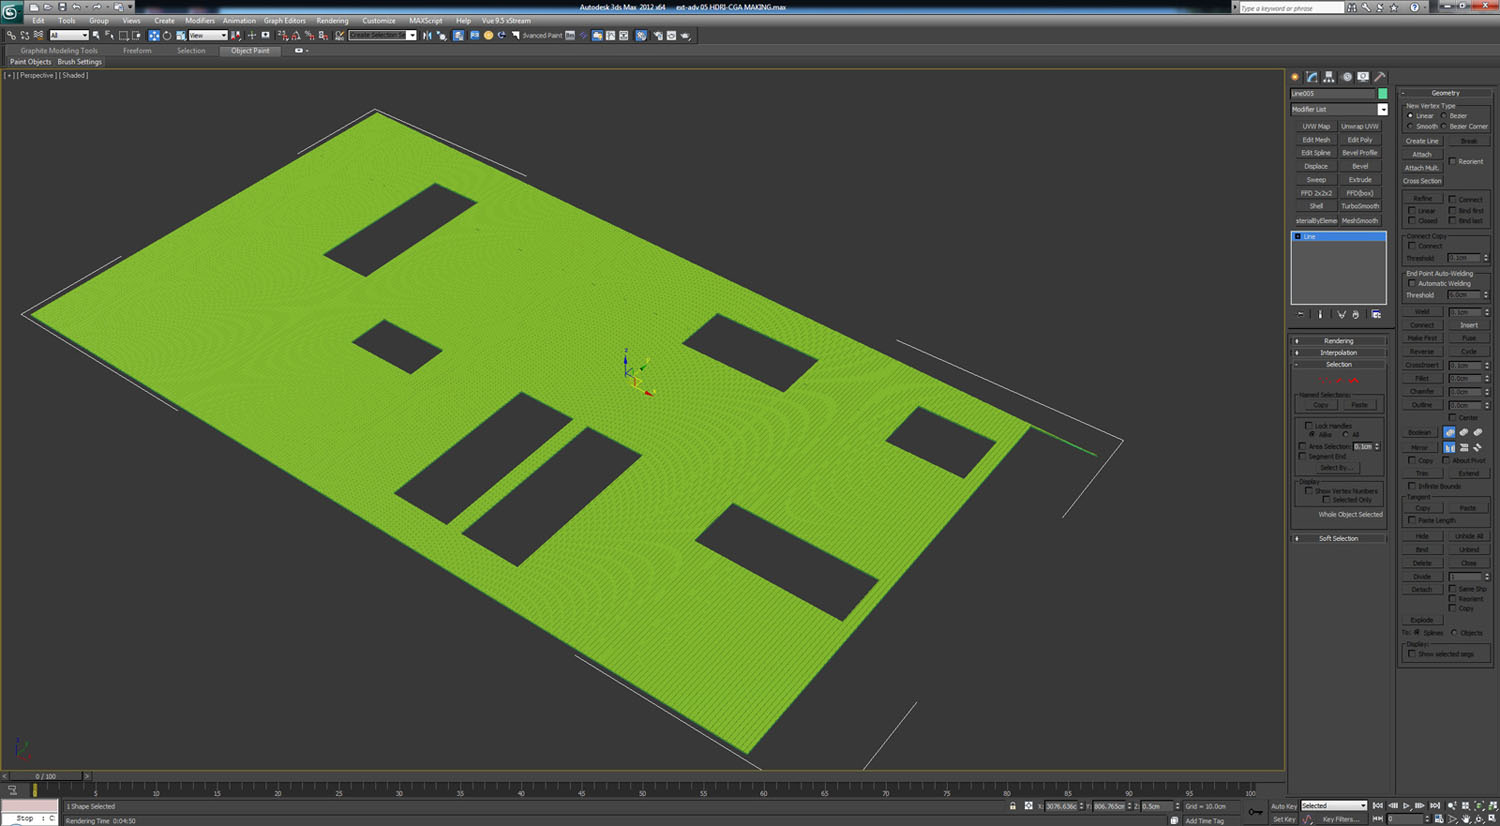

There are two ways to apply the texture for this kind of object. First we can use multitexture from cg-source.com (again, its free) and second we can use multi/sub-object. The weakness of using multitexture is on the thickness part of the planks. As a result I decided to use multi/sub-object for a better result.
First I create the multi/sub-object in the material editor slot and create one wood texture using arroway wood texture.
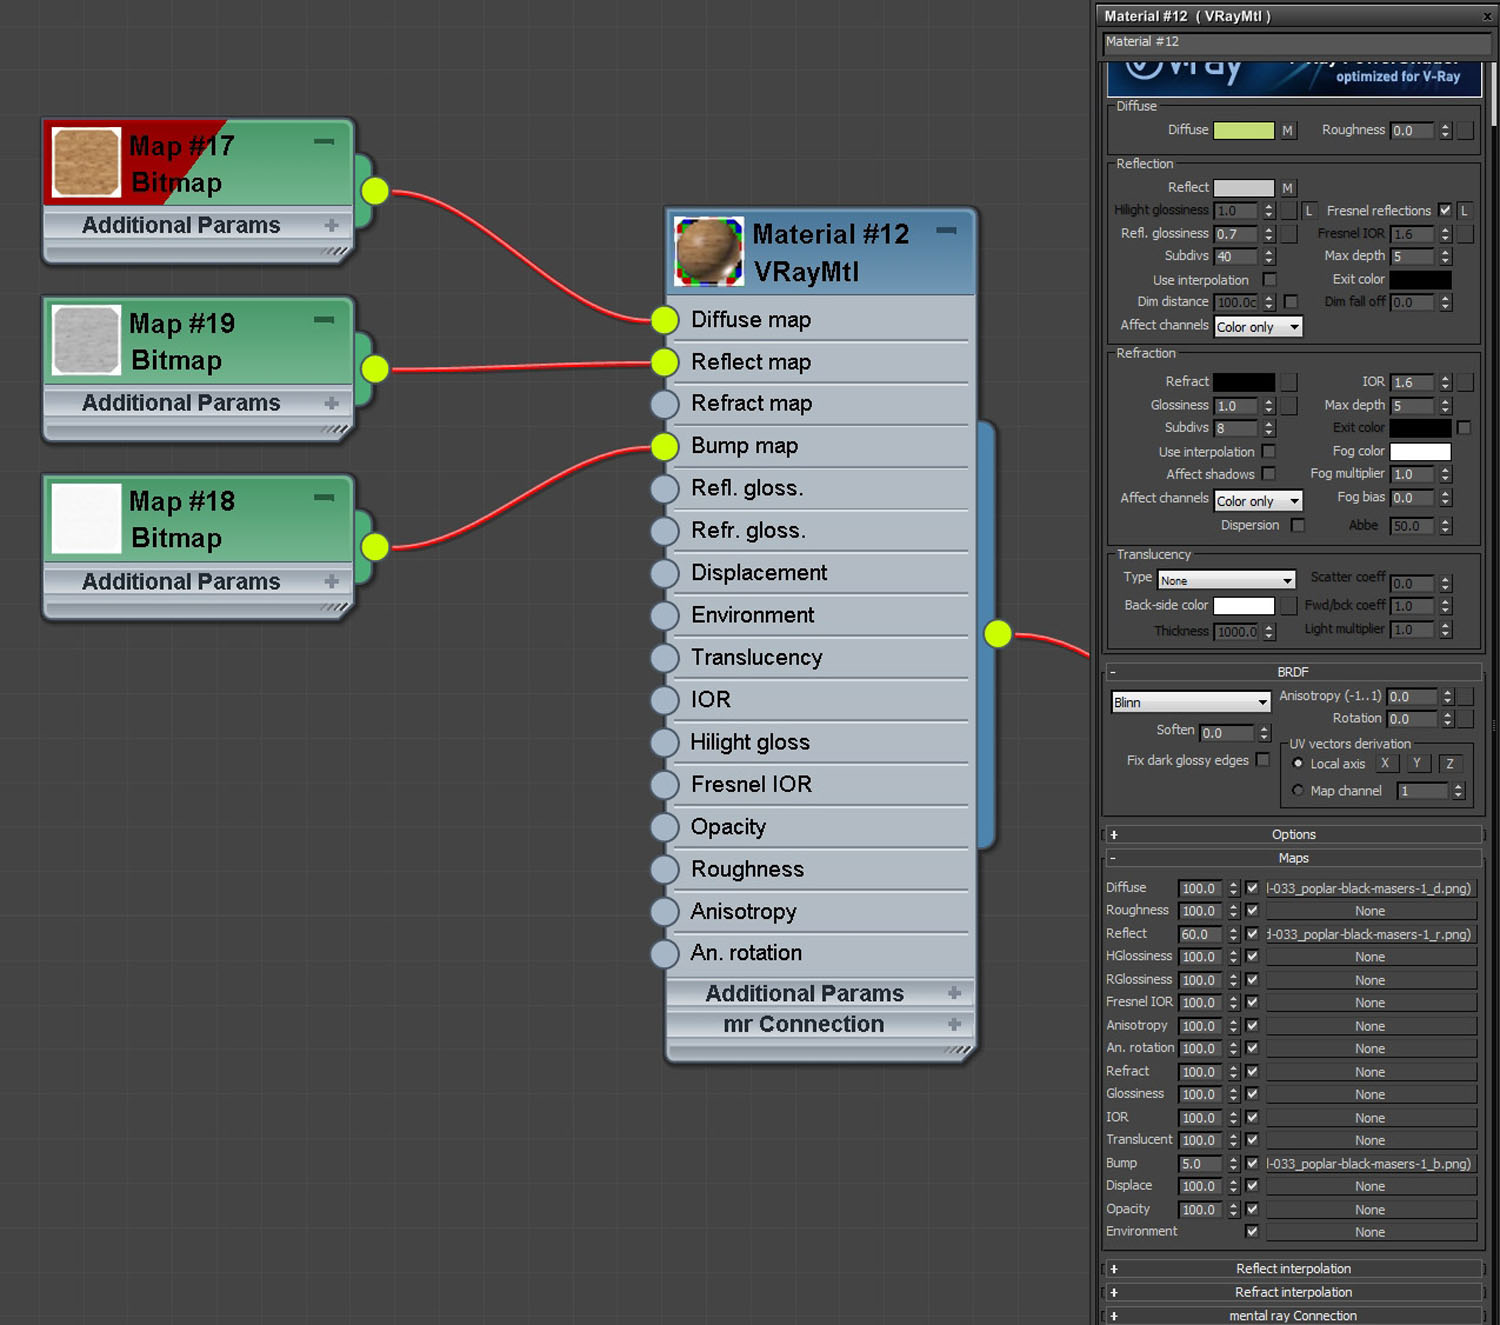
I put a reflection map in the reflection slot and used Fresnel. I put a bump bitmap also. For me, Fresnel is the best way to create reflection because Fresnel is physically correct. And the reflection will change based on the angle. After the wooden material is done, I copied it to another slot and make five 5 different materials.
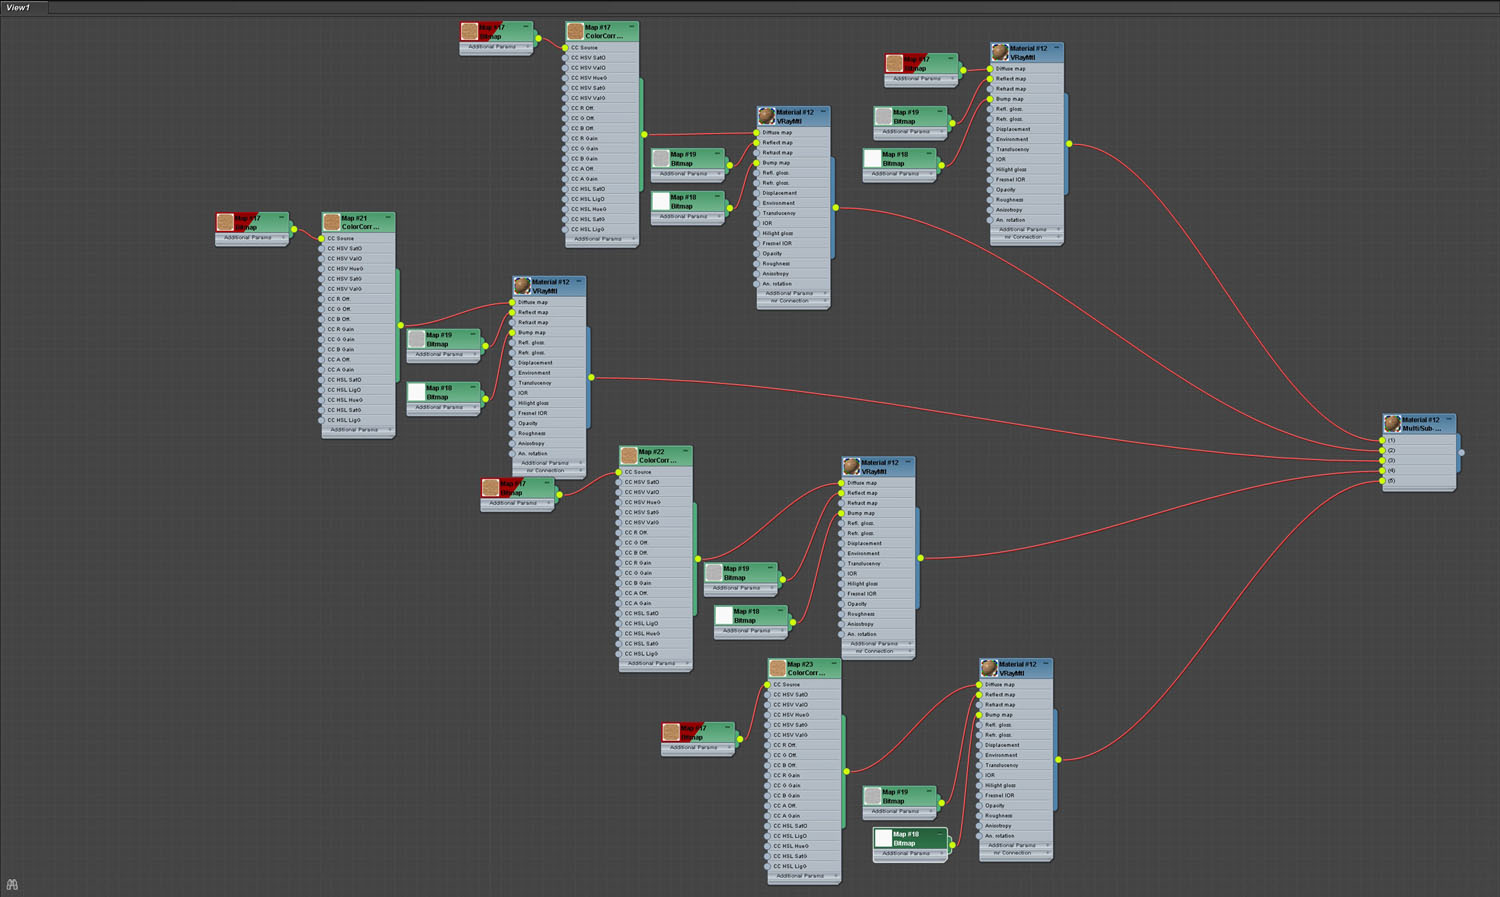
You can see I used color correct to change the color of the diffuse bitmap. I then assign the material to the planks. Make sure you assign a material by element modifier.
The wooden deck was also created the same way and I also used multi/sub-object material.
The rest of the material is a simple V-Ray material.
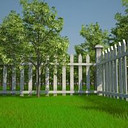
The next step is to distribute the trees. I use Archmodels trees and convert then to Vray proxies. I divided the trees into two categories: background trees and foreground trees. The background trees are all Vray proxies. The foreground trees are 3d models as I wanted to see the displacement of the bark on the foreground trees. Remember, keep everything close to your camera with as much detail as you can.
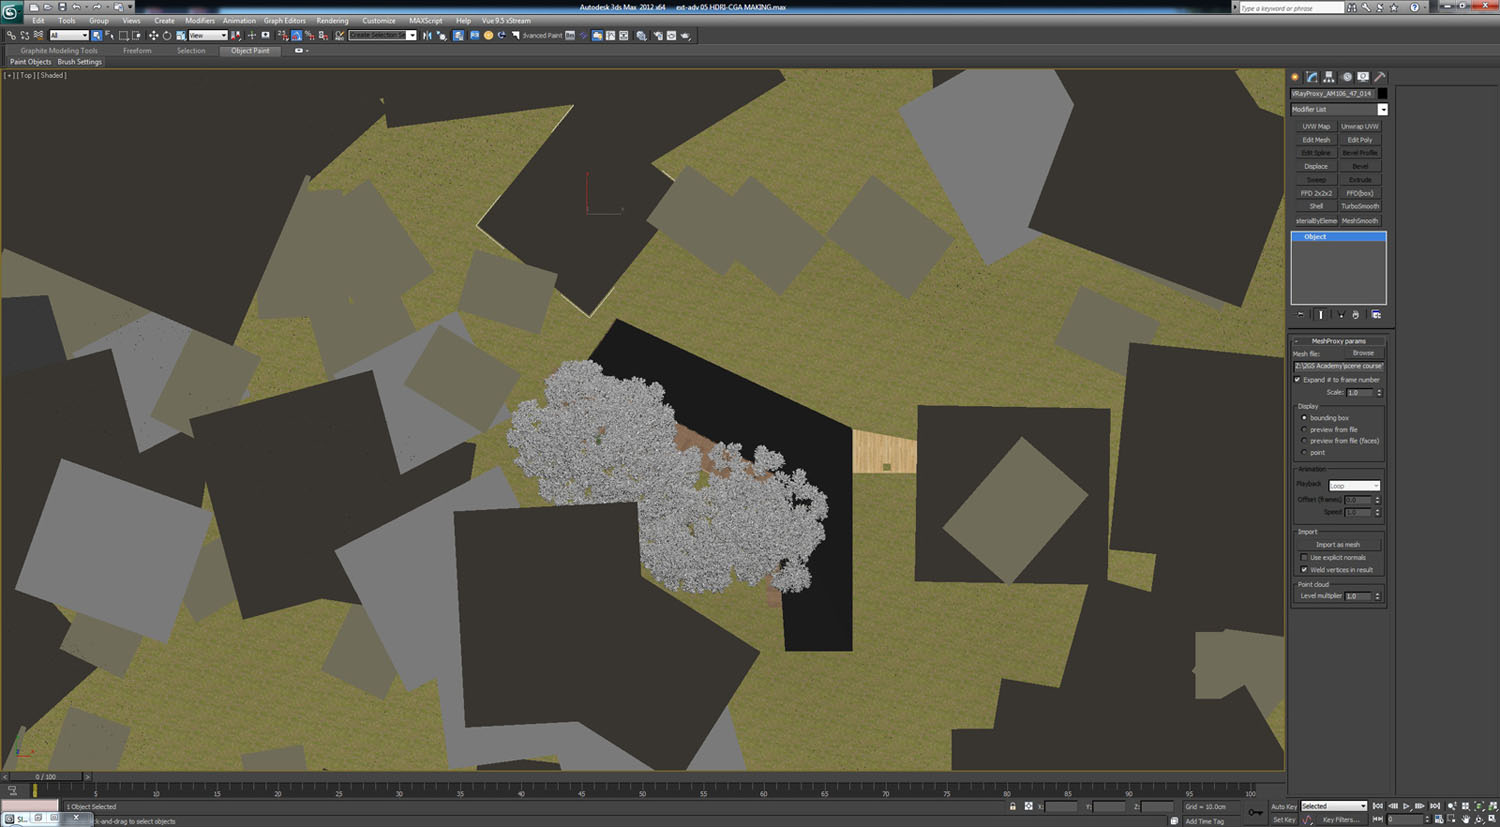
I then placed some bushes to make sure we do not see the horizon.
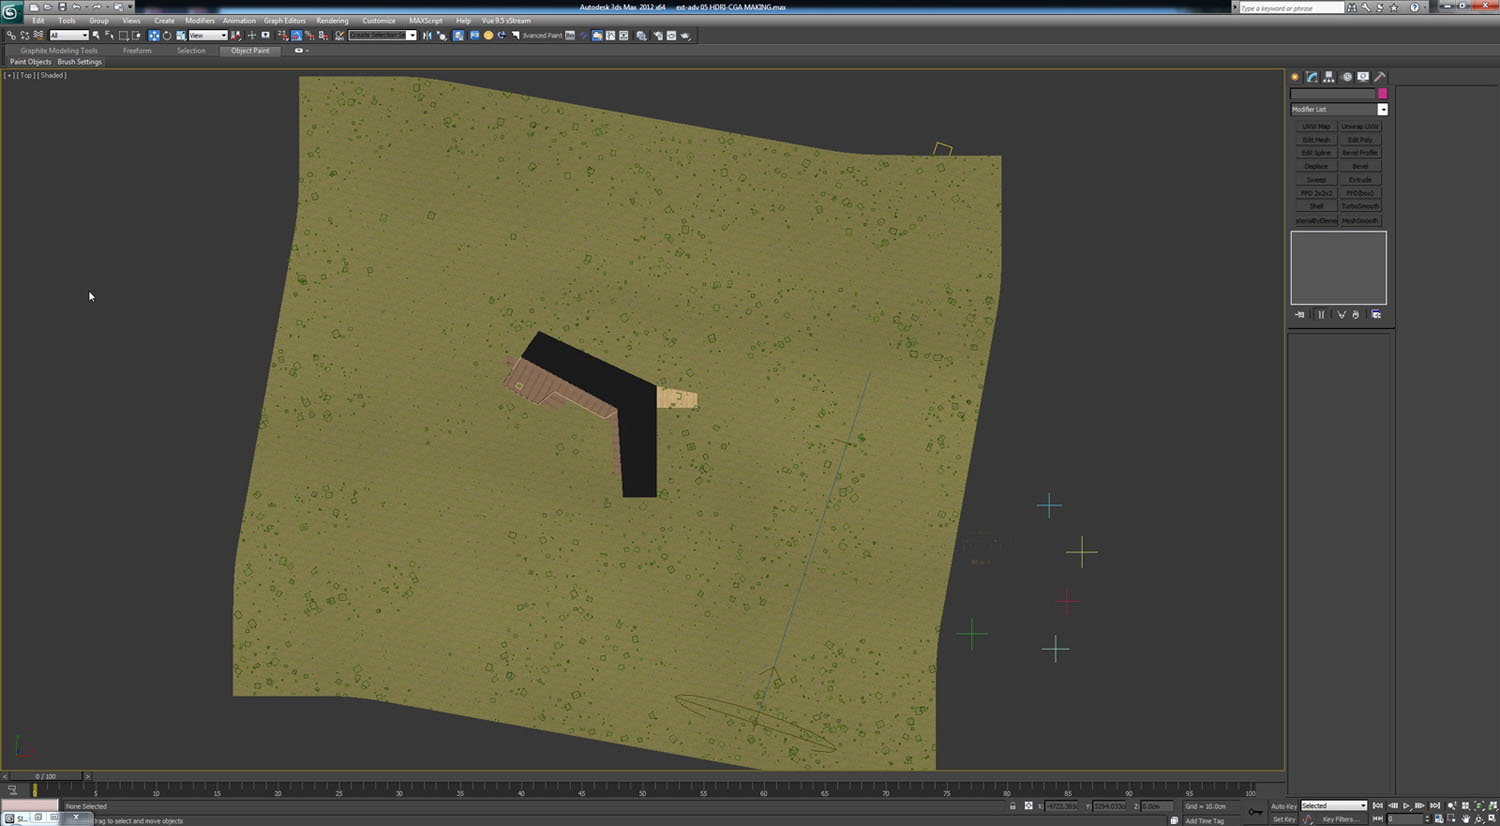
With the trees complete I worked on the grass. I didn't want to only use the grass material for the entire ground surface as I wanted to make it look more detailed. I used a mix material and a black and white bitmap.

I continued to distributed the grass using multiscatter and using the 3d model from i-cube i grass.
Now lets continue to the rendering part. I used Linear Workflow gamma 2.2 to make sure I get as photorealistic as I can. Here are the settings:
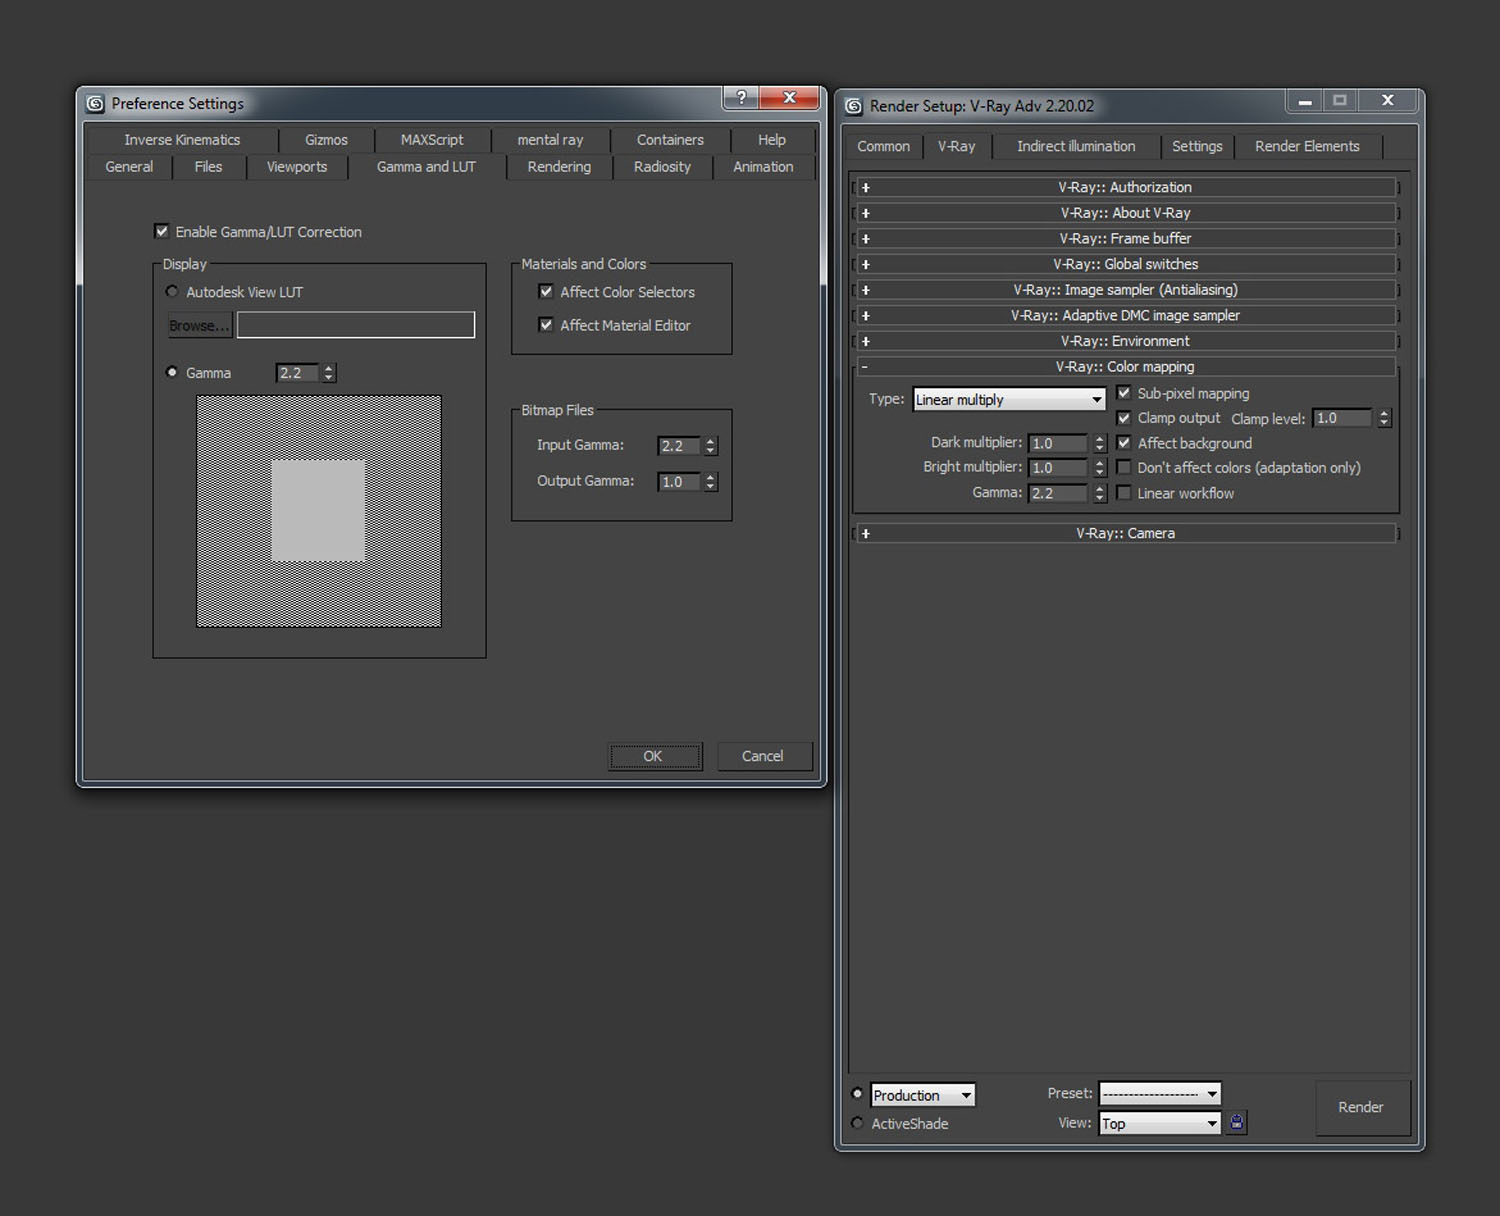
Here are my preset setting, which are nothing special really.

Next I set the Vray physical camera and the lighting. For the camera setting I used an f-number of 8, shutter speed 15, and ISO 100. For the lighting I used cgskies HDRI. You can download it at www.cgskies.com. You can download the 3000 pixel sample and do some tests before you buy. I choose cgskies because cgskies HDRI is 12000 pixel. We don't need to use any backplates to do the post production since the bitmap is already big enough. Also cgskies hdri have less noise. Less noise means faster render times. I put the HDRI into vraylight dome and connected the vraylight dome to the vray sun. When I rotate the dome the vray sun also will follow. You can see the settings below:

Below you can see where I put the vray sun.
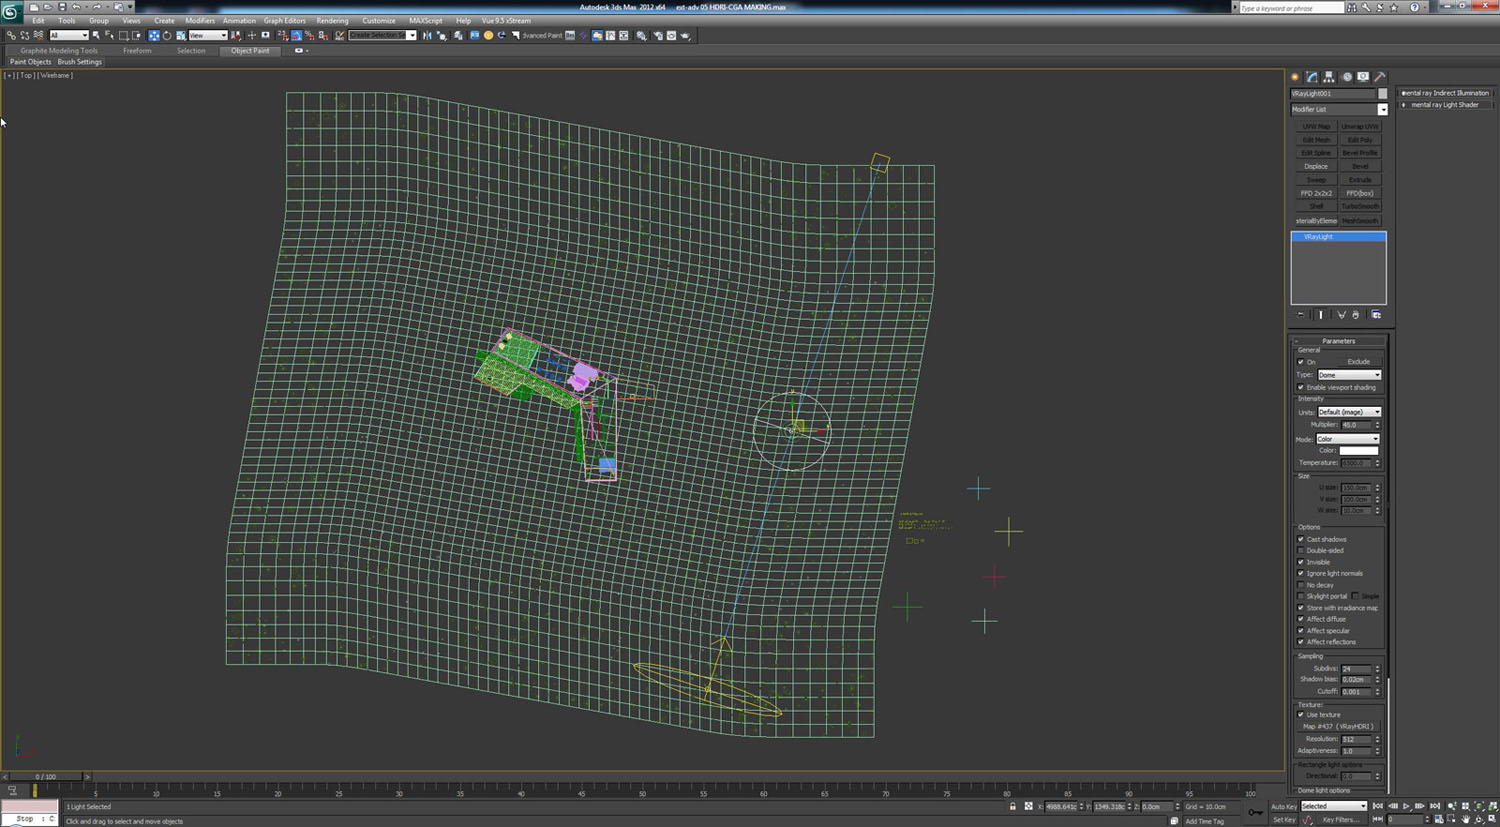
I wanted the vray sun to hit directly on the building and to go through the tree leaves.
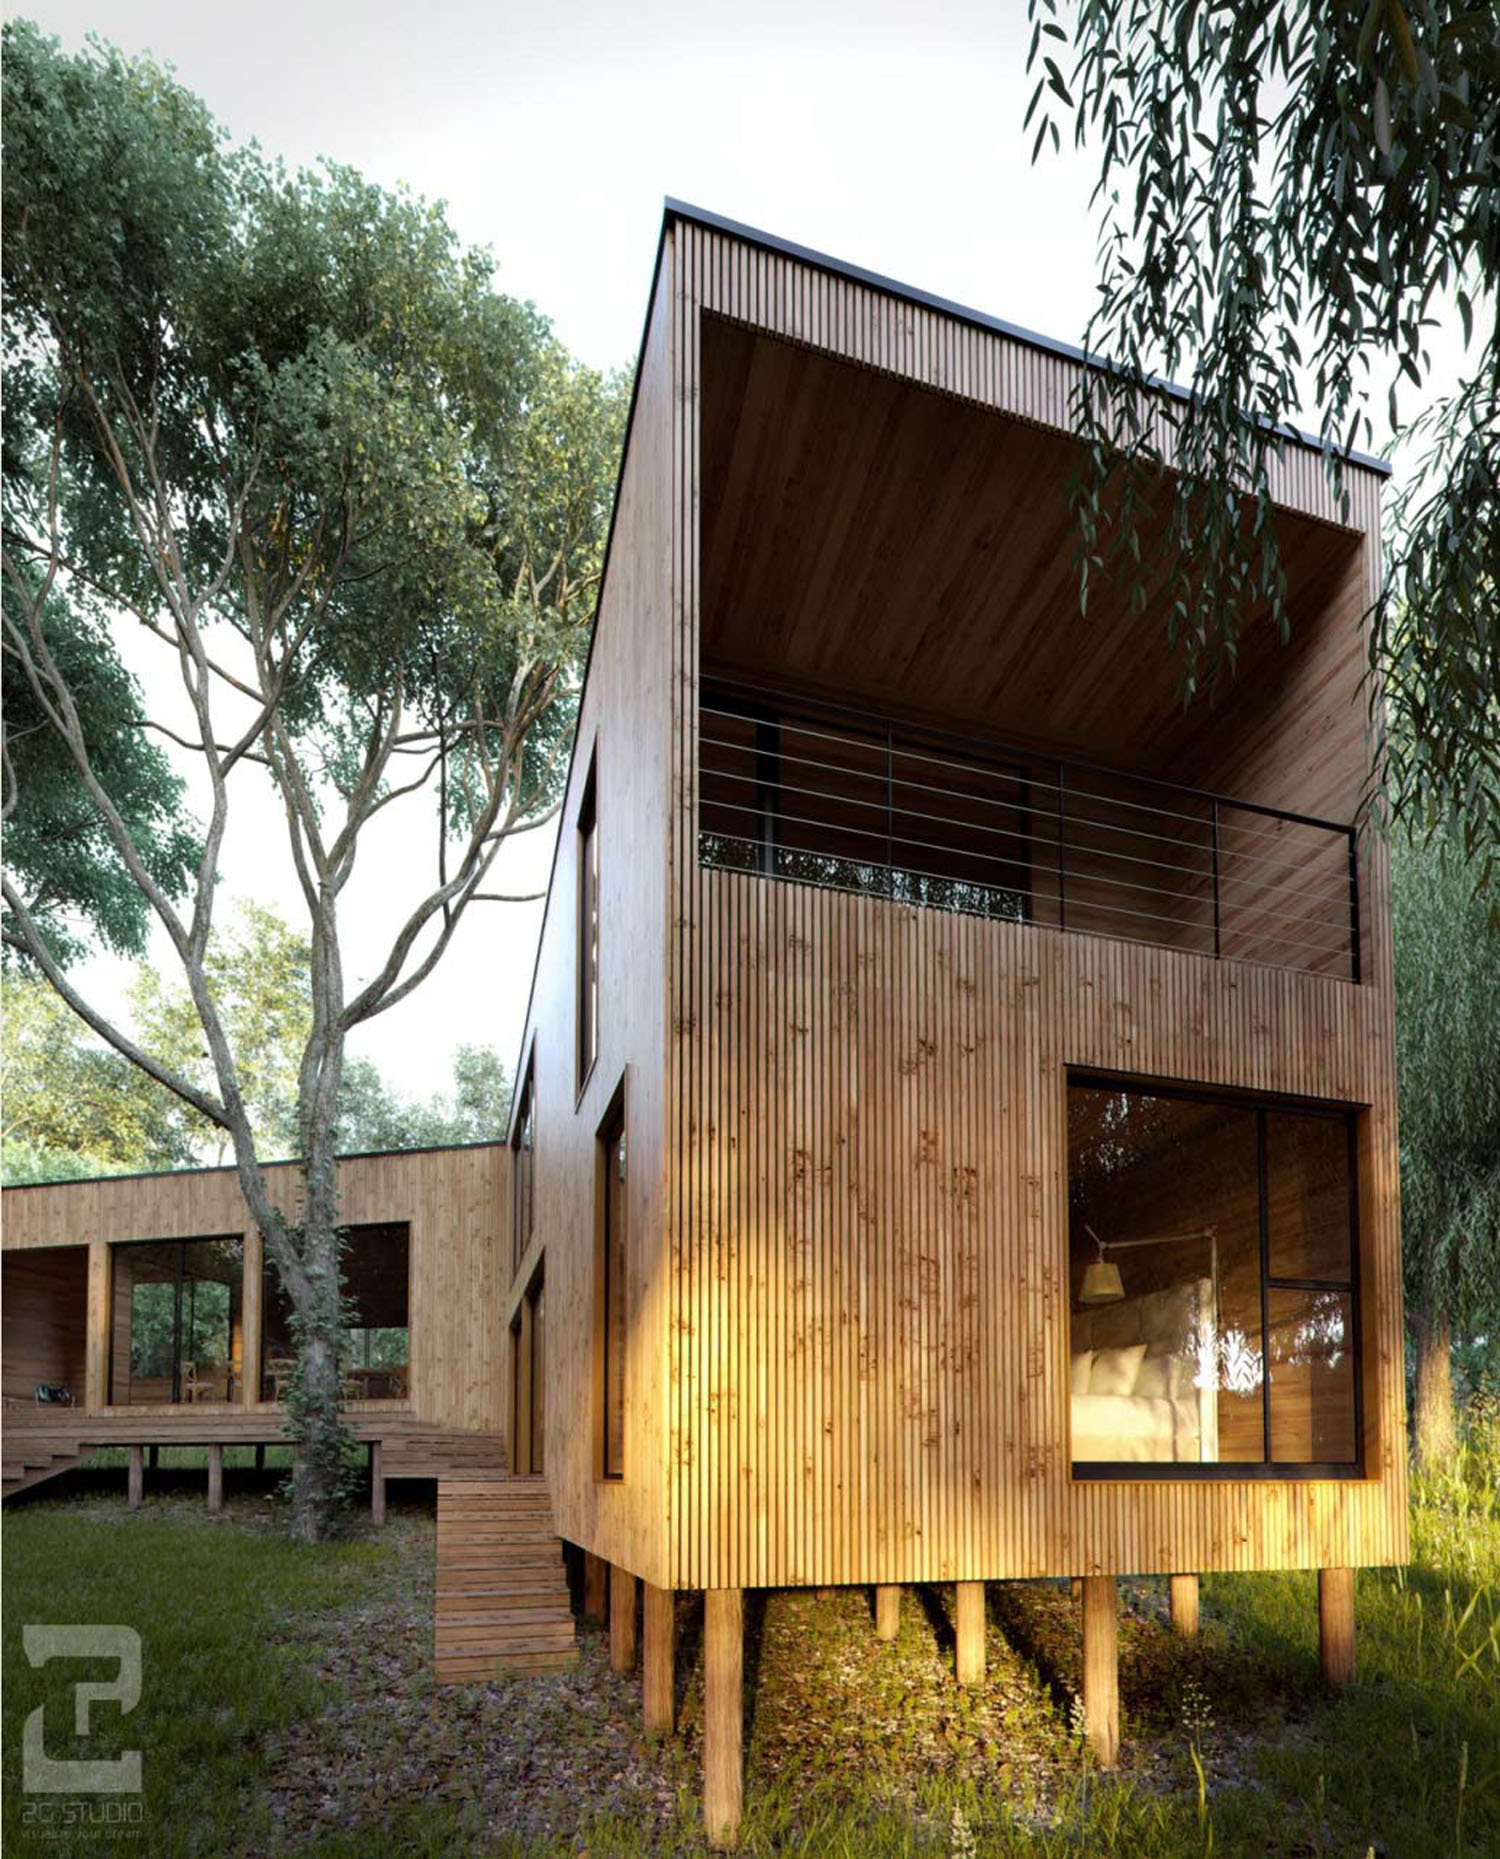
Here is the raw render result.
It's not that good actually, but no worries, I saved it as an EXR so I would have the freedom to do the post production.
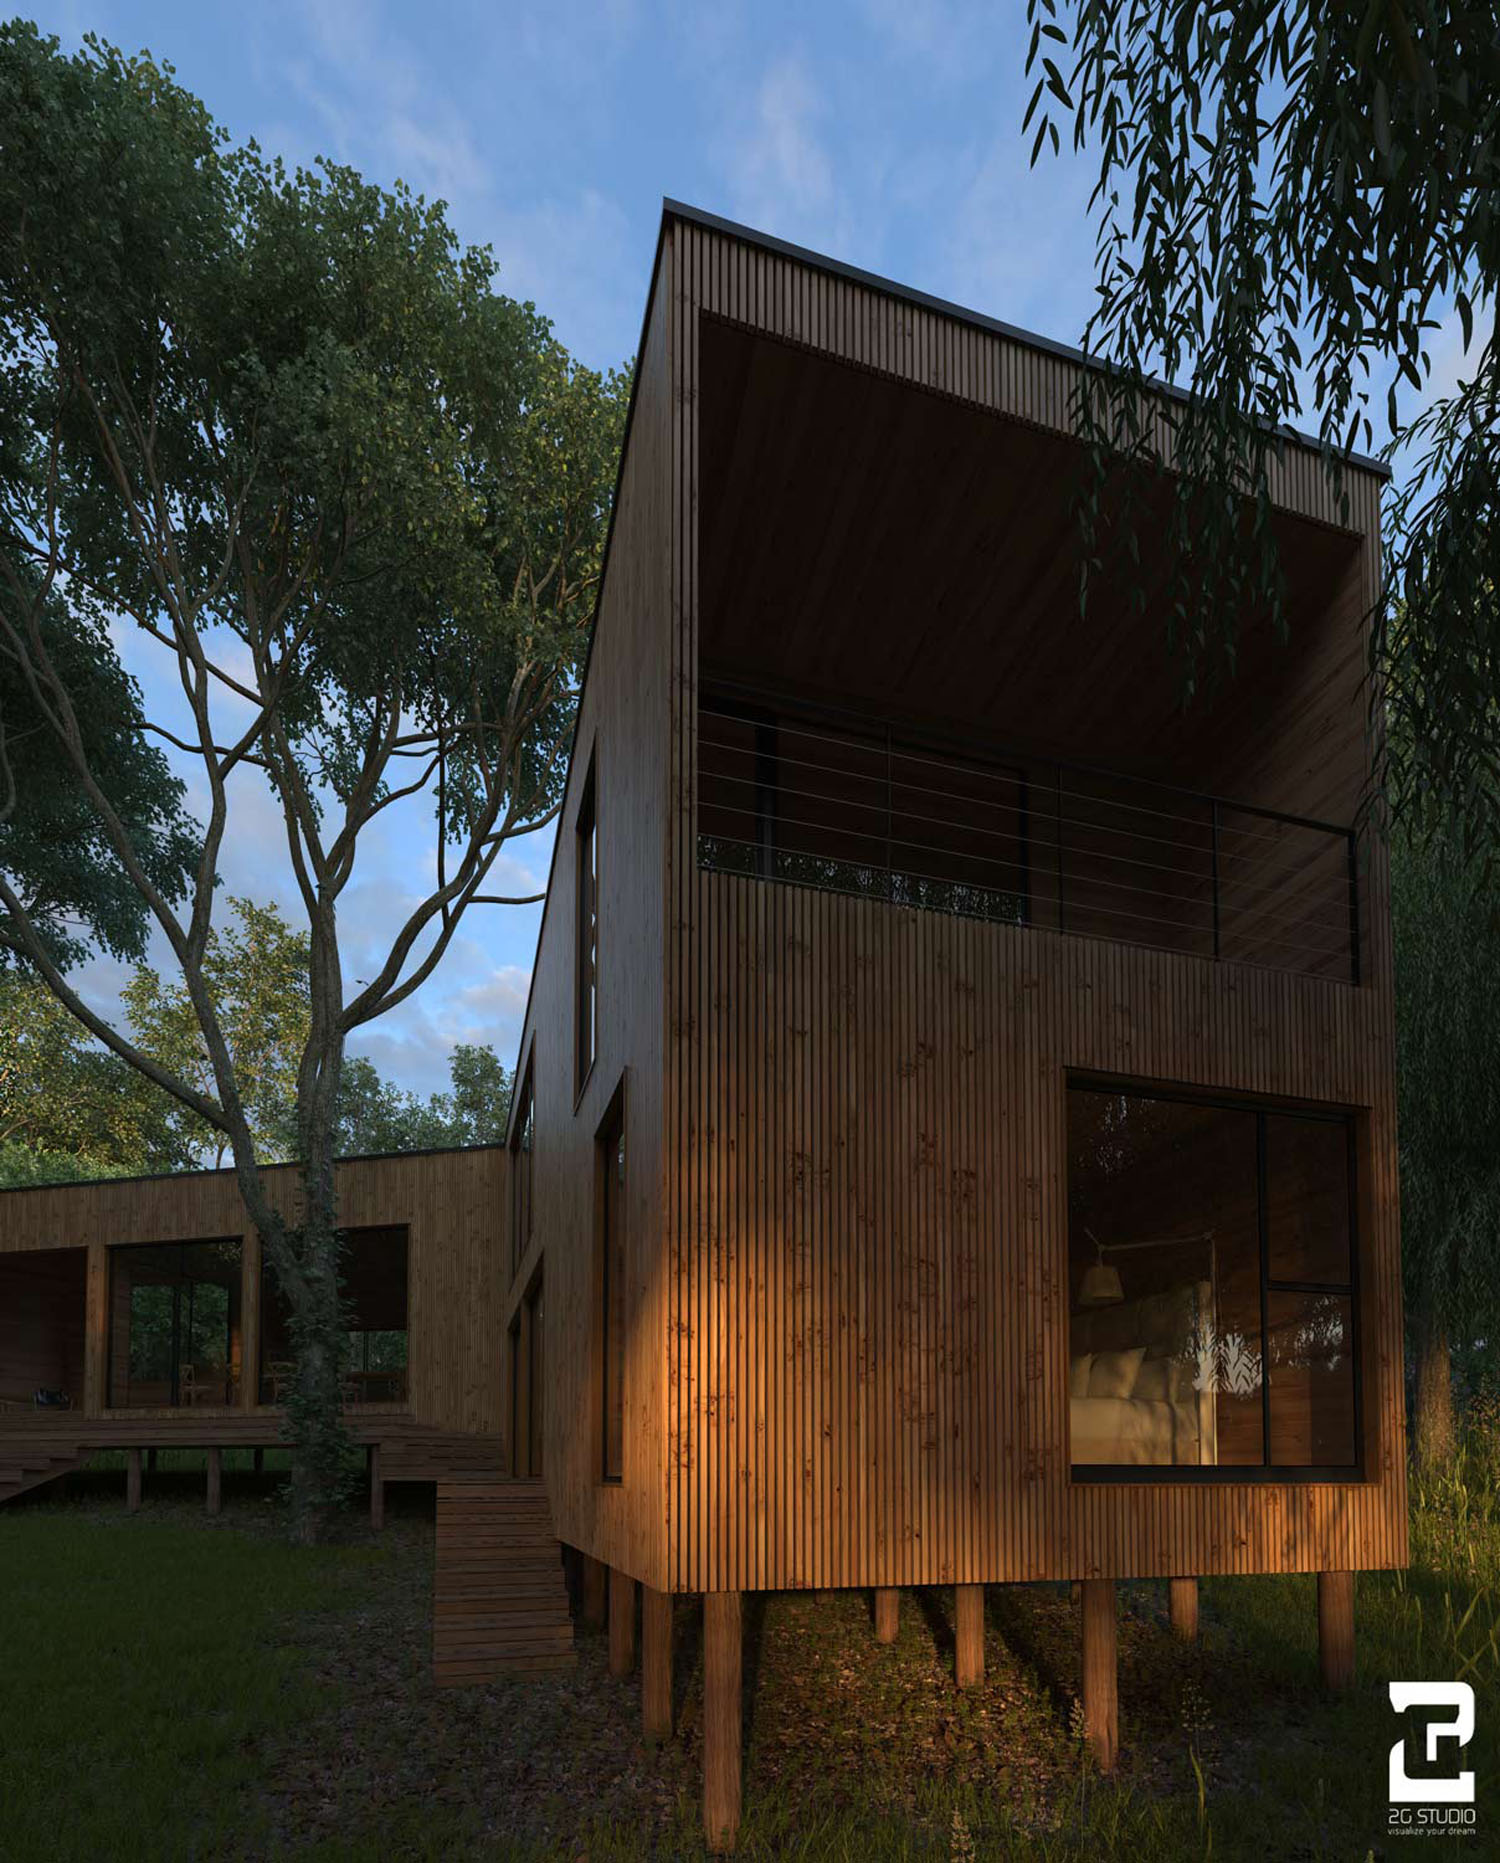
Here is my post production process:
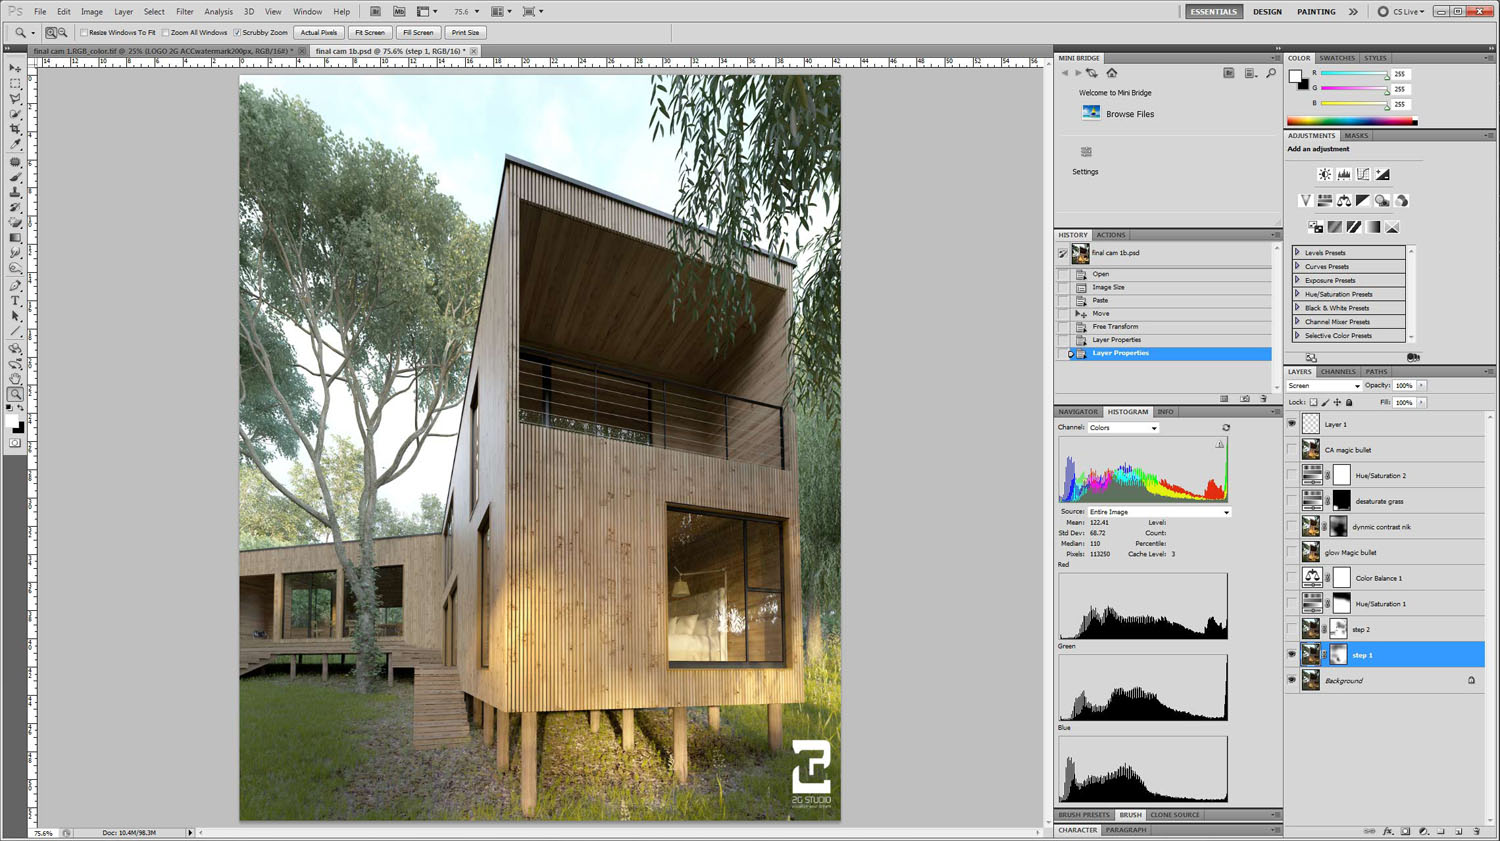
1. I open the EXR and convert it to 16 bit.
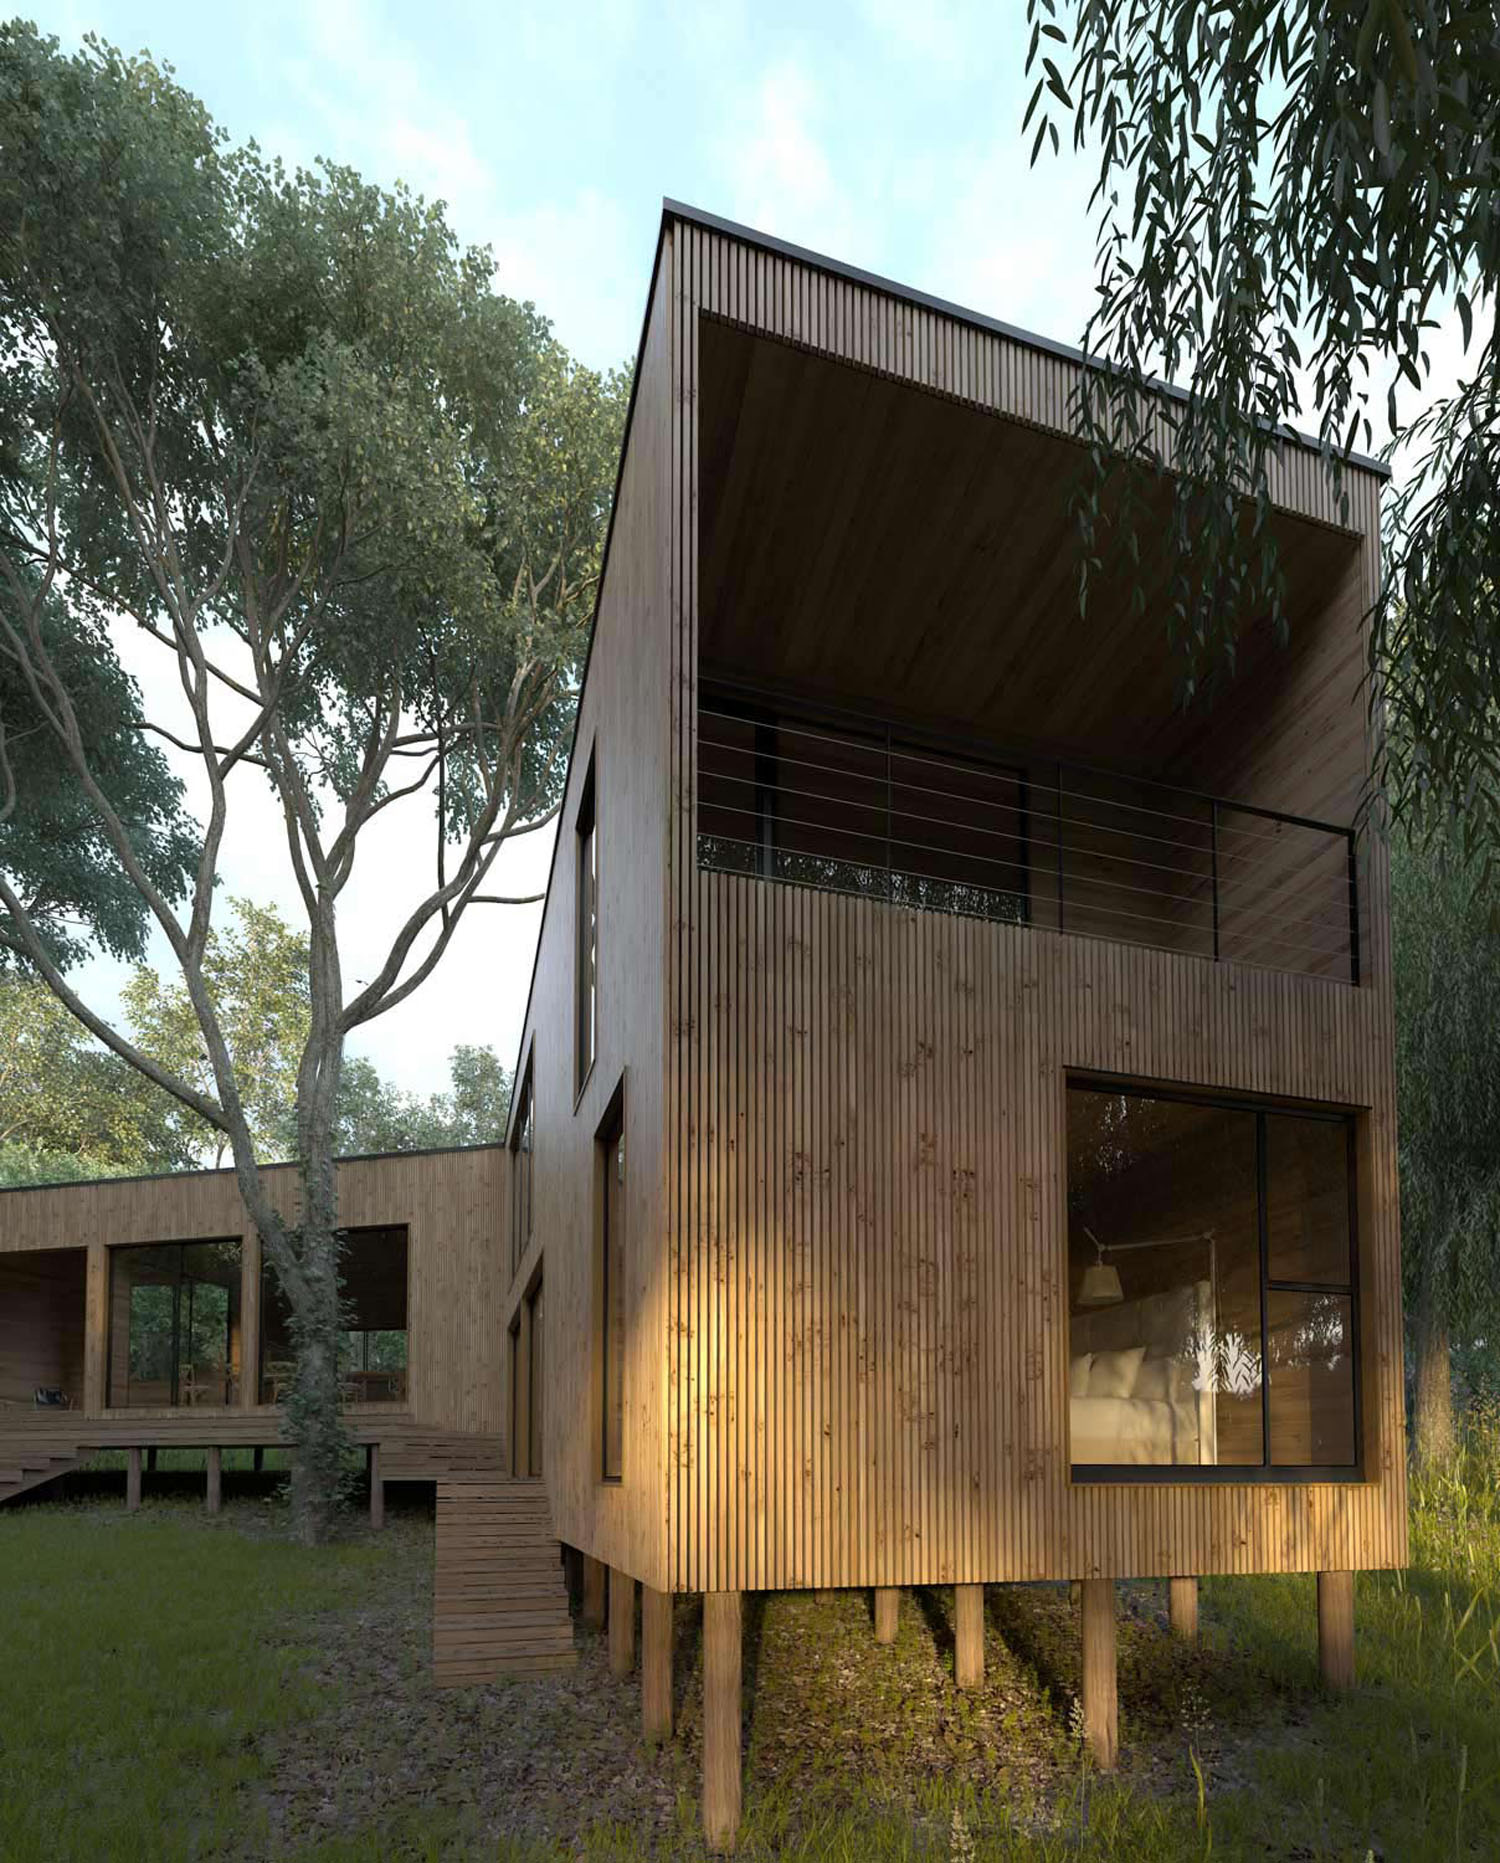
2. I duplicate the rendered image using screen mode and delete any overly bright parts using a mask.
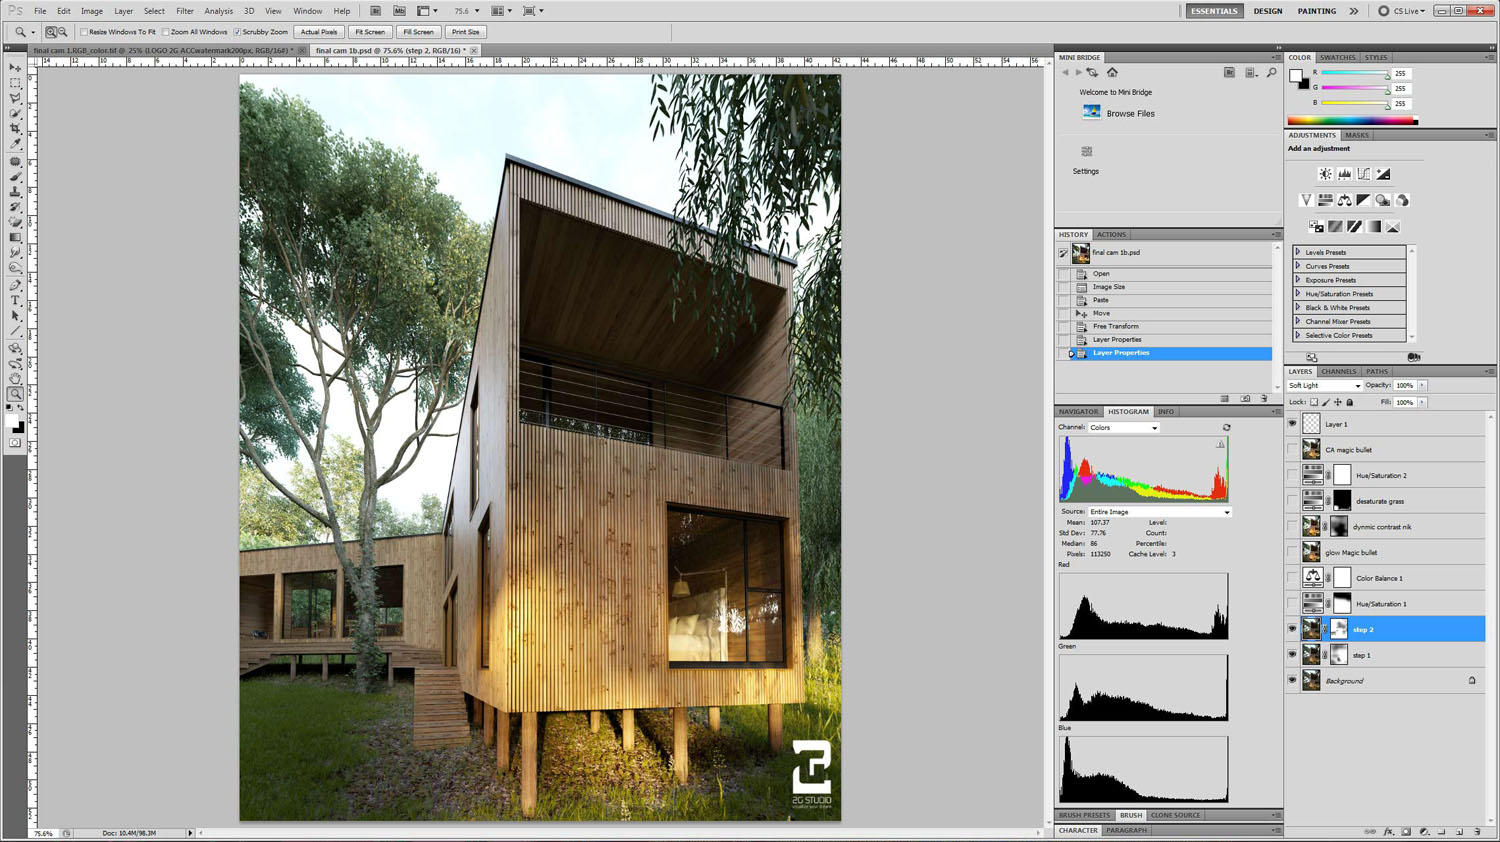
3. I duplicated the rendered image again and used softlight mode. I then deleted some parts that were too dark using a mask.
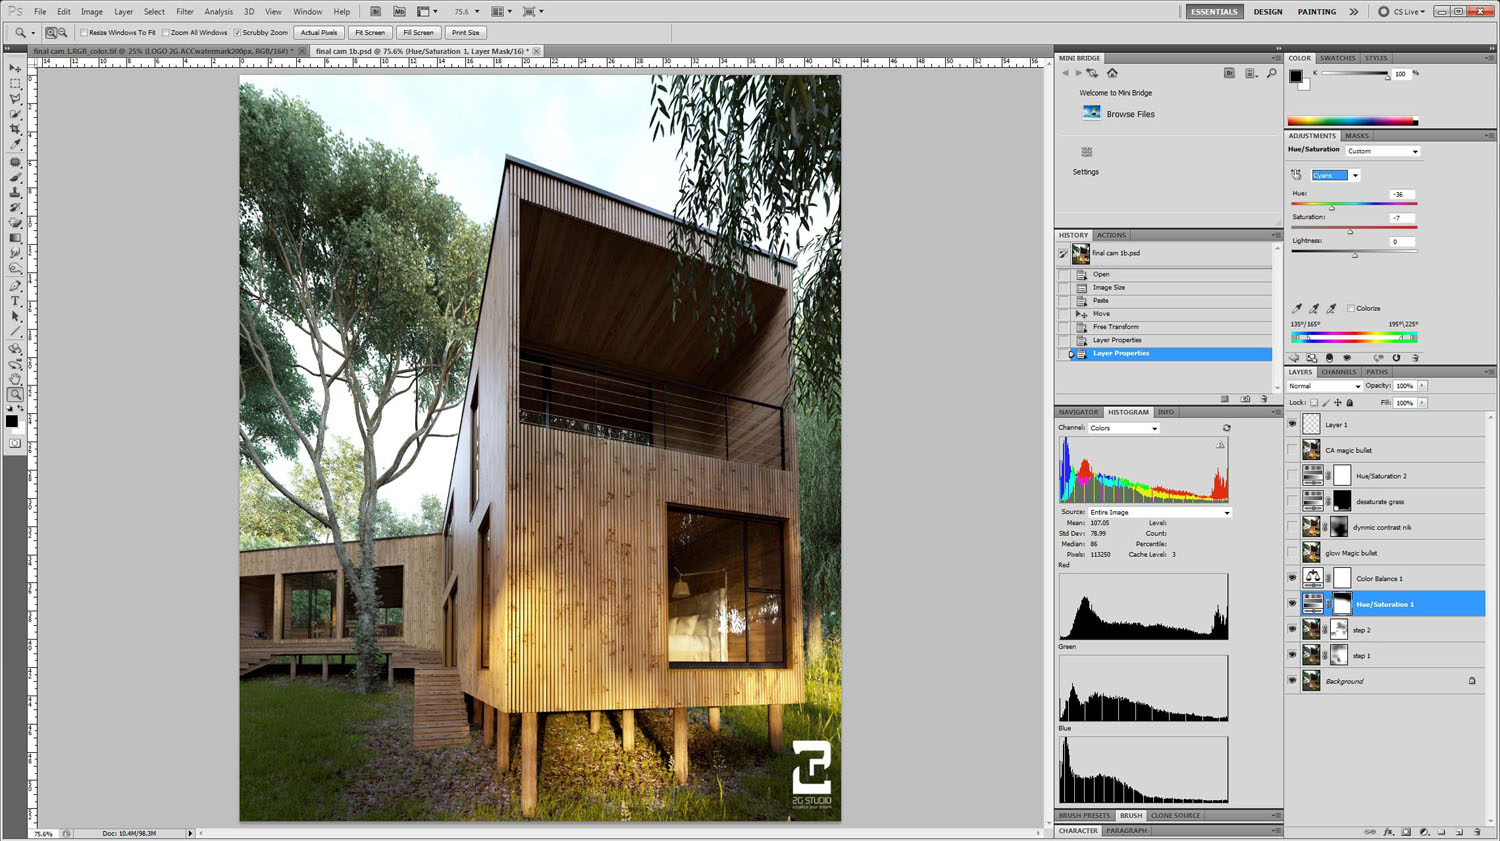
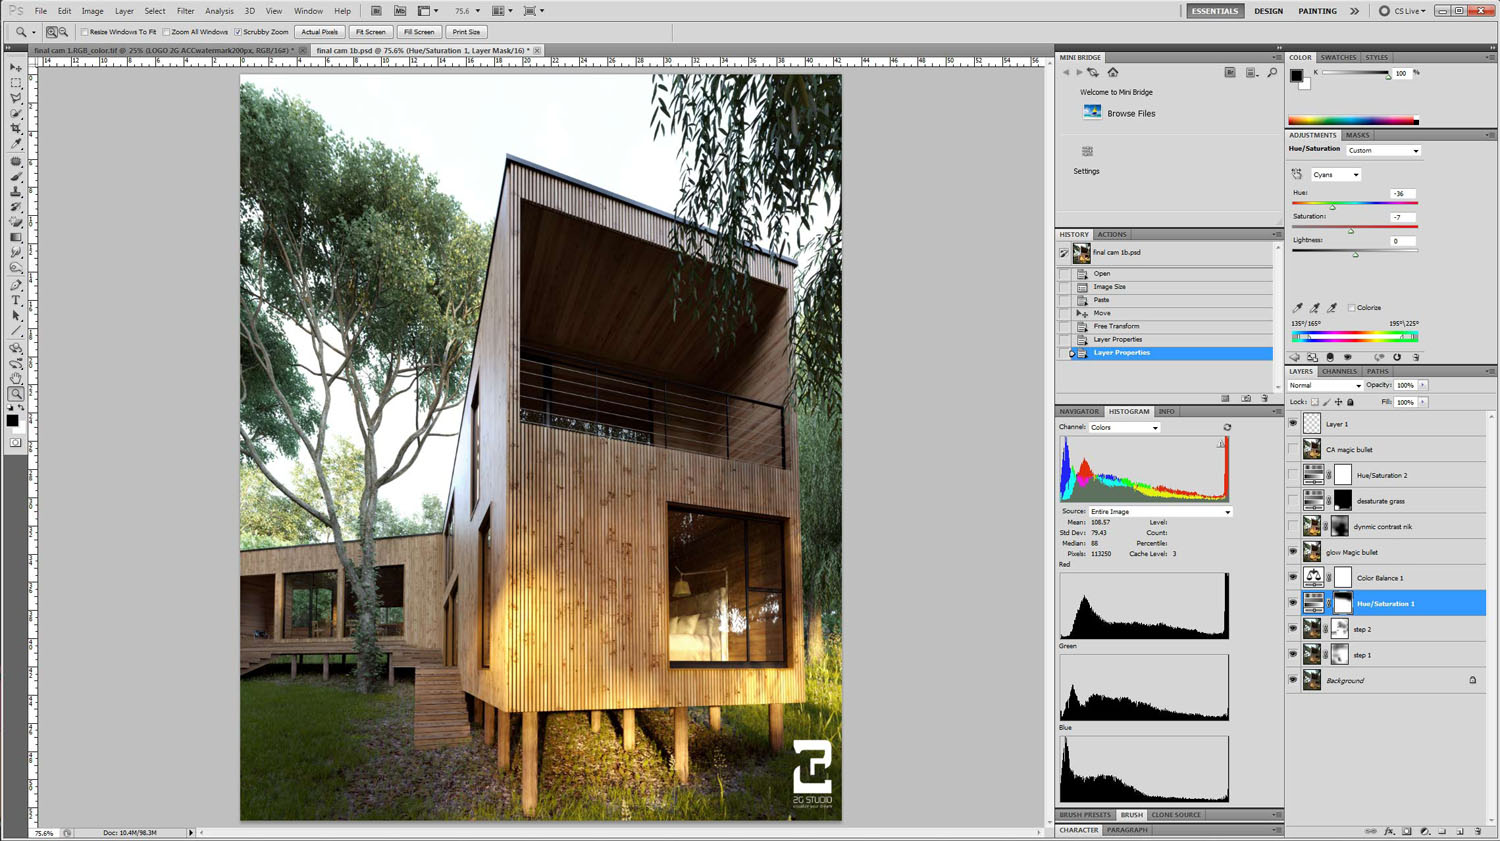
4. I added hue/saturation and color balance to adjust the color
5. I used Magic Bullet to add diffusion
6. I used Nik Color correct to get the dynamic contrast and deleted the parts i didn't like.

7. I didn't like the green color of the grass so I decide to make it less saturated.
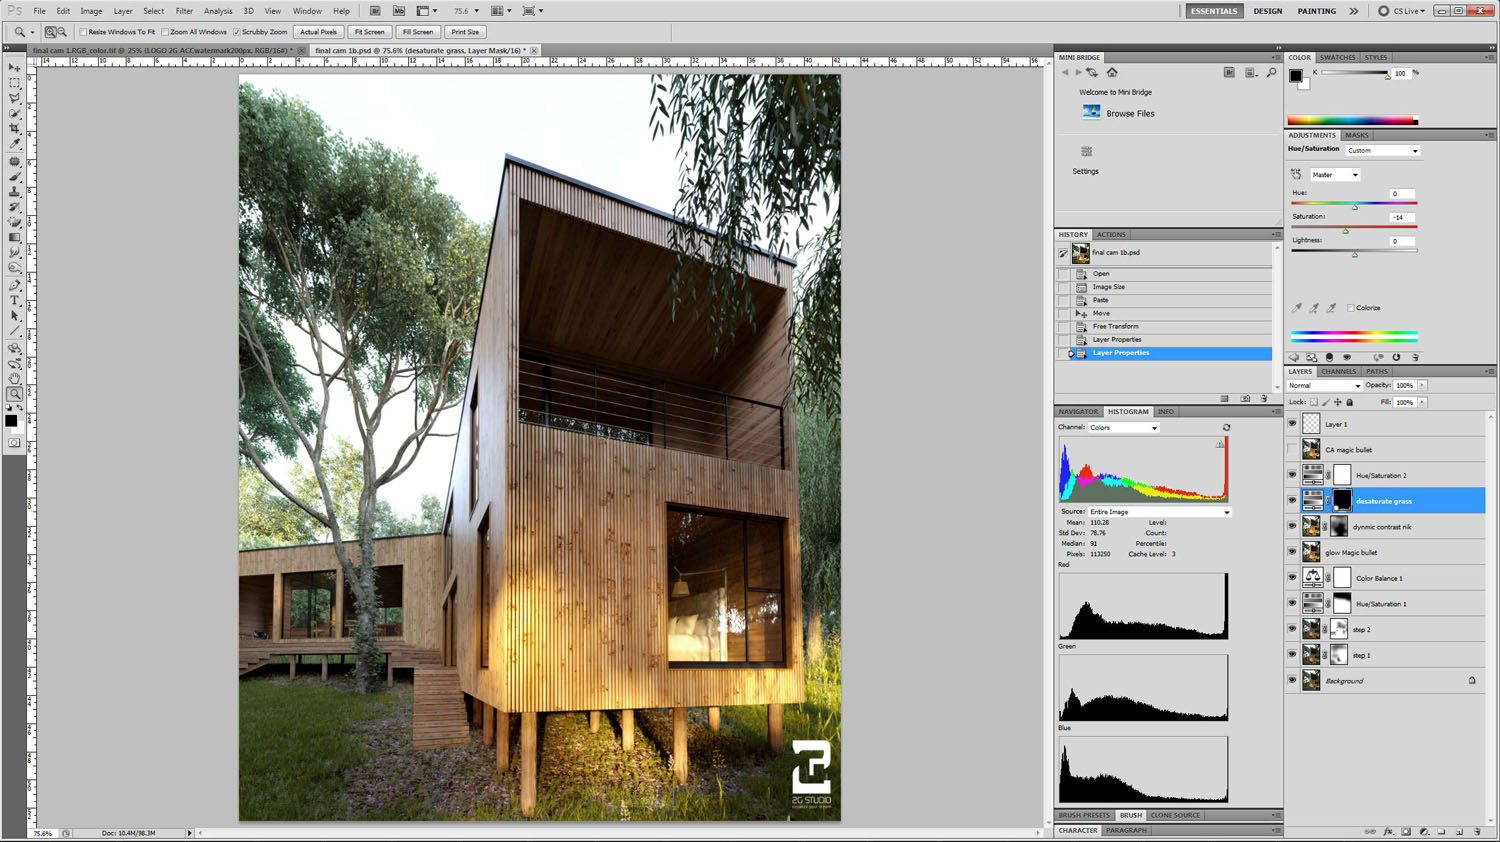
8. After that I added a chromatic abbe ration effect using Magic Bullet.

9. The last step is putting the 2G Studio logo on it :p
Well guys, that all, nothing magical right? Actually the workflow is very simple and almost the same as other artist workflows. And it looks very easy, right ? Easy if you think it's easy and hard if you think it's hard.
I also wanted to take this opportunity to offer some advice. The key to making a good visualization is actually not in the preset setting and not only in the lighting. All components are integrated with one another. The render preset must be supporting and must be set to optimum settings, not the maximum settings. To use somebody's preset setting is easy, but understanding the preset settings is not that easy. It needs a deeper understanding.
Using HDRI and connecting it with a vray sun its not the answer for good lighting. The key is how to balance the lighting. Putting lots of tree, stones, grass is not the answer, but putting the detail in the right places and knowing how to create the details. Adding grass on the entire ground plane is easy, but you cannot use multiscatter just like that. You need to use a bitmap to define where you need to add grass and where you don't need to add the grass.
To get best material is easy, you can find them everywhere, but to create an optimum material setting is not that easy. If you use the best material setting using very high subdiv, you will need lots of time to render. All of descriptions above are the reason my partner and I partnered to create the 2gacademy. We decided to explain it step by step and give you a deeper understanding. I will explain and give a deeper understanding. Such as why I use vraylight dome subdiv 24. Why I decided using max subdiv 8 for the DMC sampler. Why I decided to use -4 -2 as the prepass in irradiance map and many more.
Hopefully you all enjoying this article and bring lots of benefit for you all.
You must be logged in to post a comment. Login here.
r
ravi kapoor
Report Abuse
thanks for sharing your knowledge....keep doing it..god bless..
J
Jordan Sullo
Report Abuse
can you teach me how to connect the sun and the domelight, and also the setting of the sun
a
akoto sac
Report Abuse
hi Evan, does our tutorial require basic knowledge of 3dsmax? because looking from above tutorial, it seems you have to. Or it is more simplfied on your 2G Academy tutorial.
By the way, awesome work!

Jonathan Burch
Report Abuse
It might be that your dynamic memory limit is still at default? Its under the v-ray system rollout in your render settings. Try setting it to 60-80% of your total RAM.
I have 24GbRam so I typically set it to 16000mb.
Sketchup shouldnt be causing a multiscatter error - good luck!
k
kool arsenal
Report Abuse
Great work, my friend. I have some problem using multiscatter. When I hit render my 3dsmax just crashed right away. I use 3dsmax design 2011 64bit , vray 2.0 and multiscatter 1.2. My work flow is exactly like yours, I model in Sketchup, export to 3dsmax to render. I guess the problem is this because when I using multiscatter in a pure 3dsmax file ( not imported from Sketchup ), it's ok. Do you have any idea?
M
Marcin Chester
Report Abuse
Great Stuff, thanks a lot!!
h
handsy revn
Report Abuse
also wnt to thnks jeff
who brings this all making of great models without any cost....
its reaaly grt....i hv 1 reqst if u can put alll privous making ofsss....Plzzz m very curious to see all n learnd somthing frm grt peoplz
h
handsy revn
Report Abuse
hey its very nice....awsum work

Rashed Haikal
Report Abuse
thank you for sharing this its helpful. For the wooden planks material you created five of them and changed the diffuse using color correction then randomly assigned them to the planks using MATid?

thiyagu arjunan
Report Abuse
like it
s
socf micael
Report Abuse
Wow..nice work.
Jae Arif
Report Abuse
keren mas bro :)

msje rafajesa
Report Abuse
nice work masta...
M
Mark Mwoka
Report Abuse
Wow..nice work.How did you move from sketch up to 3ds max?

Shiva Assef
Report Abuse
i wish i could be like u some day! Thanks for sharing your knowledge

Sérgio Merêces
Report Abuse
congrats Evan! great making off. Regards
C
CS B
Report Abuse
Great things..!
Could you tell us what the final render size was? and how long it took on what kind of machines?

Tunahan Koca
Report Abuse
great tutorial! thank you so much for sharing your knowledge.Especially the advices at the bottom line.As you said, the most important thing is to understanding and learning the desired atmosphere. We would like to see more articles from your team ^^
L
Luis B
Report Abuse
Thank you Evan great tutorial, very useful!
I see you are using VraySincFilter, Whats the difference instead of using Area filter?
Thanks!

Juan Gayarre
Report Abuse
Great work! Congratulations and thanks for share the process ;)
About this article
The Making Of House La Invernada by Evan Mandala from 2G Studio & 2D Academy.
visibility38.9 k
favorite_border43
mode_comment23


