Building one’s own wardrobe is not often on people’s minds, even if they are diehard DIY fans. The reason is simple – wardrobes are considered to be complex undertakings with too many compartments and too big a frame. It is true that wardrobes can be complex to handle, but they don’t necessarily have to.
If you have never built a wardrobe before, this post may inspire you to consider it. We present here detailed steps to create a basic, functional, and pretty wardrobe.
If you have a lot of discarded furniture lying around, like a long old table with a leg missing, or a book shelf from ages ago, not touched, not even looked at in 20 years, you can put it to good use now. If not, you will have to buy the plywood.
Start with determining your needs, the space you have, and what you want the wardrobe for, and accordingly come up with dimensions best suited to you.
For the purpose of this post we will stick with the dimensions of 4’ X 5’. That is 1.2 x 1.5 meters. (You can use any dimensions that you want, ours are just a guide.)
So without further delay, let’s get down to business.
1 wooden sheet for the back of the wardrobe – 4’1” X 5’1”
2 wooden planks – 4 feet X 60 centimeters (for the top and the bottom of the wardrobe)
2 wooden planks – 5 feet X 60 centimeters (to enclose the wardrobe from both sides)
2 wooden planks – 3 feet X 58 centimeters (big middle shelves)
4 wooden planks – 1 foot X 58 centimeters (small shelves on the right, one top of the other)
1 long wooden plank – 5 feet X 60 centimeters (separating the middle shelves on the left from the small ones on the right, all wooden planks need to have a thickness of 1 inch)
1 footer - a big and chunky sheet of wood that will become the base of the wardrobe– 4 feet X 60 centimeters X 2 inches
A rod – approx 3 feet long (a discarded bathroom rod will do)
Old curtain hooks
Wooden sheets
Measurement tape, ruling sets, and pencils
A handsaw or a circular saw (whichever you prefer)
A drill
Safety glasses
Hand gloves
Strong adhesive
Nails (1/4” and 2”) and hammer
Sander or sand paper
Paint and paint brush
Turpentine
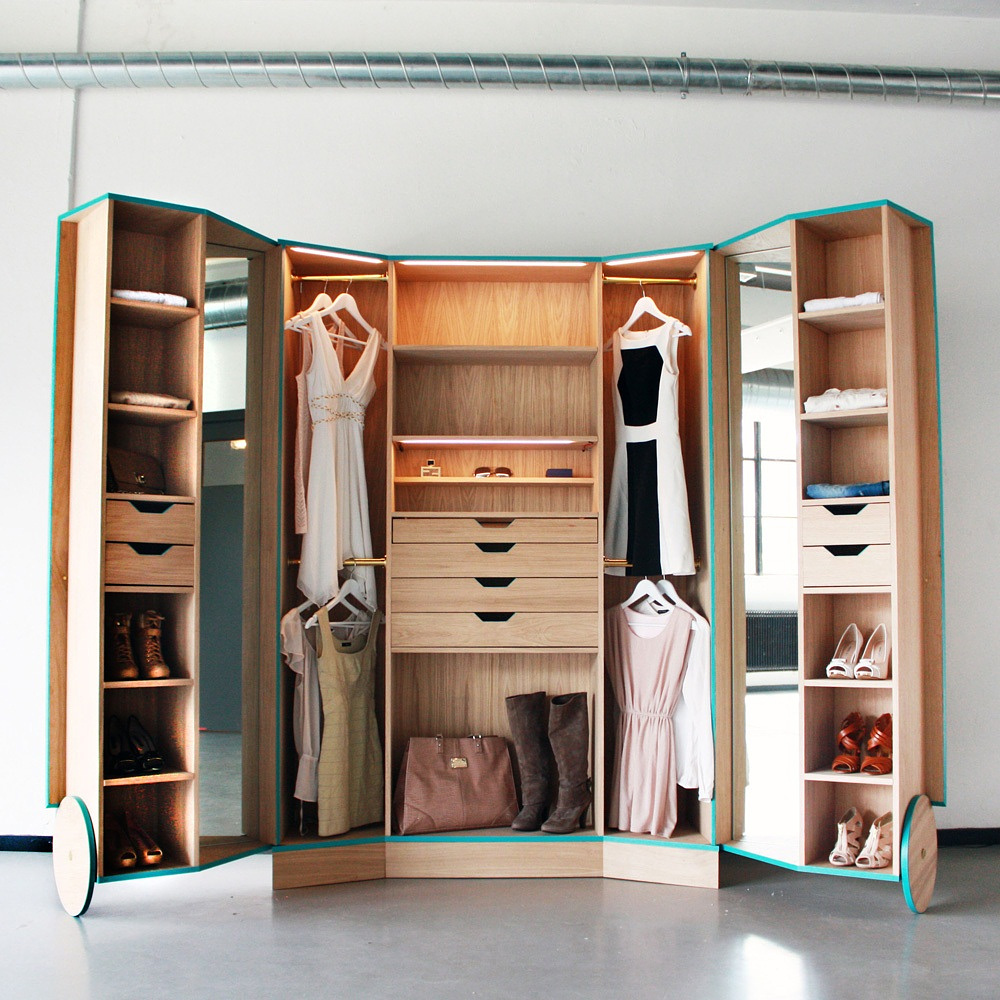
We are aiming for something like the following. Disclaimer: I do not own this picture. It is strictly meant to be used for inspiration.
The building starts now. (For measurements, refer to the previous section.) The entire process is in essence very simple but it requires you to pay utmost attention when you are working on it. You will also have to be extremely careful with your measurements, as any mistake can become difficult to rectify later on.
Roll out the wooden sheets for cutting. If it’s an old dining table you are using for this purpose, simply chop the legs off and smoothen the surface with a sander.
Draw the measurements on the wood with a pencil and get started to saw off the wood to create planks that are going to be the building blocks of our wardrobe. Once you are done, you will have to smoothen them all out with the sander.
First carve out the back of the wardrobe. Take your time with the saw; you DON’T want to be making any mistakes here. We hope you have put on your hand gloves and safety glasses. Splinters will be flying aplenty now, you don’t want any of that nasty stuff to get into your eyes or pierce into the delicate skin of your hands.
Once the base sheet has been laid out and is good to use, we now turn our attention to other planks in the wardrobe. We start at the top of the wardrobe and work downwards. Cut out the sheets with care and precision.
Once the planks are all sawn off and ready to use, it’s time to hammer them into the base sheet. Start with the planks meant to go on the top and the bottom of the wardrobe.
The two side ones come up next. Once they are all fixed to the base sheet with the glue and the nails, we will have a functional rectangle to work into. Don’t stand the frame yet. That will be the last step.
The first thing to into this frame would be the longest remaining plank, which will act as a partition between the bigger and smaller shelves in the wardrobe. Place the plank vertically, 3 feet to the right and secure it with 2” nails. You may have to turn the frame on its side to secure this plank firmly onto the base sheet (on which all planks will ultimately be glued and nailed into).
Now it’s only a matter of placing the remaining shelves in their right place and fastening them with the glue and nails. Take your time with this.
The last thing to do would be to find a block of wood thick enough to act as the base on which the wardrobe will stand and cut it down to the size of the wardrobe. Nail it into the frame and you are ready to stand your wardrobe.
Depending on your speed, this could be two days’ work. But of course, we are not done yet. If the wooden color is pleasing on your eyes, you don’t need to paint it. But we recommend that you do. That will make your wardrobe really stand out.
Choose eye-catching colors like bright green, pink, red, or yellow. White is alright too. Painting the wardrobe will be the easiest part of this entire process.
Now procure a rod big and strong enough to bear the weight of your clothes and equip it with curtain hooks if you have them already in the house. If not, you can order hangers from a website like , who stock an impressive variety of hangers. Fasten the rod to the wardrobe frame as shown in the picture.
There you go. Your wardrobe is now ready to use! There are many little additions you can make to this basic wardrobe we have here. Doors are also an option. If that is too much work, you may instead cover the wardrobe with a curtain. You simply have to attach the curtain rod to the topmost part of the frame and it will keep your wardrobe protected and dust free.