

Making Of
Doll House
Hello guys, we are from the 2G Studio team. First, we want to say thanks to Jeff Mottle and CGarchitect for giving us a chance to create the “the making of” The Dolls house.
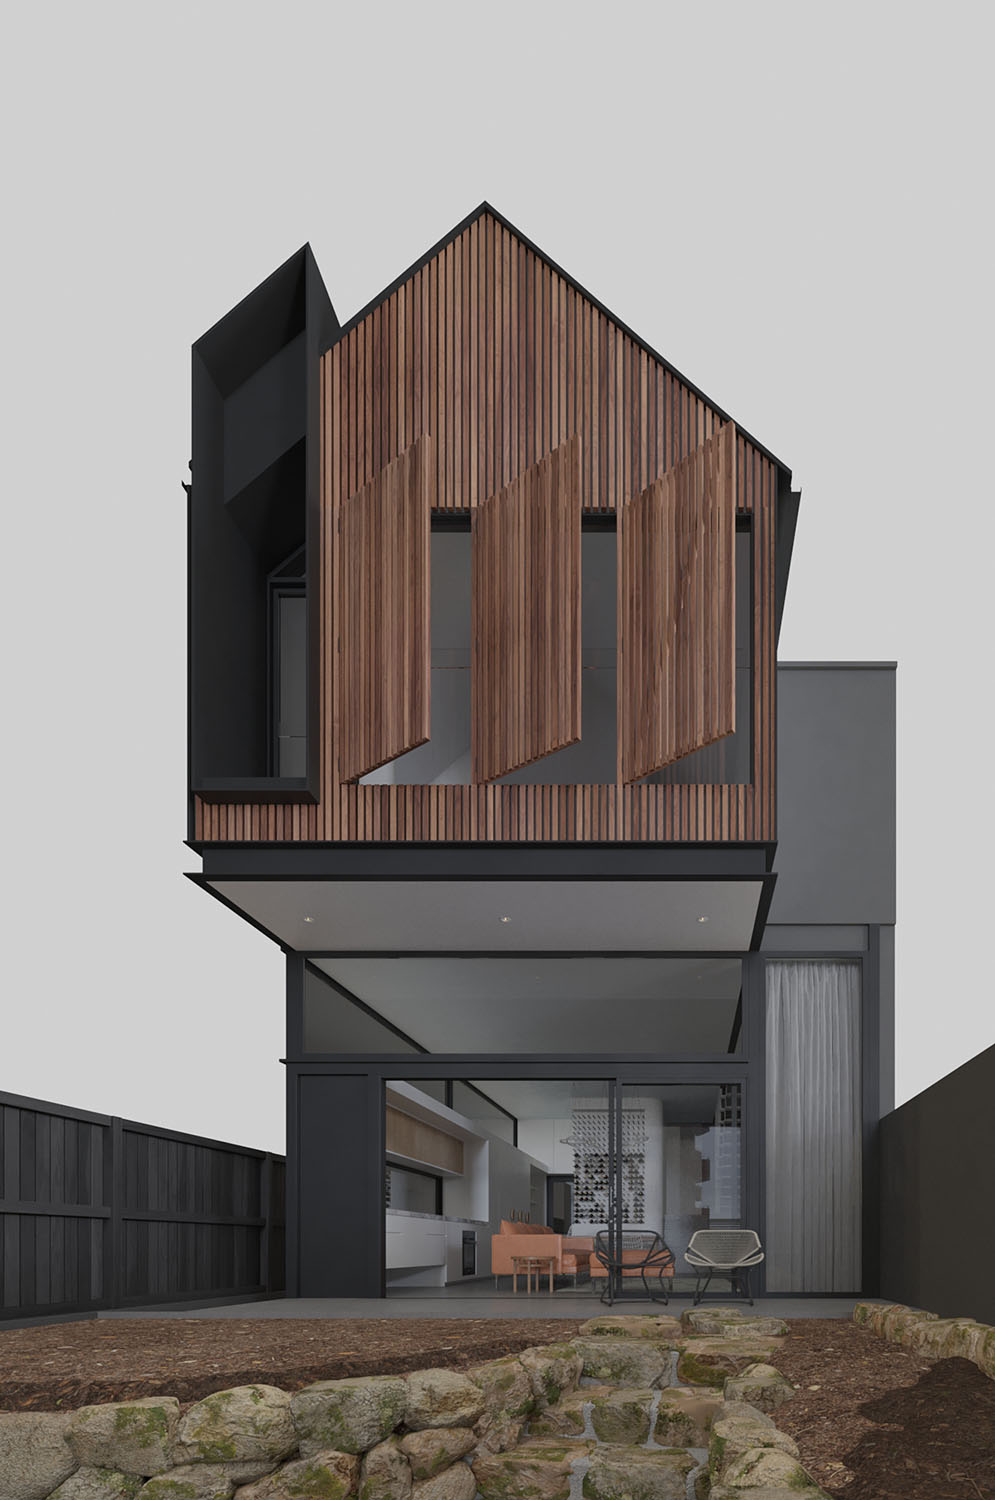
When our creative director looking for reference from Archdaily to brainstorm ideas, he saw The Dolls House by Day Bukh Architect and decided to use it as a reference.
Why is it challenging?
The primary purpose of making this scene is we want to help people to open their mind “especially for beginners”. We’ll explain the logic in reality and describe the consideration in 3D software to these people, that there is no instant process such as using a preset that’s straightforward because every case will have a different treatment to get good visuals. They all have their important role in terms of modelling to lighting. In terms of technique, we use the most basic for this scene; and the challenge is that from this basic technique, we will create optimal results.
Modelling
For the base building model, we use 3DsMax, we got some information from Archdaily with the structure of the floor-plan in an image, and we model the arrangement according to it.
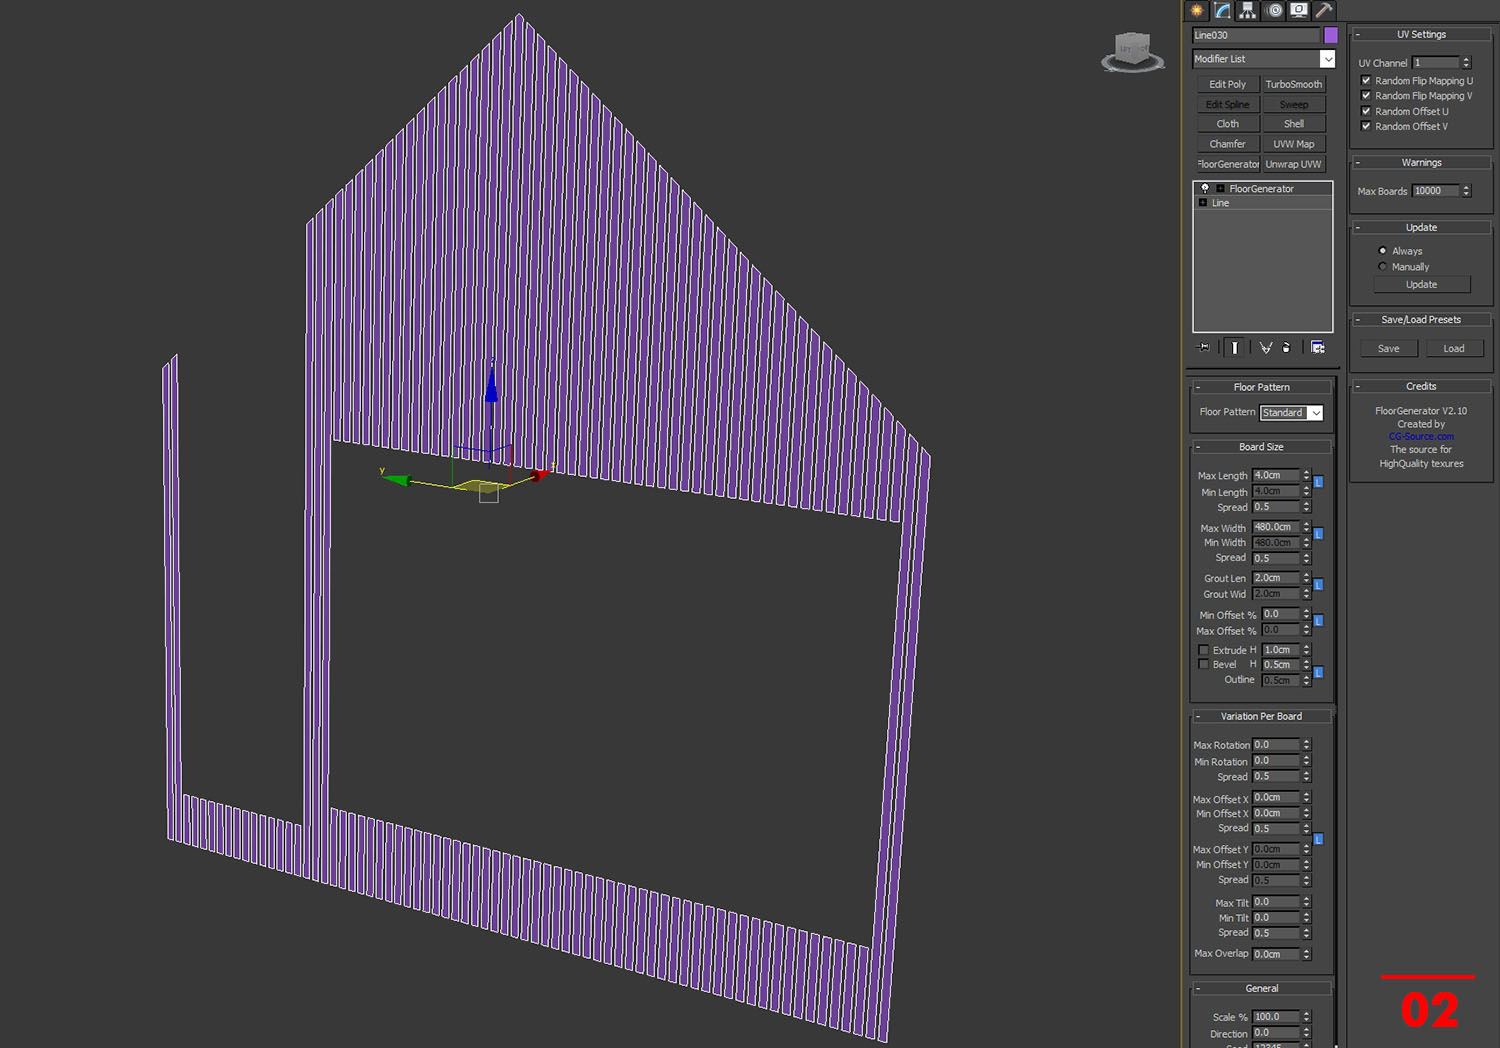
For the Timber Cladding, we use a floor generator. You can follow the steps below on how to make the timber cladding.
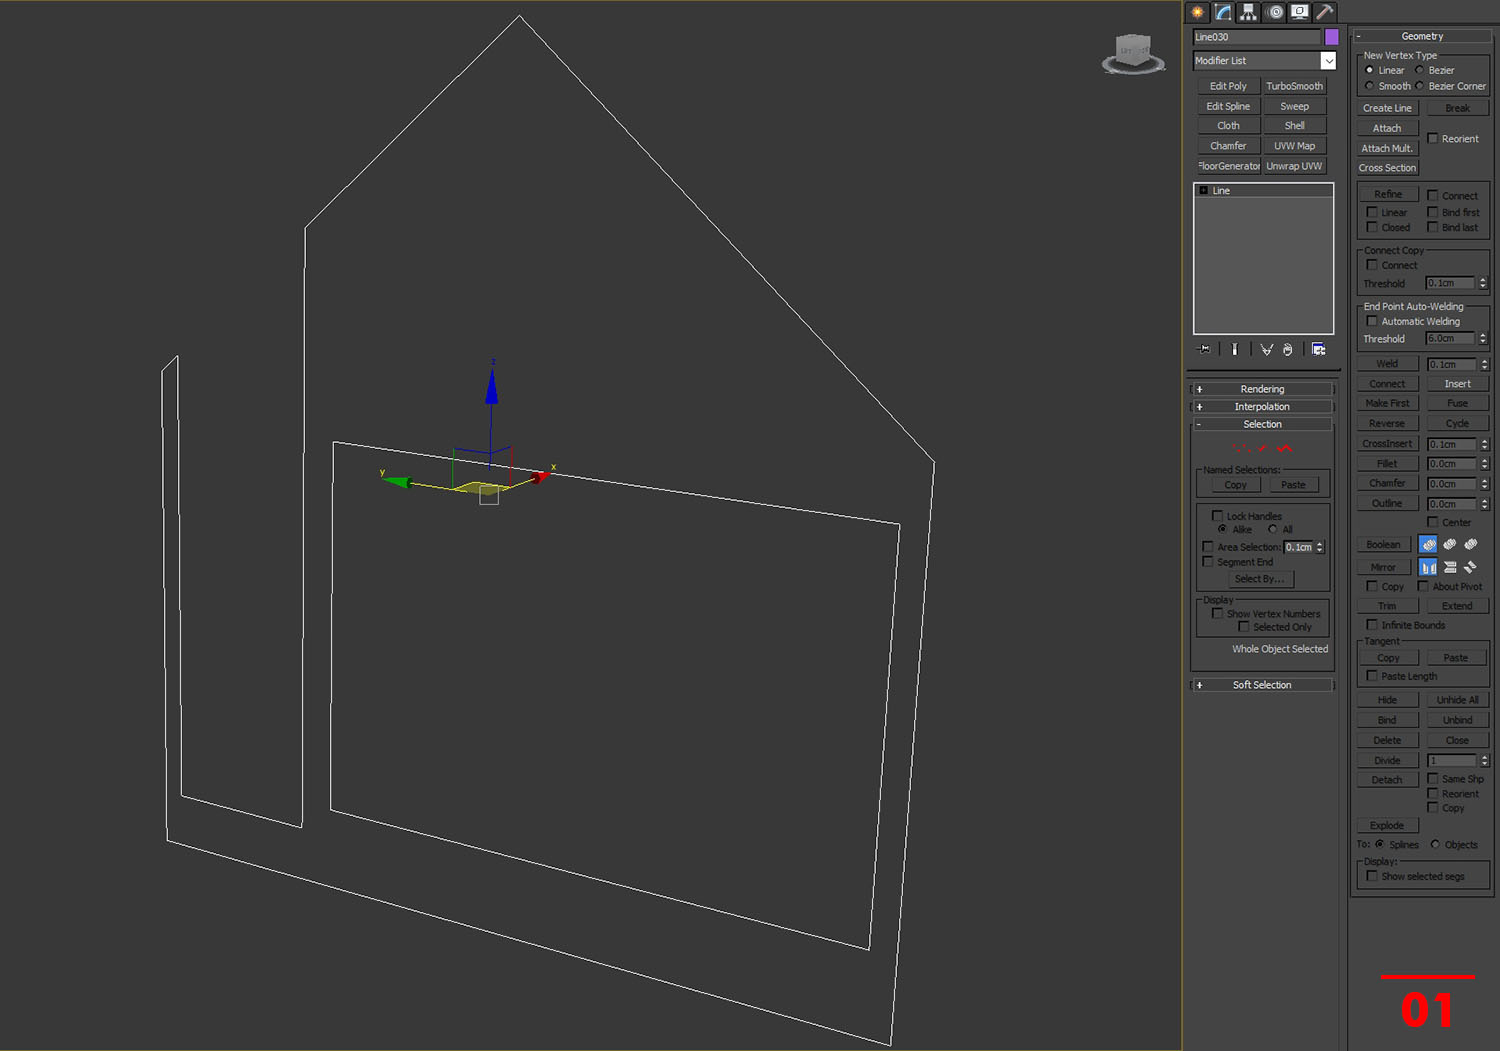
- First, we must create an area.
- Go to the modifier list, then find floor generator. For the size, we adjust it like the image reference.
- Next, we give a modifier shell for the thickness.
- Lastly, don’t forget to add chamfer because nothing is perfectly sharp with a 90 degrees edge in real life.

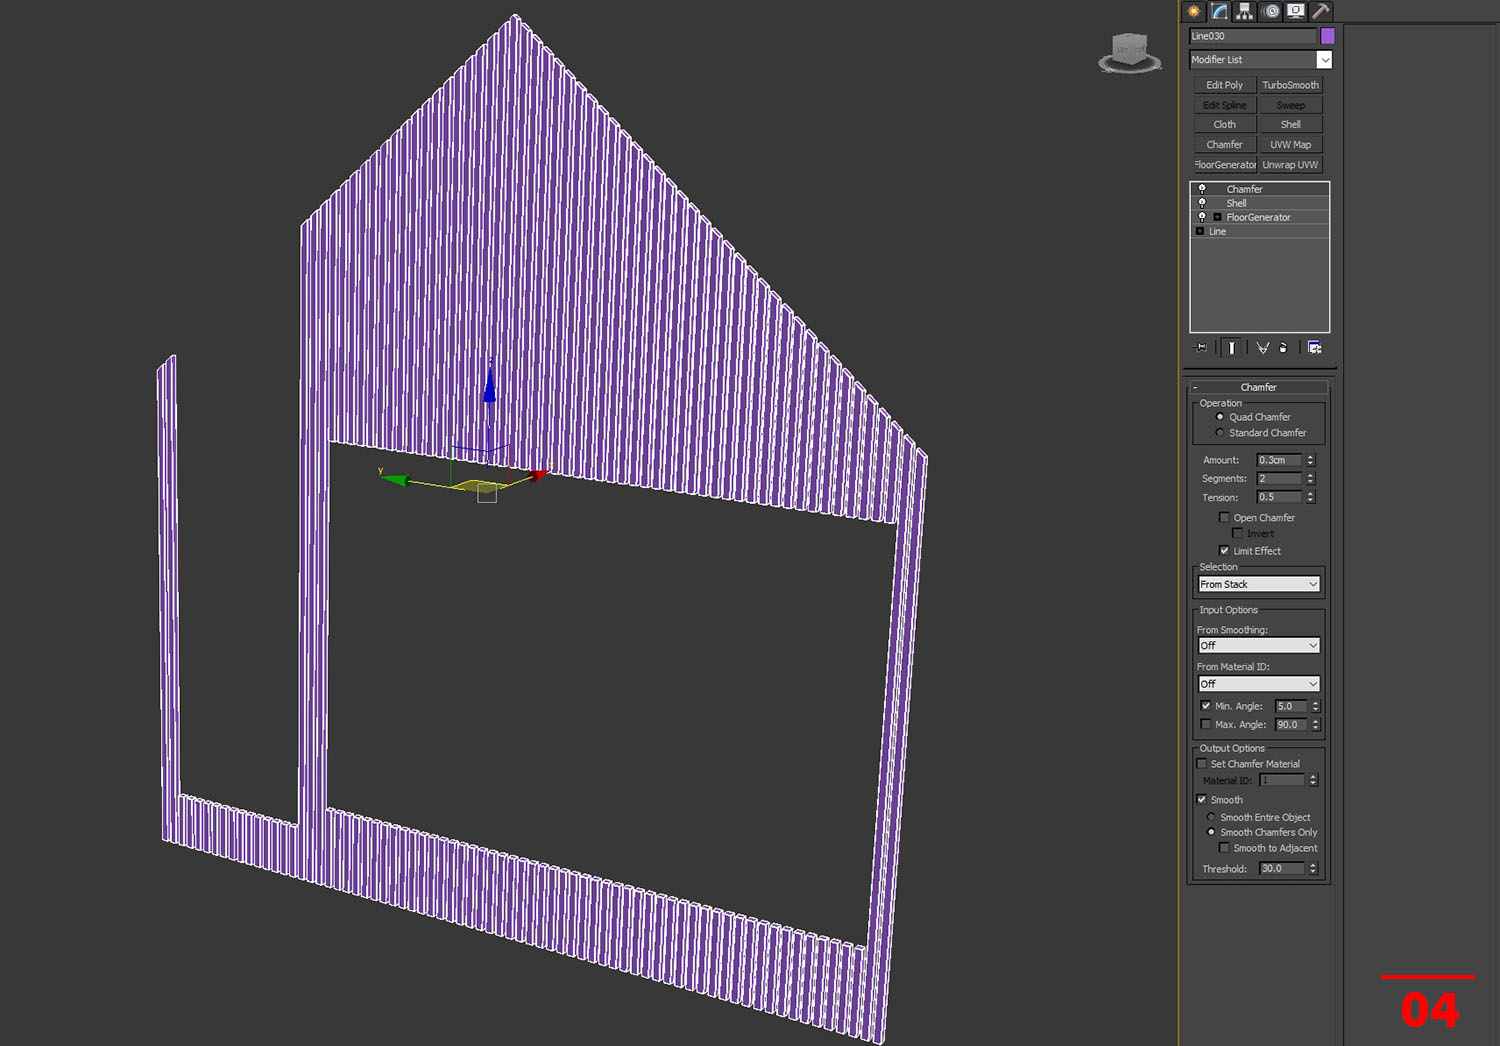
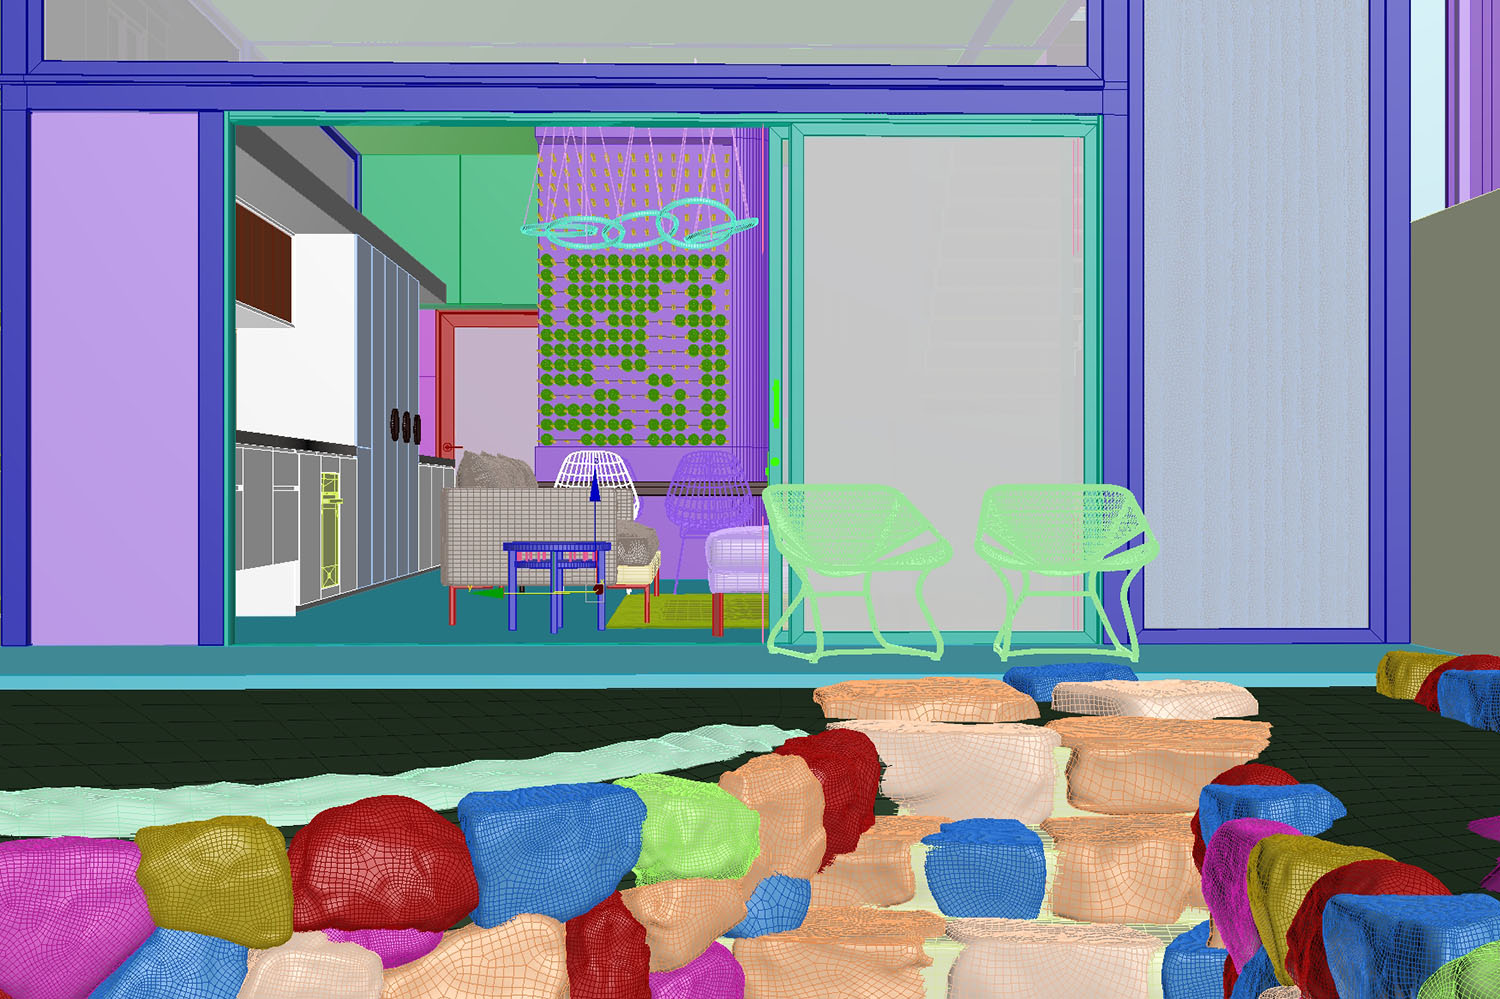
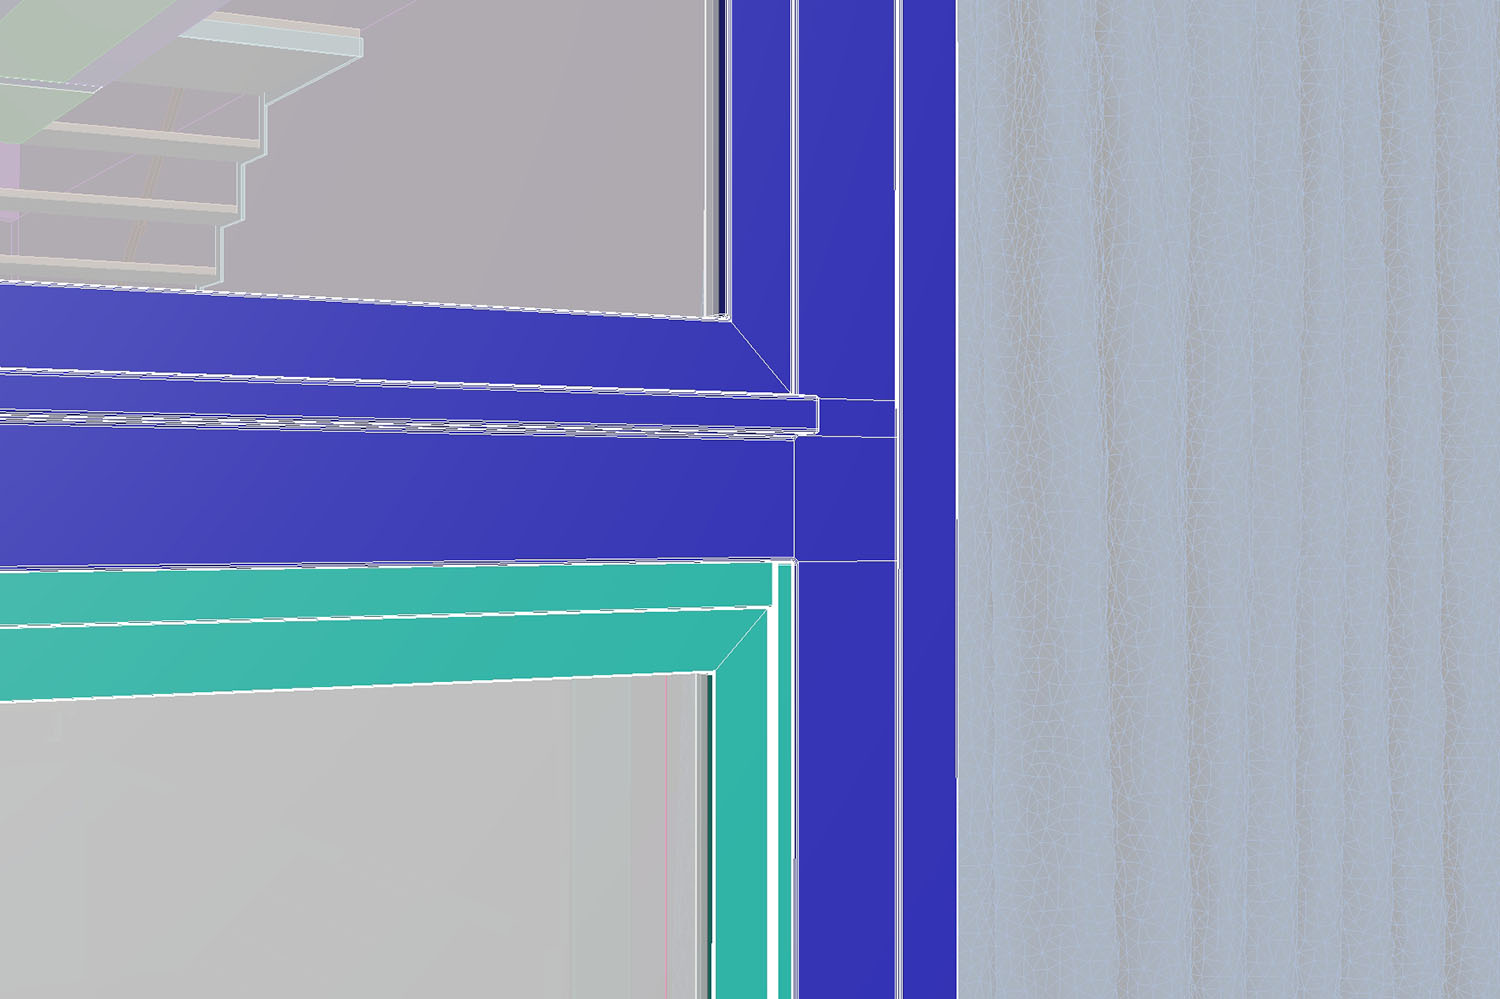
Create the model detail as much as possible.
Don’t forget to add a chamfer to the whole object to add a small detail.
Don’t forget to add a chamfer to the whole object to add a small detail.
---
Materials
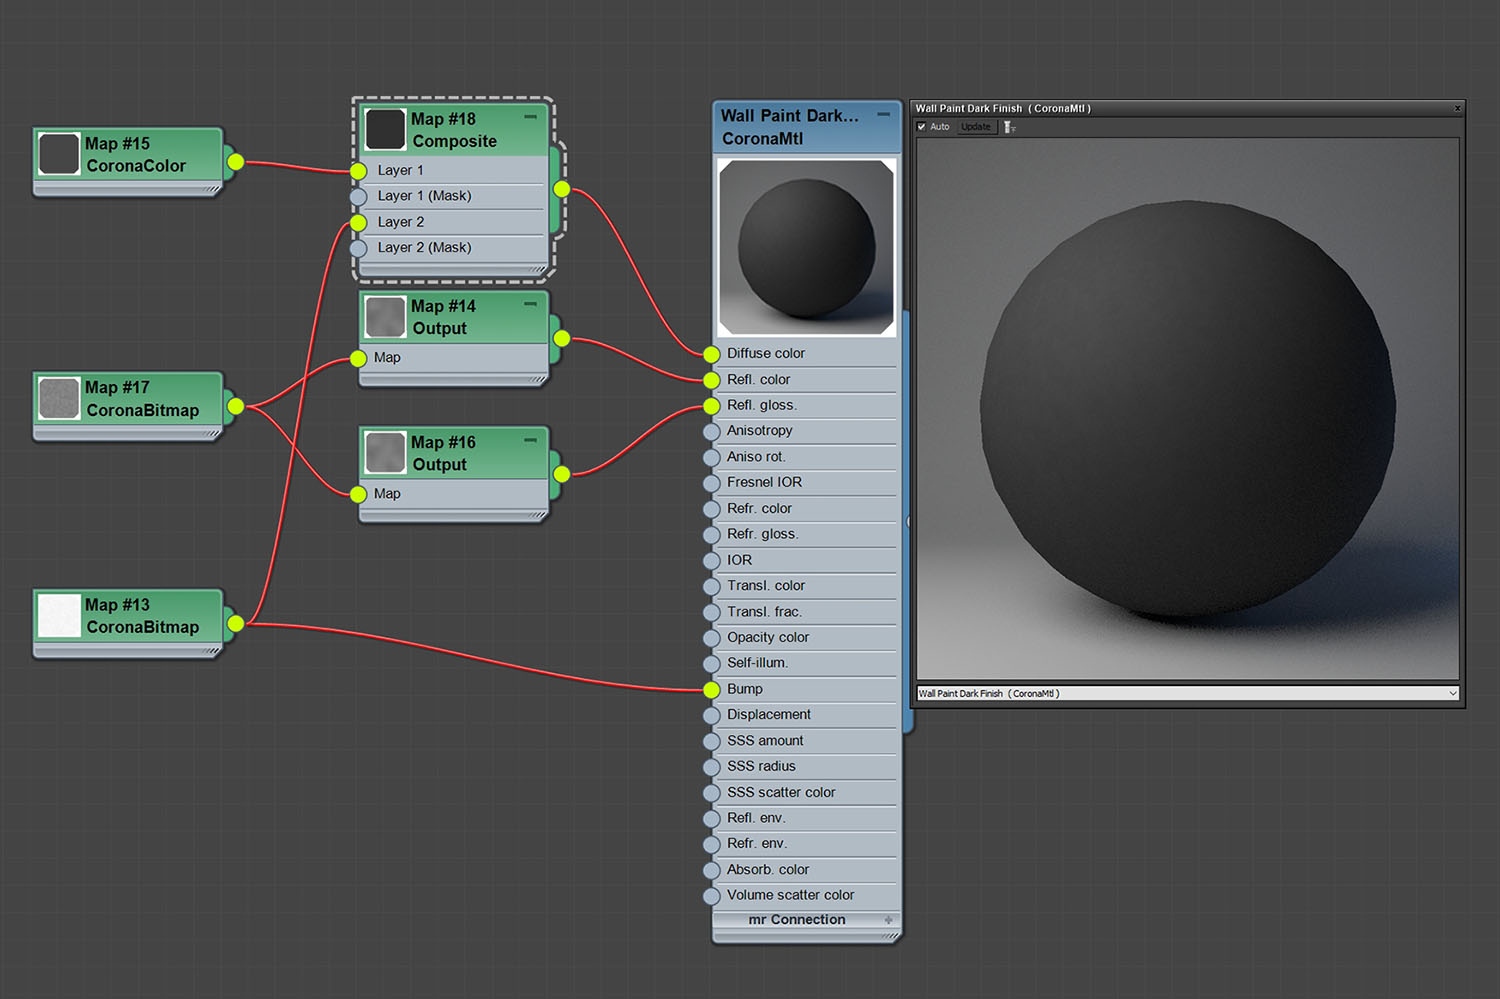
Wall Paint
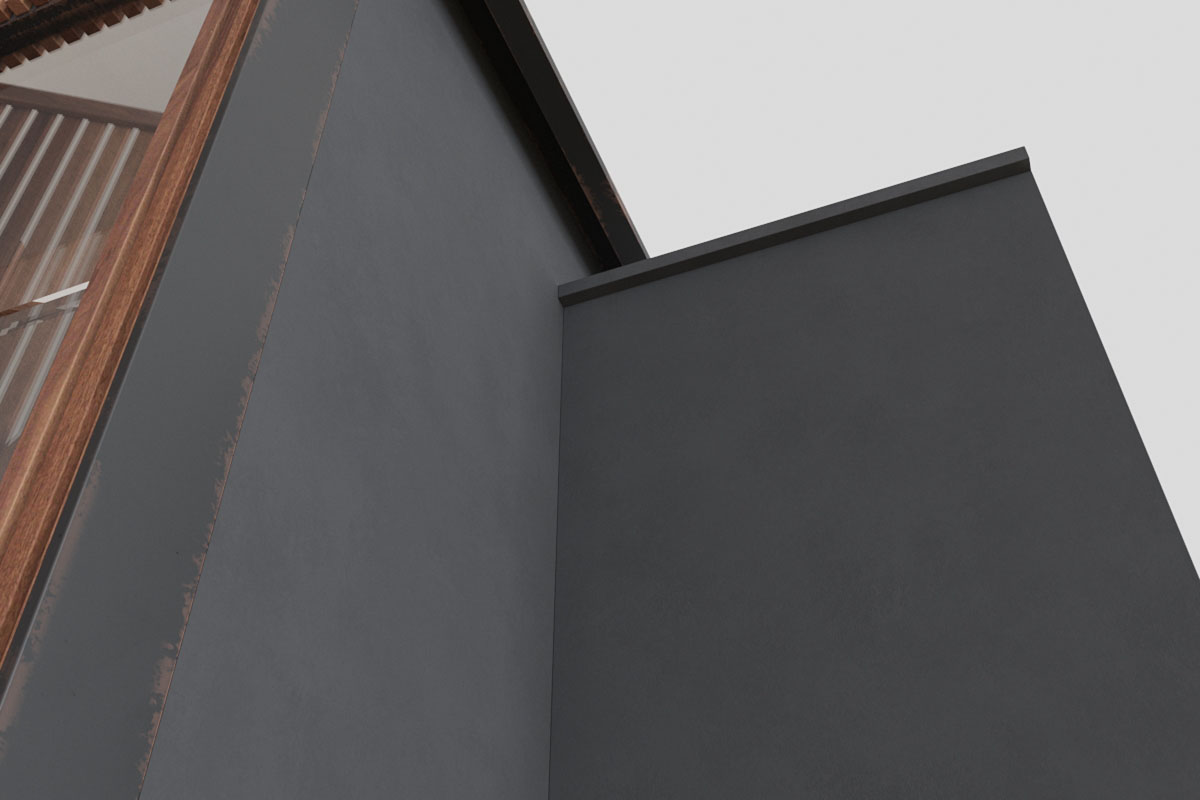
We don’t only use color for the diffuse on wall paint material. We add texture, and we mix it with color. Because CG render is too clean so we add this effect for making the result a bit defective.
We don’t only use color for the diffuse on wall paint material. We add texture, and we mix it with color. Because CG render is too clean so we add this effect for making the result a bit defective.
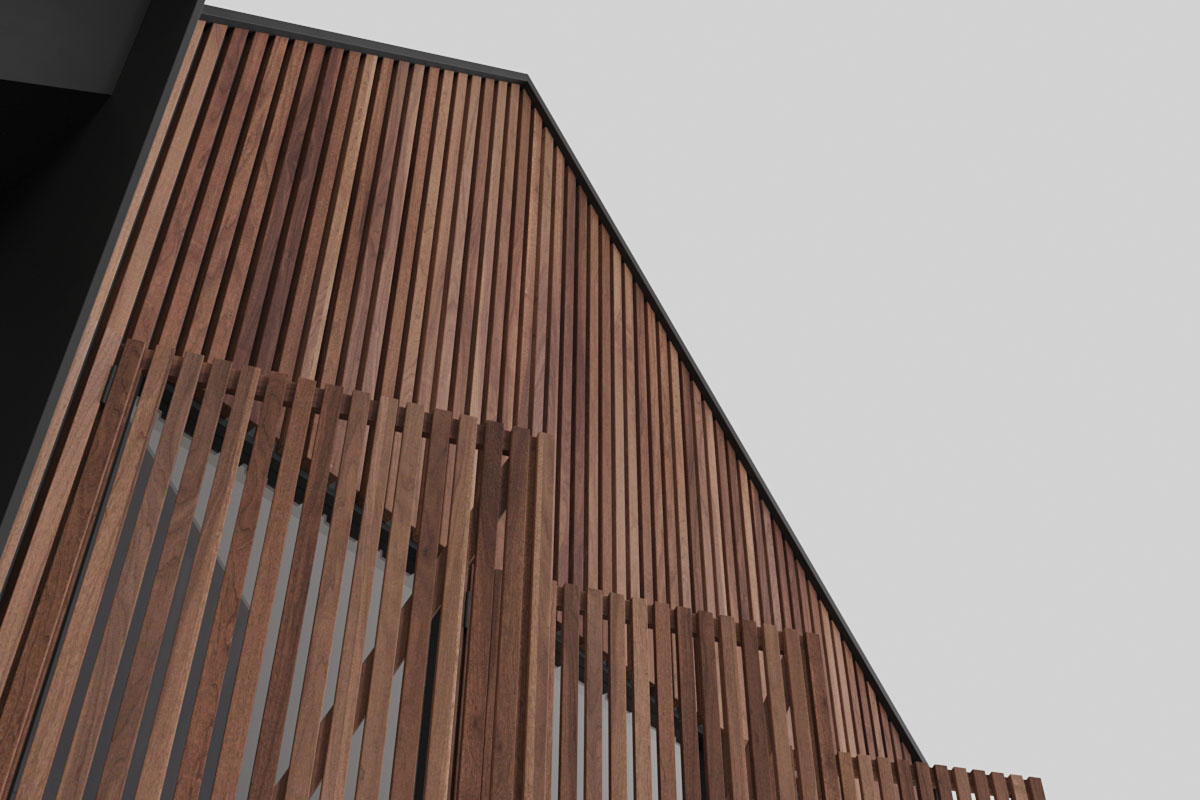
Timber Cladding
For this material, we use CoronaMultiMap to get a random effect on the wood texture. For the texture of each material, we set U/V offset randomly.
For this material, we use CoronaMultiMap to get a random effect on the wood texture. For the texture of each material, we set U/V offset randomly.

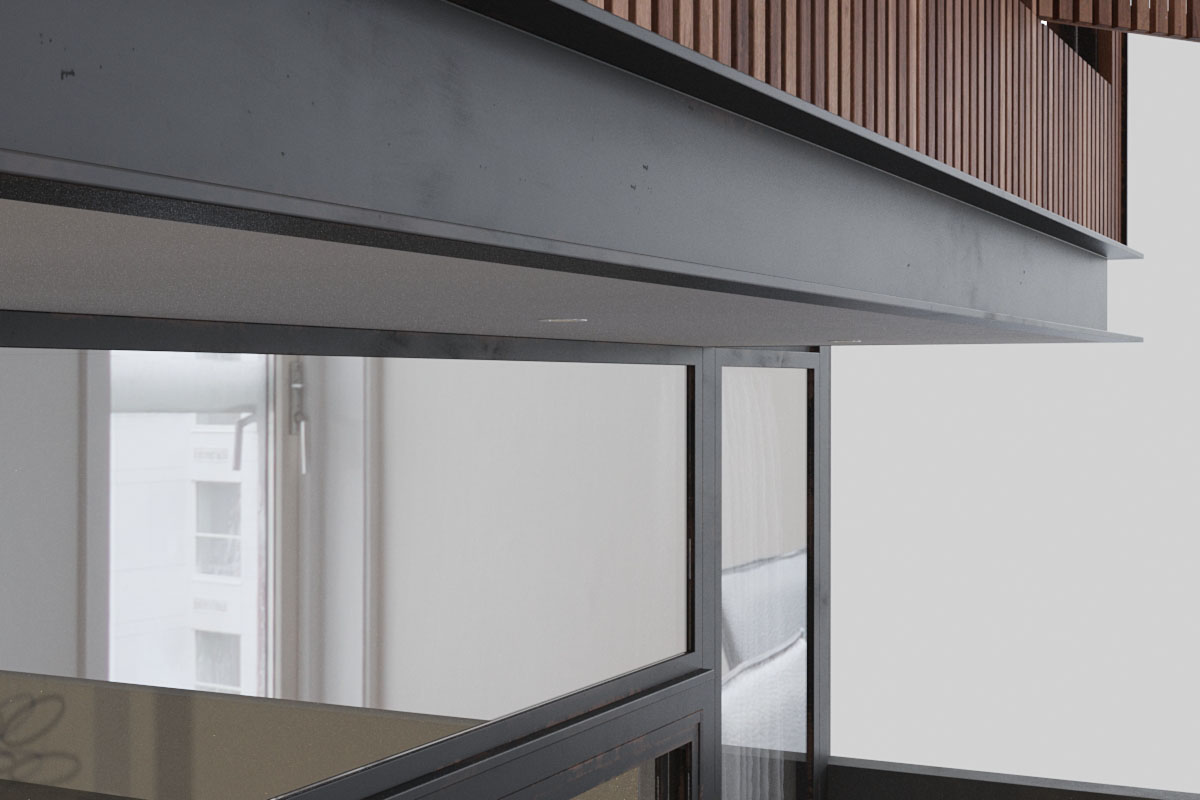
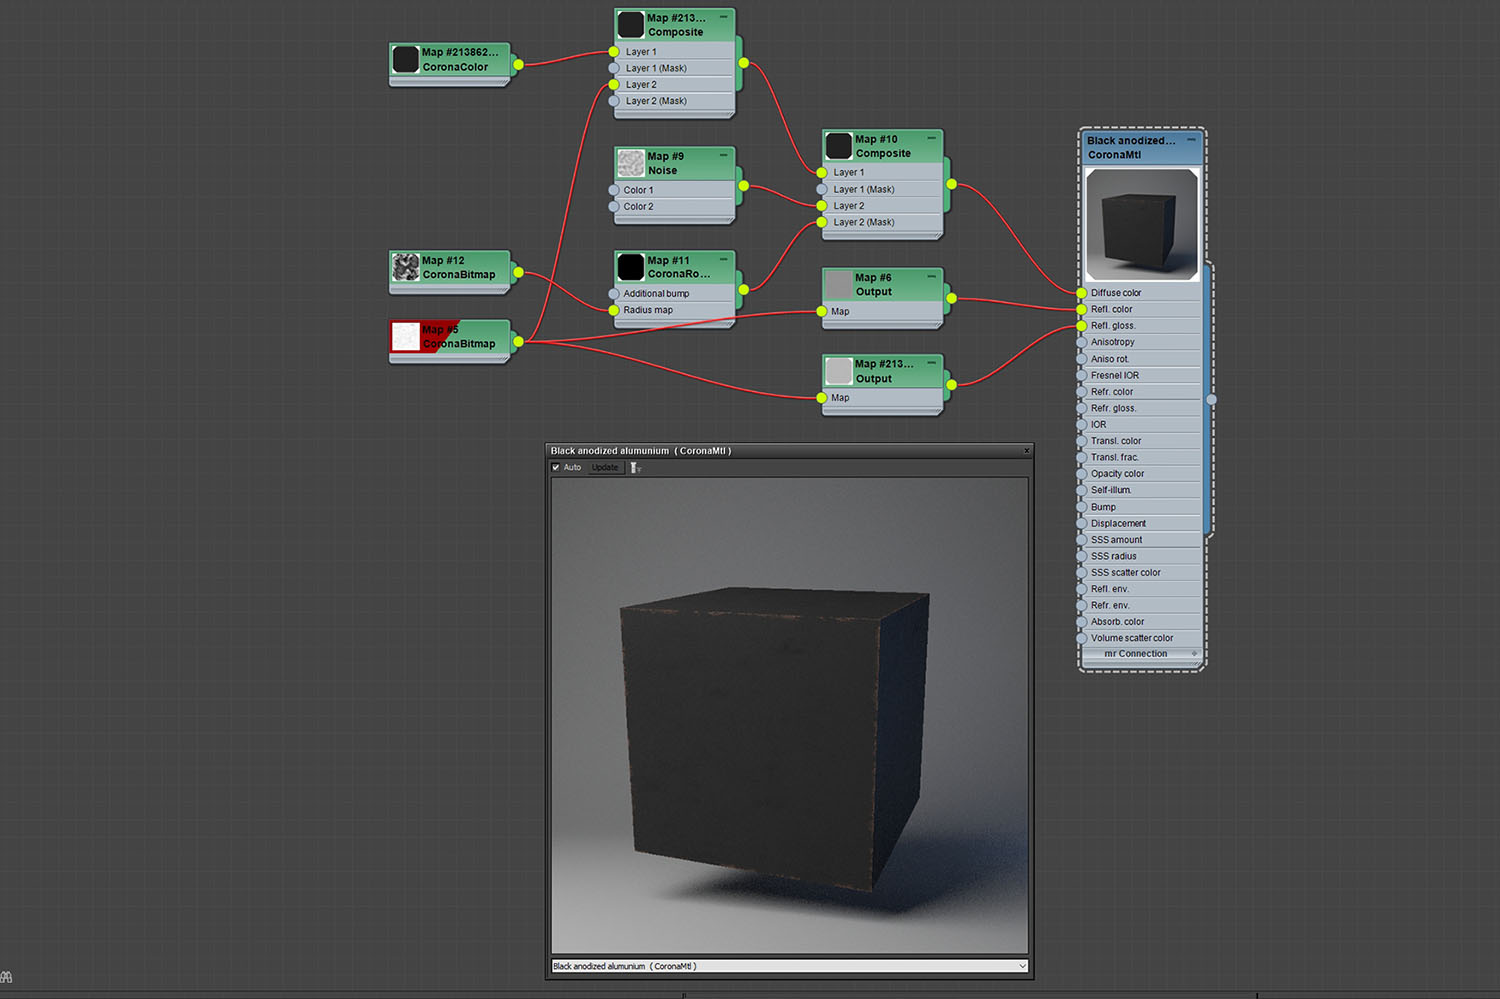
Metal
We add some rustic effects a bit because the imperfection effect makes our result more realistic.
For the rustic effect only on edge, we use composite, and then we use CoronaRoundEdge as masking.
We add some rustic effects a bit because the imperfection effect makes our result more realistic.
For the rustic effect only on edge, we use composite, and then we use CoronaRoundEdge as masking.
---
Environment
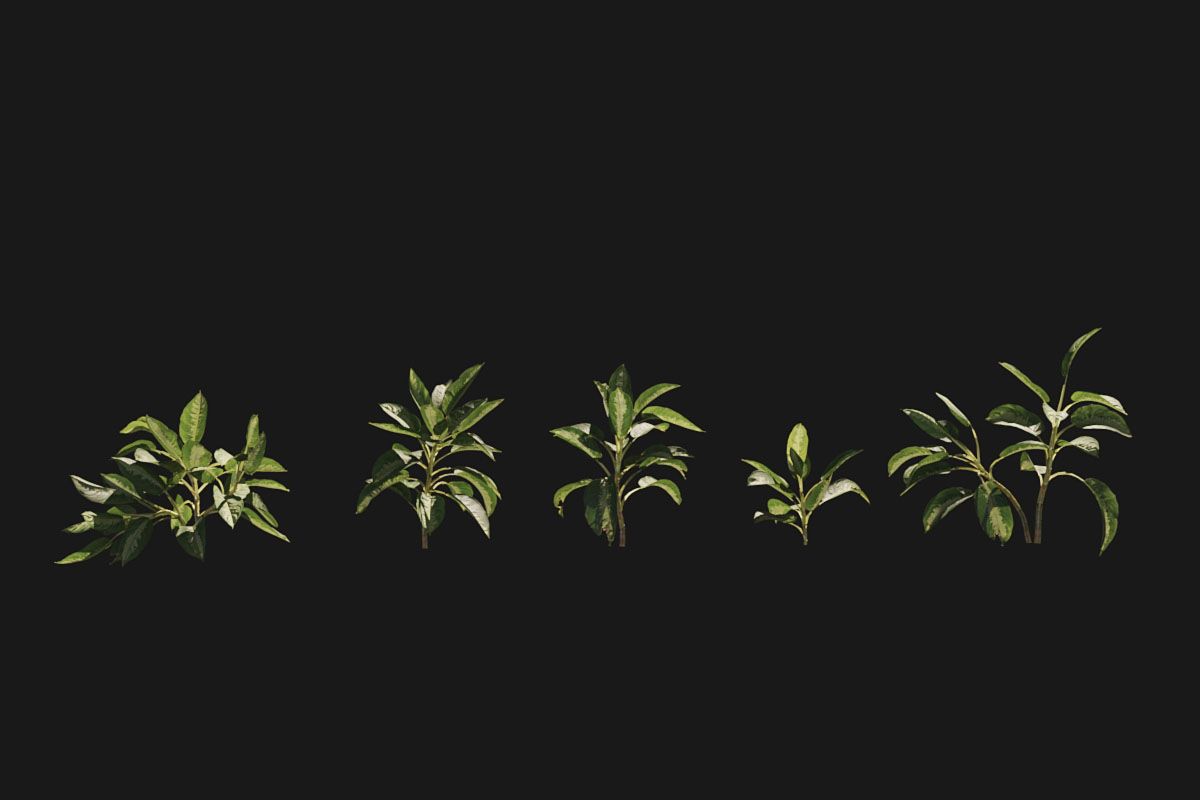
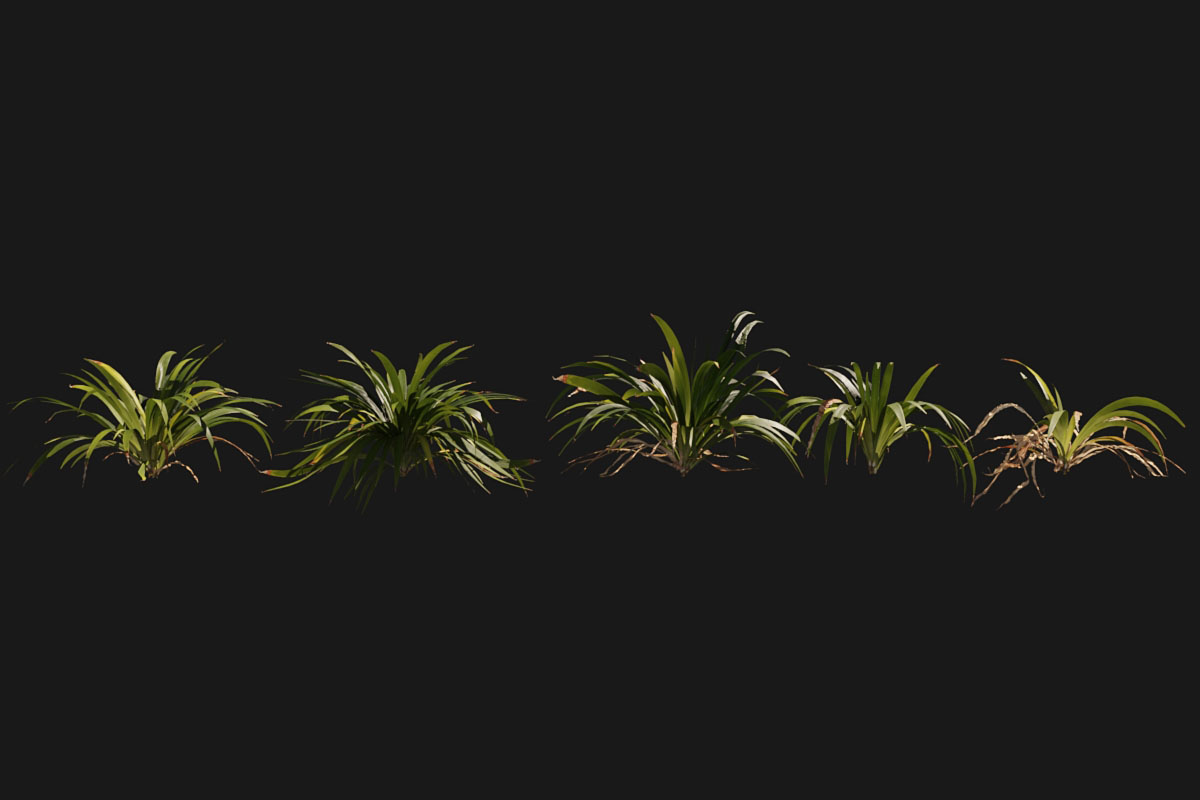
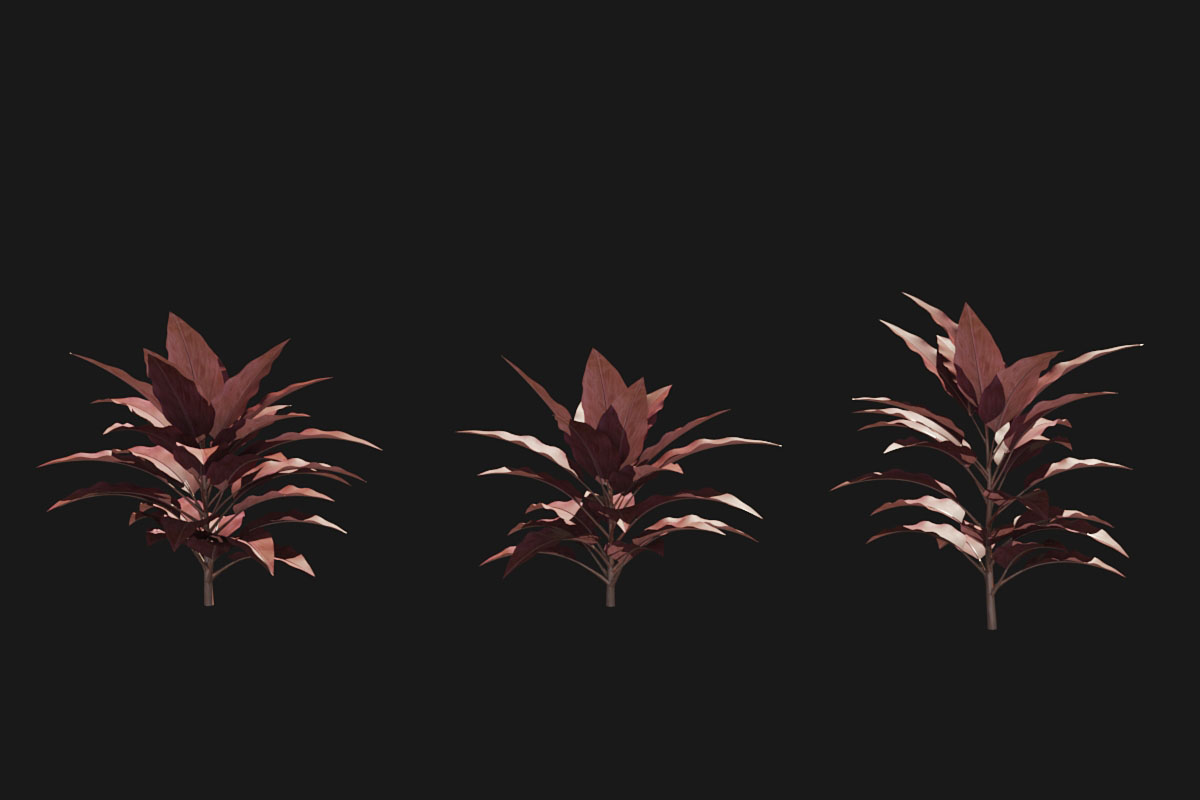
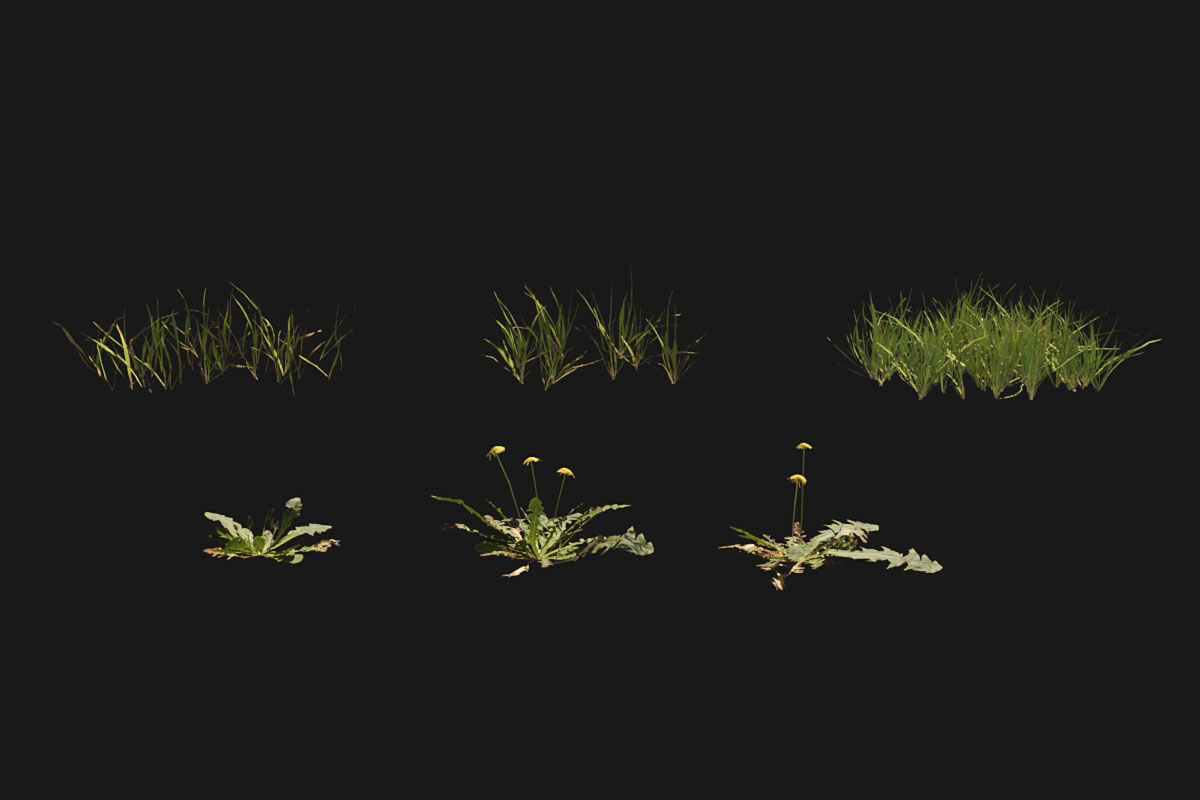
Plant & Foliage
For the large trees, medium plants and the hedges, we create it with Plugins Grow FX by Exlevel. Because we want to make the shape of the tree as we want.
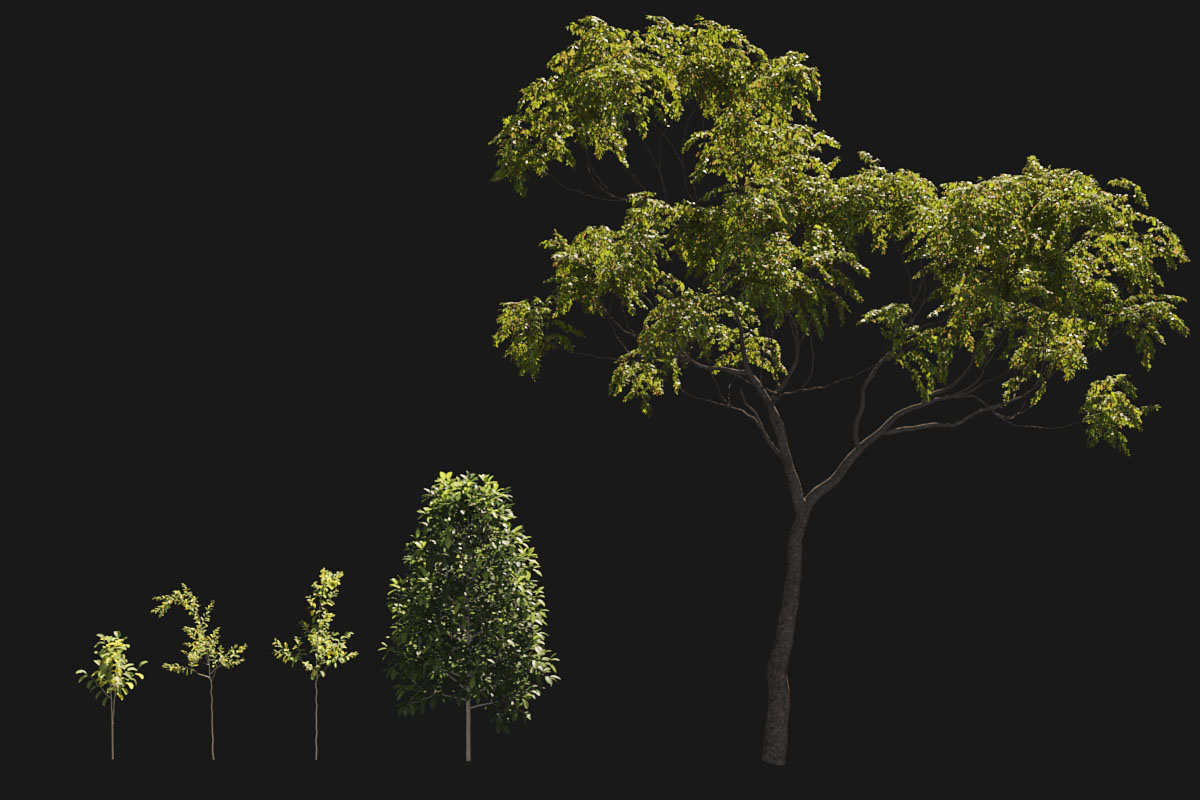

For the low plants and ground covers, we use Megascans and create some of it with Grow FX.
Ground Texture
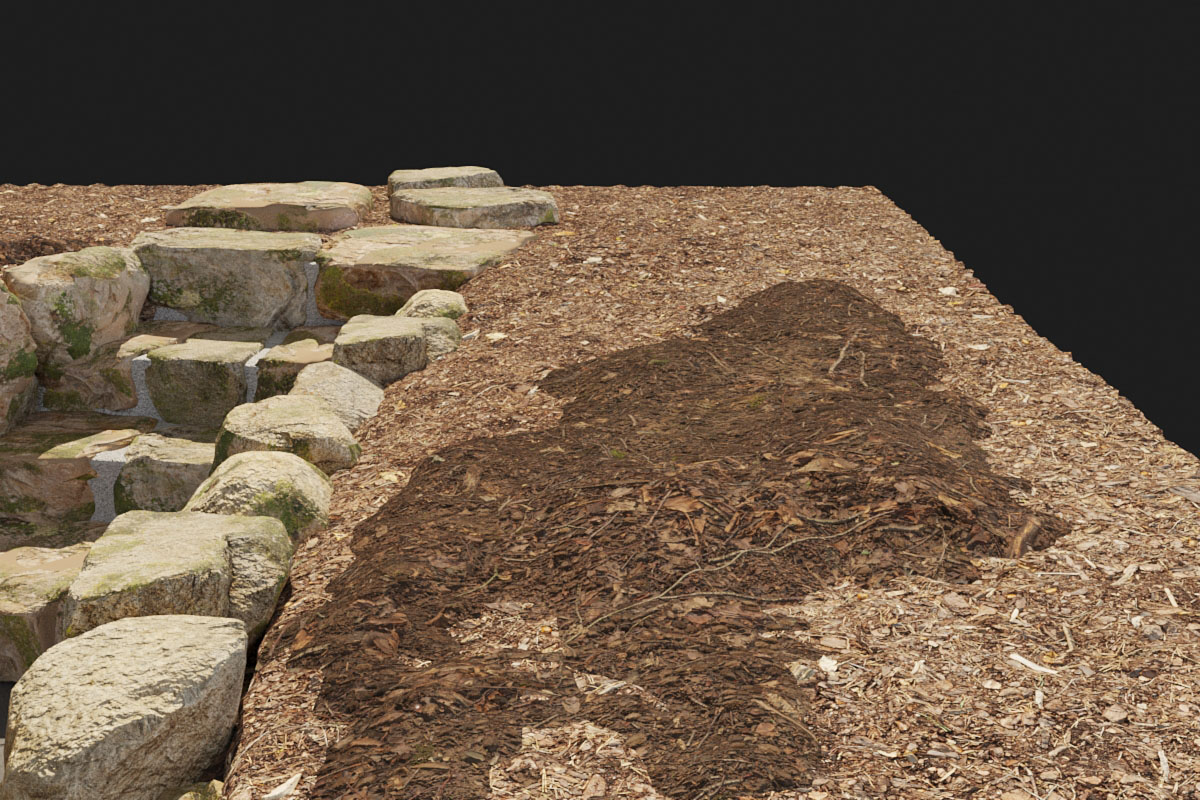
We use VP boulder for the rock, we arrange it and mix it with moss texture a bit, and we use Megascans assets to create realistic ground texture. To get maximum results, we use displacement.
We use VP boulder for the rock, we arrange it and mix it with moss texture a bit, and we use Megascans assets to create realistic ground texture. To get maximum results, we use displacement.
Scattering
For scattering, we use Corona Scatter. And for the big trees, we place it with manual method.
For scattering, we use Corona Scatter. And for the big trees, we place it with manual method.
Well, as you can see we always pay close attention to every detail because every detail will significantly affect the quality of our image.
So, I think it’s enough for scene preparation.
---
So, I think it’s enough for scene preparation.
---
Story Boarding
Coming up with story ideas is always hard. But there are ways to make the process much easier and get over this “writer’s block” many people experience.
The challenge is that when facing an empty white page, people often freaked out and went blank. That is because the thought that you can do anything is scary and will often push you into inaction.
How did our team use this to find an idea for this movie?
We had to have restrictions. So our team decided to write them down.
- It will take place in 1 location.
- It will be daytime.
- “Dolls house” from the name it needs to be fun, cozy, family able, bright, catchy, memorable.
- It will be under 20 seconds for short advertise.
We already have a more definite starting point than most people, they usually miss this step, for a beginner, it’s essential, but we took it a step further.
---
Camera Shot and Angle
1. Still image
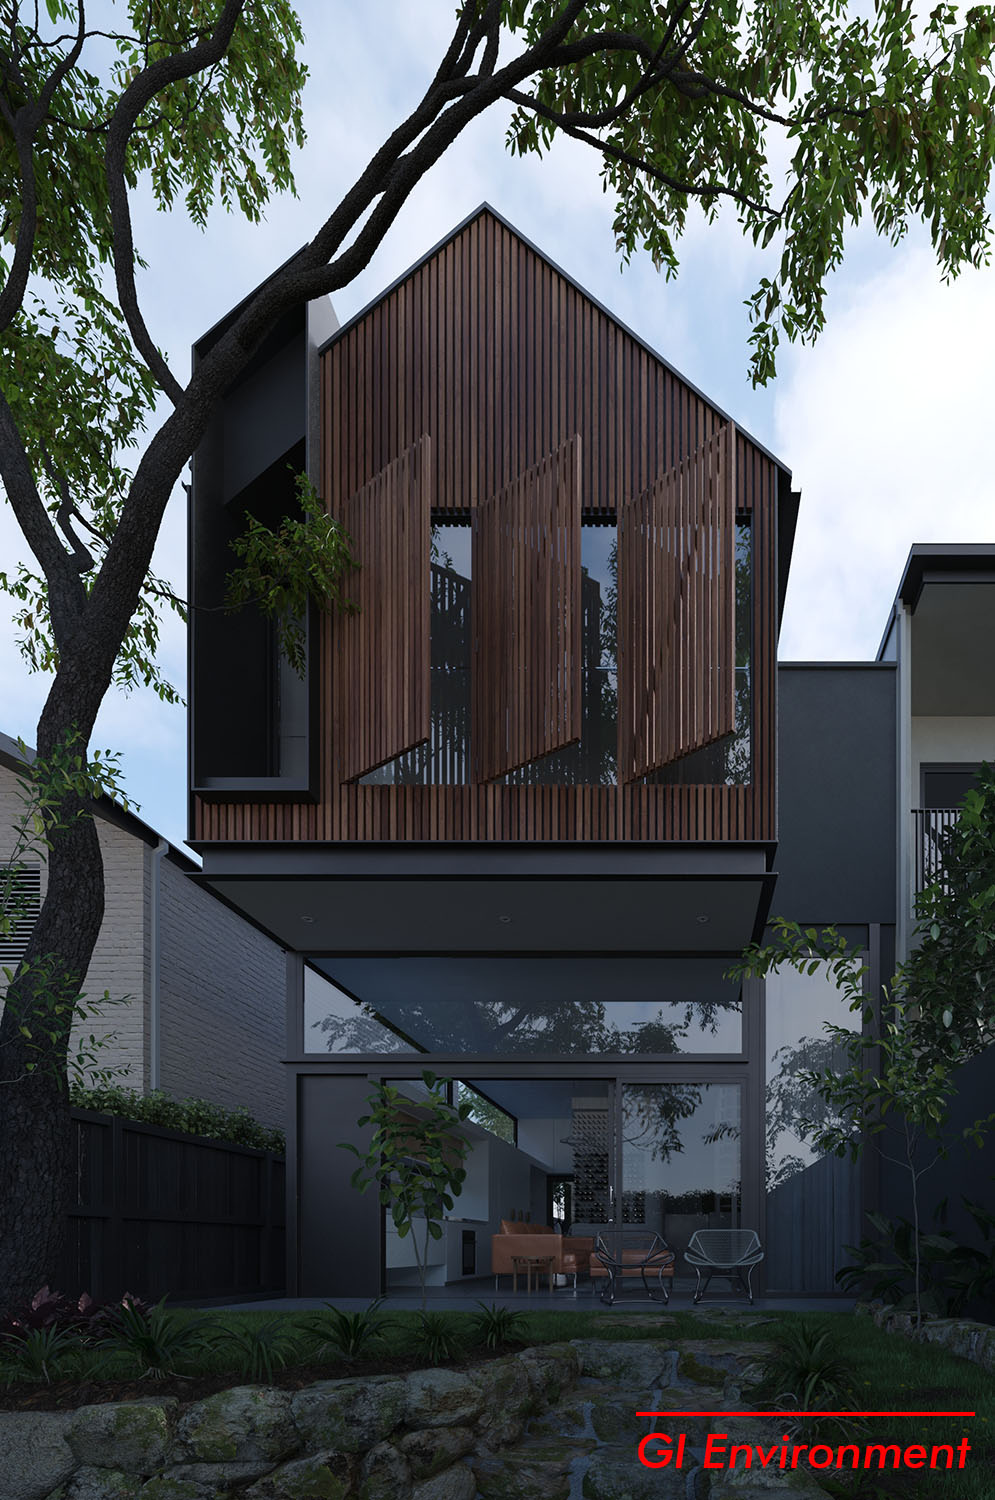
Photography is all about creativity, inspiration, and sharing your unique artistic vision. Is there any space for rules? Yes! Photography composition rules should always be kept in mind because they are fundamental in excelling as a photographer.
The rule makes it easy for us to get a great composition. Sometimes it doesn’t have to be precise but already represented the rule.
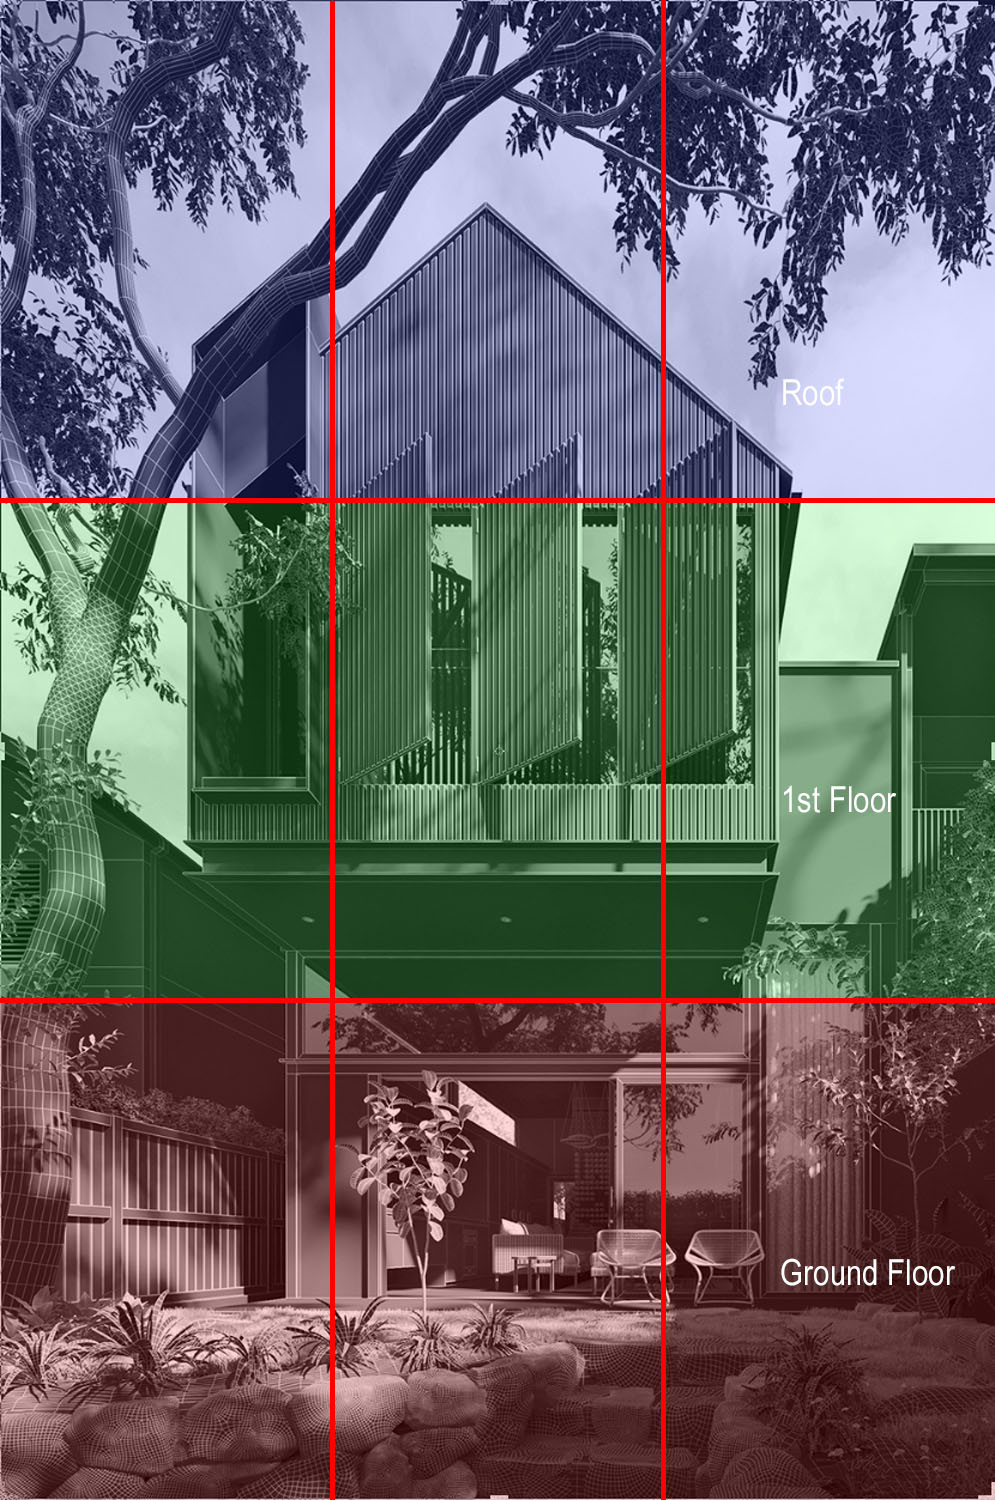
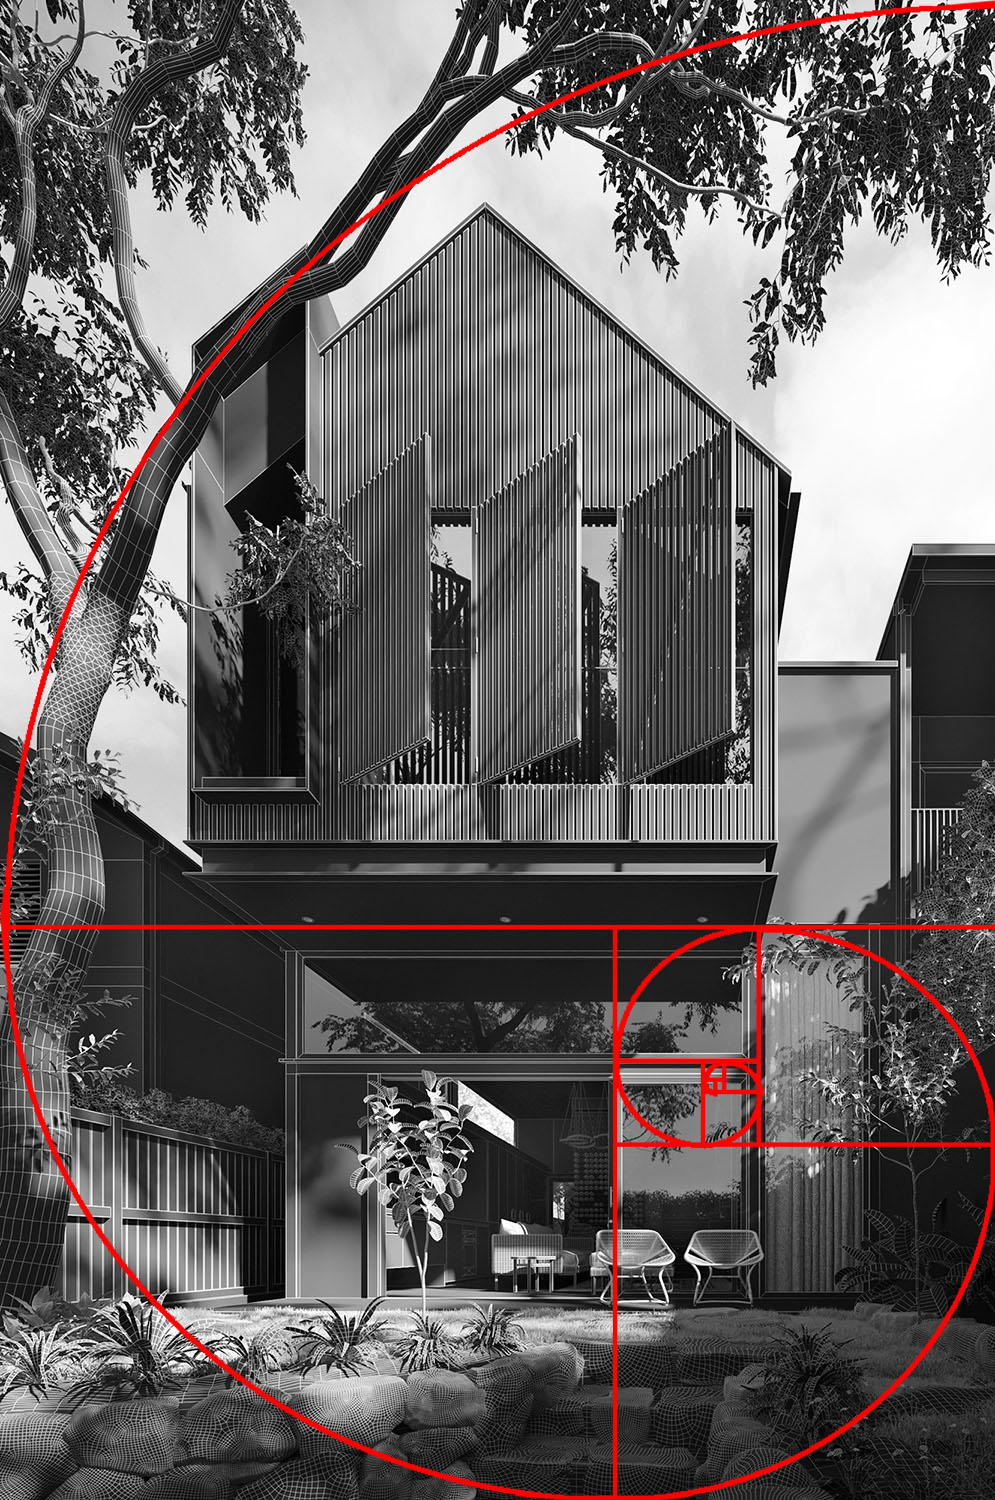
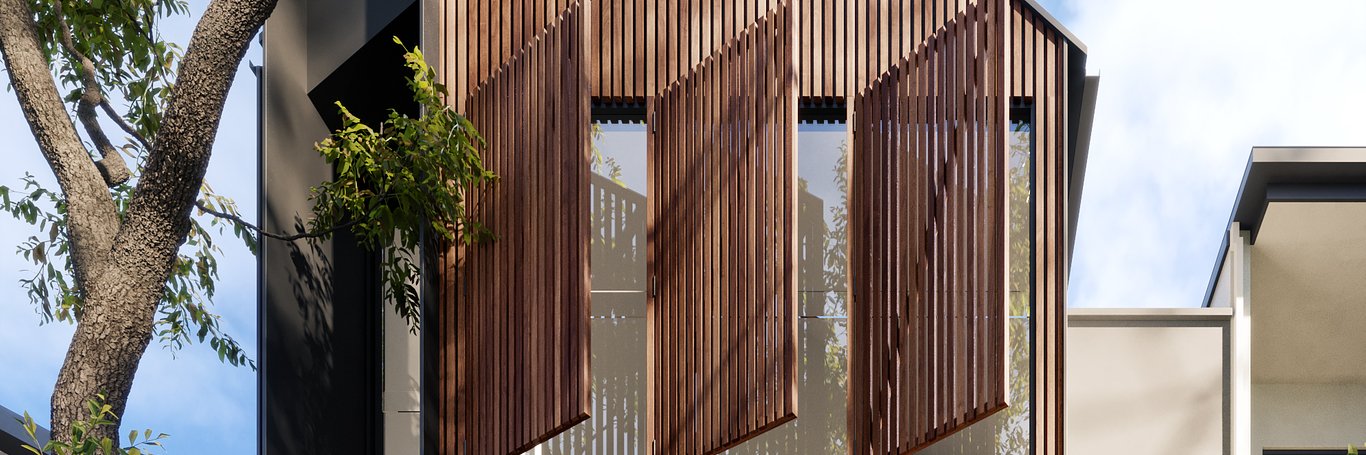
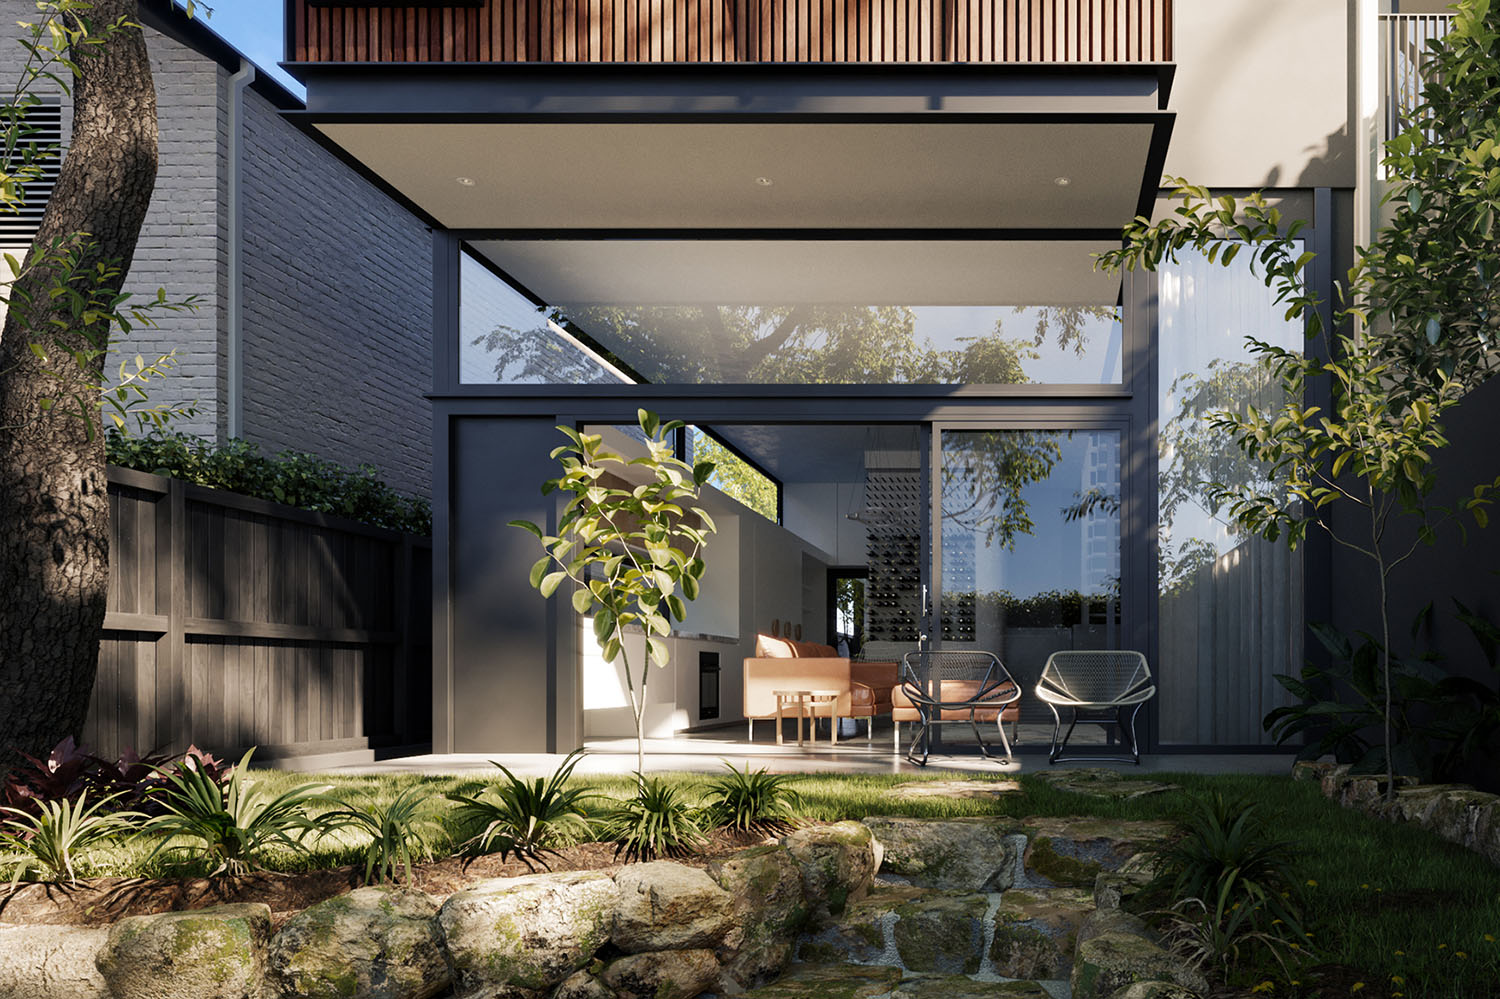
For the actor/main focus is absolutely the building. From the Rule of Third, we can interpret the building is divided into three sections, the first section is for landscape and ground floor, the second section is for the first floor, and the third section is for the roof and the sky. And we think it’s a strong composition to show the information about the building.
The second rule is the Golden Spiral. As you can see in the image above, the framing tree and small tree in the image represented the rule, maybe the focus from this rule is not too strong.
2. Animation
Great cinematography is always challenging to achieve. Great and convincing cinematography in 3D is even more complicated.
In this post, we’ll go over the challenges of using a camera in 3D, as well as the camera rigs we used for our film and our favourite lens choices. We’ll also go over camera shots and angles, explaining the thought behind them.
Why is it challenging?
In a 3D environment (the 3D software) there are no limitations, unlike real life, where you are restricted by the laws of physics or by the budget you film has.
Our lens choices
In 3dsmax, you determine the lens in the ‘Focal Length’ attribute, If you’re familiar with lenses then you should be able to figure out the right sizes for your different needs, but if you need a little guidance, here is a quick reference:
- 15-18 focal length: Used for very wide shots, landscape, establishing shots, creating a deep perspective.
- 35-55 focal length: Used for close-ups, medium shots, whenever you just want to show a character doing something without being too intrusive.
- 80 – 200 focal length: Used to flatten out the perspective, or for quick action shots.
We didn’t only create one camera and then instantly get the perfect result in every clip, but we created many options. After that, we discuss with the creative director and all members of the team to choose the best result.
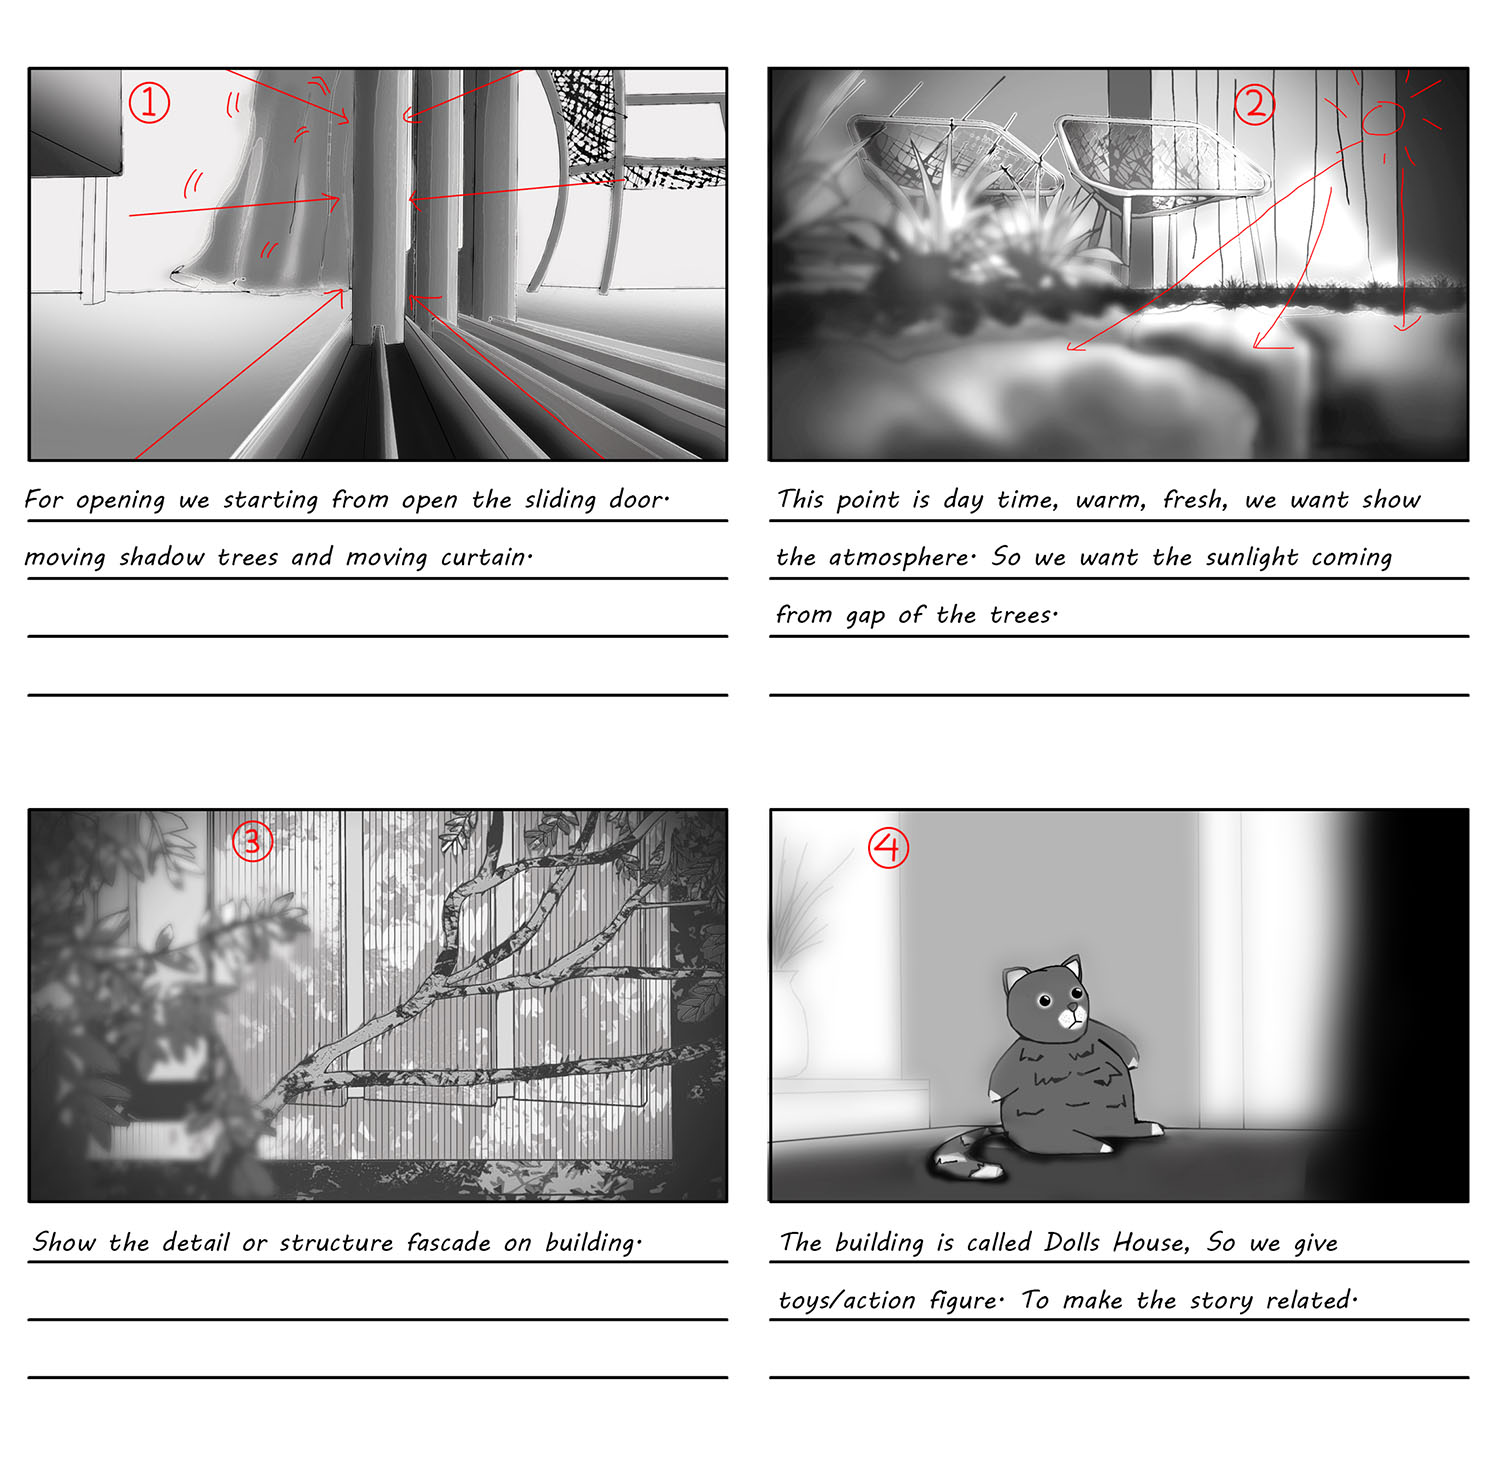
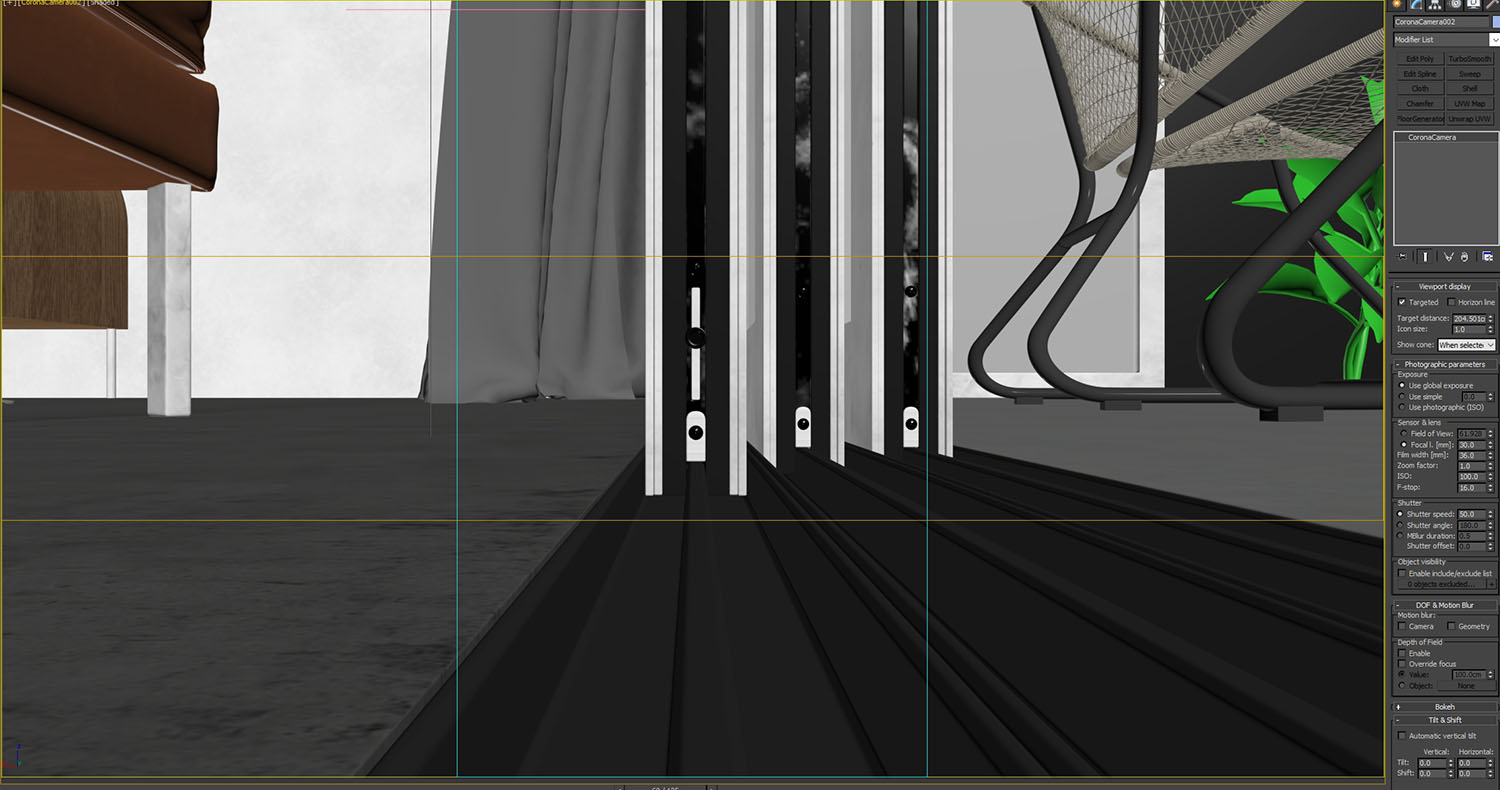
The First Shot, we got inspiration from the anime film “your name.” We place the camera in the centre of the moving door. To make this clip more dynamic, we will move the trees outside to get moving shadows on the area we will show.
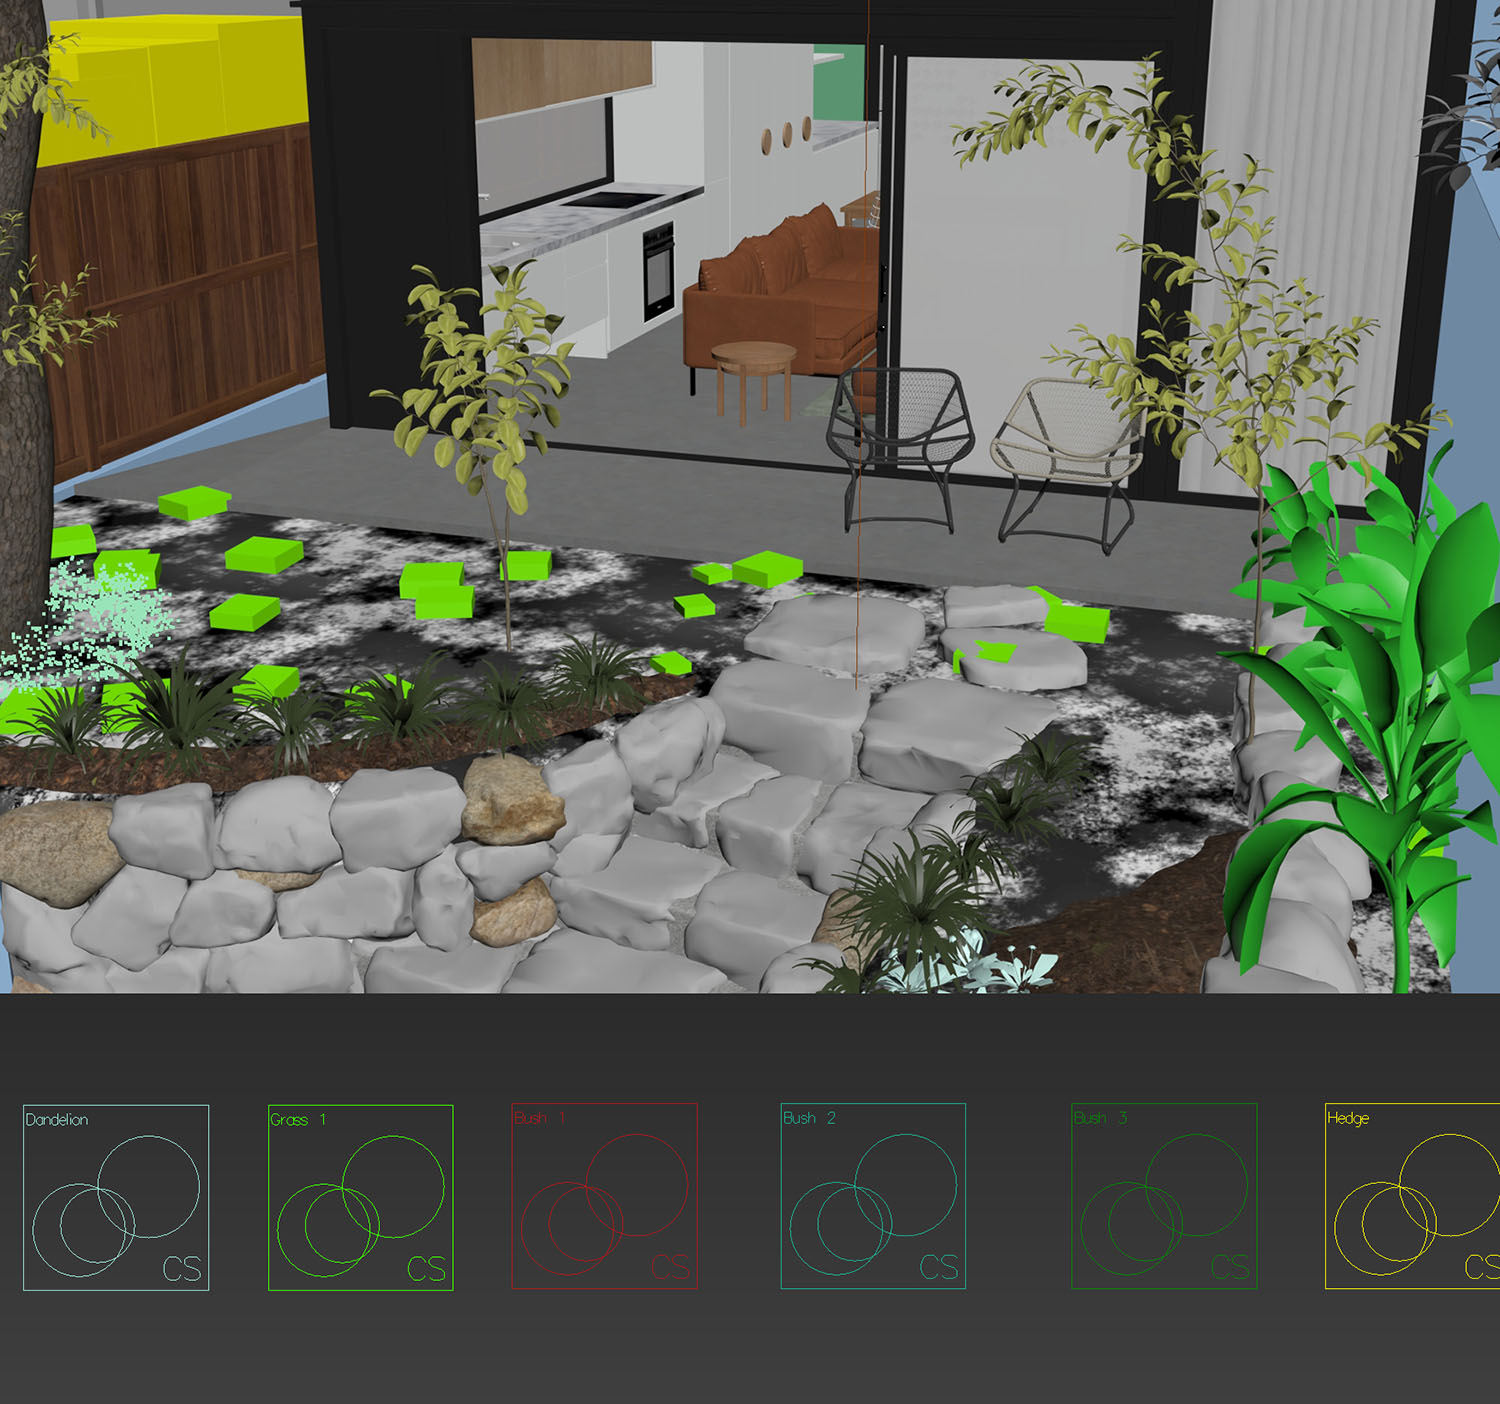
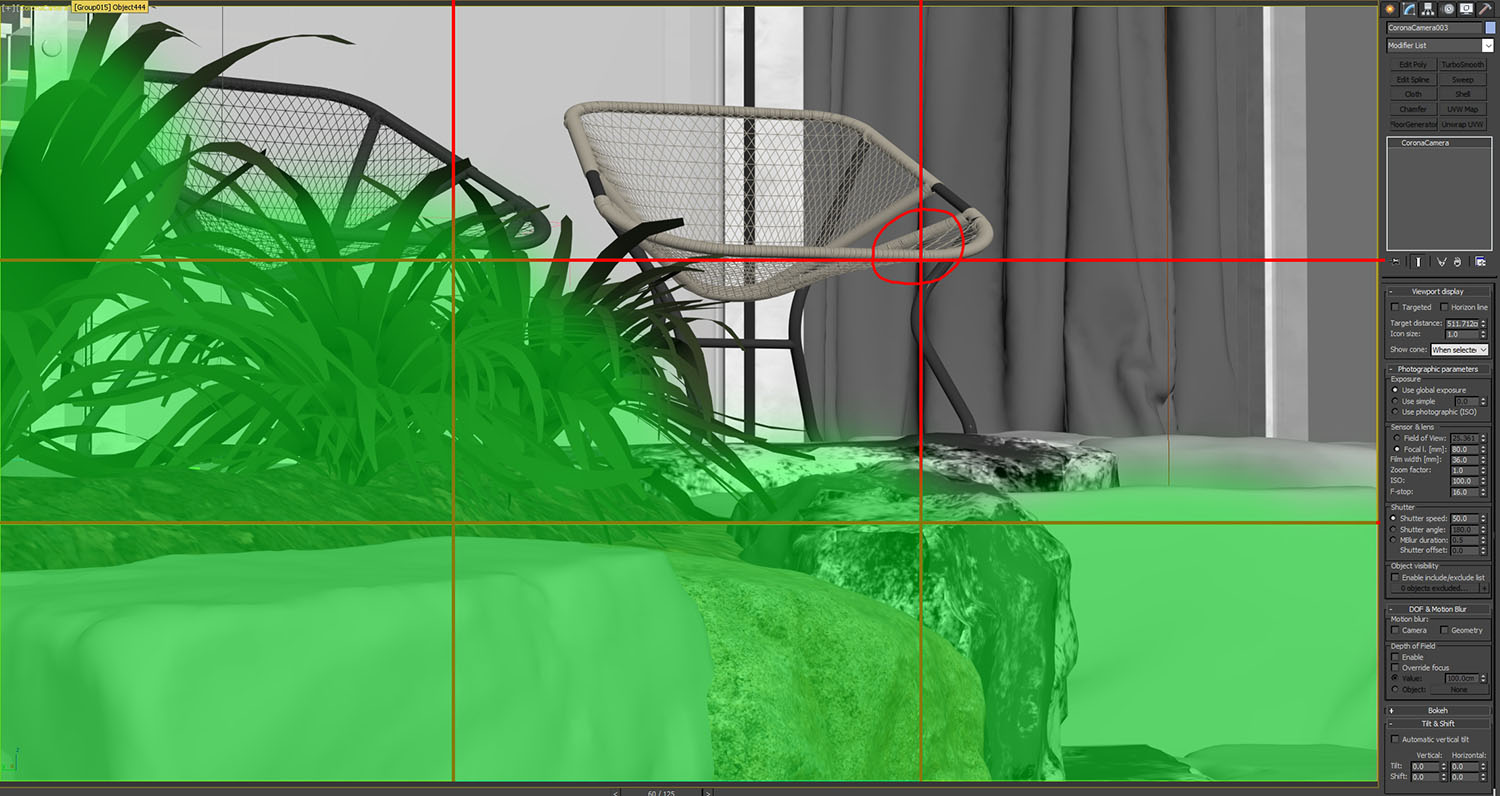
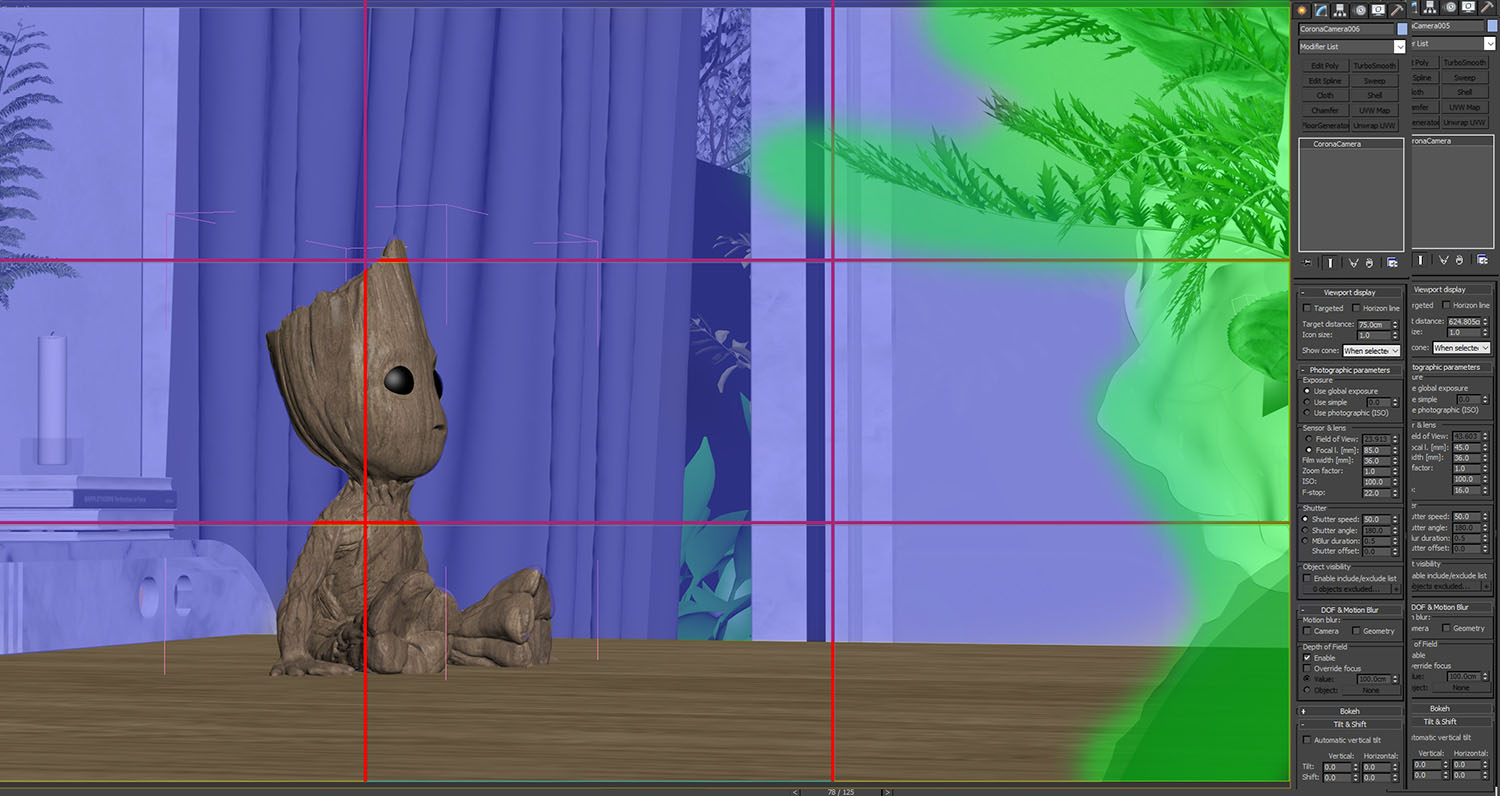
The Second Shot, we wanted this shot to be like as if we’re peeking from behind the Rocks. Why? Because when people watch our short reel, we want to make them feel curious and mysterious. We played with the foreground and background to give volume on our shot, and we think that’s pretty nice, it works all the time. The green mark is the foreground, and we will make it a bit blurry.
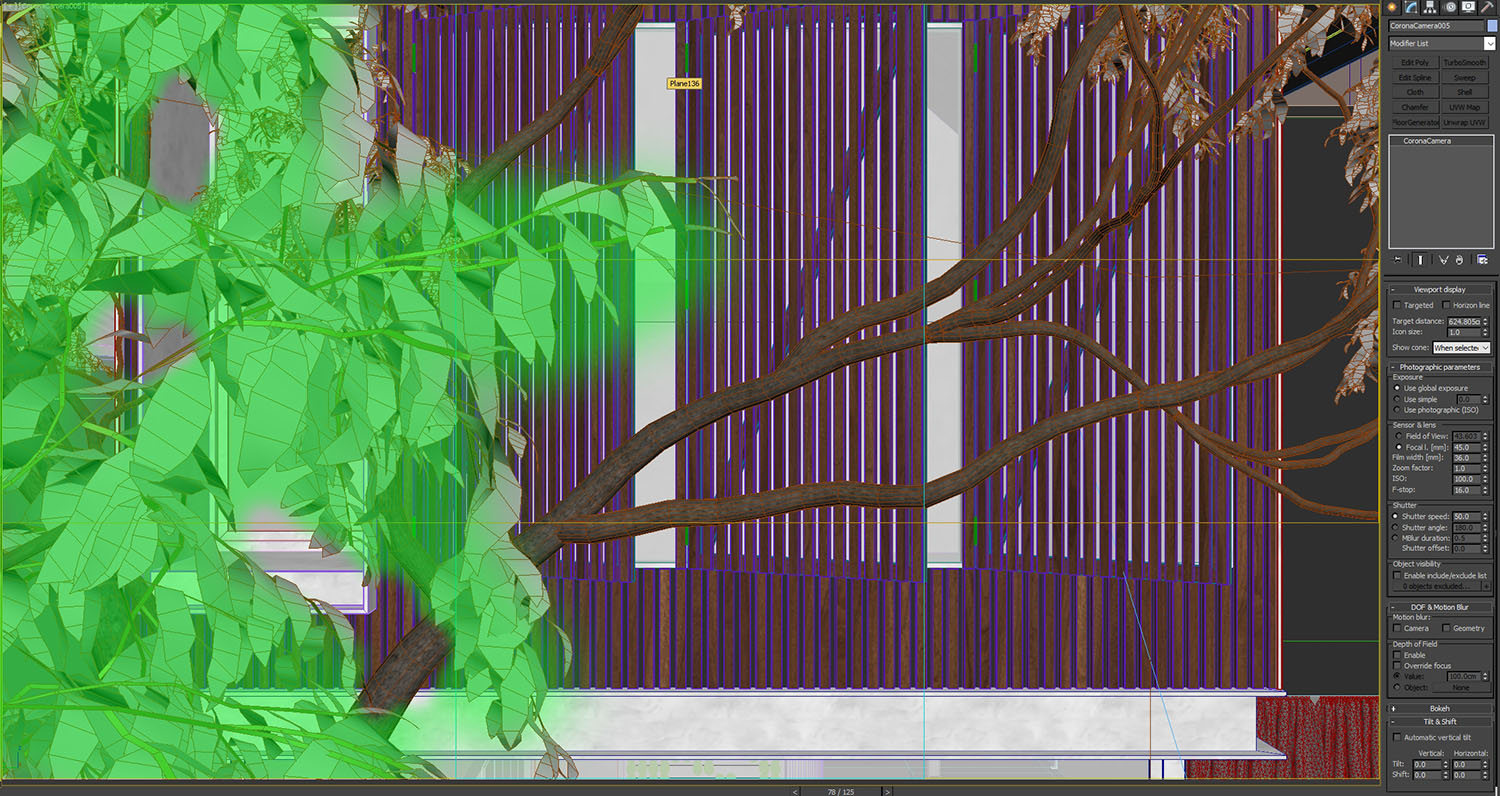
The Third Shot, In a 3D environment (the 3D software) there are no limitations, unlike in real life. You can place the camera anywhere. For a daylight mood, we thought this shot had potential when the sun hit the wood timber cladding, and also, we will make the trees moving.
The fourth shot, the building, called “Dolls house “, we use action figure Groot, because Groot represents nature, friendly, and cute. So we were placing our focus on the Groot at the rule of third point left bottom.
---
How to animate
Camera path
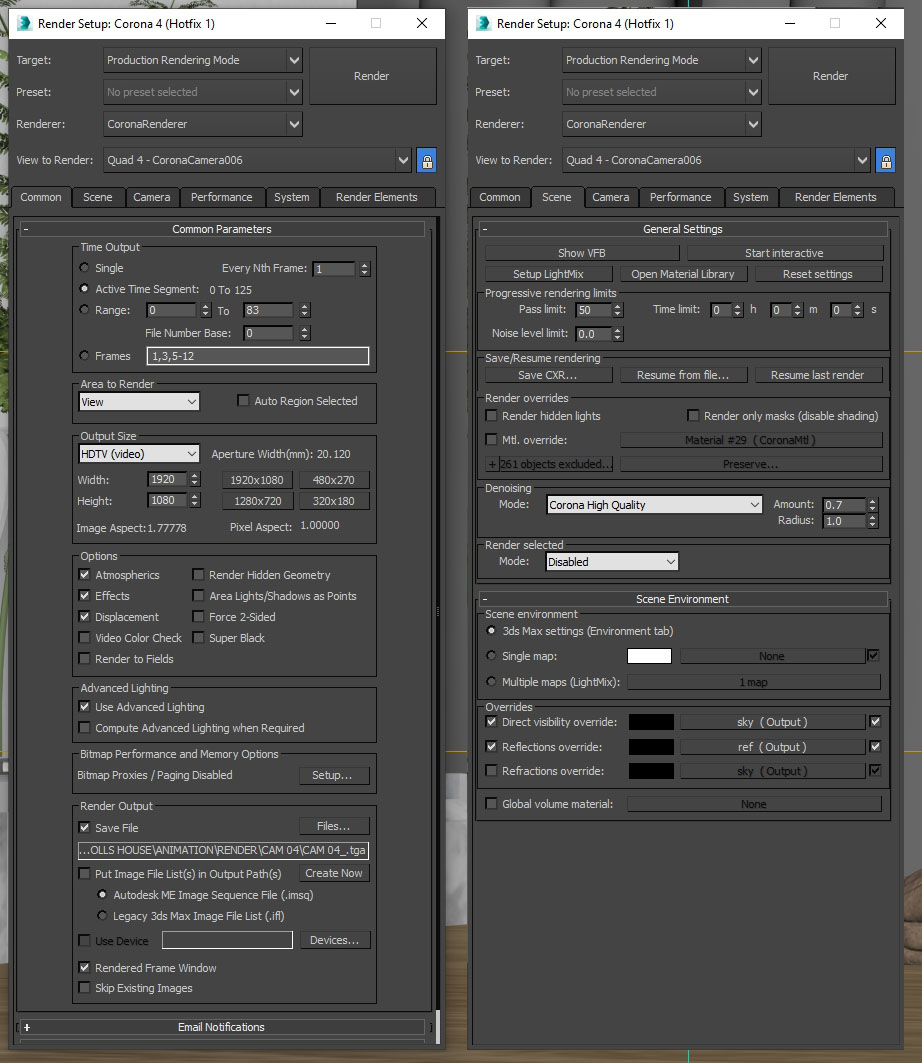
Before we created the camera, we must set the time configuration and output size.
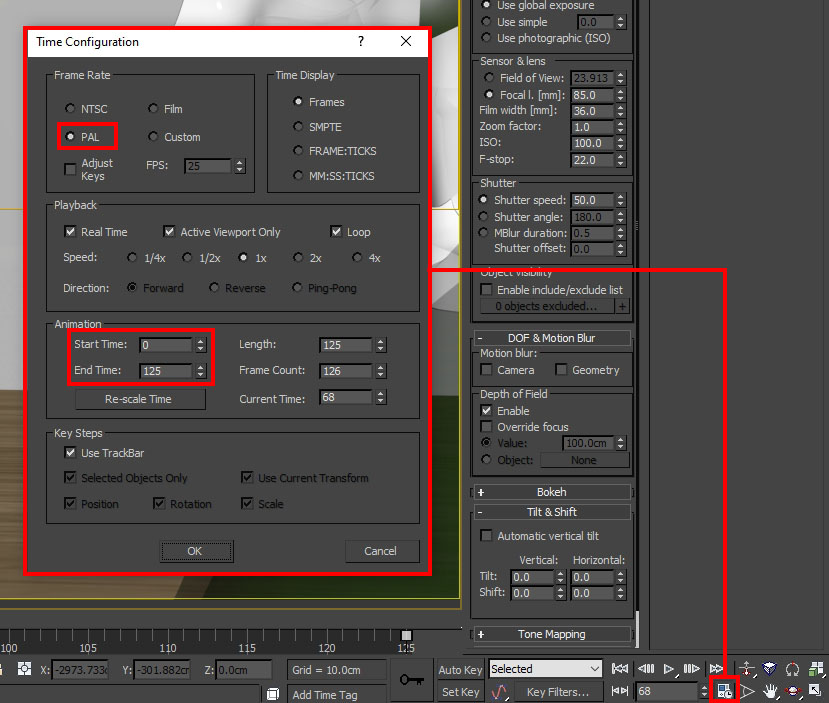
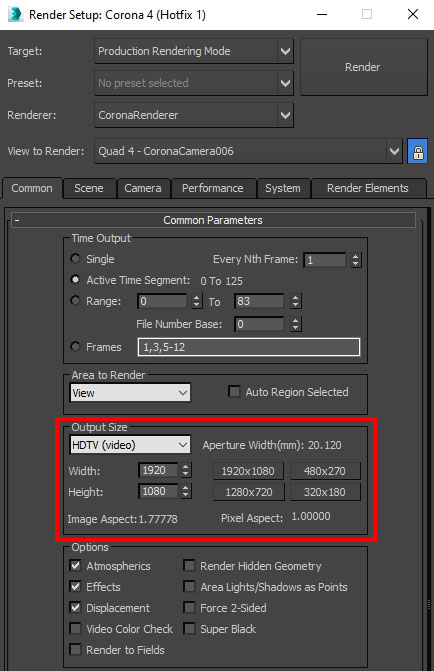
Phase Alternating Line (PAL) is a color encoding system for analog television used in broadcast television systems in most countries broadcasting at 625-line / 50 field (25 frames) per second (576i). After that, we continued to set the output size to HDTV video in render setup.
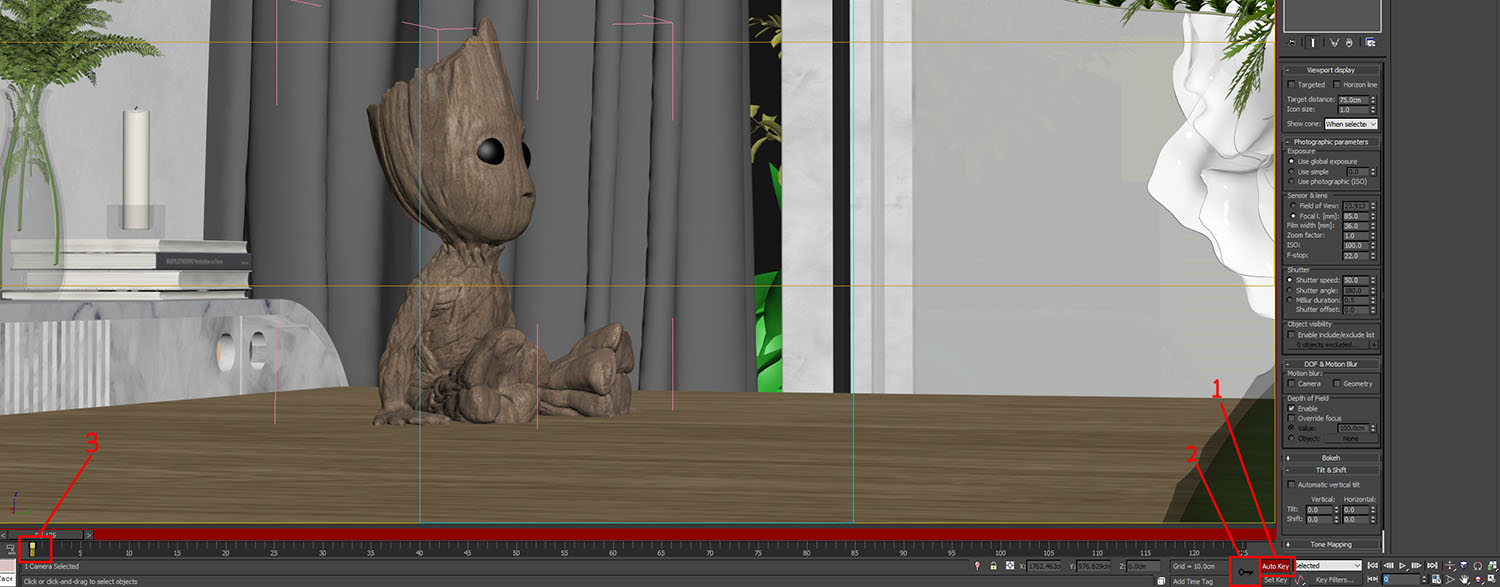
1. First, select your camera and make sure your target is off to make your camera target consistently straight when we move it. Press the Auto Key button, and you could see the viewport will be red.
2. Press the Set Key.
3. The Key Frame will appear, 0 frame is our starting point.
2. Press the Set Key.
3. The Key Frame will appear, 0 frame is our starting point.
4. Just click and drag to move the time slider, we move it to 150.
5. Move your camera position, in this shoot I move it forward a little bit, and the Key Frame automatically appear.
6. Press the Auto Key button again to deactivate. And we got our movement
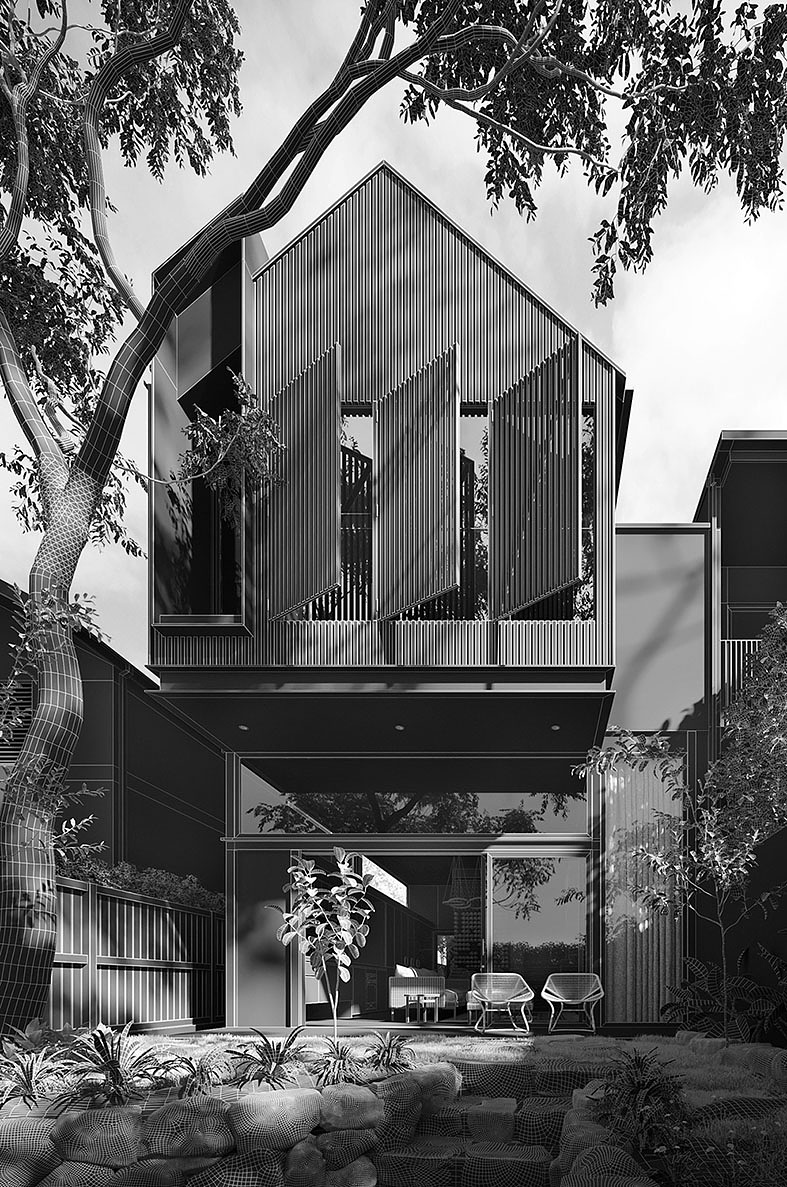
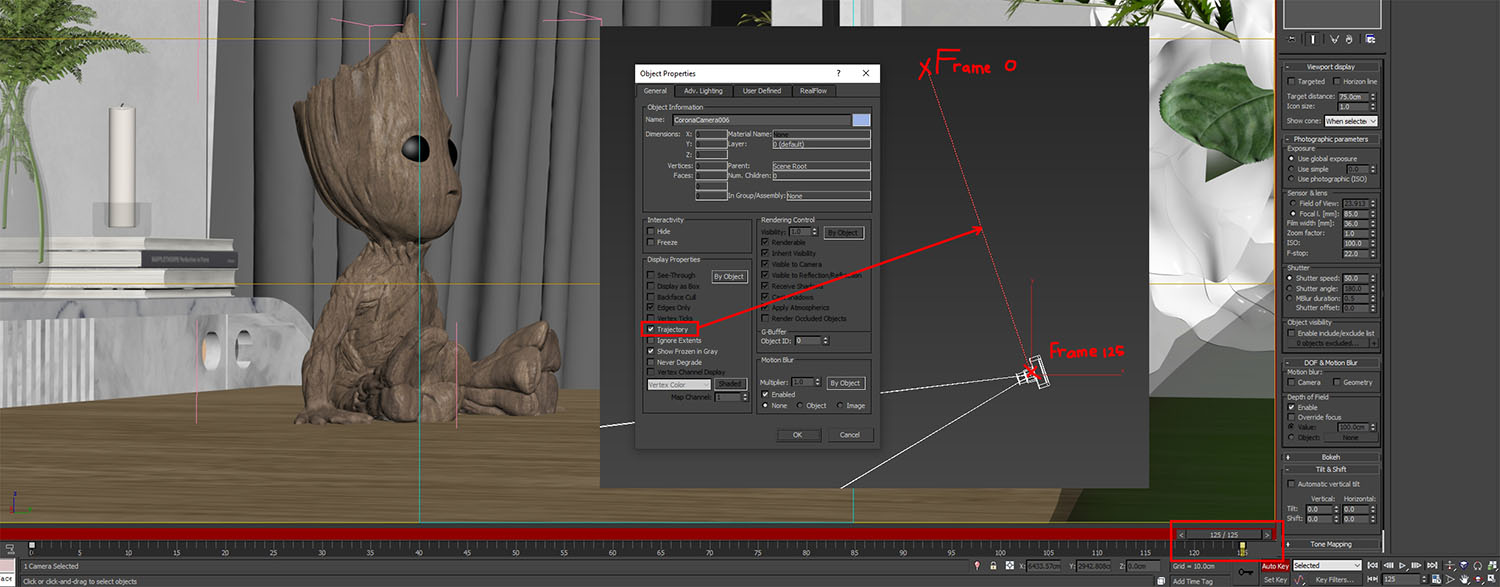
7. If you want to see the track movement, select your camera right-click, find object properties like the image above, and activate the trajectory.
5. Move your camera position, in this shoot I move it forward a little bit, and the Key Frame automatically appear.
6. Press the Auto Key button again to deactivate. And we got our movement
7. If you want to see the track movement, select your camera right-click, find object properties like the image above, and activate the trajectory.

8. Now we must check the movement at the curve editor, and you can bring out the track view press curve editor button.
The default setting always automatically starts with ease in and ends with ease out. What I need is linear movement, so we must adjust it.
The default setting always automatically starts with ease in and ends with ease out. What I need is linear movement, so we must adjust it.
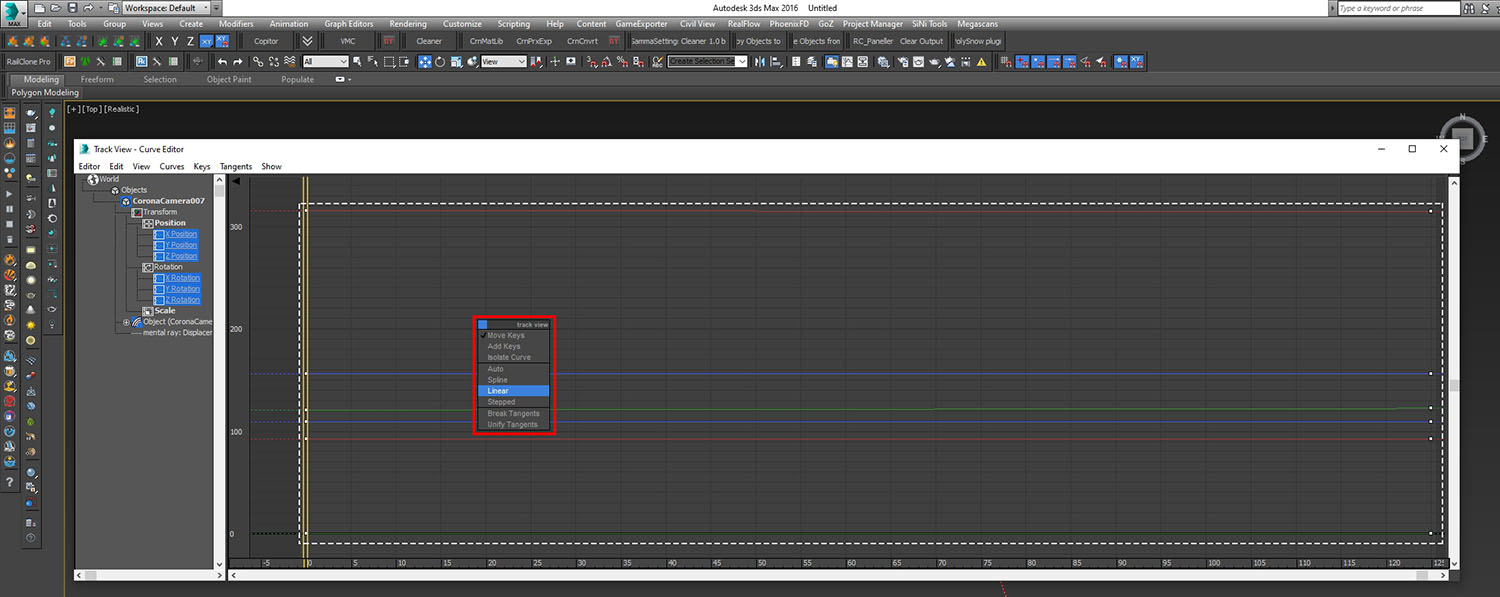
9. Select your keyframe and press Right-click, set to linear. And we have finished with the camera movement. We can use the same technique for another clip.
Tree movement
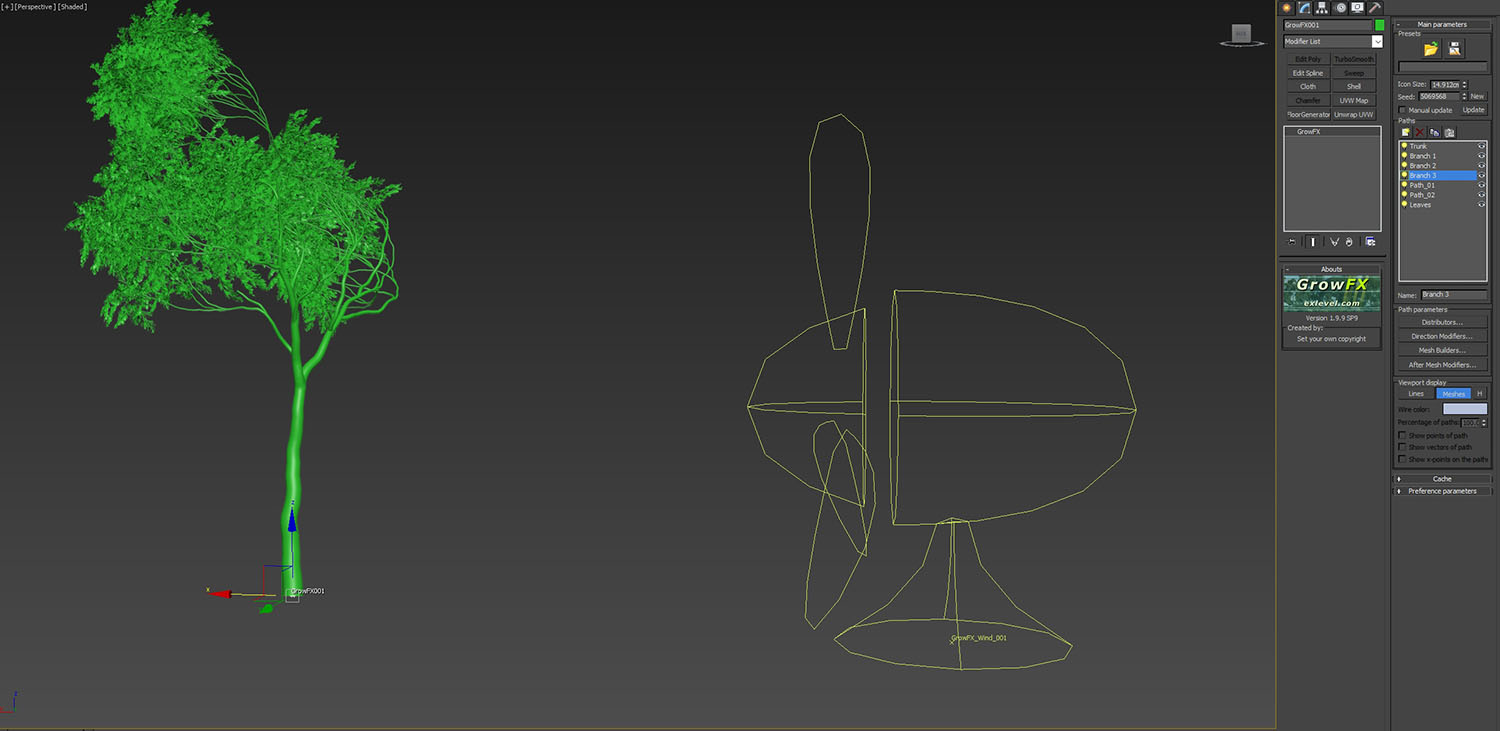
We create custom the tree from Grow FX by exlevel and also the wind simulation for the animation. Because sometimes many people, creativity is restricted by the 3d library. We can’t get the tree as we want. So these plugins are beneficial and powerful to control.
Tree movement
We create custom the tree from Grow FX by exlevel and also the wind simulation for the animation. Because sometimes many people, creativity is restricted by the 3d library. We can’t get the tree as we want. So these plugins are beneficial and powerful to control.
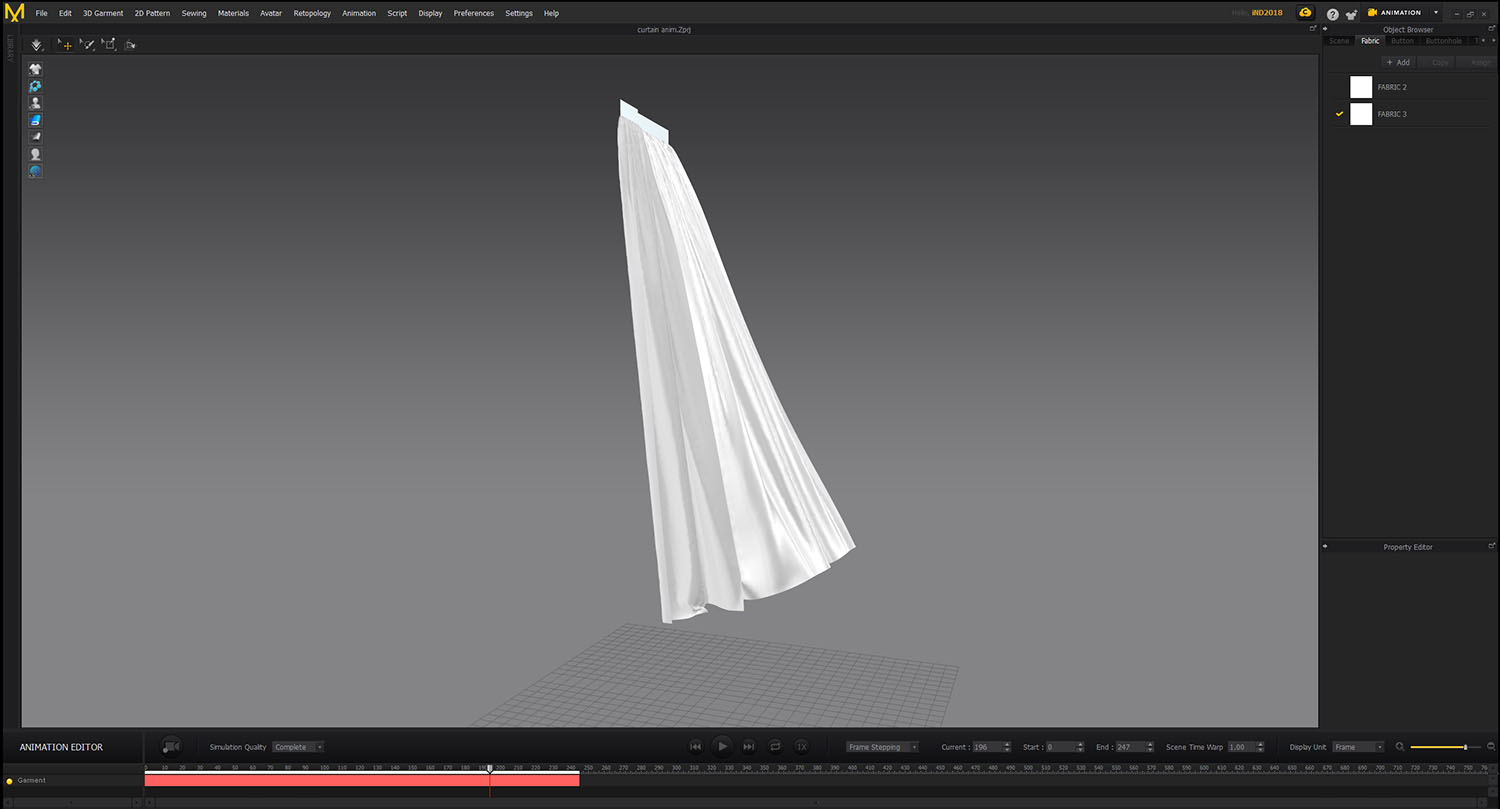
Moving Curtain
For this effect, we use Marvelous designer. Because Marvelous Designer allows you to create beautiful 3D virtual clothing with our cutting-edge design software.
For this effect, we use Marvelous designer. Because Marvelous Designer allows you to create beautiful 3D virtual clothing with our cutting-edge design software.
---
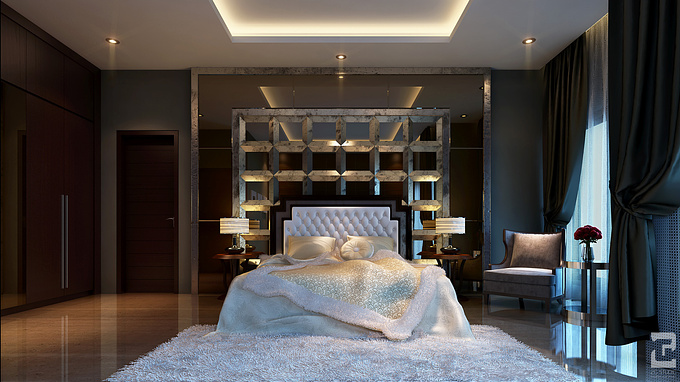
Lighting And Rendering
Daylight
You can see my setting in the image below.
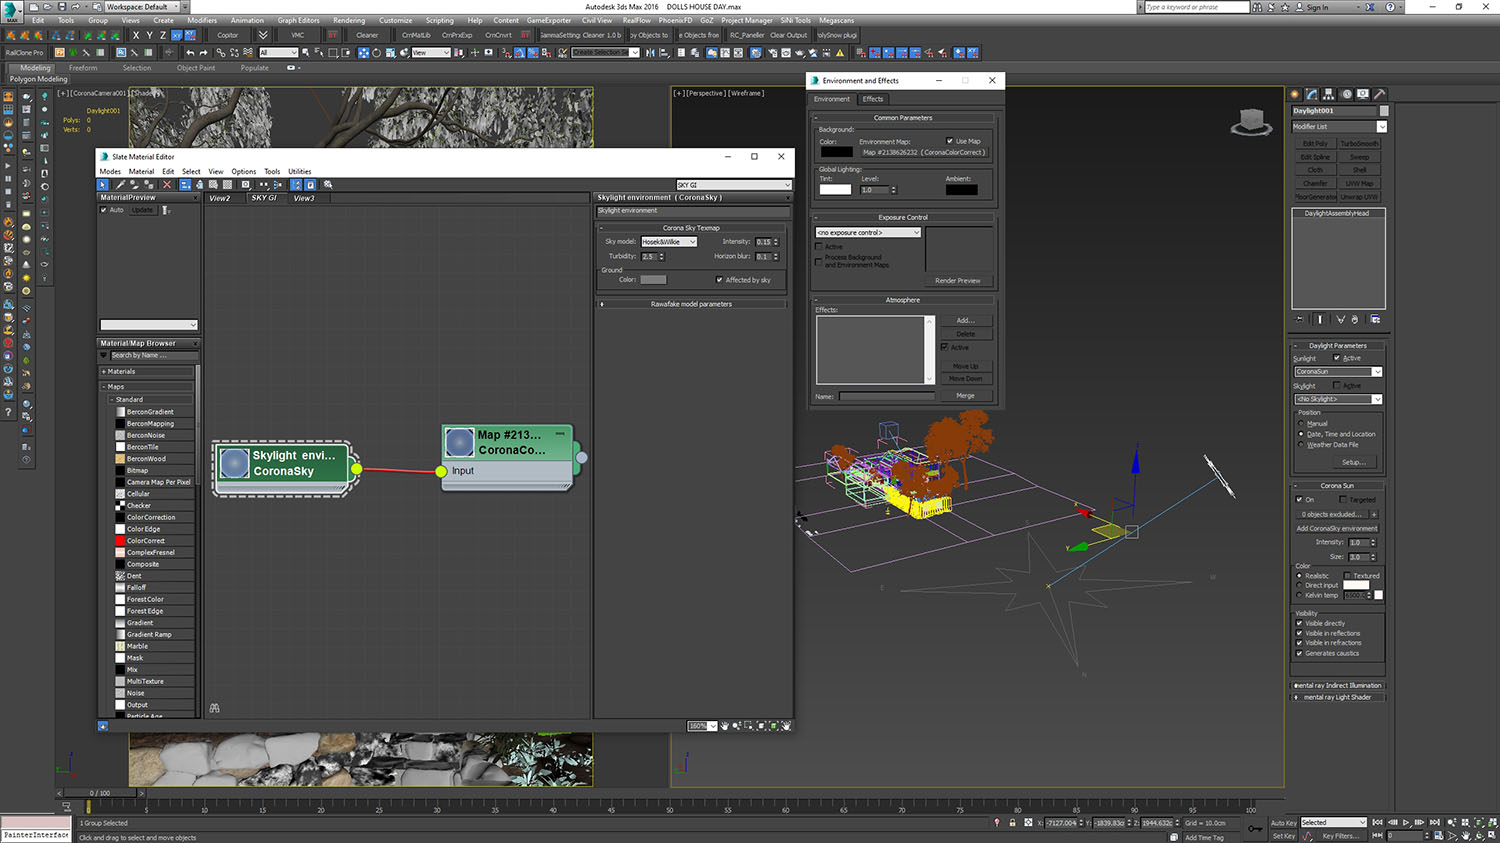
For daylight mood, we are using daylight system to get precision according to conditions at that location, and we use the corona sky at the environment map. We tweaked a bit using color correct. We don’t use HDRI on primary light because the height of the sun will restrict us, so it can make trouble to our scene because it’s difficult to control. And for the other reason, in this case, is the incoming sun and the global illumination is reduced by the surrounding trees, so we get imperfection lighting although using default corona sky. Cause every scene has a different case, we can’t use the same direction of the sun to another clip for the animation. When we were lighting, we use separate max file every camera path to enhance the scene.
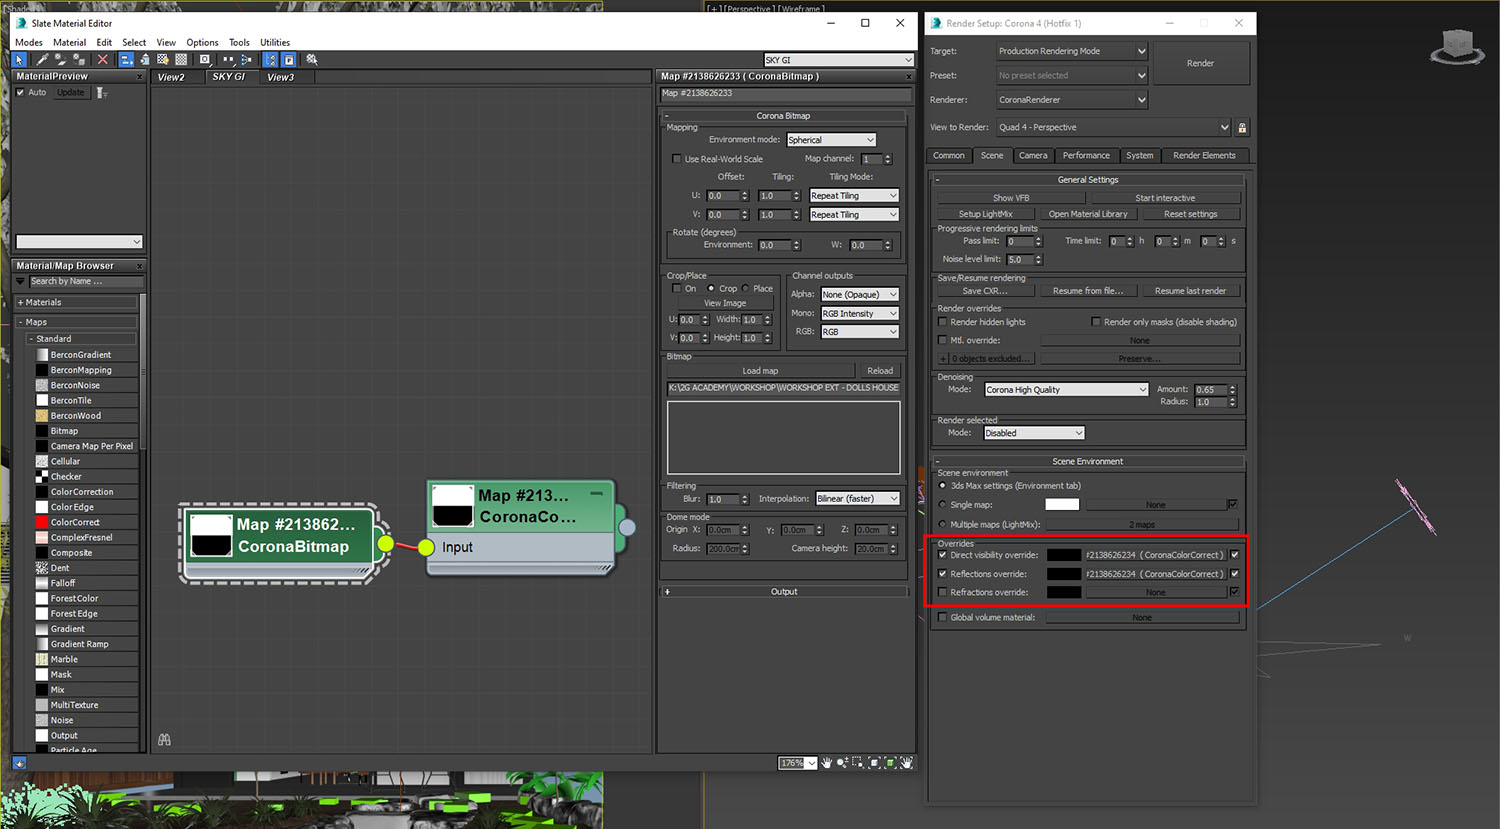
And for the background/sky, we use HDRI you can see at my setting above. We apply it to direct visibility and reflection. We tweaked a bit using color correct. We want to balance it in 3D, so we don’t take much adjustment at post-production. So as you can see at our raw render image bellow. We must adjust our lighting in max as much as possible so that we have no much trouble at post-pro; the point is easier for us when post-production, not to contrast and not to wash out. We give space between that for post-production. We don’t have a black point / over-bright at this result, and we are pleased about this.
And for the background/sky, we use HDRI you can see at my setting above. We apply it to direct visibility and reflection. We tweaked a bit using color correct. We want to balance it in 3D, so we don’t take much adjustment at post-production. So as you can see at our raw render image bellow. We must adjust our lighting in max as much as possible so that we have no much trouble at post-pro; the point is easier for us when post-production, not to contrast and not to wash out. We give space between that for post-production. We don’t have a black point / over-bright at this result, and we are pleased about this.
Rendering
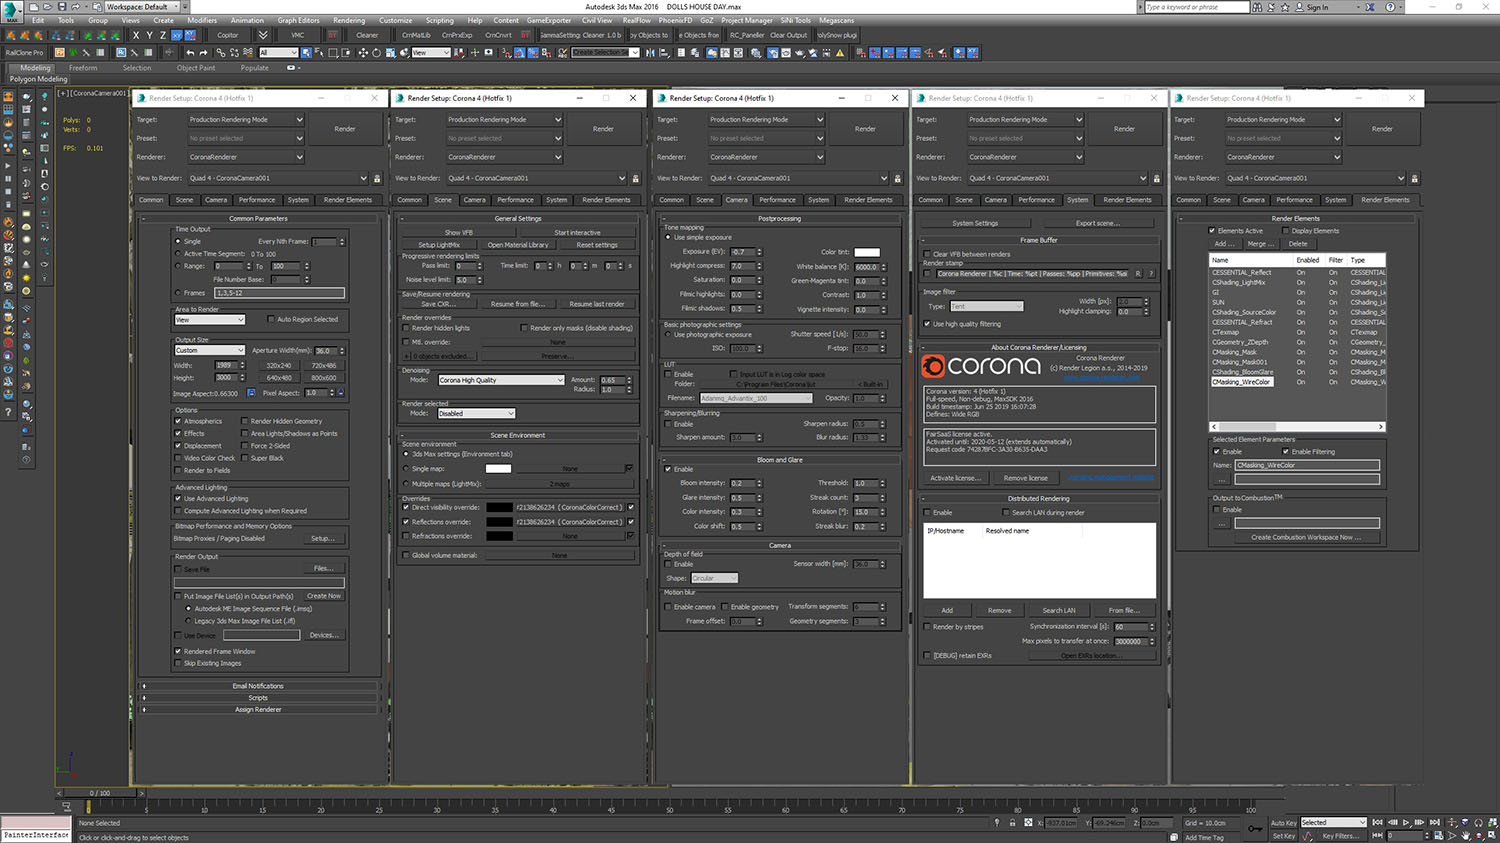
Now it’s time to render, you can see the setting on the image below for the still image, and we saved it as an EXR.
Now it’s time to render, you can see the setting on the image below for the still image, and we saved it as an EXR.
For the animation, First important thing before rendering the animation is, you must change the time output, you can use an active segment, or you can also use custom range. And make sure you save the production because the result will be a sequence. At progressive rendering limits, we use the pass limit, and we set at 50 because when we are rendering the animation, it will take much time. So we test it with one frame to ensure the noise and quality, and 50 passes we think the result is clean enough for animation. And the rendering time we get about 45 minutes for one frame. For output format, we use .tga (Targa), the usual resolution of TGA image files match those of the NTSC and PAL video formats. We don’t use .exr because the file will be large for animation. As you can see image below, For the other setting, is the same as the still image.
---
Color correction And Color Grading
Post-production
Here is our post-production process on a still image.
1. I open the EXR, and convert it to 16 bit.
2. I duplicate the rendered, For the blending mode I using Softlight to get the depth from the image, and we give hue saturation and clipping the pass to get the image not too saturated.

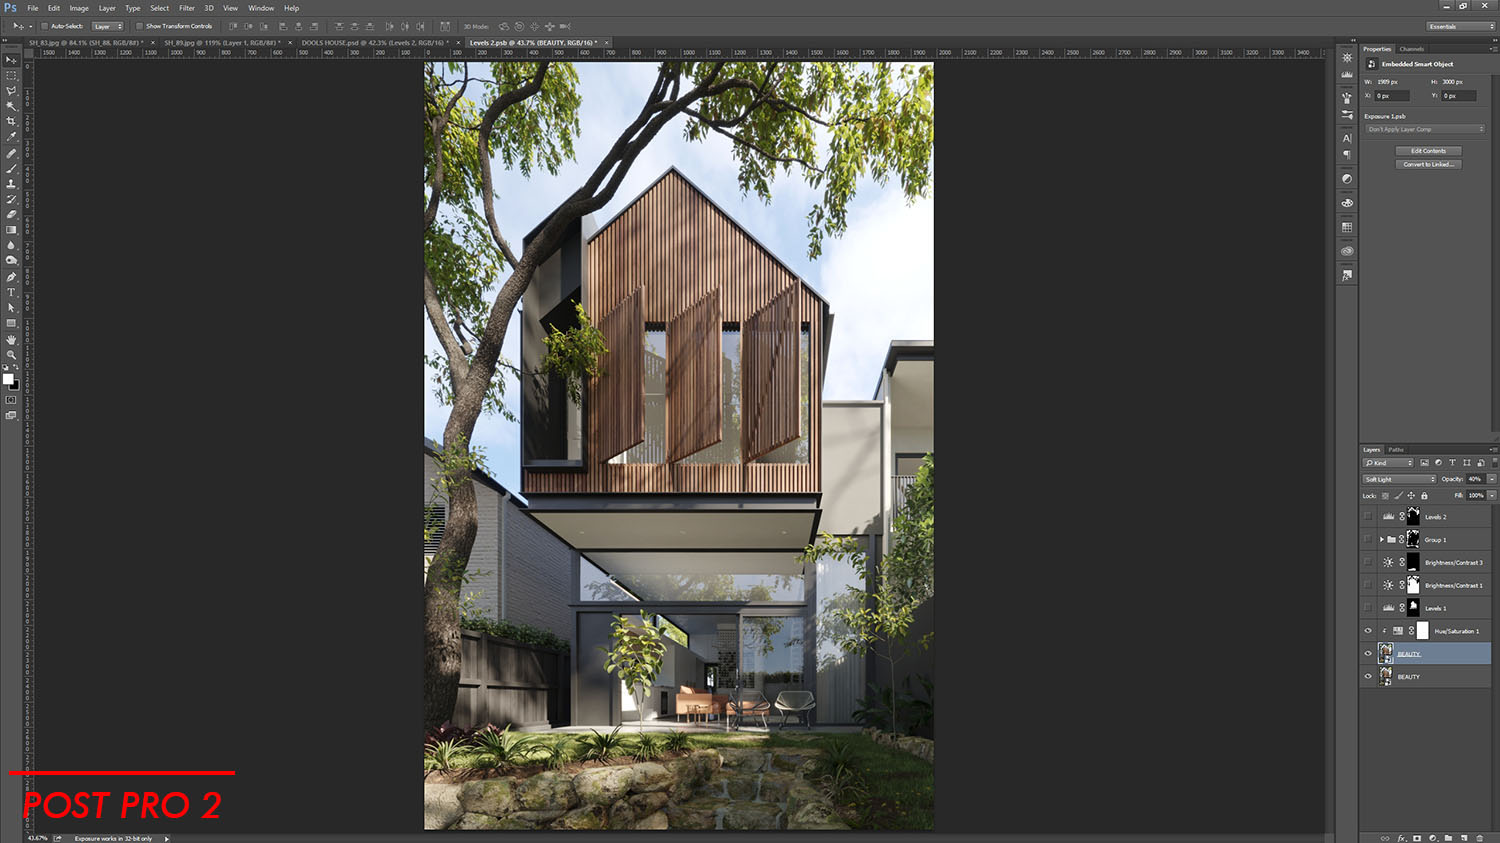
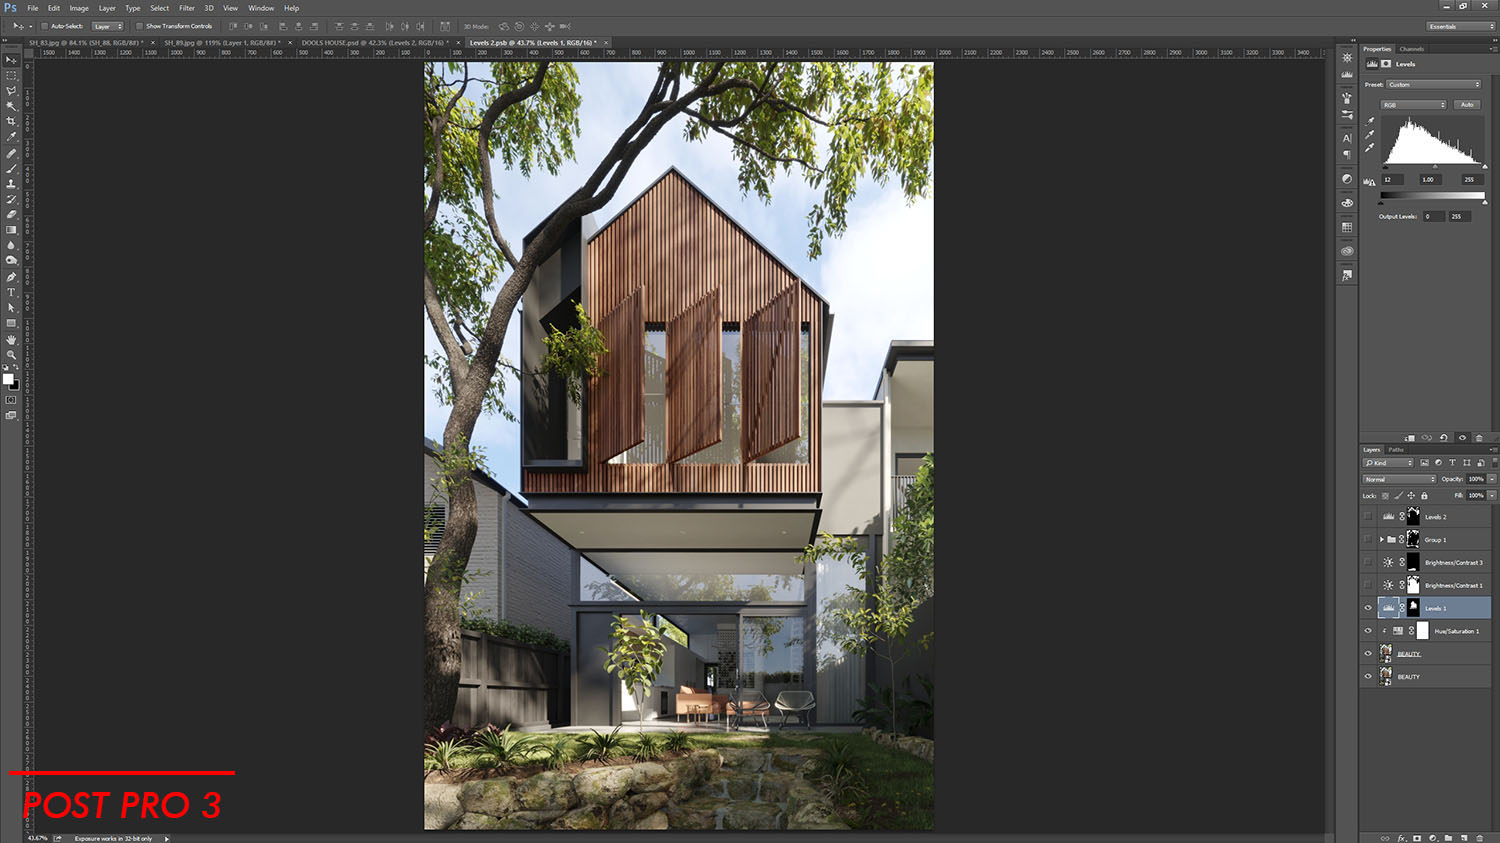
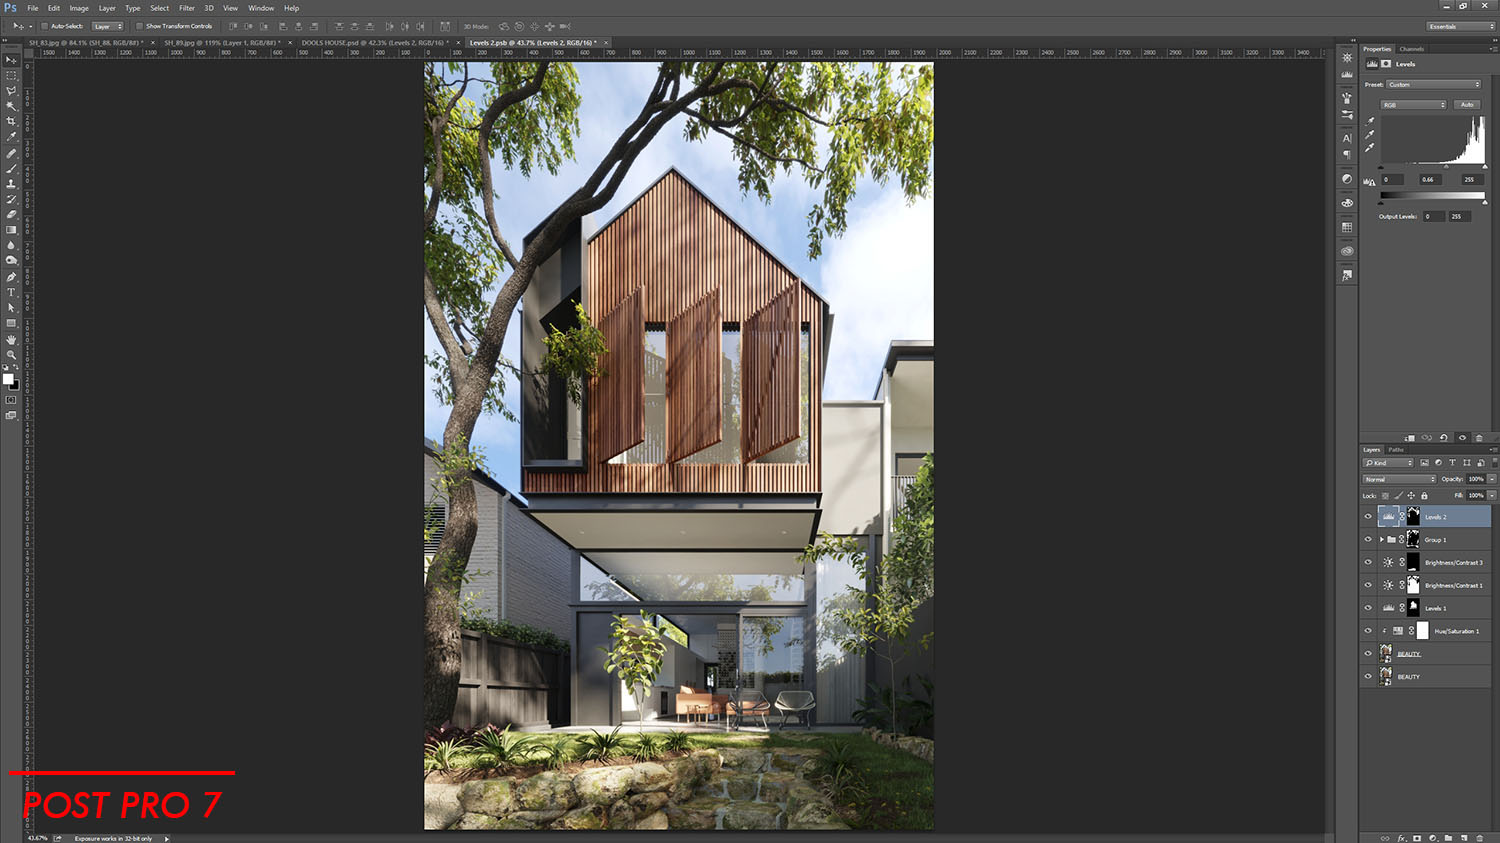
3. We added level in the area timber cladding, and we want to make it more contrast and a bit reddish.
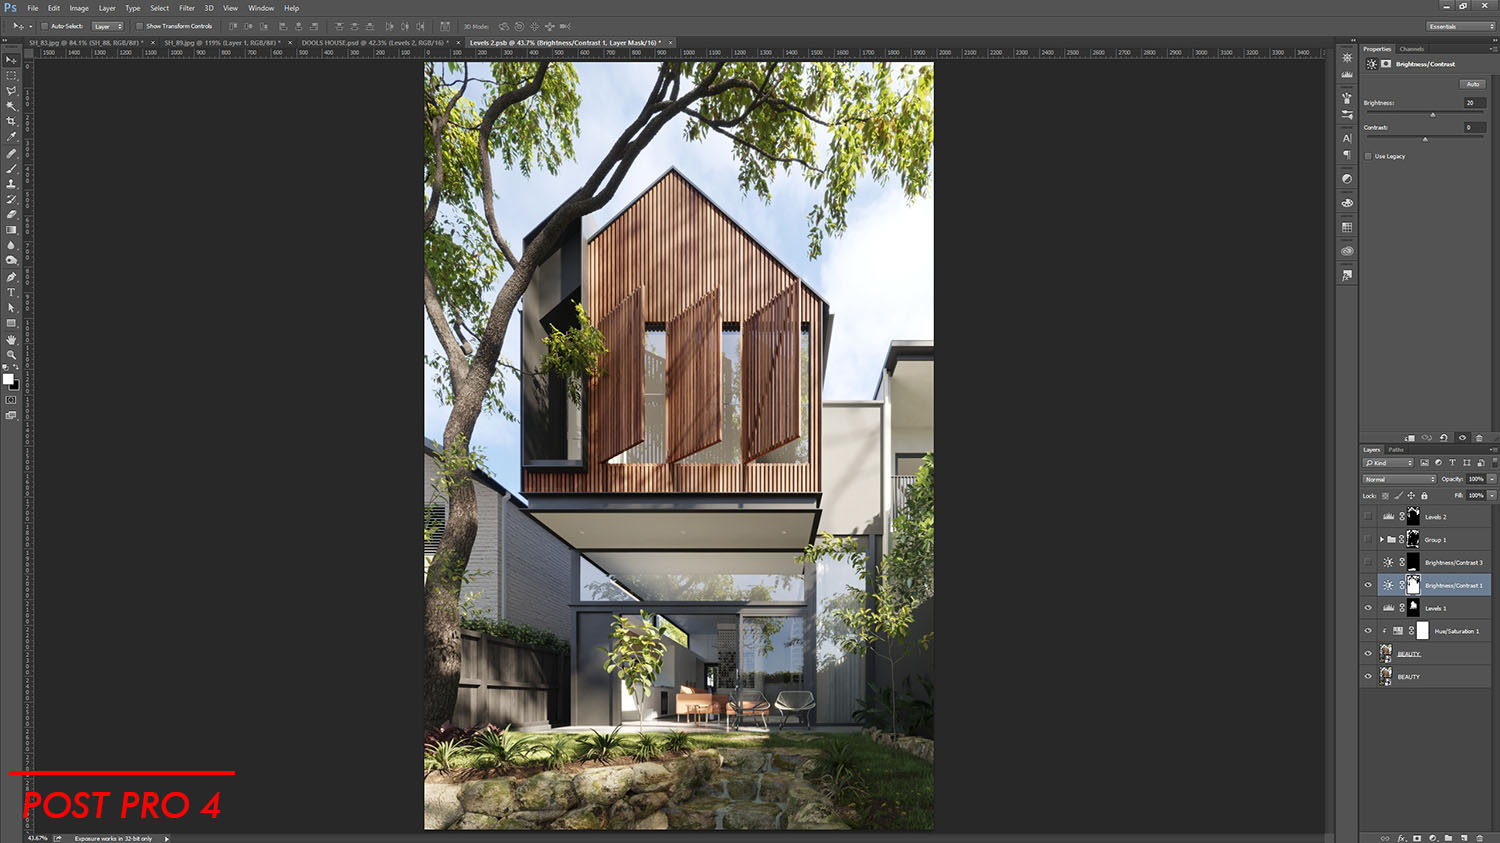
4. We brighten a bit the image, but we don’t want the sky included, so we using masking Alpha.
4. We brighten a bit the image, but we don’t want the sky included, so we using masking Alpha.
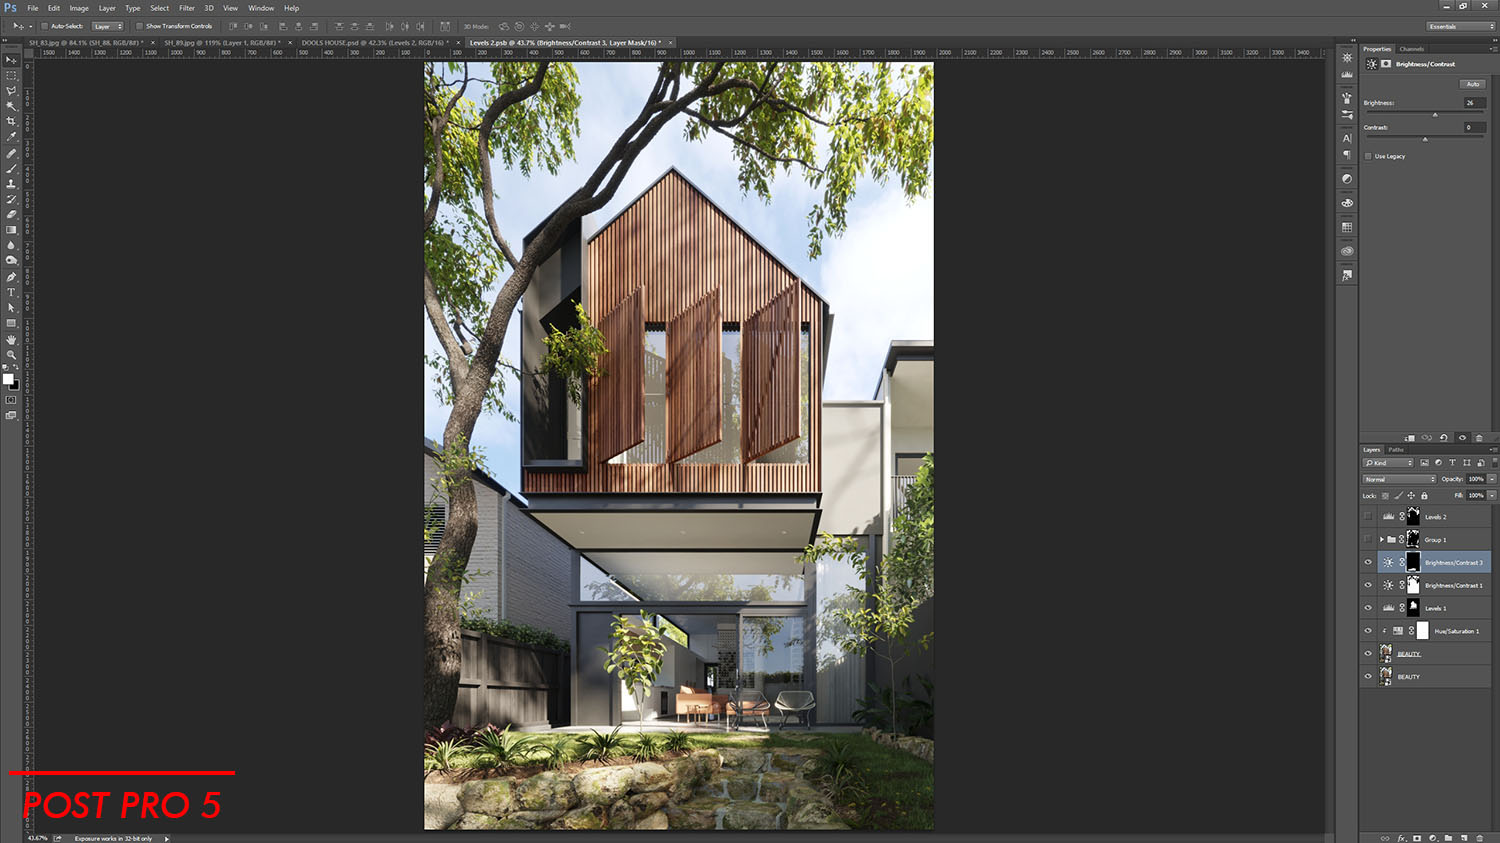
5. We don’t want the stone area not too dark, so we enhance it.
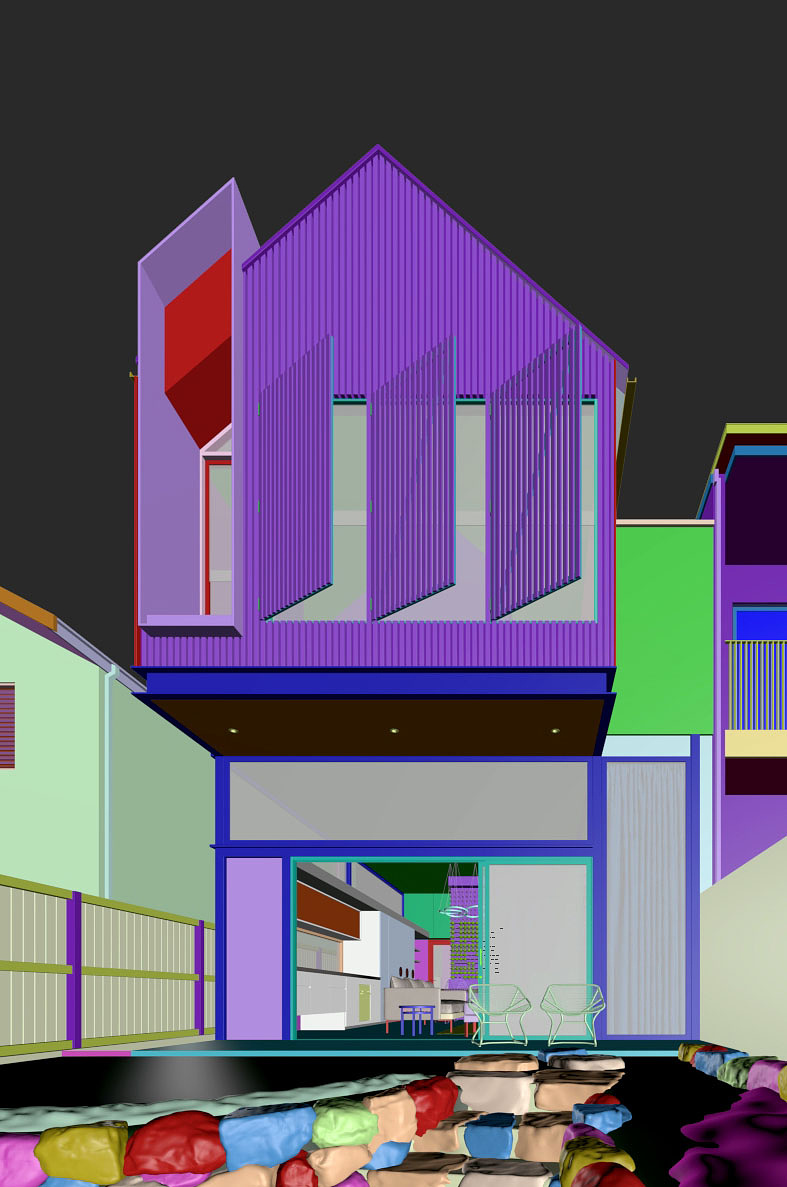
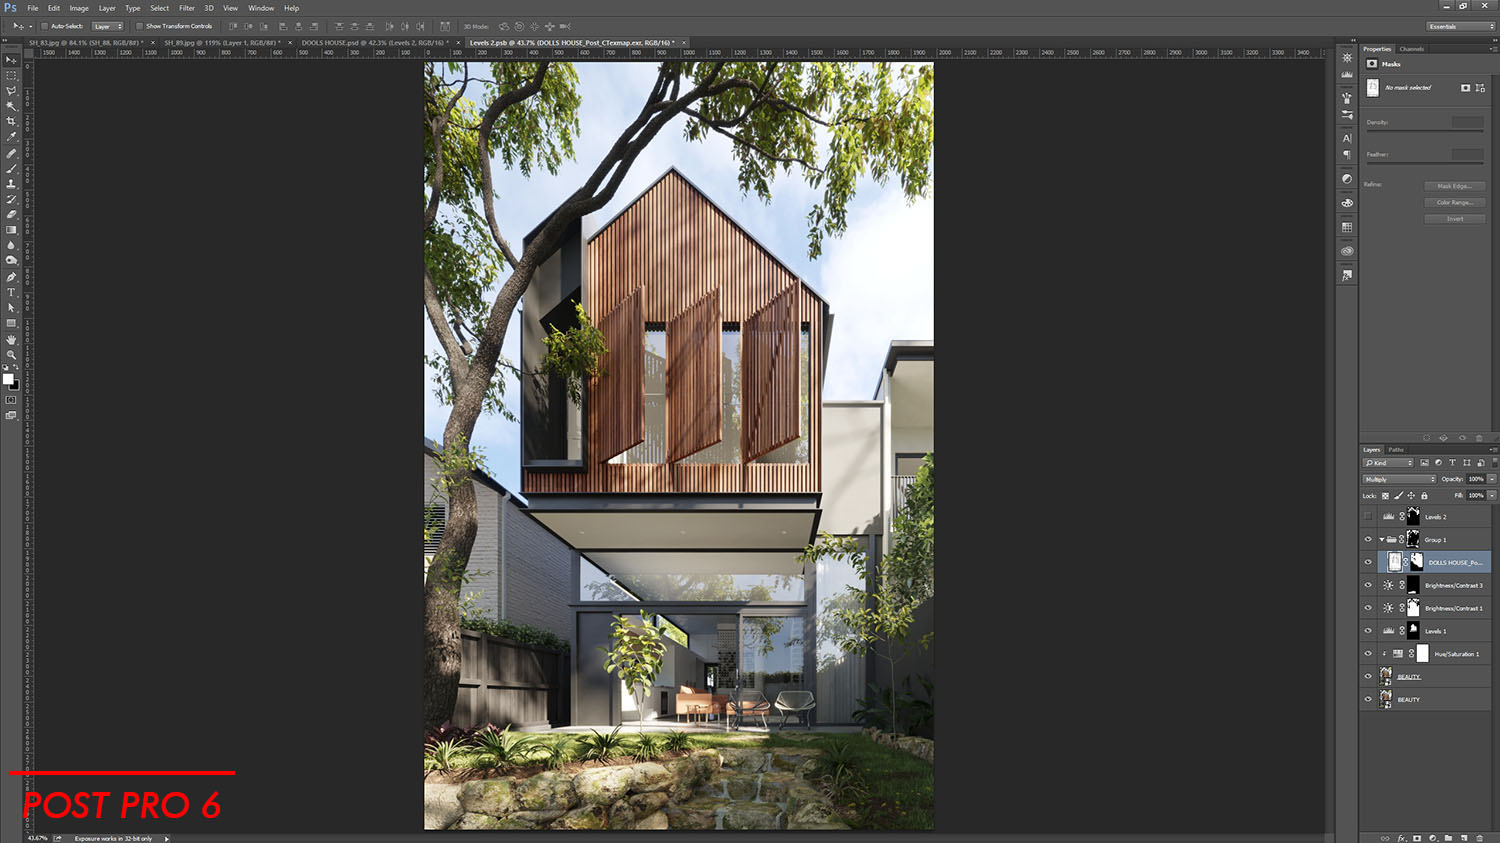
6. For the planting to get more depth, in this case, we added CTexmap and change the blending mode to multiply, and we use the planting mask that we have prepared on render element. For the opacity is done by feel, there is no fixed law about this.
6. For the planting to get more depth, in this case, we added CTexmap and change the blending mode to multiply, and we use the planting mask that we have prepared on render element. For the opacity is done by feel, there is no fixed law about this.
7. The blue color of the sky is pale, so we added level to make it more vibrance color/bluish.
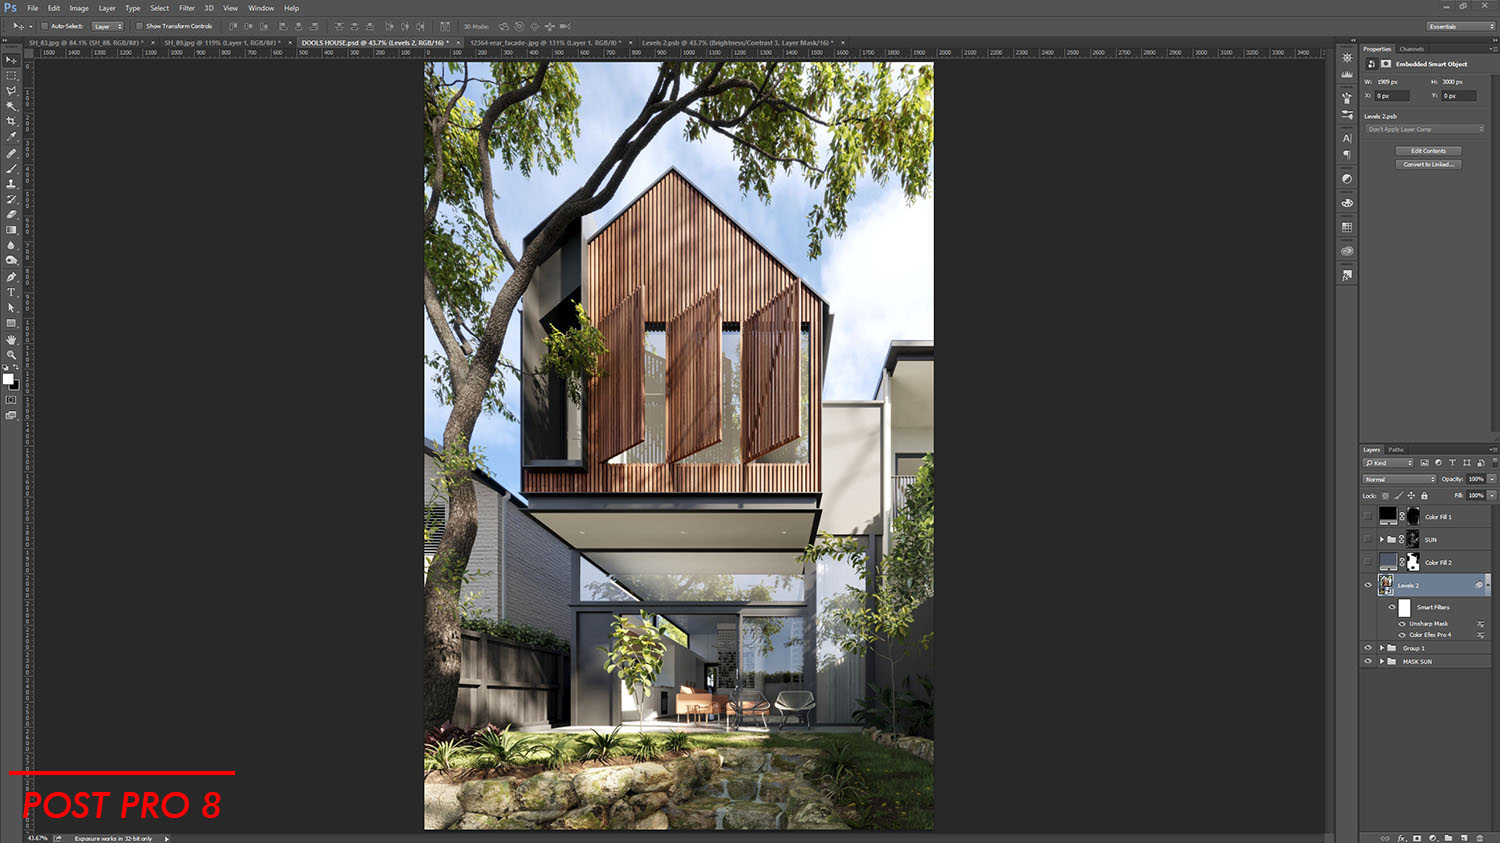
8. After that, its time to use Color Efex Pro 4 by nik collection, First I convert my work to smart object because smart object preserves an image’s source content with all its original characteristics, enabling you to perform nondestructive editing to the layer. Next, I added unsharp mask and color effect pro to get the image more crisp result.
8. After that, its time to use Color Efex Pro 4 by nik collection, First I convert my work to smart object because smart object preserves an image’s source content with all its original characteristics, enabling you to perform nondestructive editing to the layer. Next, I added unsharp mask and color effect pro to get the image more crisp result.
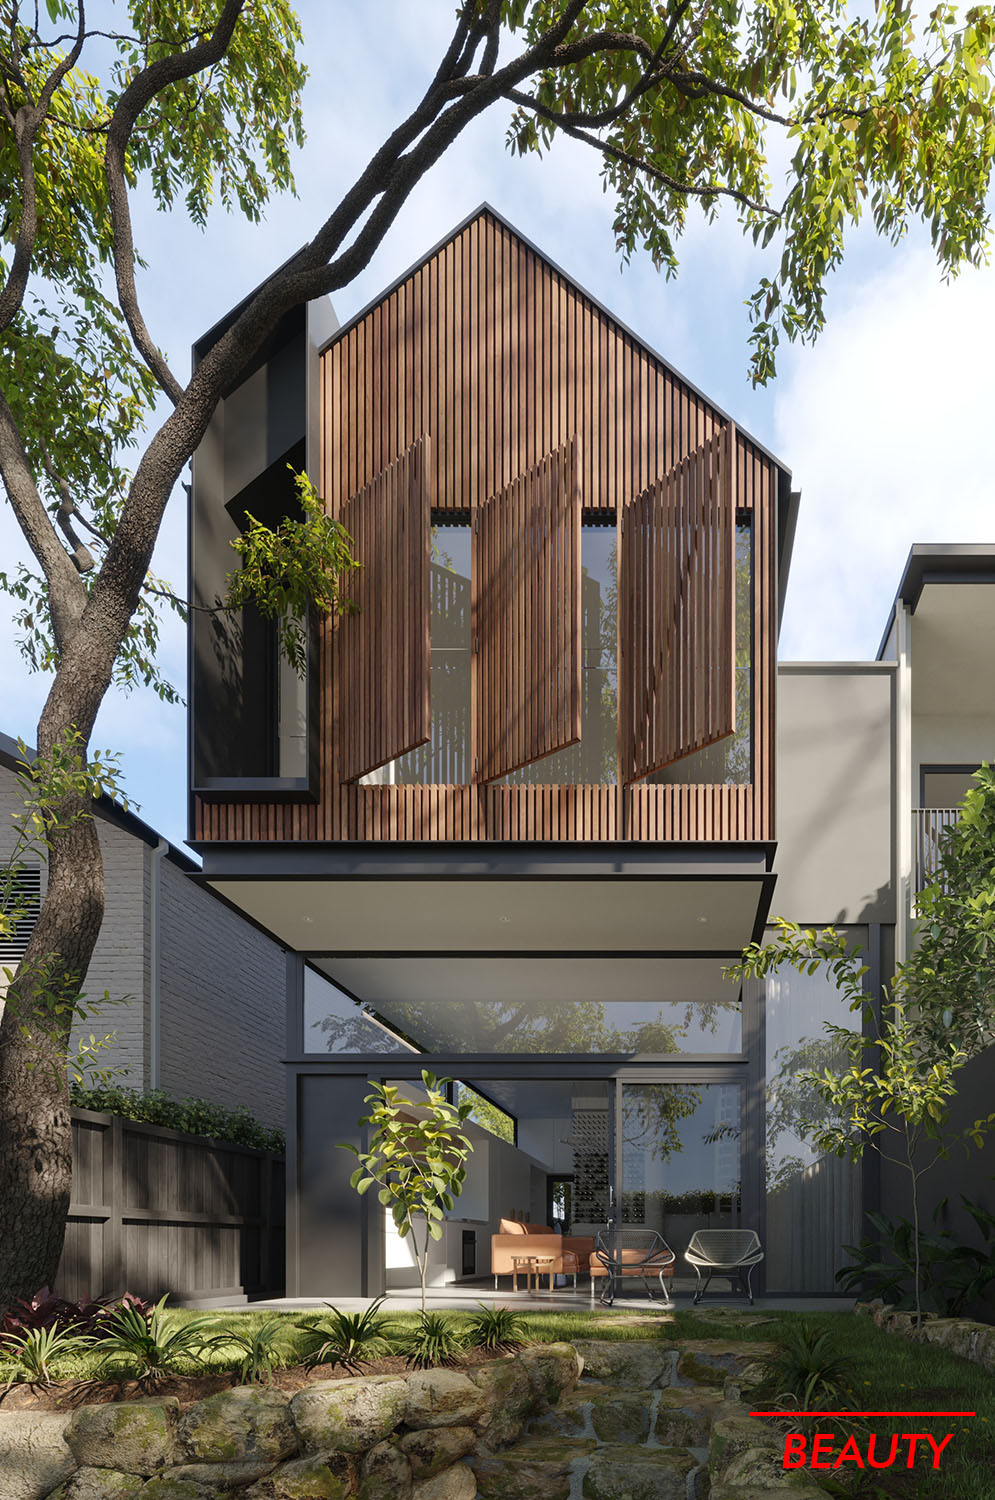
From images below, you will find our CG Render in the right and Photo Reference in the left.
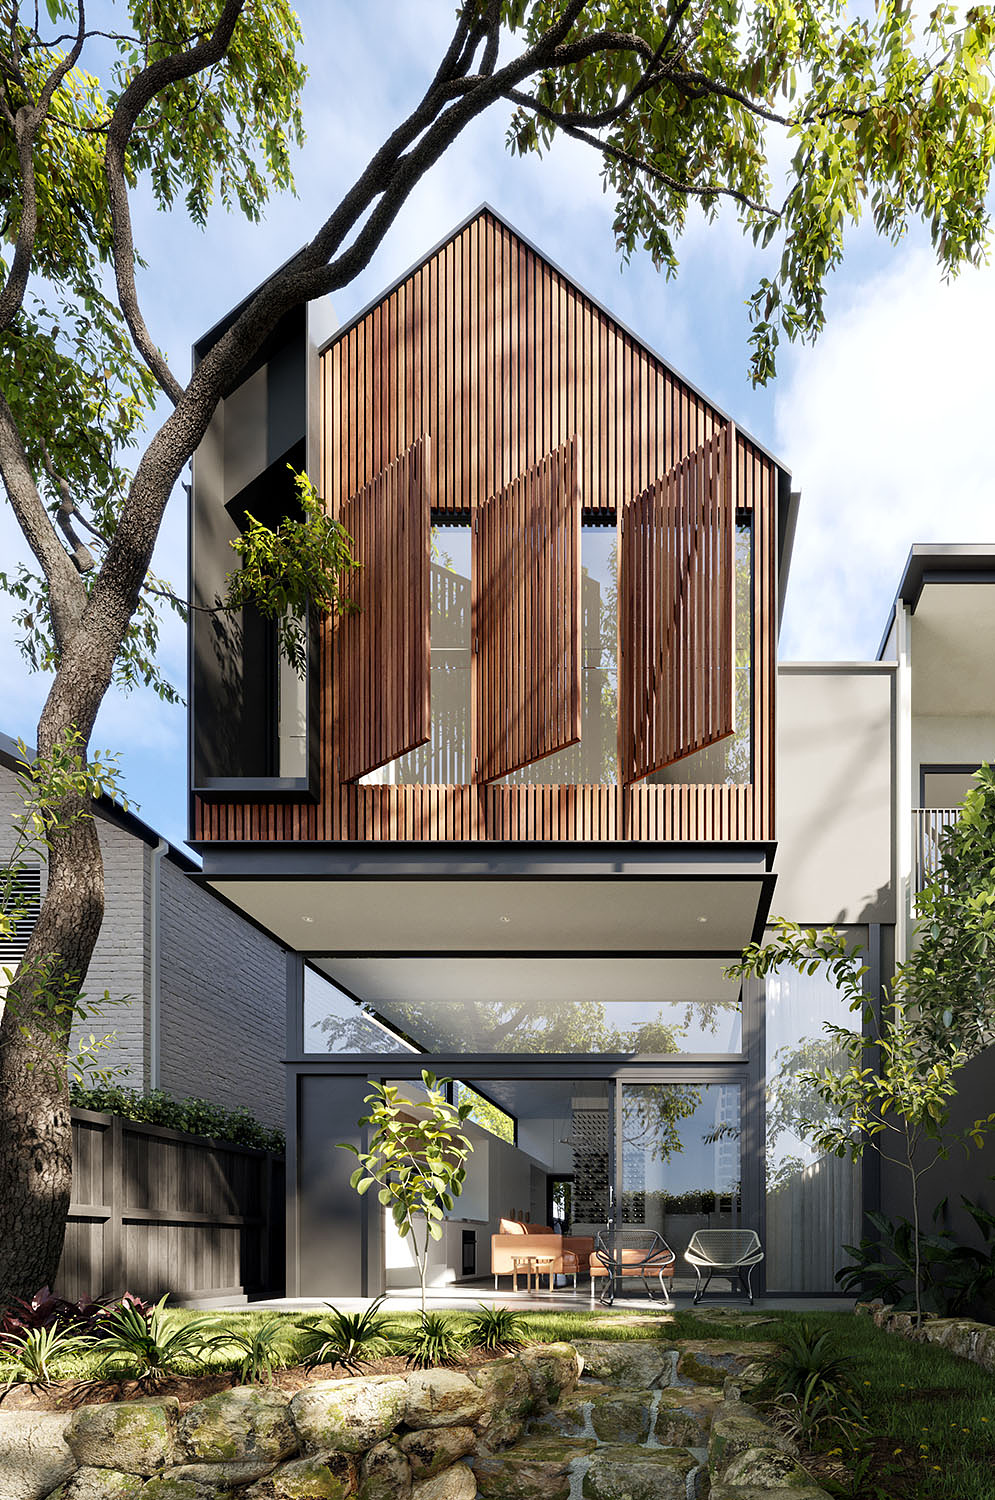
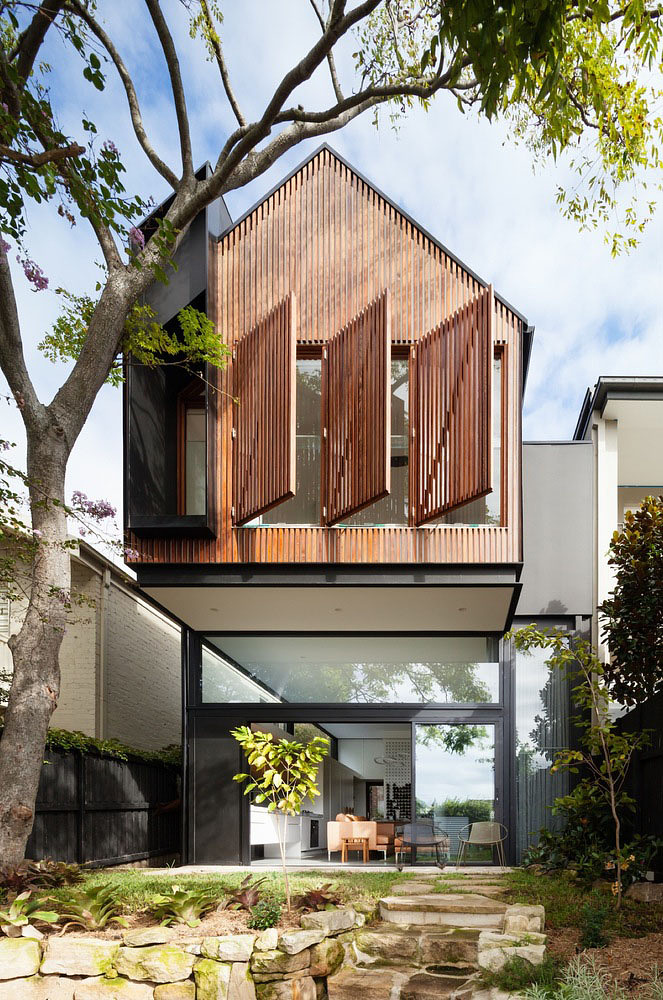
From this result, actually, we are already approaching reference photos. Still, we are not finished here, and maybe we can enhance it. After seeing the result, our image looks neutral, so we give color grading to provide the image with a more dynamic color.
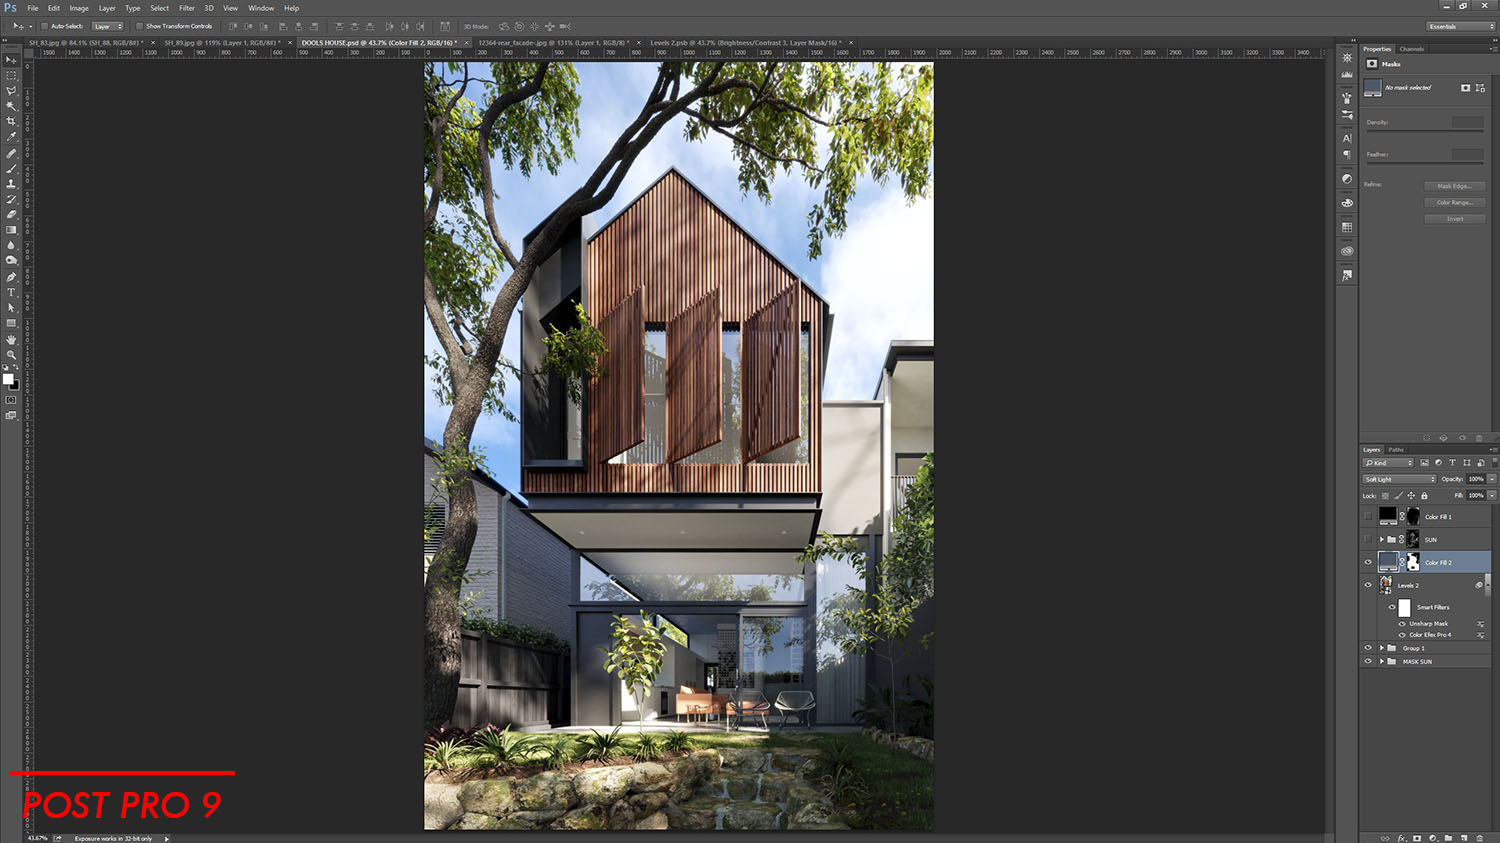
9. I want to make it bluer,I added blue color fill and change the blending mode to soft light and exclude any highlighted area using mask.
9. I want to make it bluer,I added blue color fill and change the blending mode to soft light and exclude any highlighted area using mask.
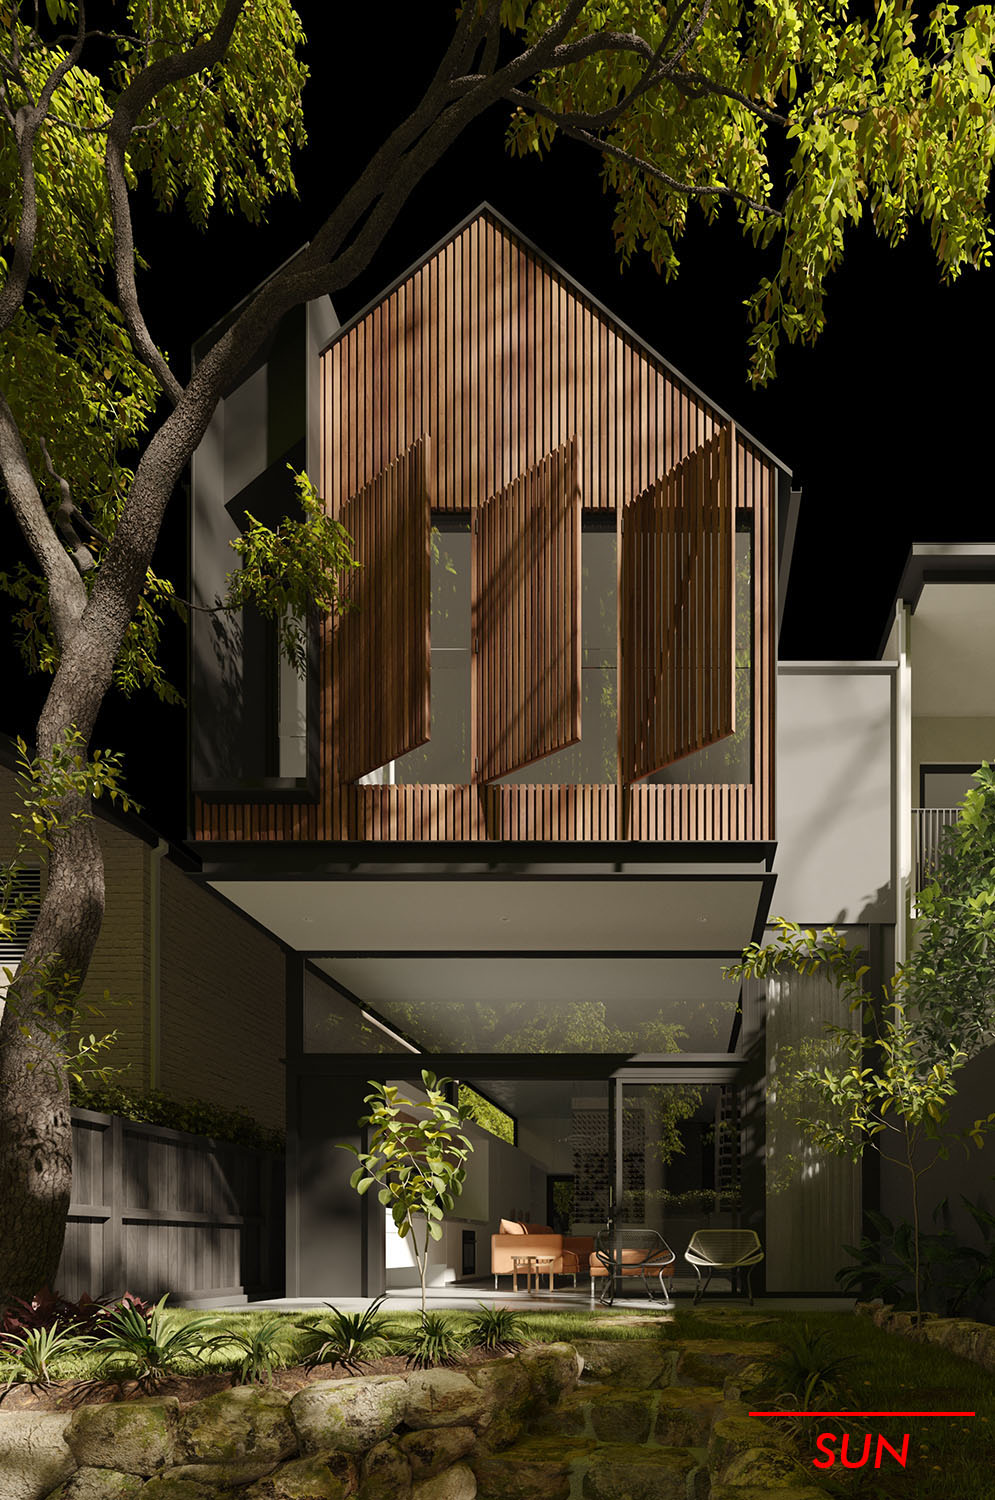
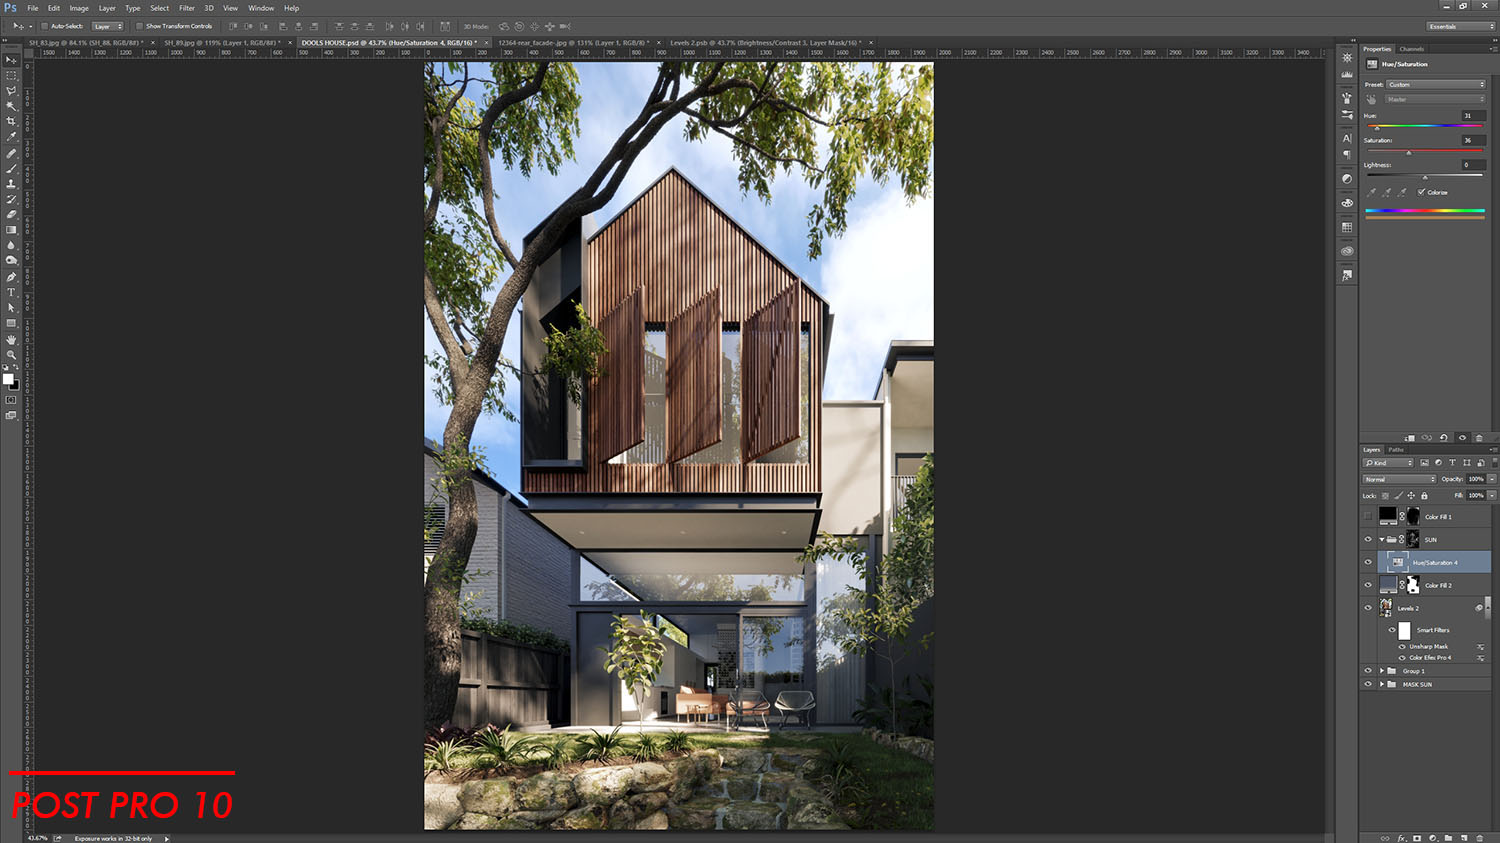
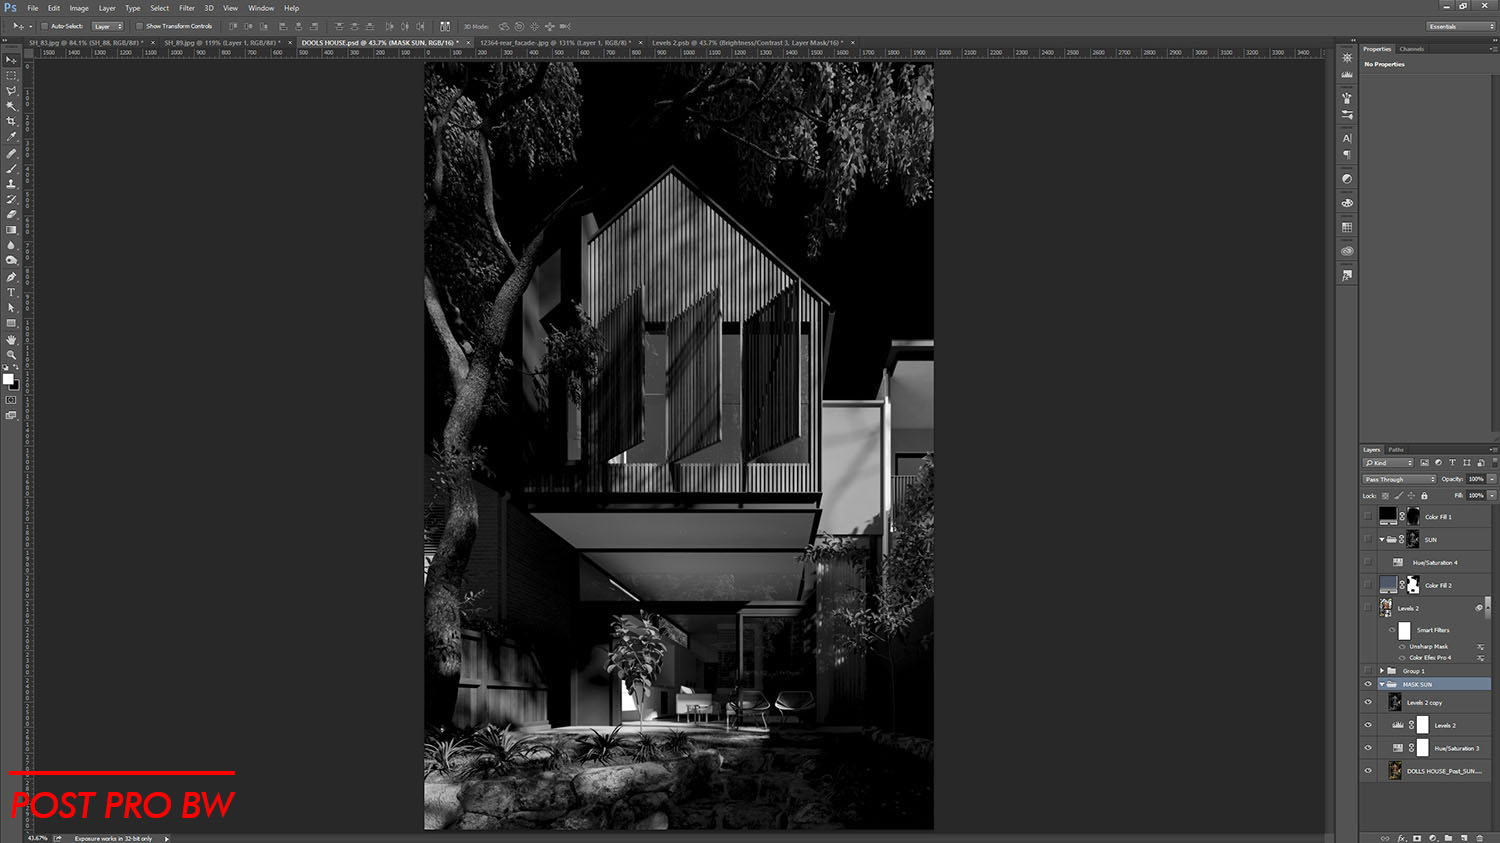
10. After that, I want the sunlight warmer, so I added hue saturation. For the masking, we use light select sun from rendering element, and we tweak it to black and white, and we adjust the level until we get what we want.
11. For the last touch up, I added a vignette effect.
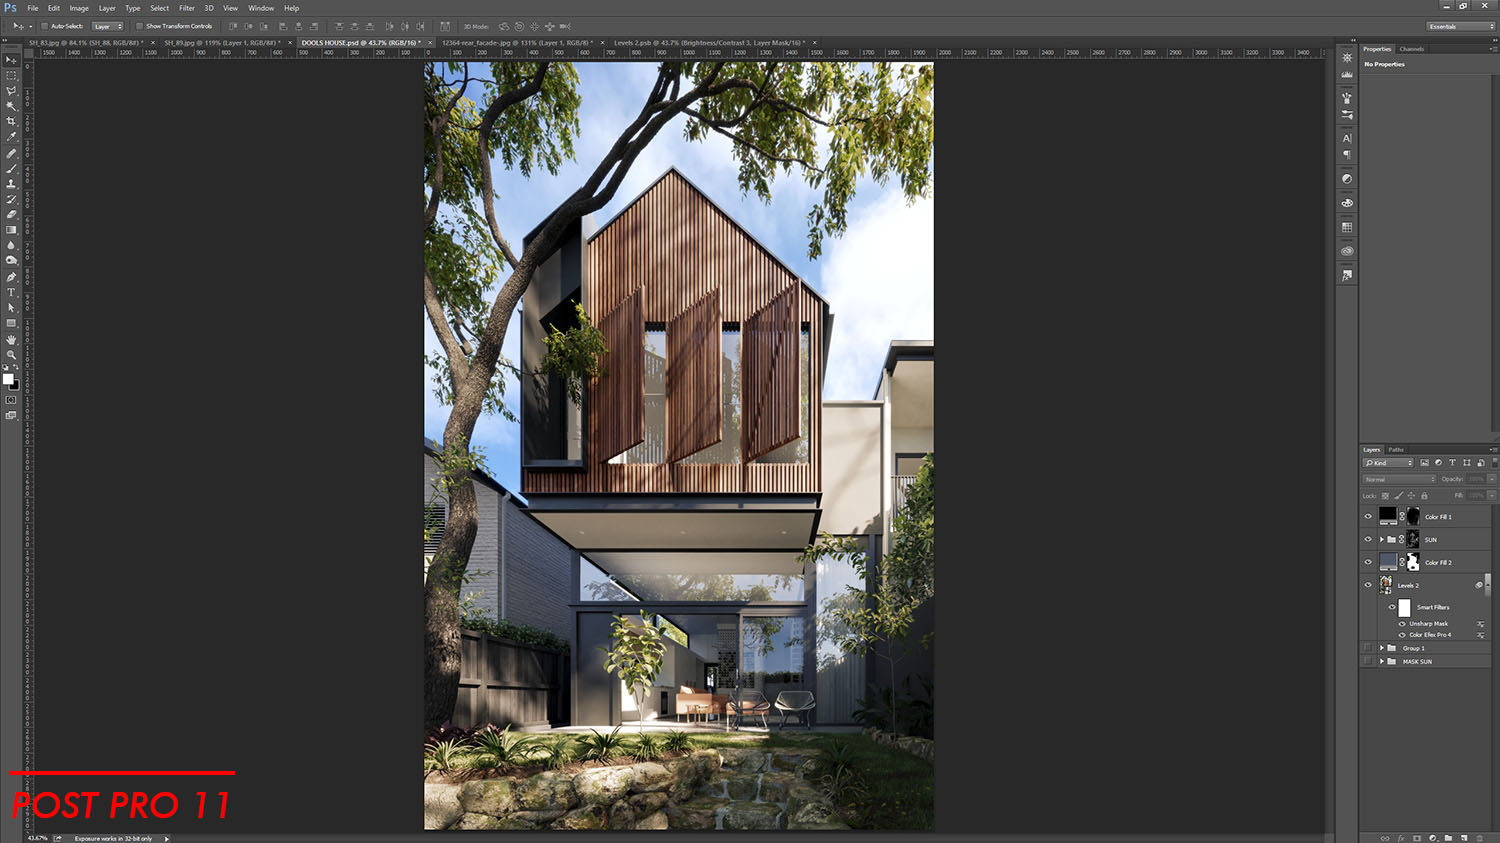
And this is the final result it’s much better than before. We want the mood is cozy, and we can feel cold and warm together.
Well, there is still some other last touch, but I guess you can pick this up from here and go on pretty good on your own…
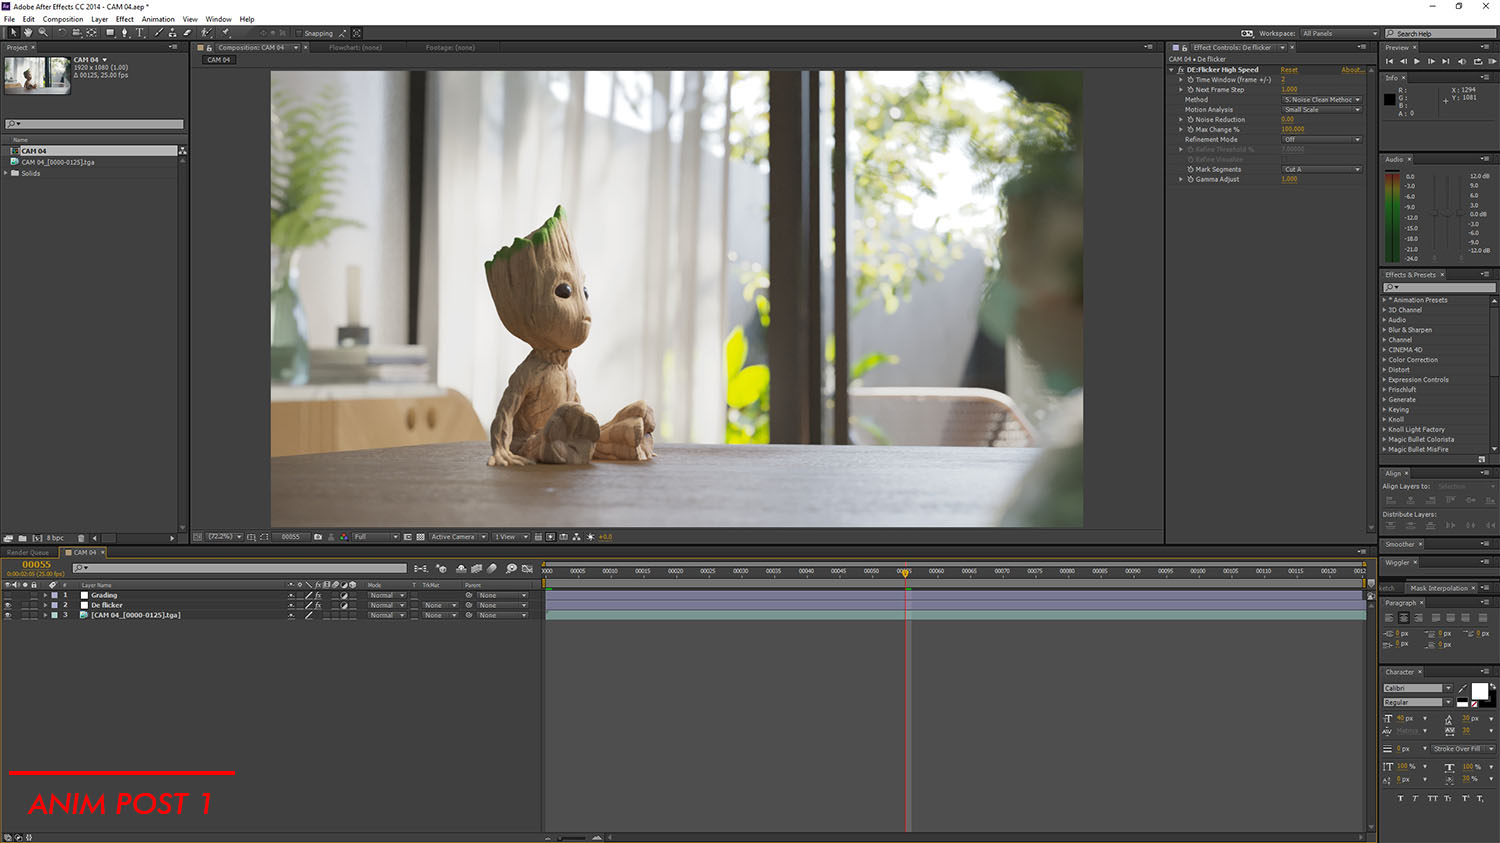
For the animation, we already have raw not too contrast. We give space between that for post-production. As you can see image above, we don’t make much adjustment here.
1. I added deflicker to reduce the flicker.
Well, there is still some other last touch, but I guess you can pick this up from here and go on pretty good on your own…
For the animation, we already have raw not too contrast. We give space between that for post-production. As you can see image above, we don’t make much adjustment here.
1. I added deflicker to reduce the flicker.
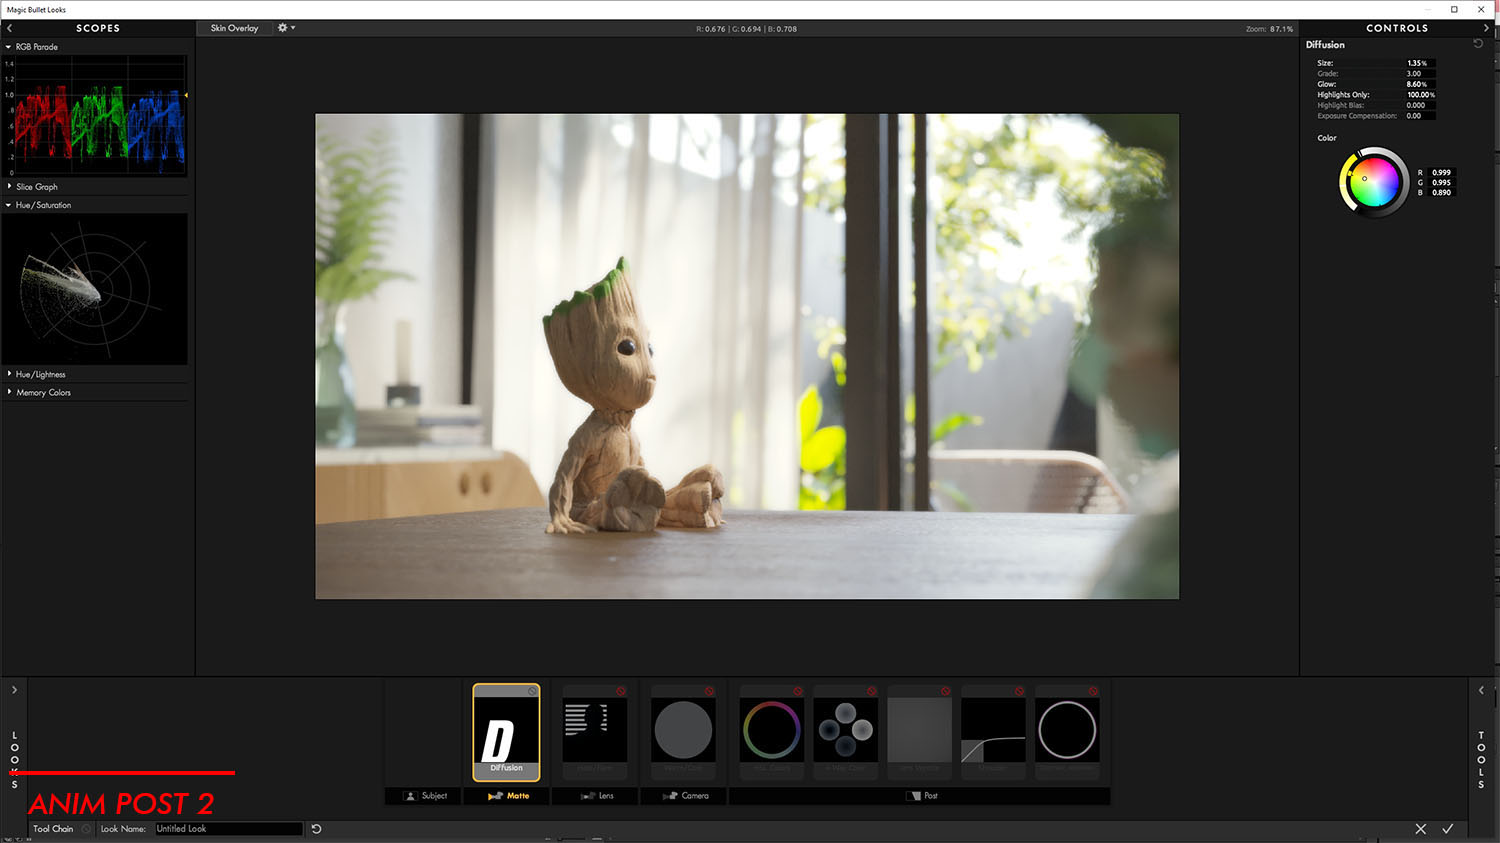
Now it’s time to use magic bullet photo looks for color grading. To adjust the basic colors used to change or enhance the nuances of our animation, to get cinematic looks. With color grading, the video can have different looks. That means cinematographers can create or manipulate the nuance of the setting of the place so that it looks different from the original. The layering system magic bullet is from left to right. This step can be back and forth with another step.
2. For the starting point, I added diffusion to spreading all of the element color at this scene more widely. This effect gives the movie to feel the atmosphere. Because we have a dominant color of the sun here, we tweak the parameter and change color to yellow.
2. For the starting point, I added diffusion to spreading all of the element color at this scene more widely. This effect gives the movie to feel the atmosphere. Because we have a dominant color of the sun here, we tweak the parameter and change color to yellow.
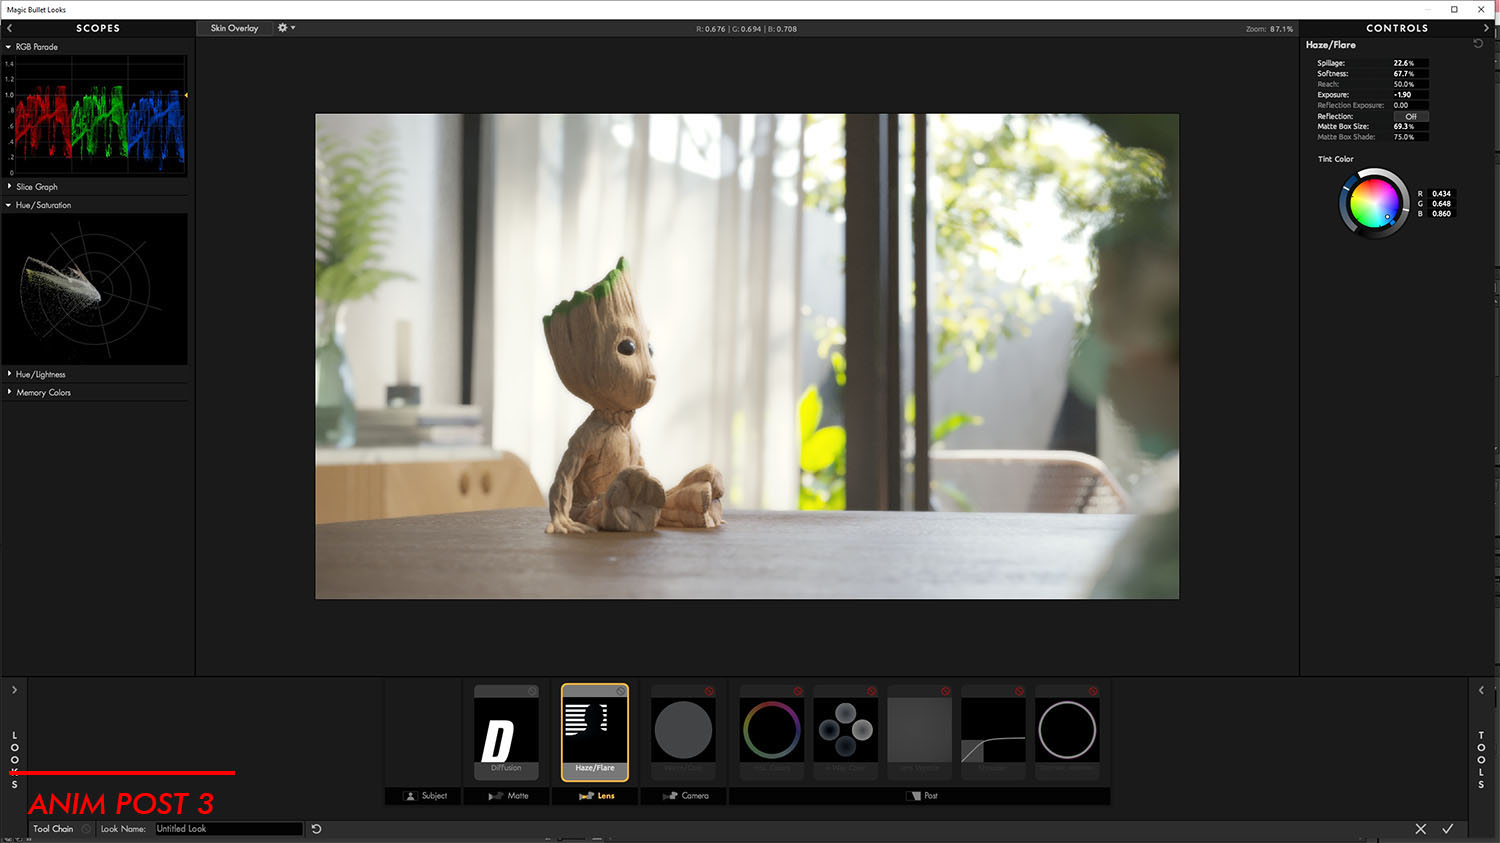
3. Next, we added Haze/flare; this adjustment we think is required to use, because this effect very helpful to get natural effect atmosphere. For the setting, you can see the image above, we tweak the color to blue. To get airy effect.
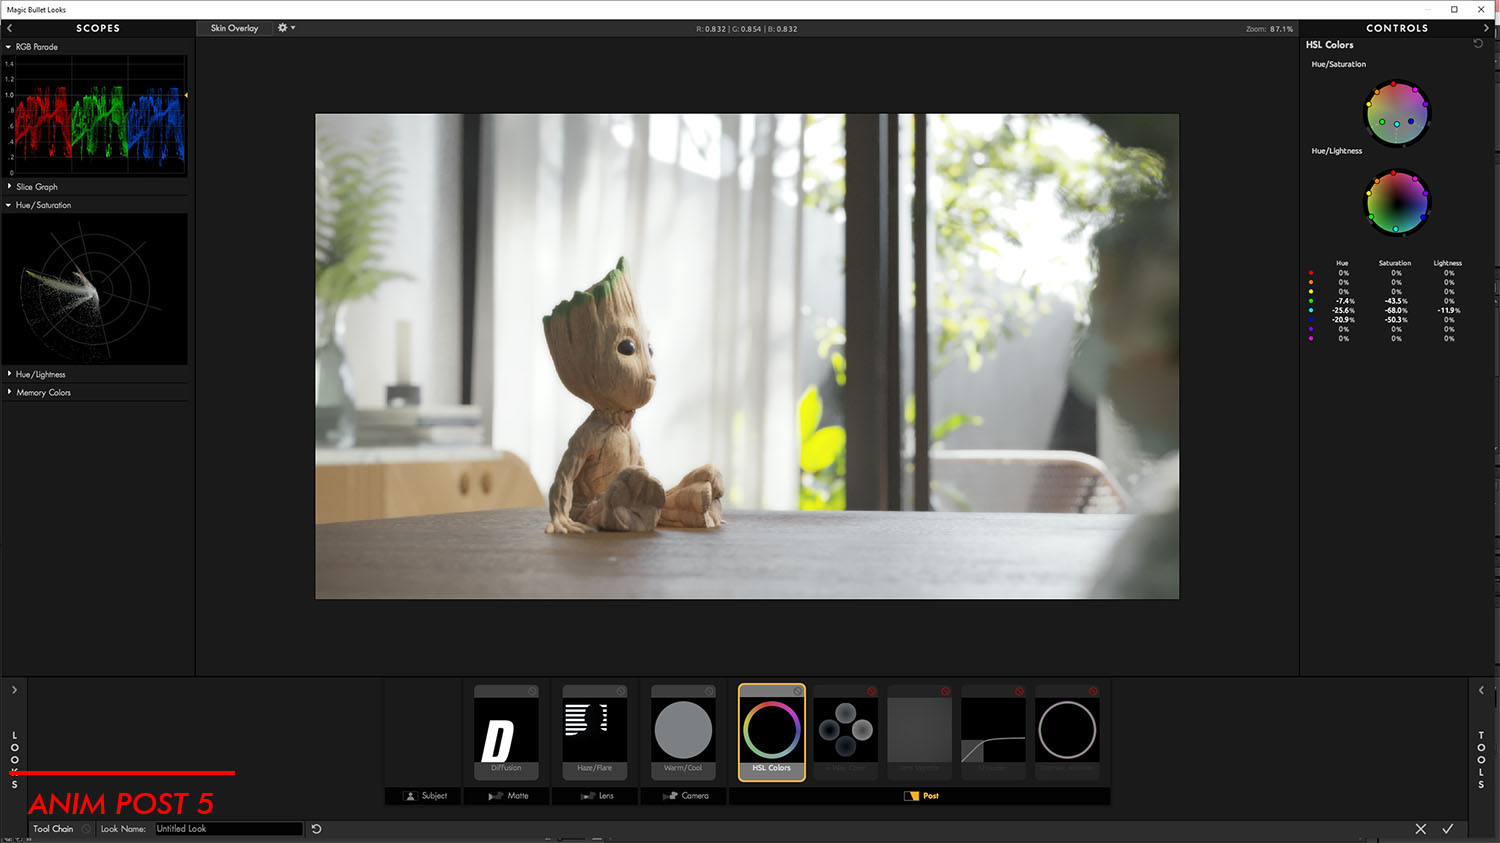
4. The result maybe it too warming overall, So we add warm and cool and tweak it a bit cool.

5. Next, I added HSL Color to control the color. In this case, I don’t want the color blue and green to vibrance, so I desaturate it because I want to get the bluish on 4-way color adjustment later.
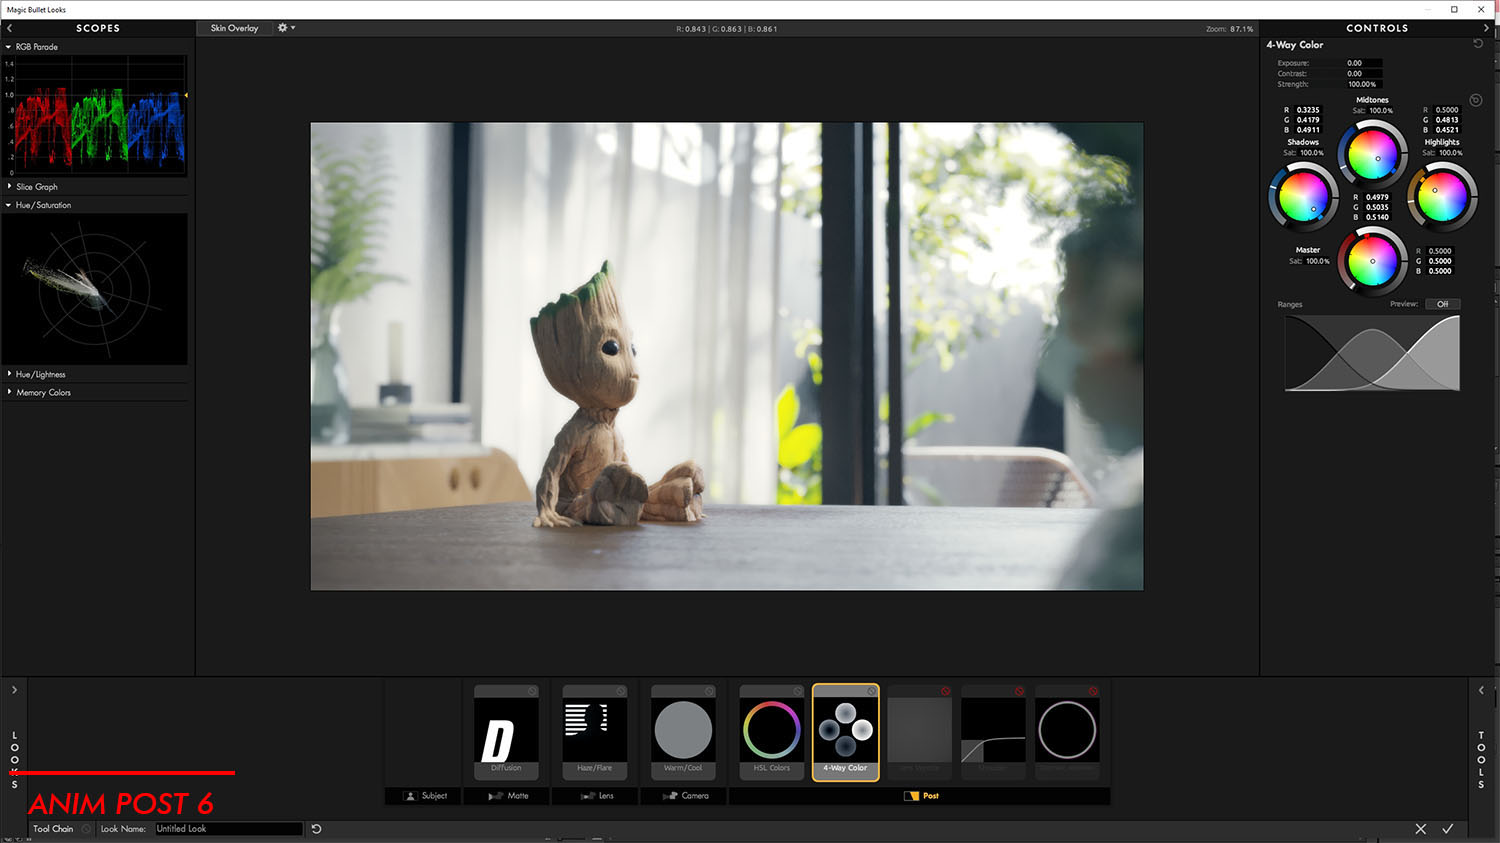
6. Now is a step to get cinematic looks to manipulate the color tone in our movie. We use 4-way color. First, we must learn which area shadows, mid-tones and highlights in this step just tweak the parameter color to see the effect. After that for setting the mood we starting to tweak the shadow to blue, we can also adjust the gamma to control the brightness and not taking effect at area mid-tones and highlights, so we can get contrast from this step. This is the reason why our render not contrasts, and for the mid tones, we tweak the color a bit blue. And tweak the highlights to orange. We want the mood is cozy, and we can feel cool and warm together.
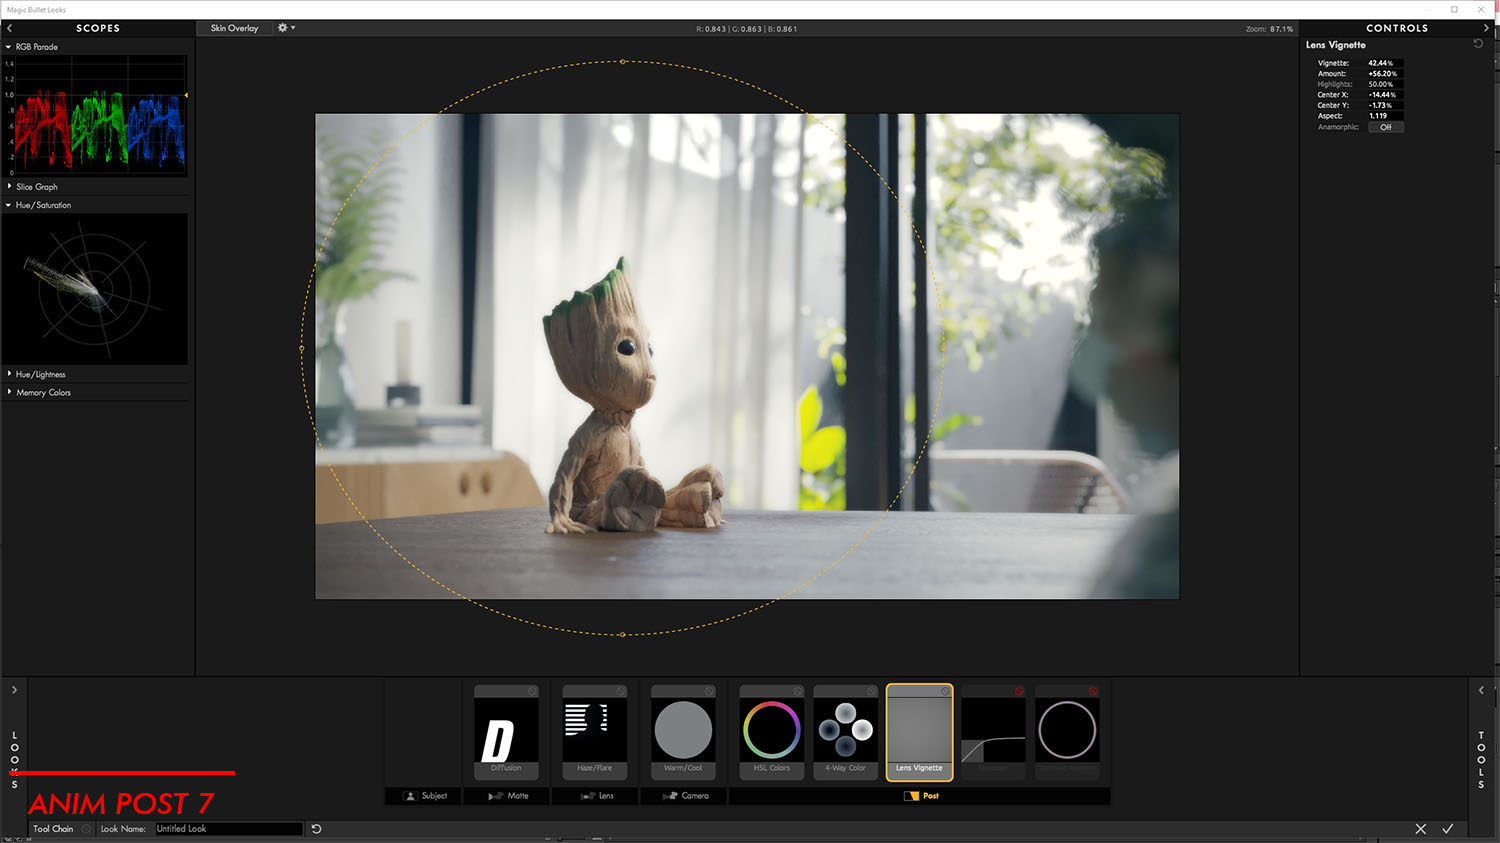
7. Next, I added lens vignette to directing our focus to the actor.
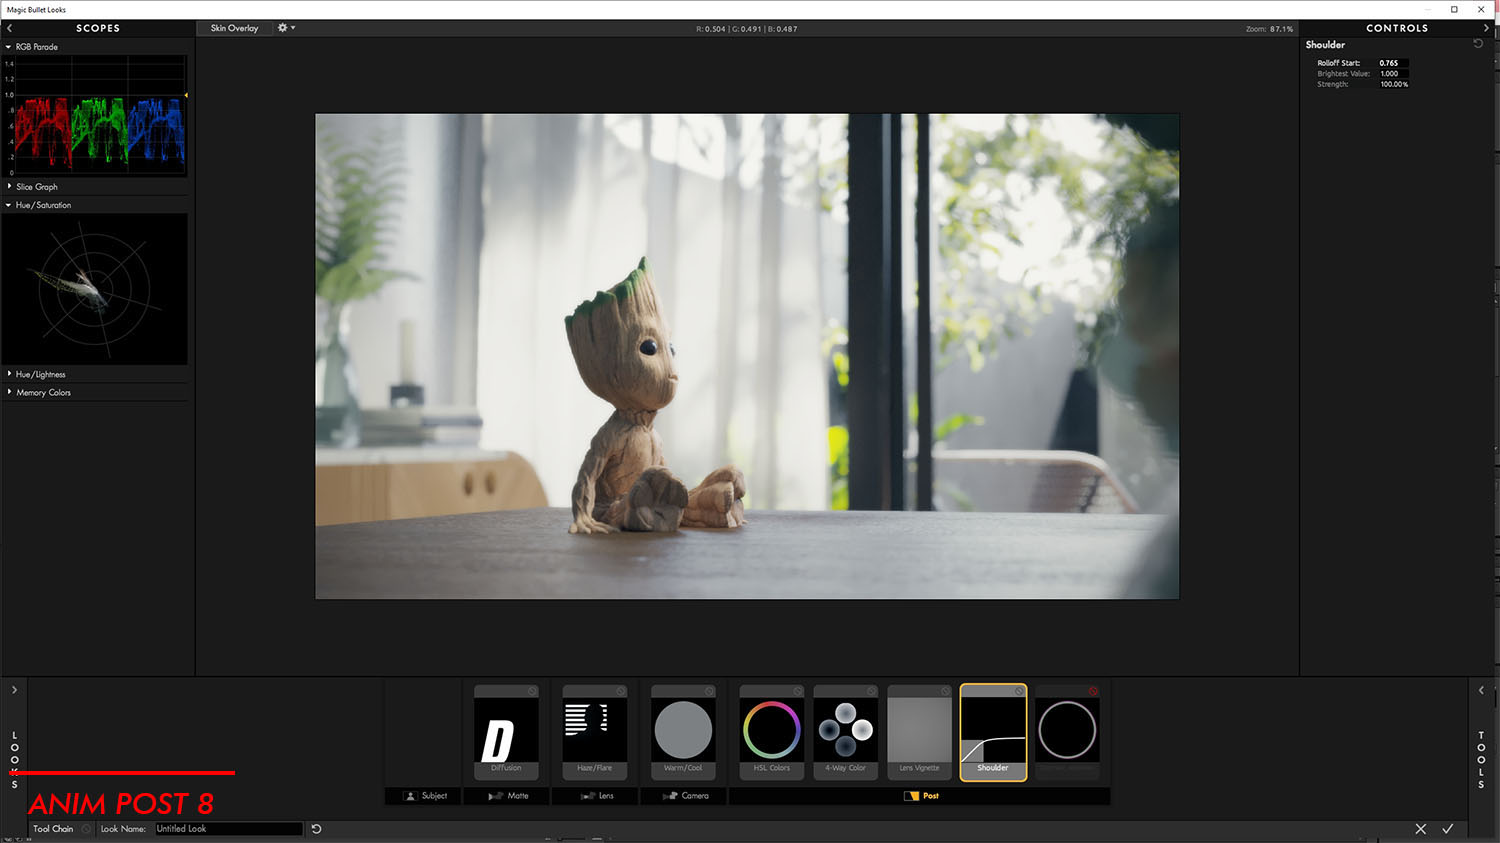
8. Next, we add shoulder for keeping our bright highlights legal in our composition. You can check it on the left up corners you can see scopes. You can see the RGB parade if our RGB color surpass 1 it means we have over the bright area. So this tool is to reduce the over bright area to under 1.
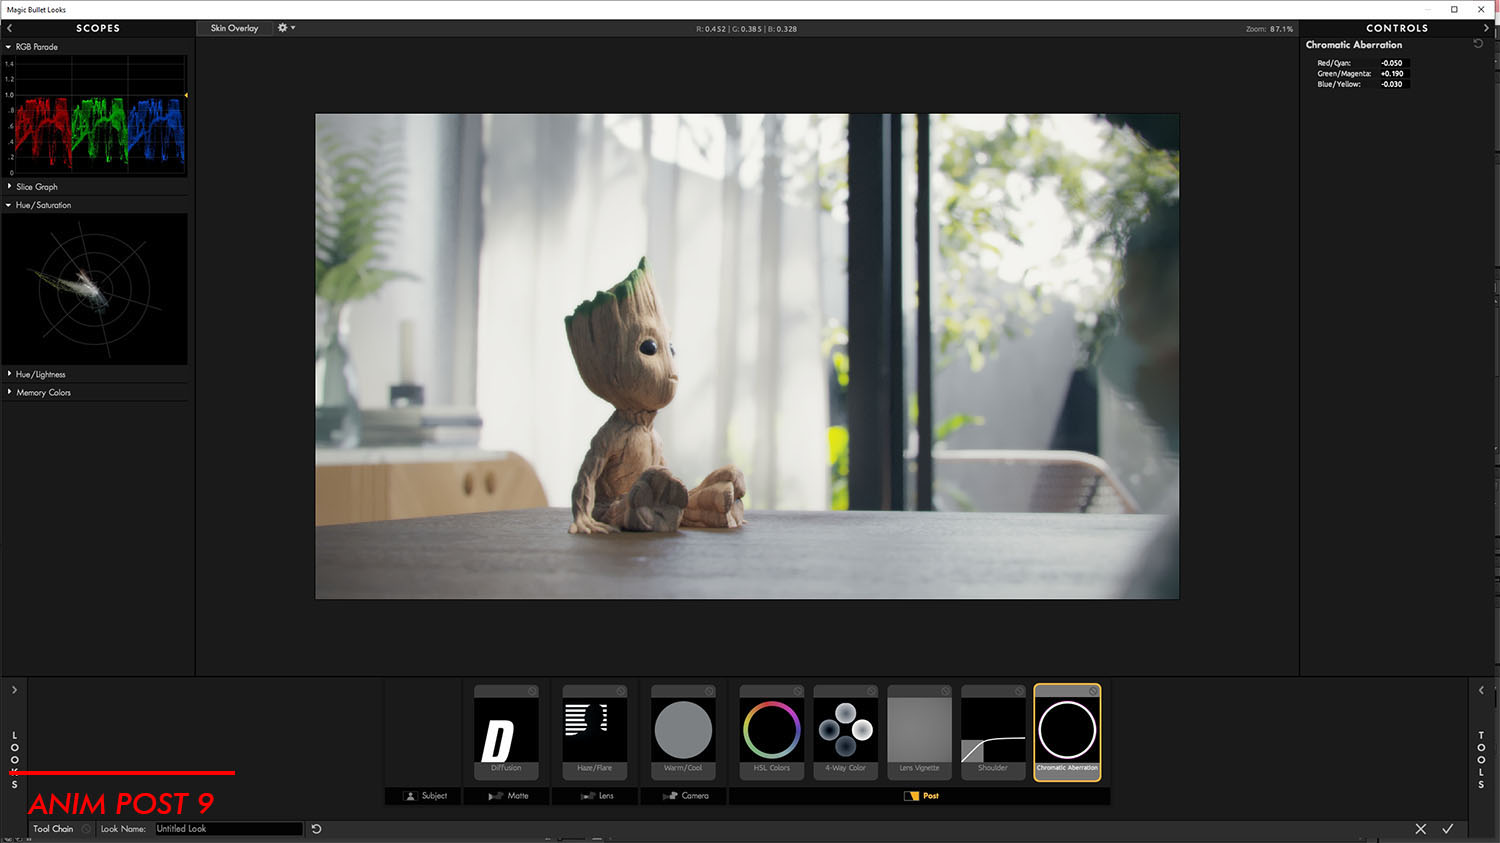
9. And now because CG render is too clean, we add chromatic aberration for making the animation a bit defective. If in the photography, this effect usually should be removed, but in CG render, we use this effect to make it more realistic because nothing is perfect in this world.
Well guys, that all, nothing magical, right? The key to making a good visualization is not in the preset setting and not only in the lighting. All components are integrated with one another. From modelling, material, and shader until lighting, The render preset must be supporting and must be set to optimum settings, not the maximum settings. To use somebody’s preset setting is easy, but understanding the preset settings is not that easy. It needs a more in-depth understanding.. Actually, the workflow is very simple and almost the same as other artist workflows. We did a lot of work for this for animation, and we do our best to describe it in detail here. Thank you for reading this making of the Dolls House. And we all members of the team hope this tutorial can help you in your own work.
You must be logged in to post a comment. Login here.
I came here right after reading your starbucks tutorial on ronen bekerman, great article as always! thank you for sharing
Nice tutorial, Thank you for sharing this :)