Tutorials
Unreal Master Materials by Kilograph's Chris Kiser
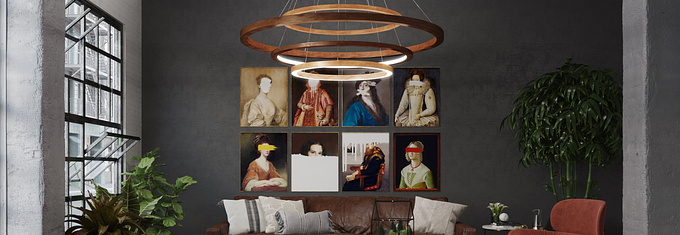
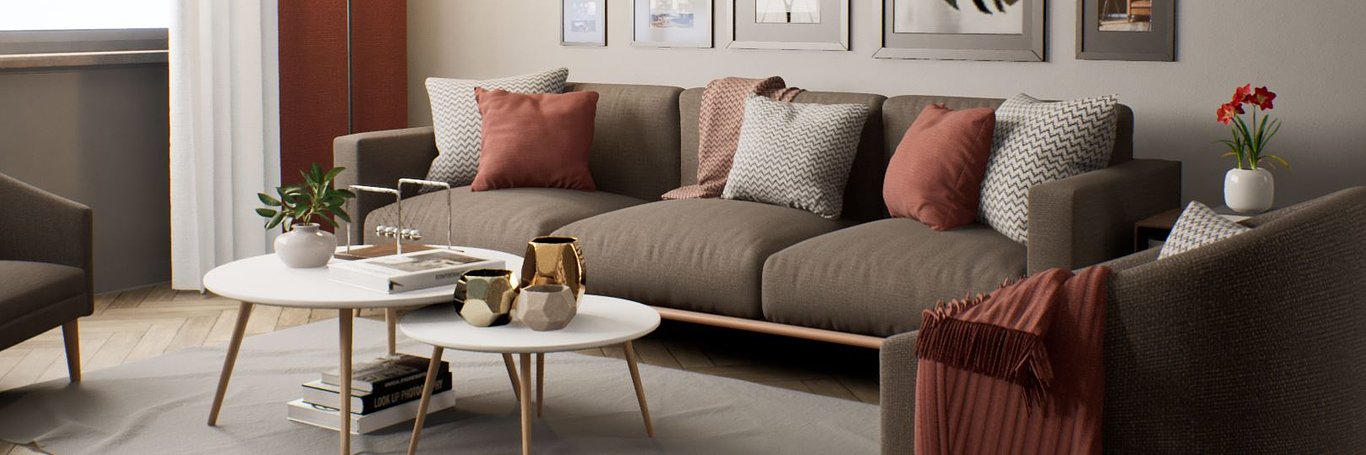
The creation of materials for architectural visualization can be time-consuming, trying to get materials just the way you want them. Creating them for Real Time is much the same but can be greatly simplified with the use of a Master Material.
Benefits of a Master Material
- Ease of Use
- With a properly created master material, you can create an infinite amount of instances that all have different parameters and settings, giving you a huge selection of materials quickly and easily.
- Performance
- When working with a real time engine like Unreal Engine, you have to be aware of how your objects and materials affect the overall performance of your scene. Each new material costs the engine in performance. But with the use of a master material and their material instances, the engine treats every one of the material instances and just 1 material.
- Teamwork/Consistency
- When working on projects with a team, you want elements of the project to remain consistent. Using an unreal material allows each material to function the same, rather than having a bunch of different material grids with different effects/costs.
Building a Master Material
Creating a master material takes some knowledge of how the unreal material network works, but if you understand the vRAY node structure it is very similar. You start by creating a new material, being sure to name it as your master material.
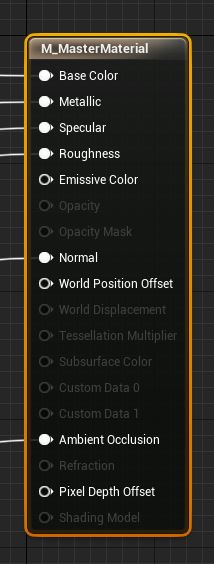
With the basic Unreal material you have access to all the nodes you need for a good master material.
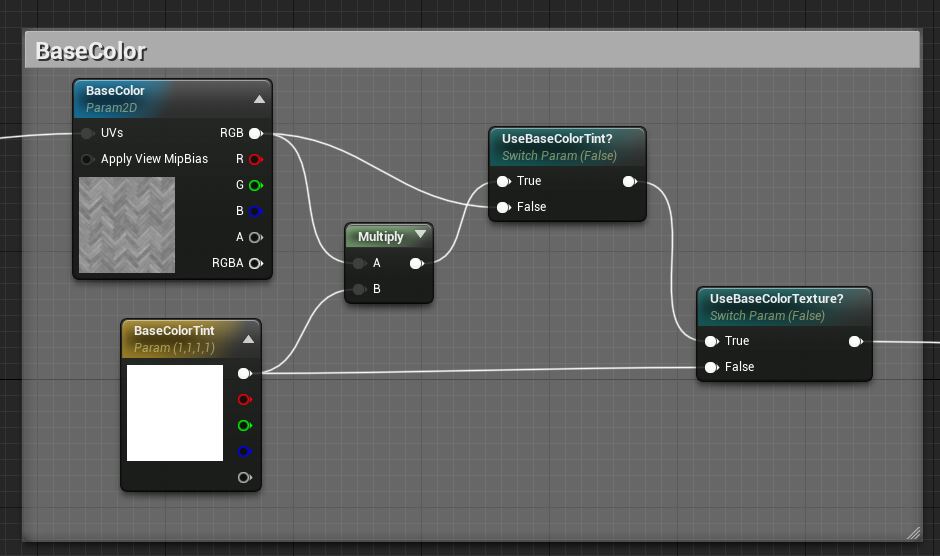
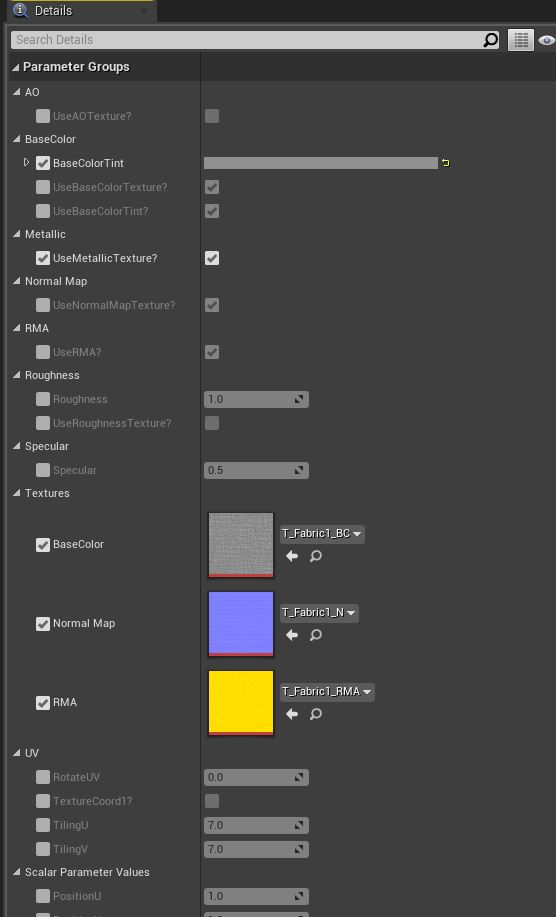
- Base Color
- Base color is your Albedo material, also known as your diffuse. Here you use either a texture map or RGB color as your base. With this you can add the additional control to add a tint to your base color.
- RMA Texture
- One other way to optimize your materials is the use of an RMA texture map. Basically you store three different texture maps inside the channels of just one texture map. So for example:
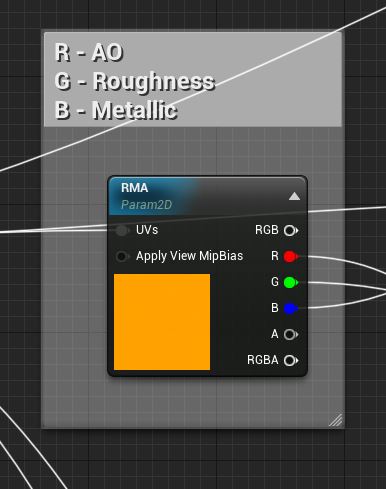
You can then feed those channels to the correct place inside the material.
- Metallic
- To add extra control to your metallic parameters you can add power control or the option to bypass the RMA node.
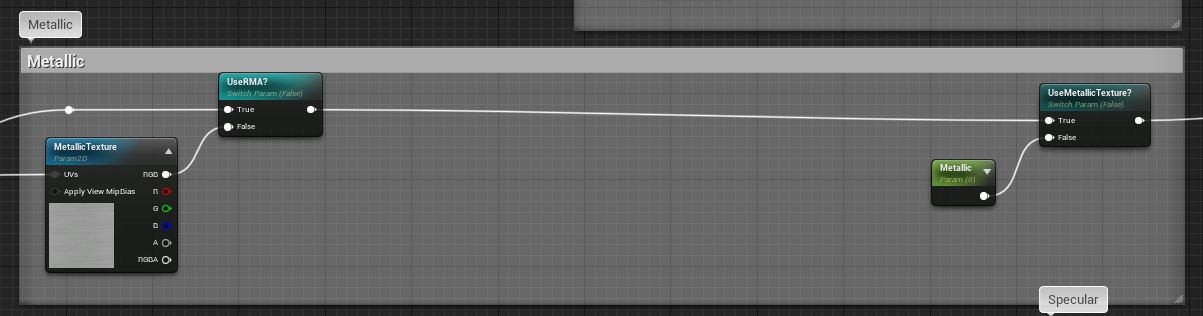
- Specular
- To follow the PBR workflow, we don't really utilize the specular part of the materials, instead relying on the roughness and or metallic nodes for that. So just set the specular to .5.
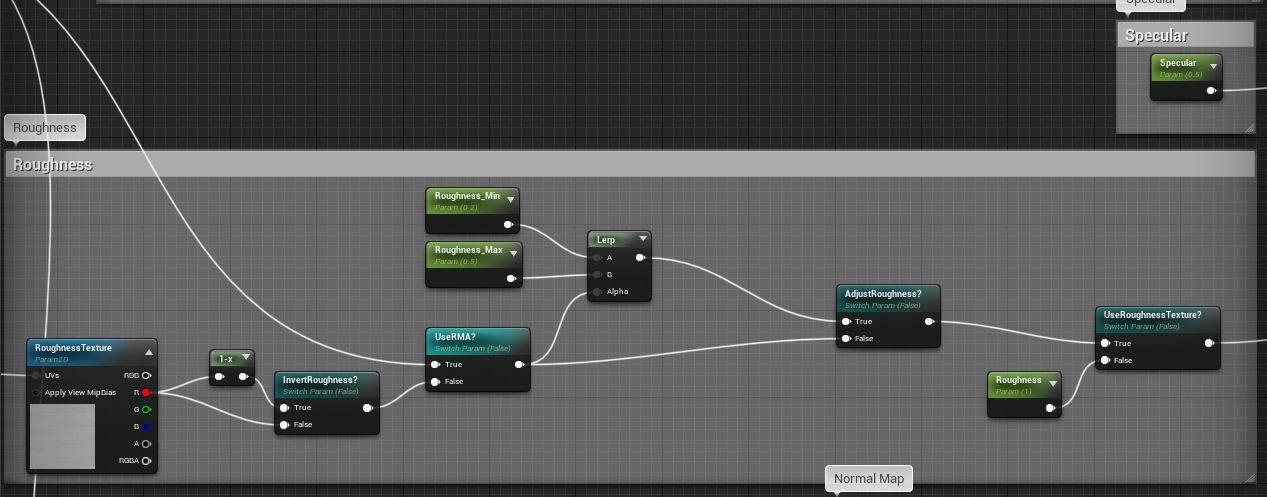
- Roughness
- Again you can add additional control to your input roughness map with adding a clamp to overall roughness and again the option to bypass the RMA map.
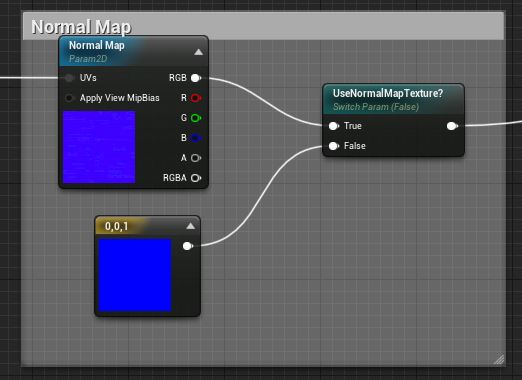
- Normal
- For this example the master material works based on the assumption that you are using a tangent space normal map rather than a black and white height based bump map. This also allows you to choose between using a normal map or just a flat normal.
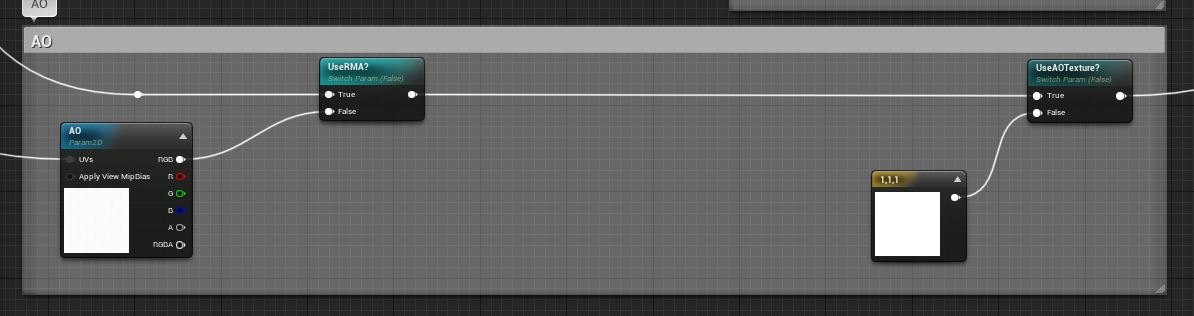
- Ambient Occlusion
- This extra control again lets you bypass or turn off the AO map if you choose.
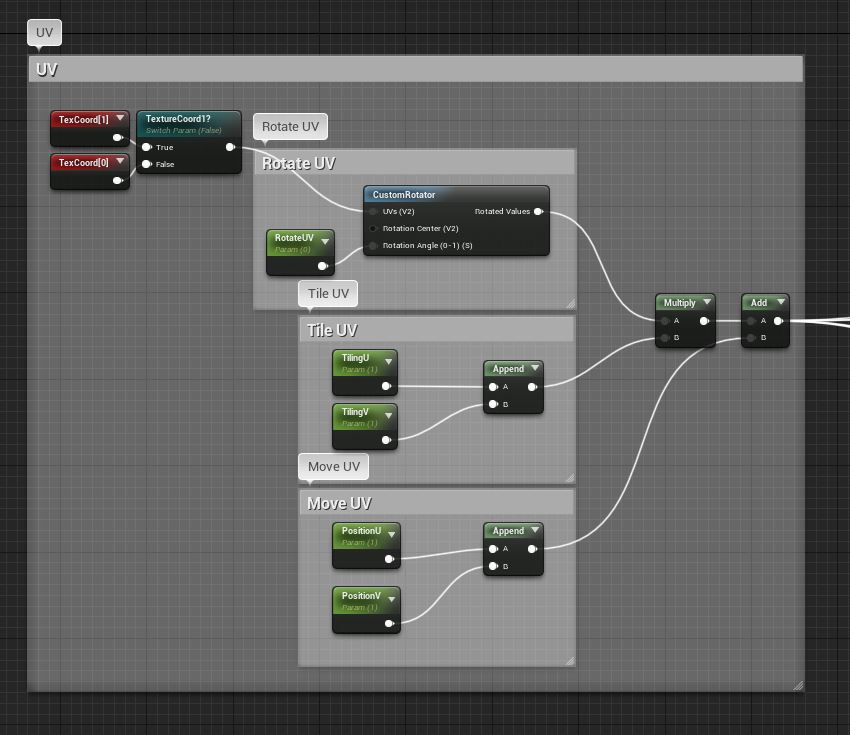
- UV’s
- The last thing is to add controls for the texture UV mapping. With this is allows you to adjust tiling, offset and rotation of textures without needing to leave Unreal.
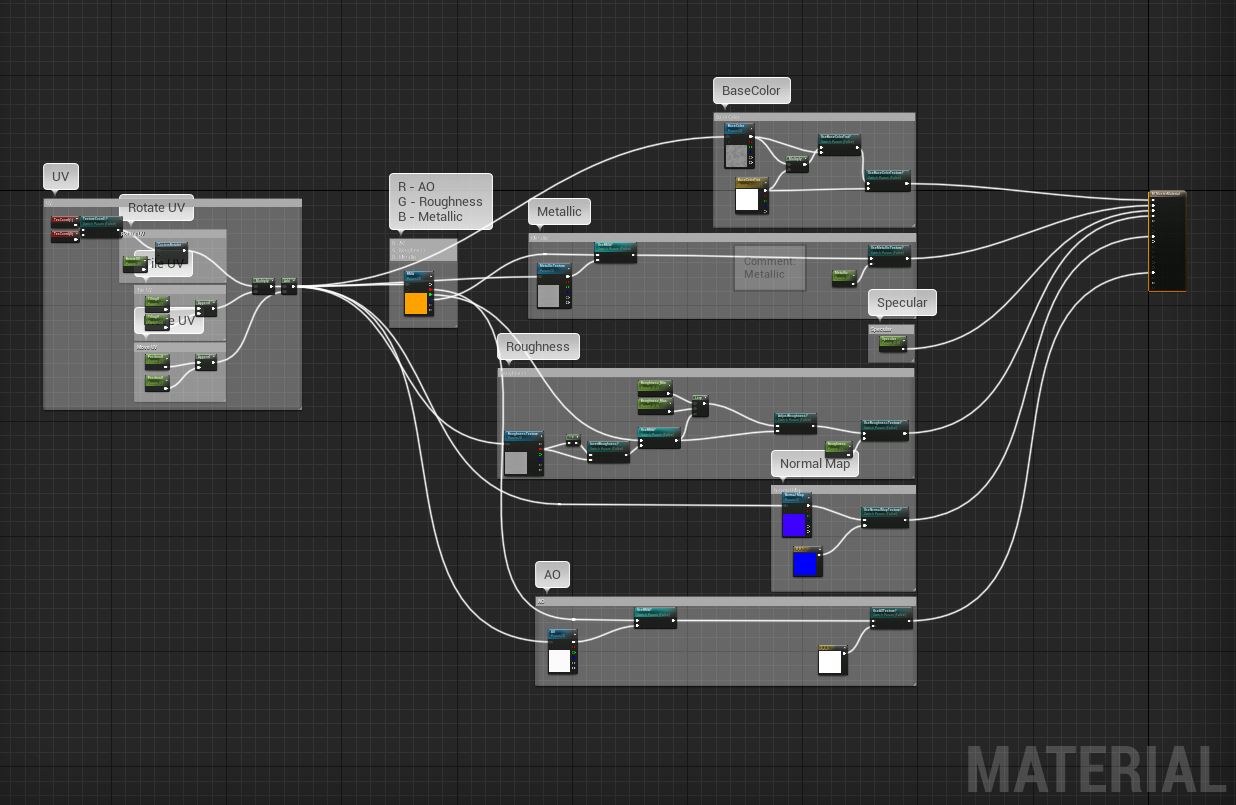
- Final Result
- With all the nodes created and linked together you have a master material network that should look like this.
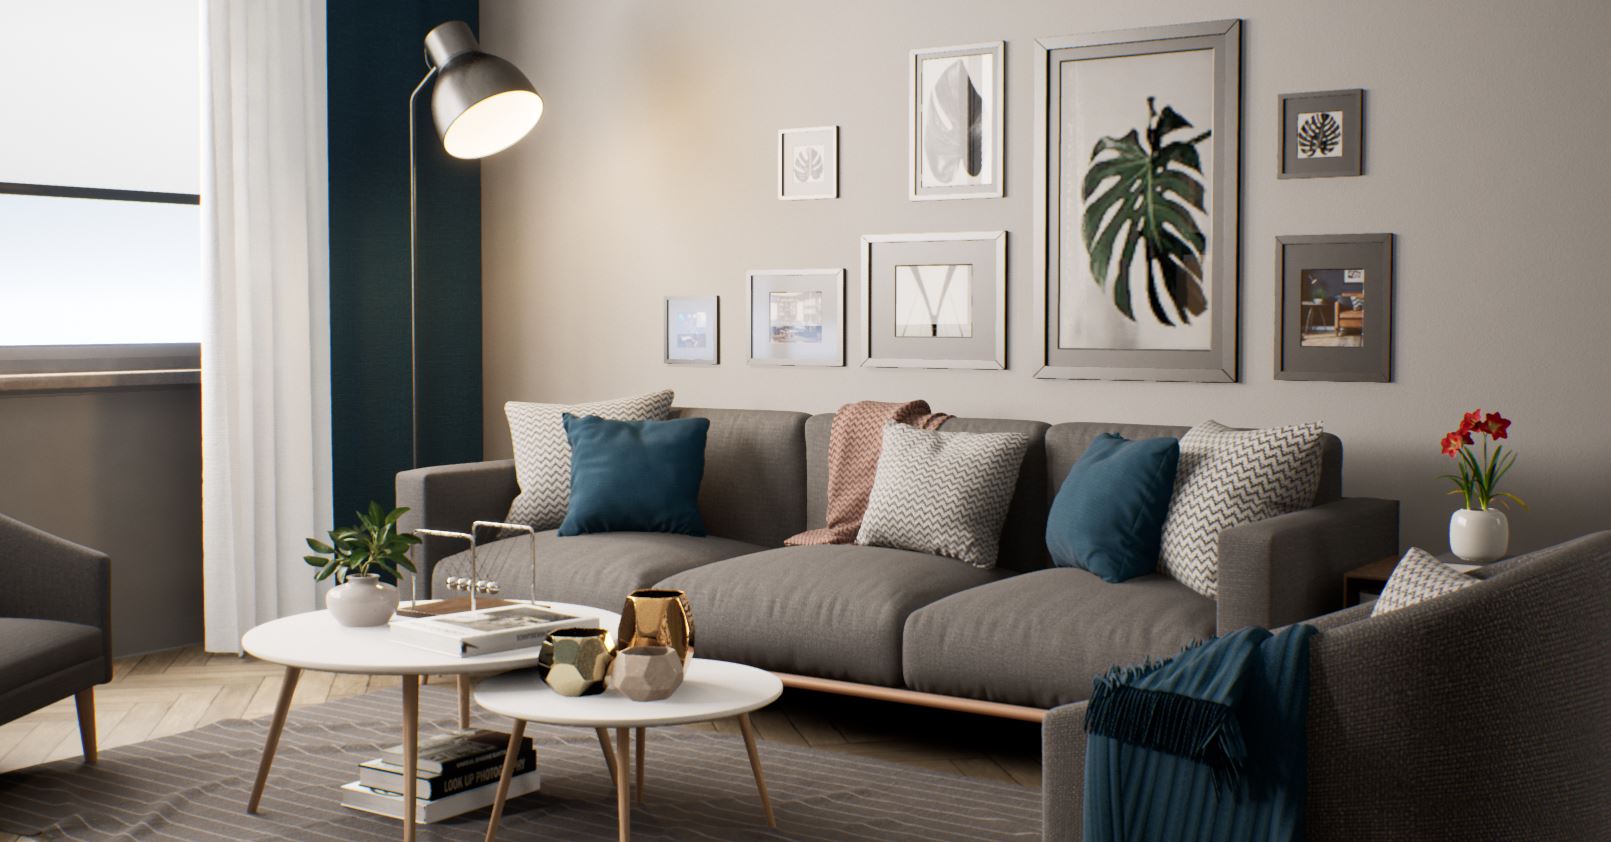
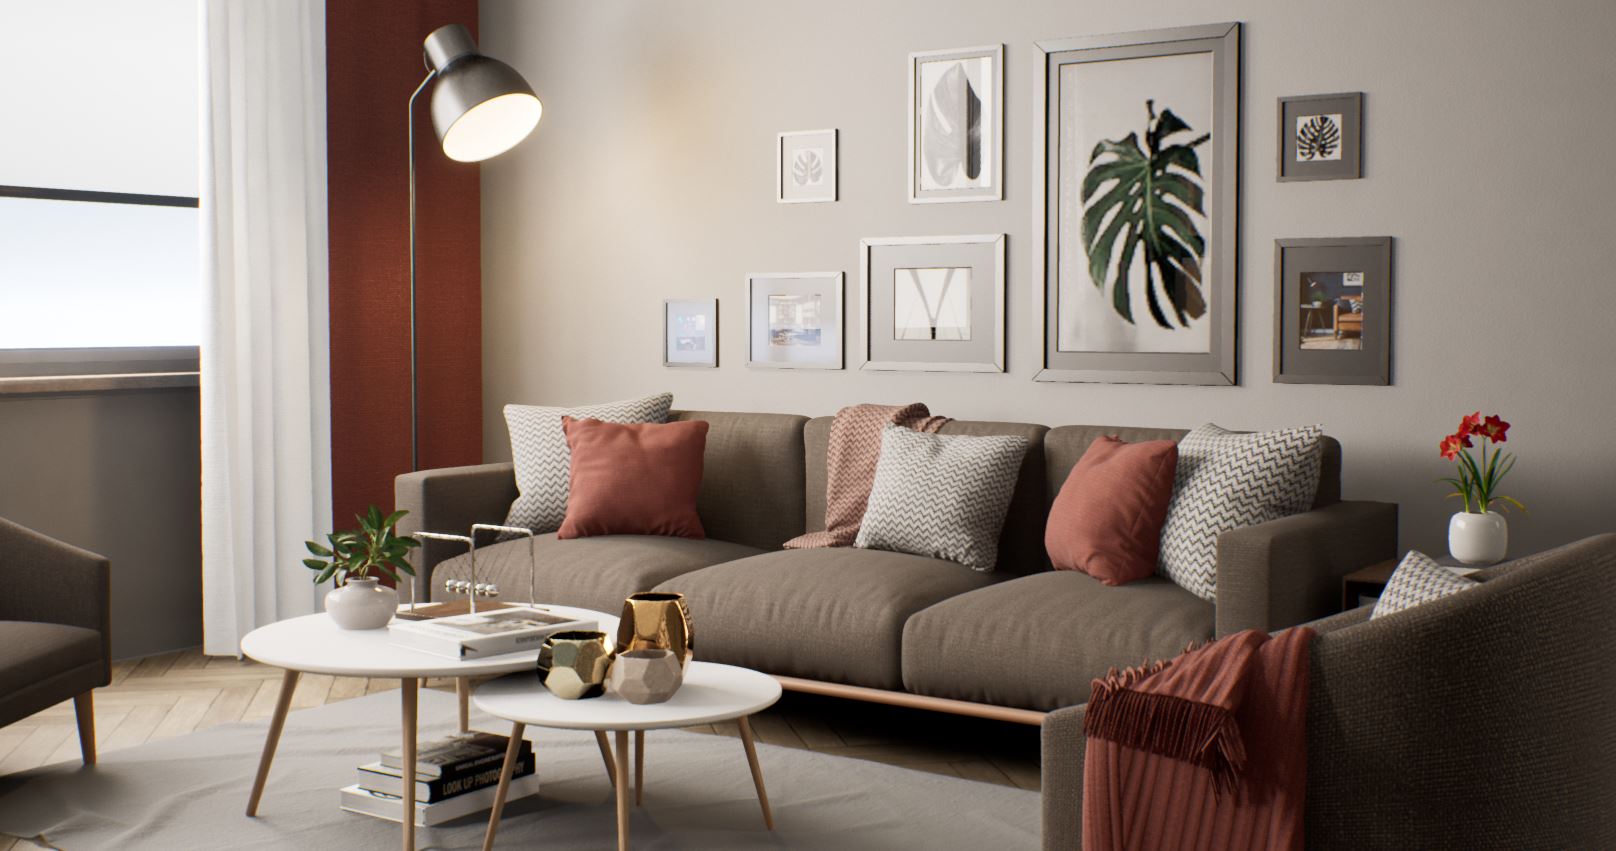
Once you have the master material created, it's now time to start creating material instances. With the proper material creating you will have a new way to modify your instances with simple check boxes or sliders like this:
As you can see you now have total control to make any number of variations of materials you could ever need. This gives you amazing control over performance and iterations in real time.
You must be logged in to post a comment. Login here.