
Making Of
Constructing the night - Building night-time 3D scenes for my music videos
Intro
Heyya, these are some of my workflows that I’ve been using for my night scenes, which have appeared prominently in many of my projects for the last few years.
I’ll skip the story / ideas / editing bits as most of my recent projects are music videos. However, I do use a lot of ‘archviz’ workflows for my CG shots. Hopefully, what I’m sharing could be of use to anyone here.
I use 3ds Max and V-Ray primarily, but I'll try making this generic enough for other software users to find this useful.
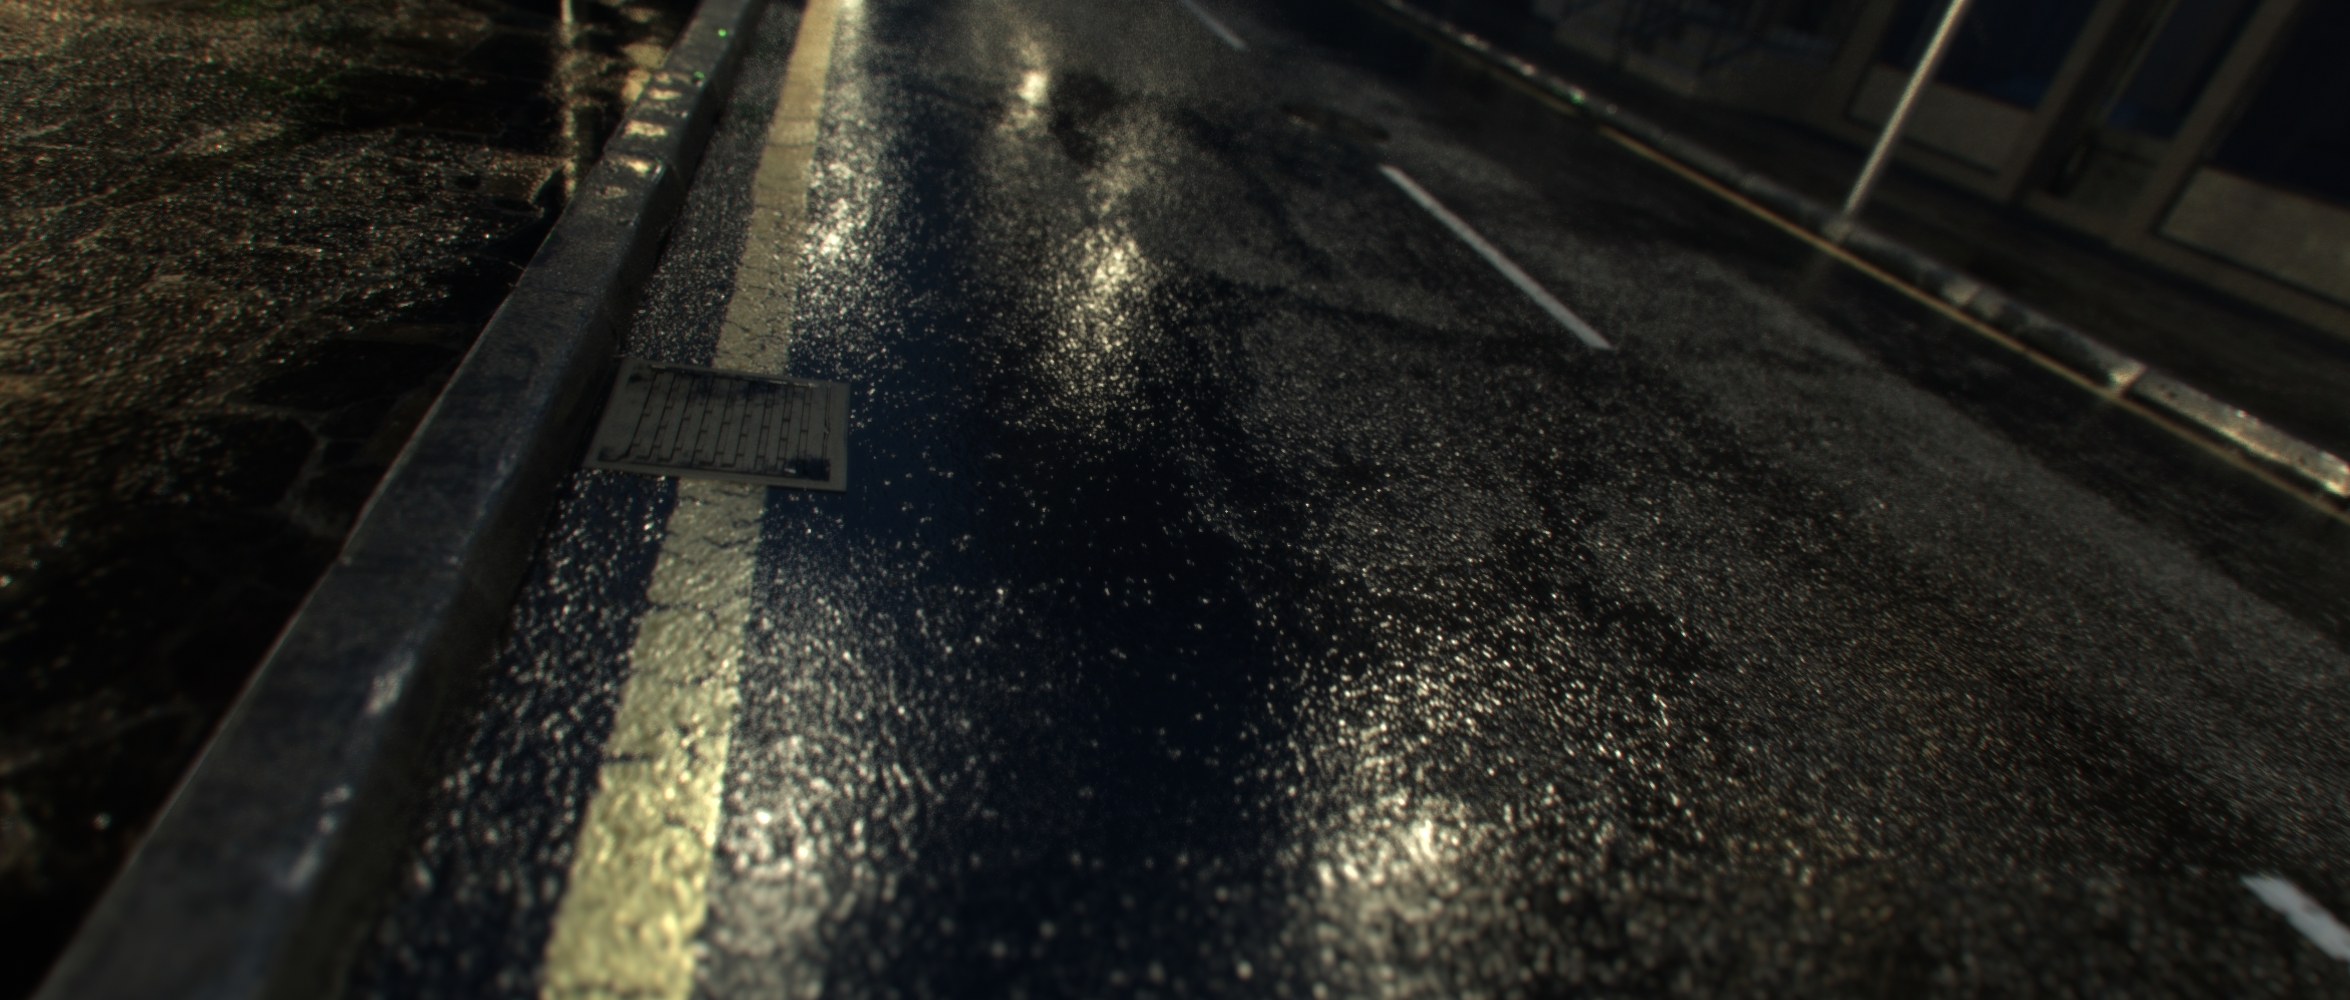
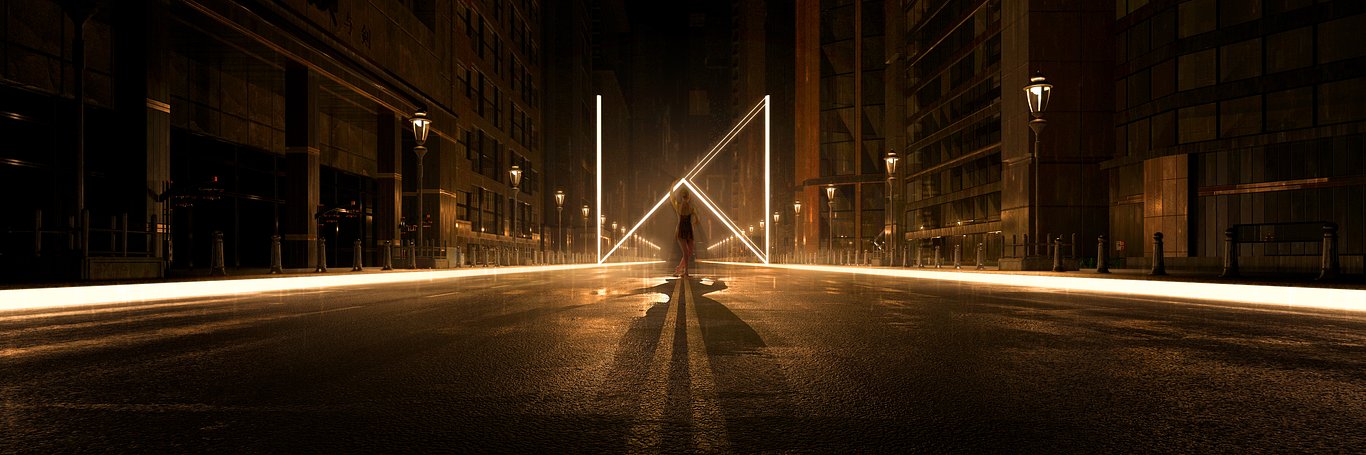
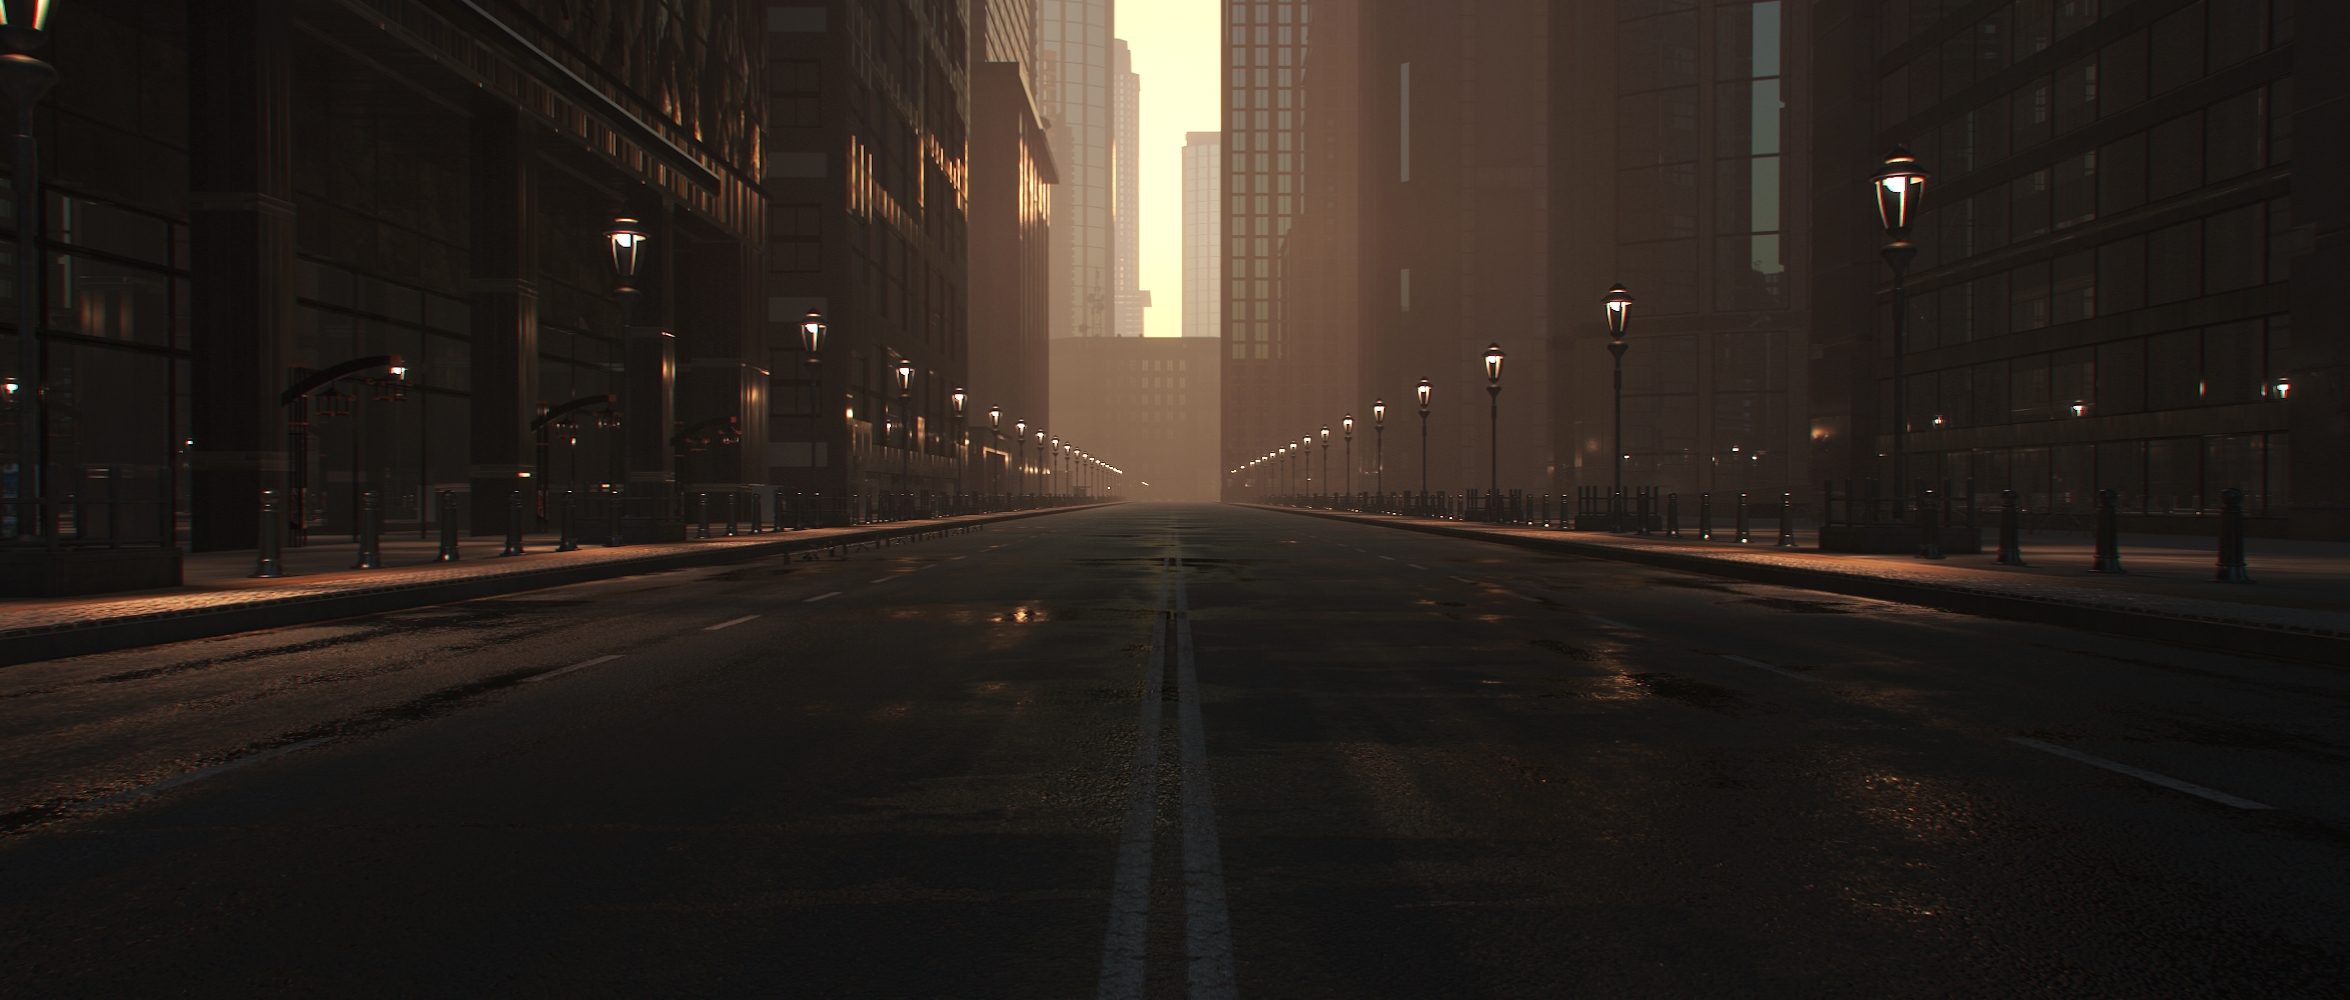
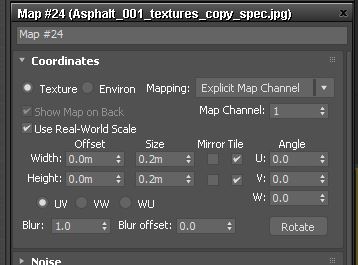
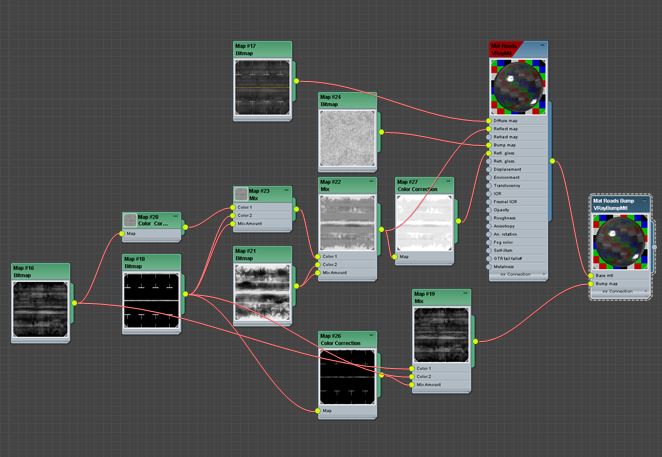
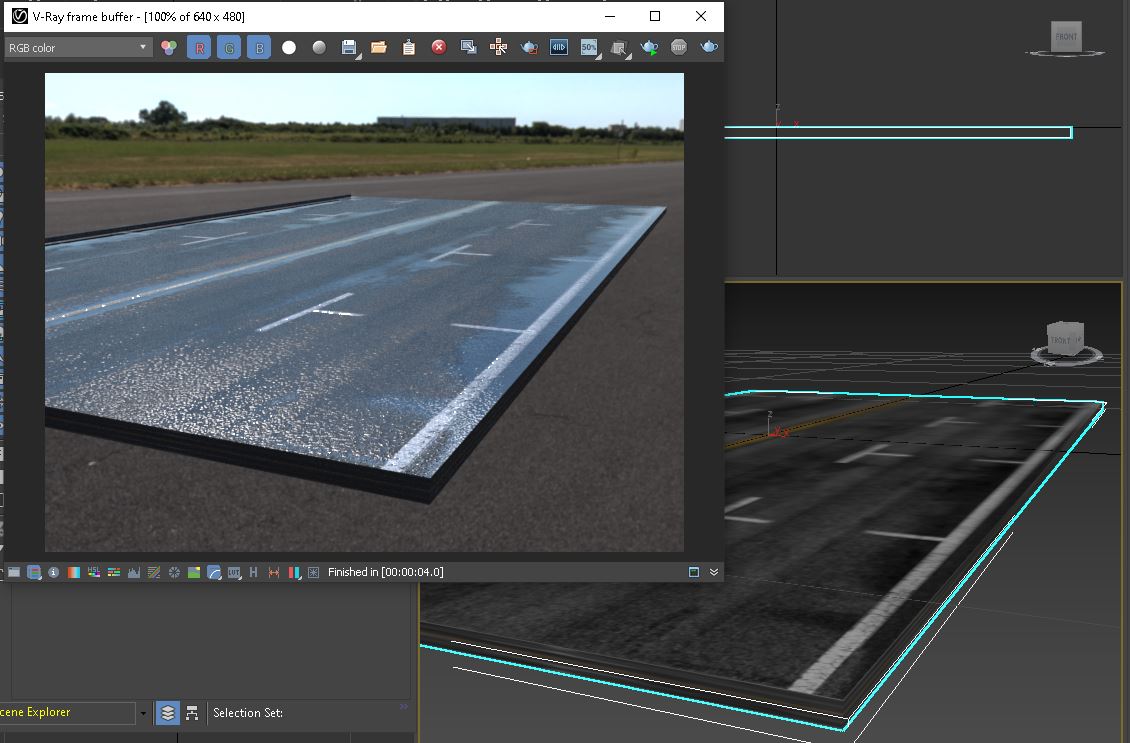
Roads, pavements, and puddles
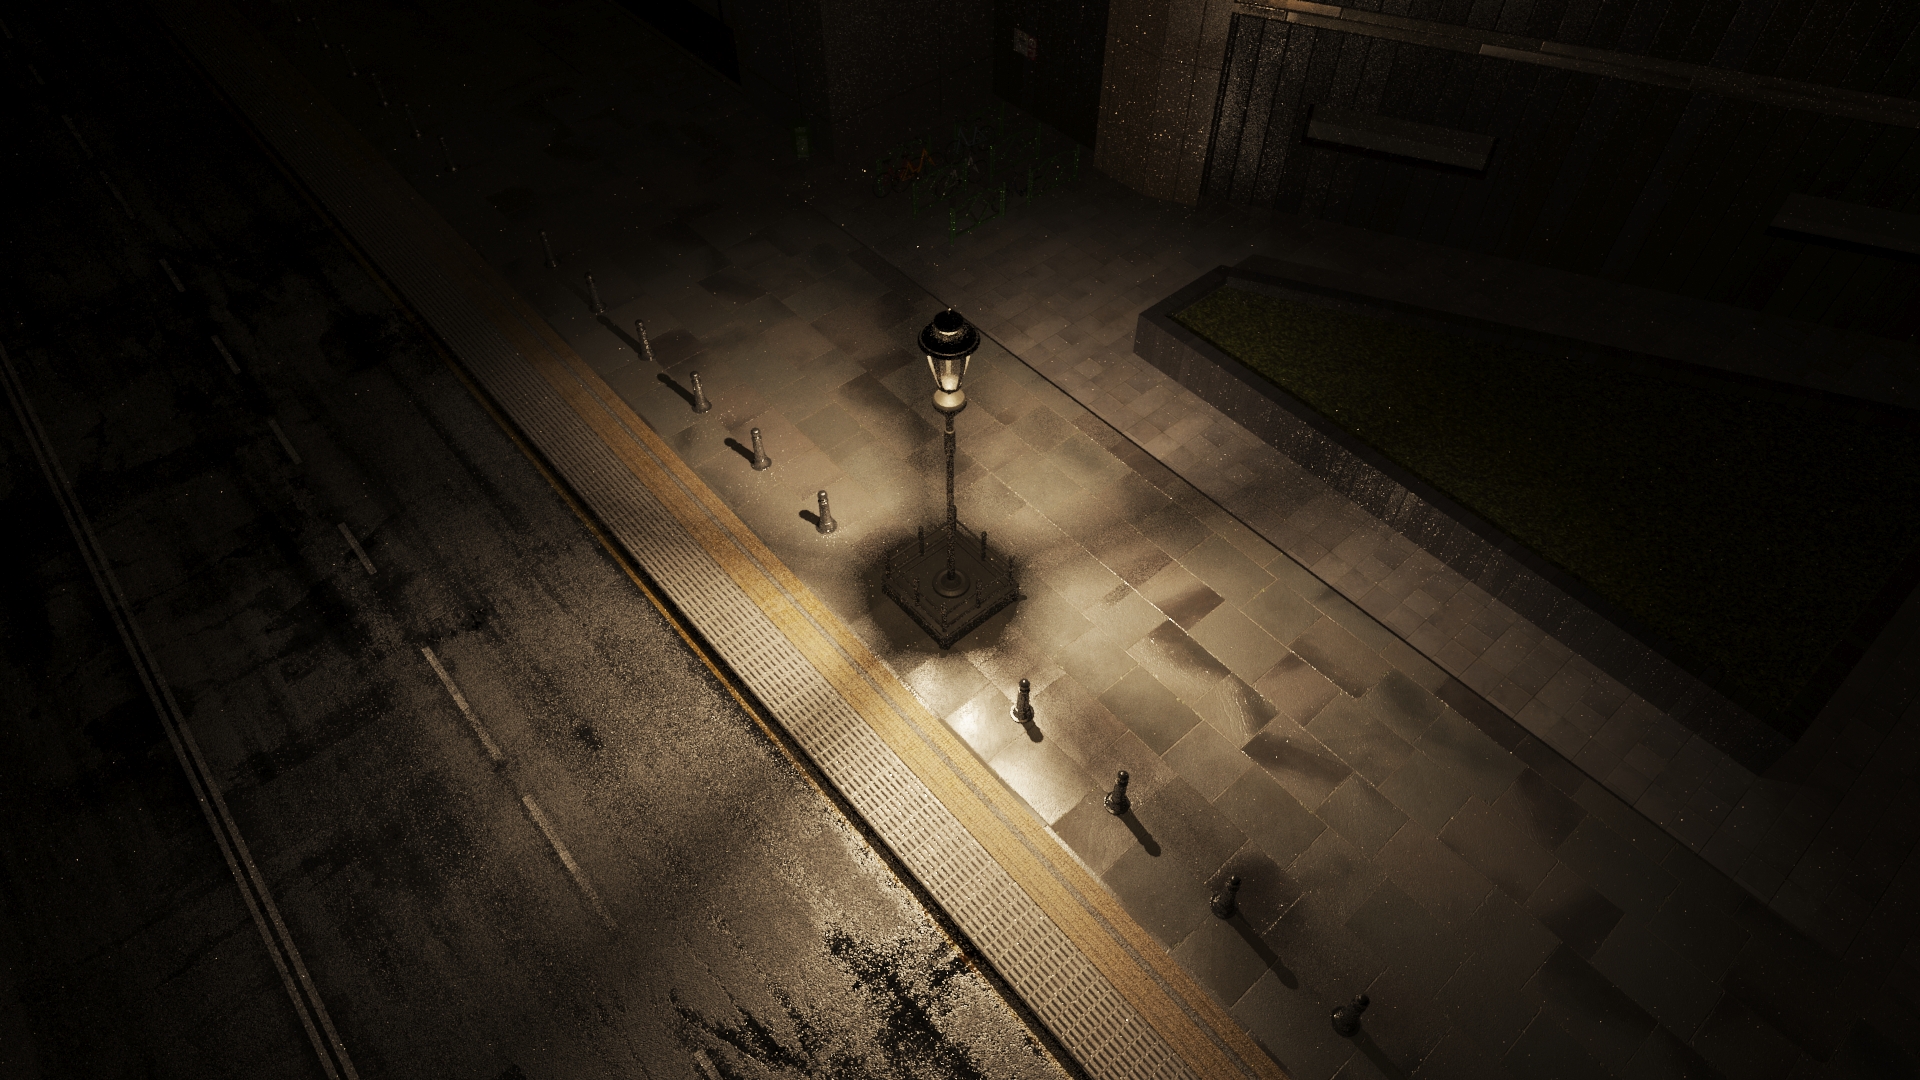
Reflections on the ground is one of the things I love to work on. I do it in an old-fashioned method of painting the passes rather than using a parametric tool like Substance Painter to generate them. Not that the latter isn’t good, I just personally find it therapeutic to matte paint roads and puddles!
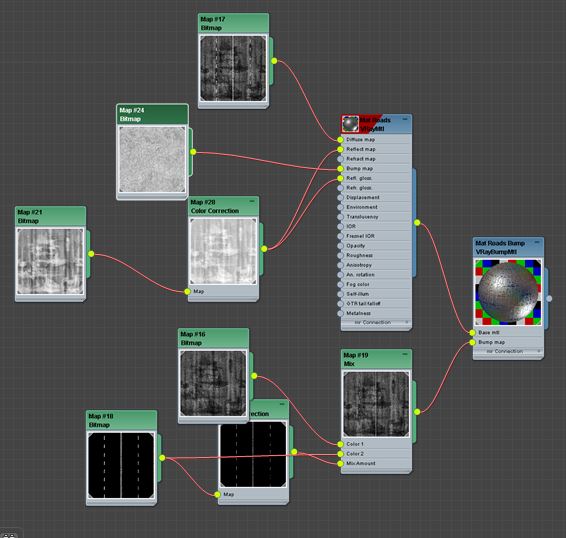
I split the road lines on a different layer. This way I can use the composite node in the material editor to add different lines to each map.
Then I invert the matte painted puddles and dirt tracks for the reflection pass. I use the color correction tool in the material editor to tweak its glossiness; brighter for a more wet road and darker for a dryer one.
For the bump parameters, I tweak the blur option in the textures. If I’m up close, I like to put it as low as 0.01 to really show off the asphalt texture, though that can cause loads of fireflies in the renders. So, it really depends on how the shot looks.
If it’s further away the default 1.00 should be good enough, but often it can make it too smooth like a flooded street.
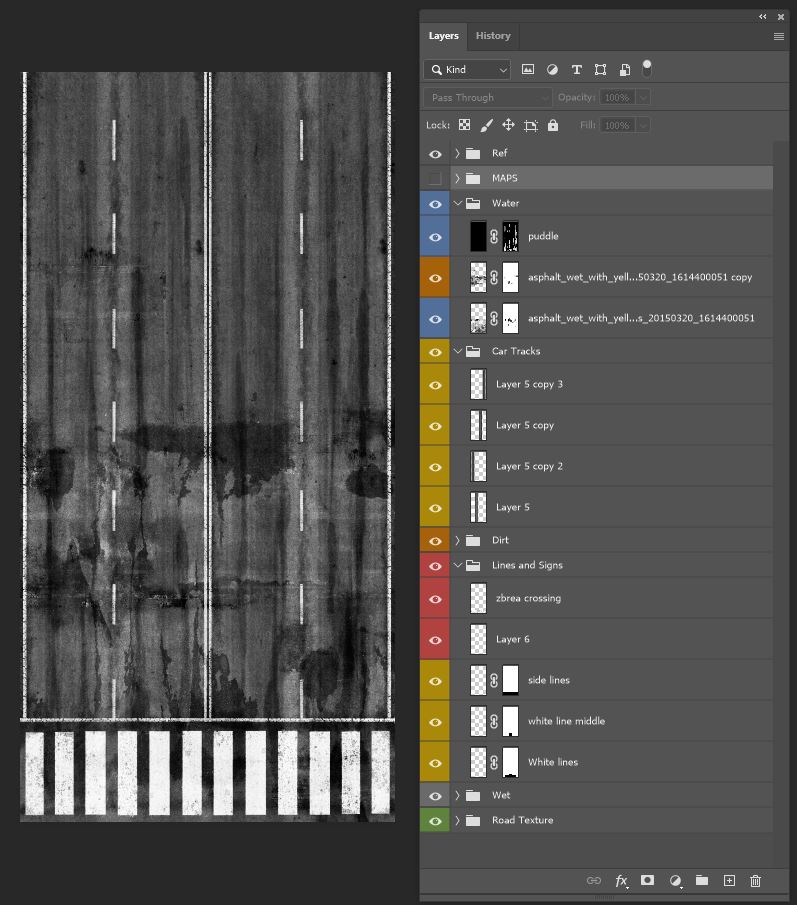
Here is a look at my layers in photoshop, all made to be seamless of course. I try to tweak them for every project, but I do admit that I reuse the same ones more often than I should!
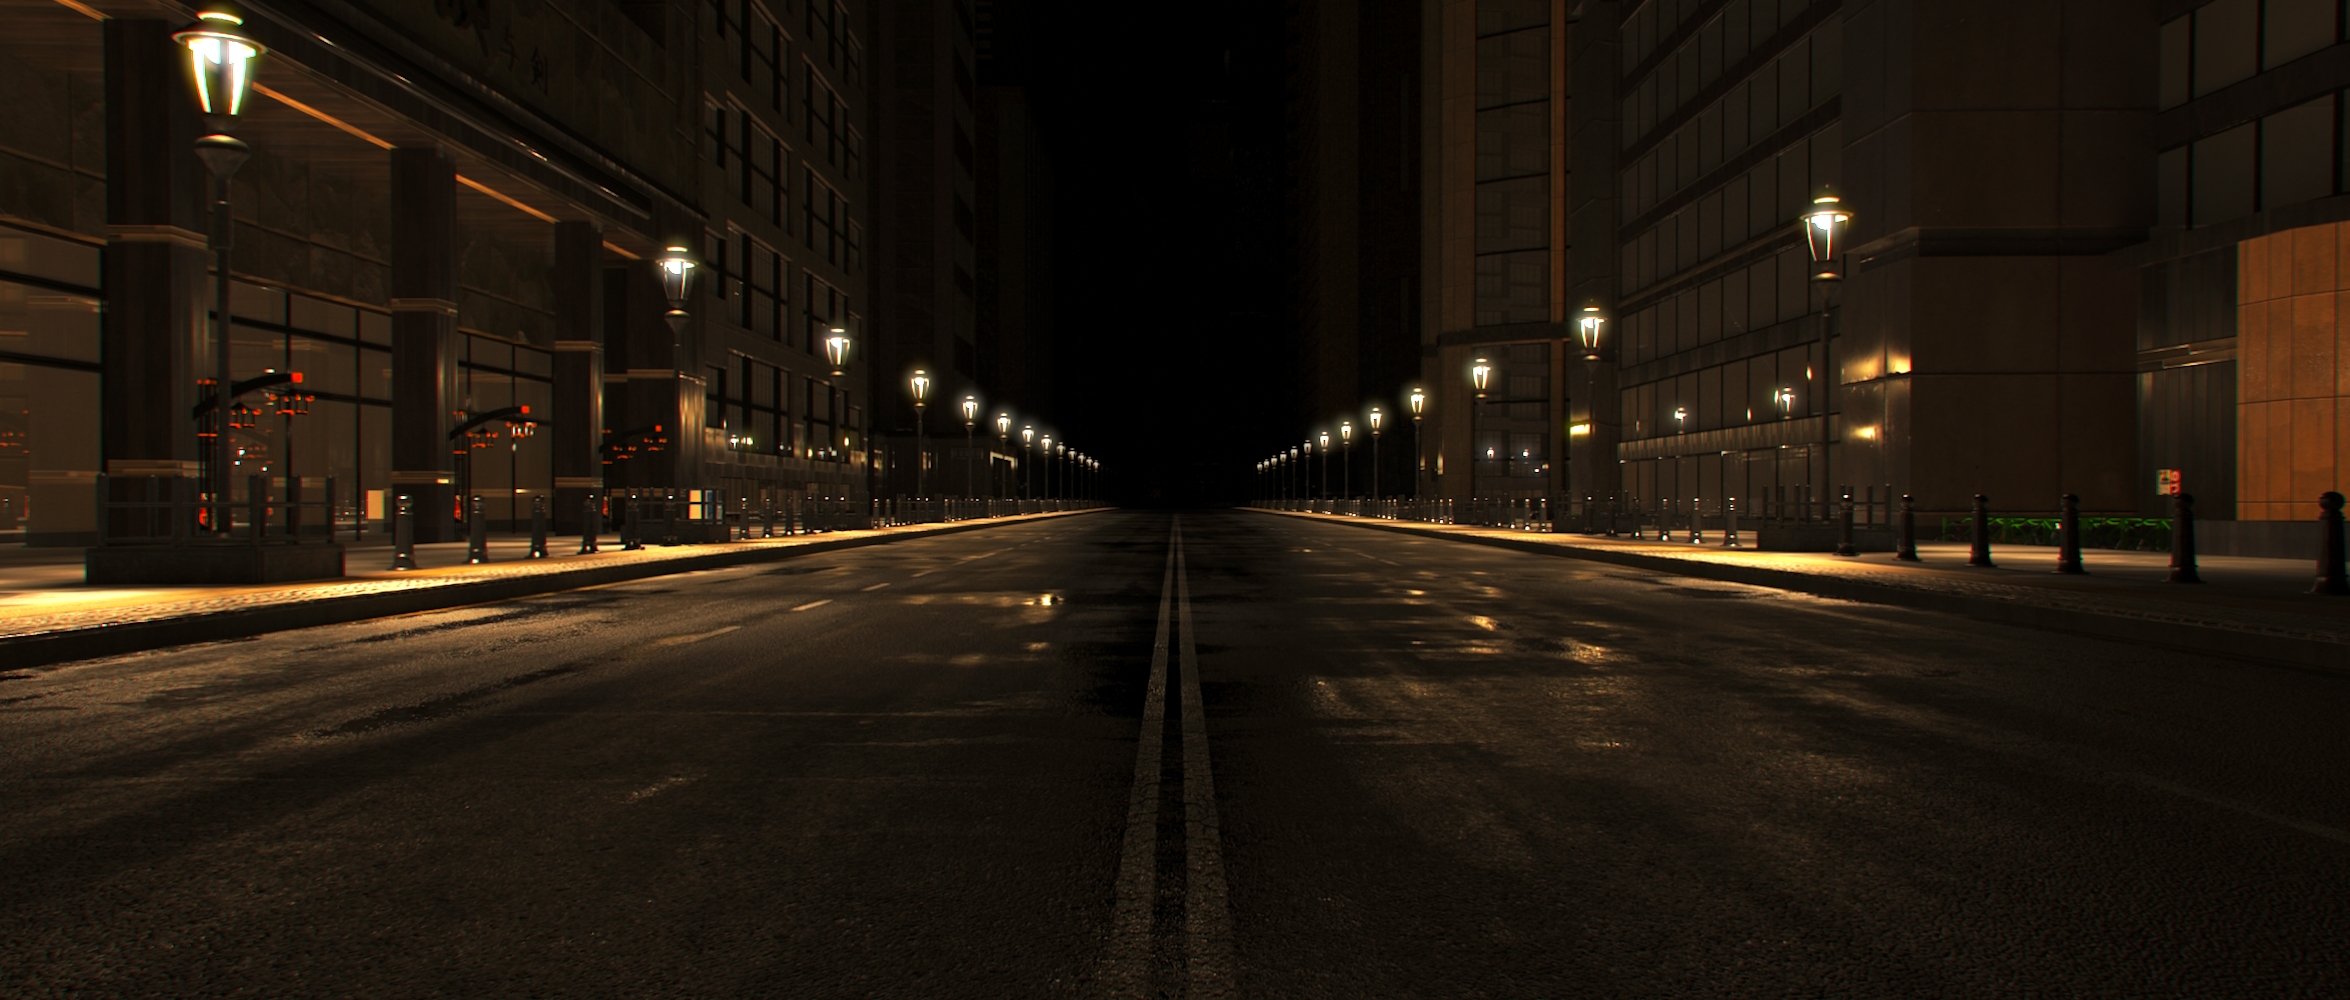
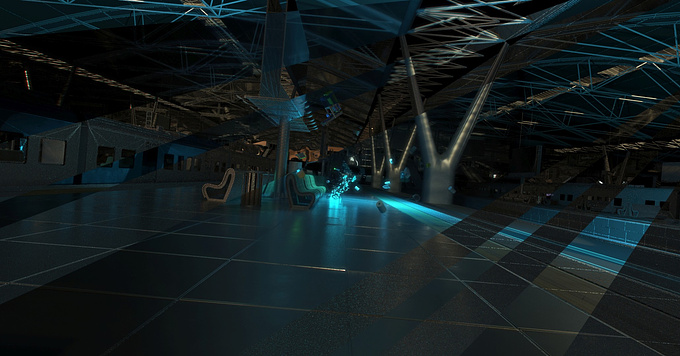
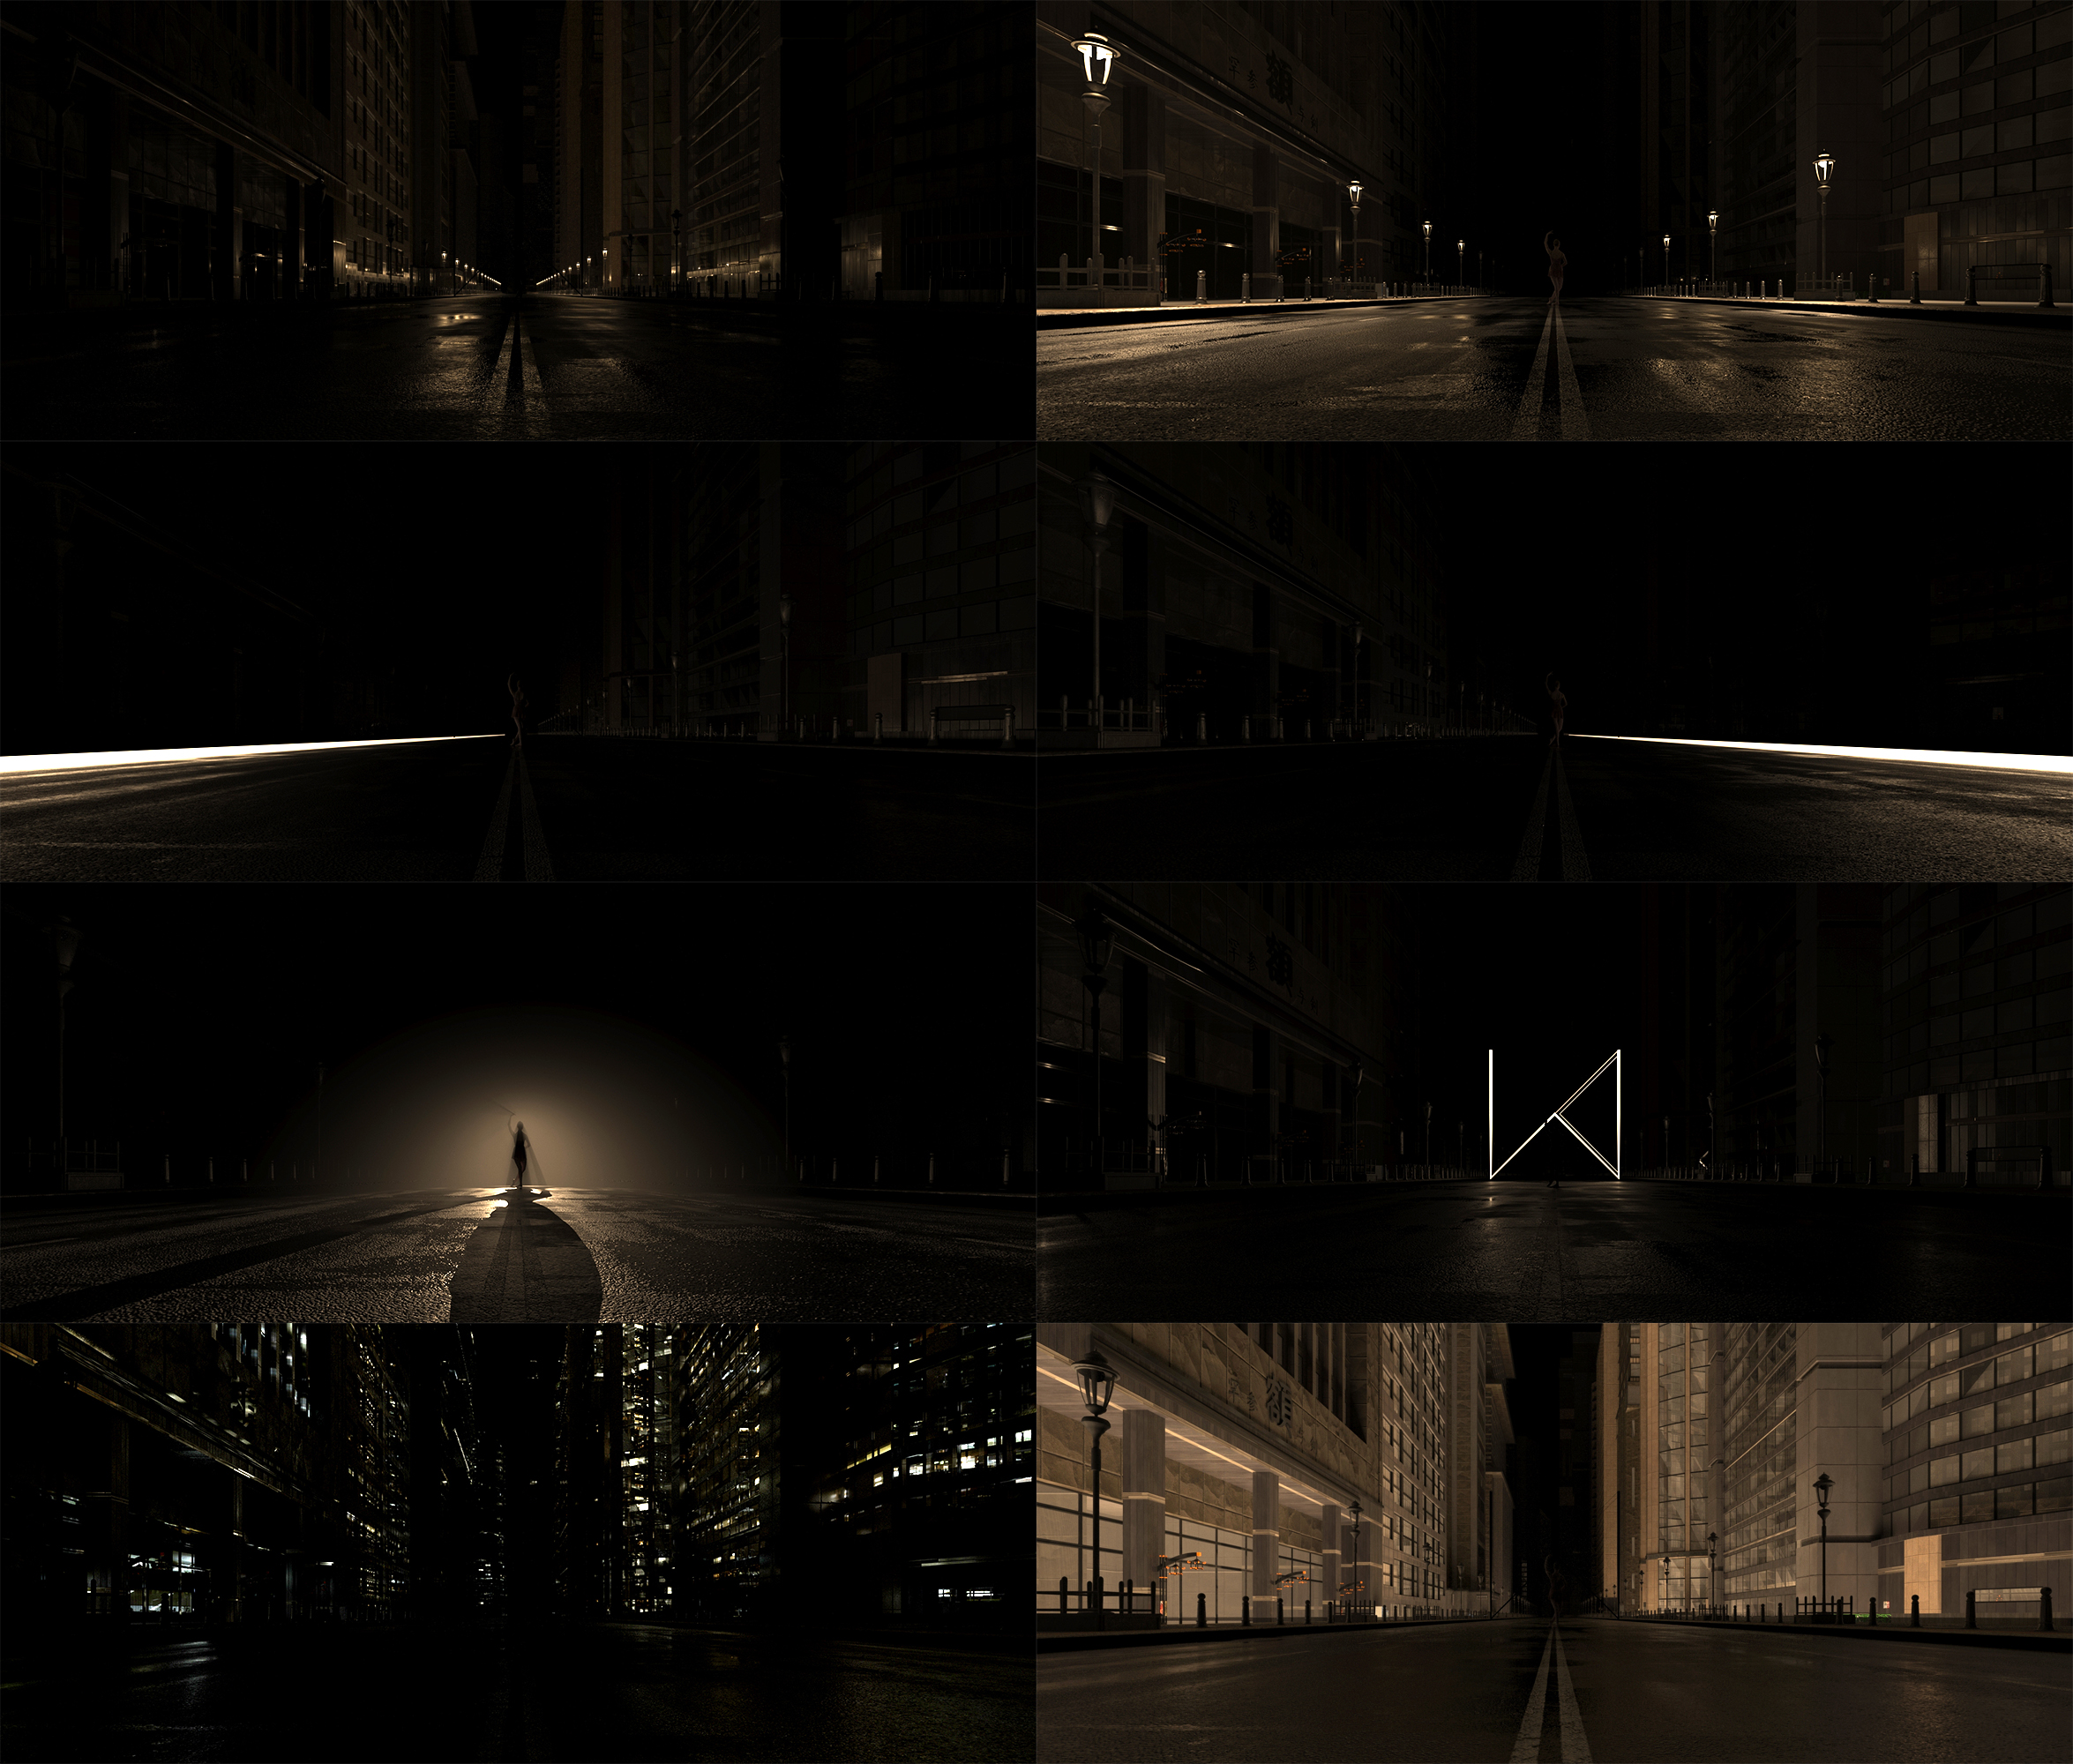
Streetlights
I approach making my streetlights like a painting. I don’t use any methods to make it physically accurate, in fact I do quite the opposite. You could say I’ve used all the ‘wrong’ ways of doing these, so take this section with a pinch of salt.
I approach making my streetlights like a painting. I don’t use any methods to make it physically accurate, in fact I do quite the opposite. You could say I’ve used all the ‘wrong’ ways of doing these, so take this section with a pinch of salt.
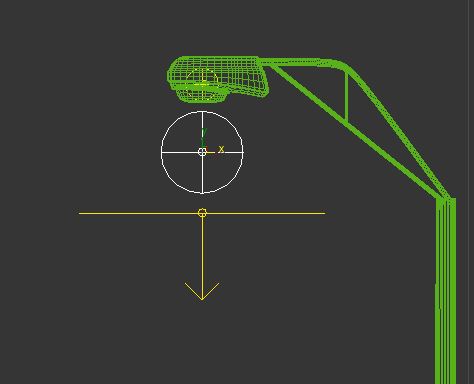
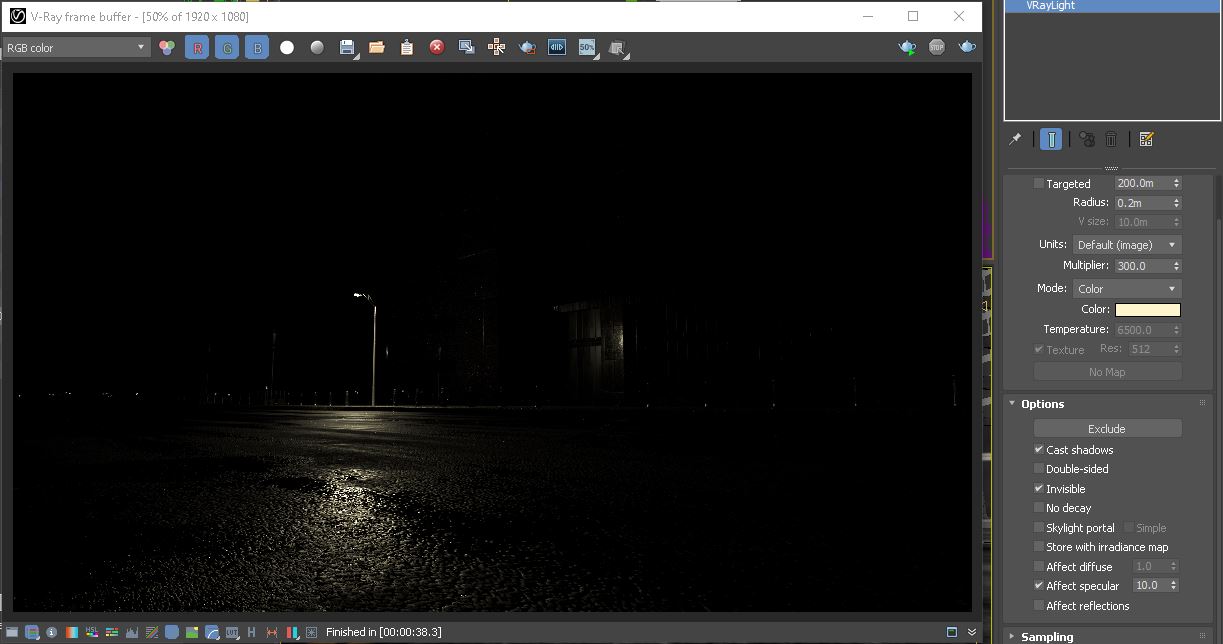
I attach 3 lights to a street light object before I distribute them around the scene.
1) A Spotlight to shine shadows on the ground and surrounding.
2) A sphere light for the bulb
3) Another sphere light that is invisible, but I multiply the ‘affect specular’ parameter much higher so it shines on the ground and creates a streak of light. I also switch off the diffuse effect for this light.
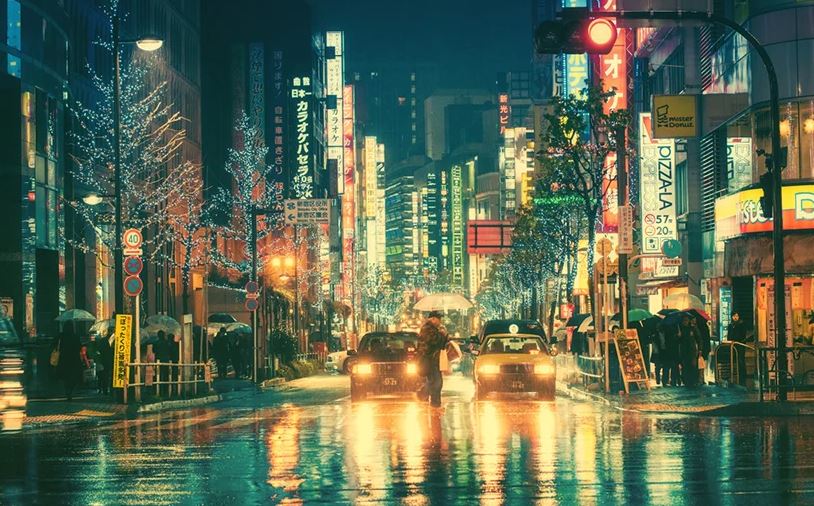
I’ve always loved the night photography of Masashi Wakui, the way the roads have lines of street light reflections pouring down. As every camera angle gives a different effect, I like the freedom of tweaking it for every single shot, hence the third ‘invisible but super specular’ light. Yep, I did say this is all wrong from a ‘physically accurate’ point of view!
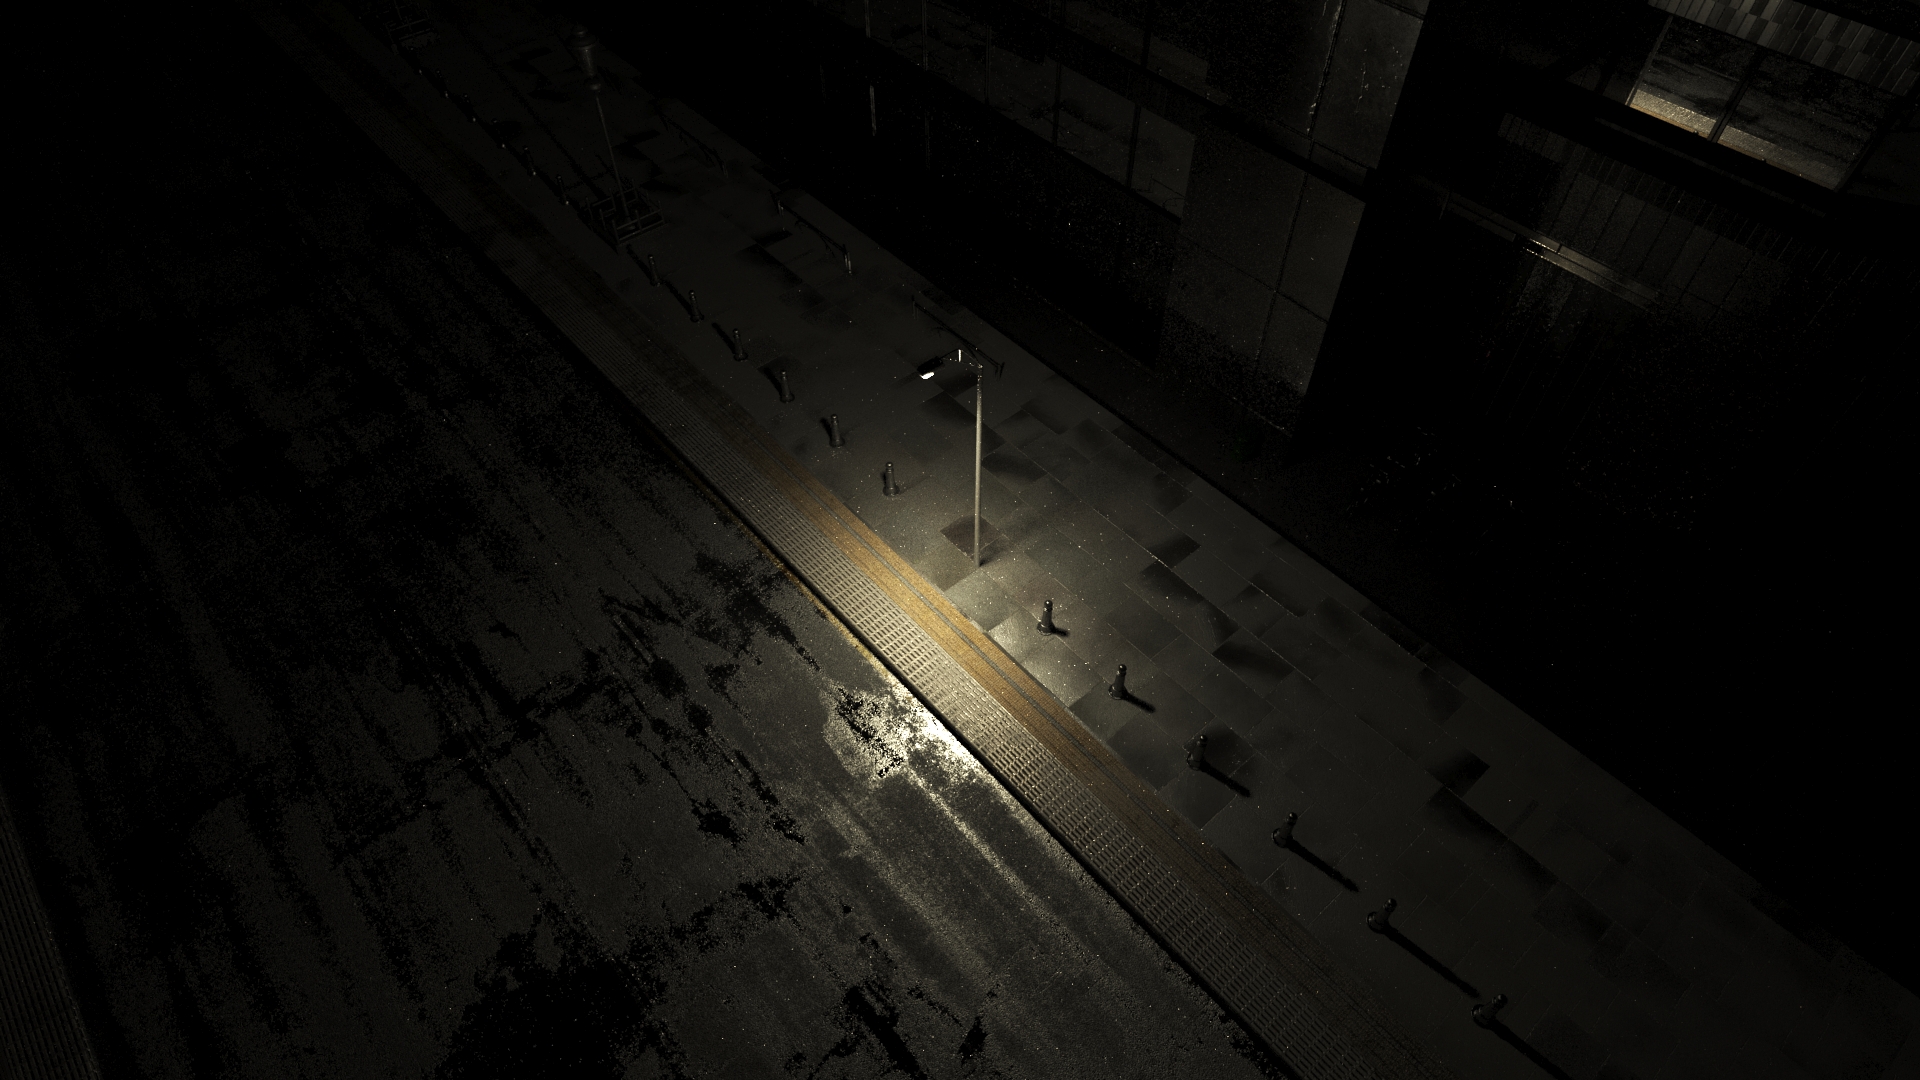
I do use a disc light instead of a spotlight sometimes to get softer shadows. For 'Facades', I wanted the reflections to be the focus. So, I used a disc light for a softer dispersion.
For ‘Dreaming Underwater’, I needed the sharp spotlight to show a clear shadow of a person walking.
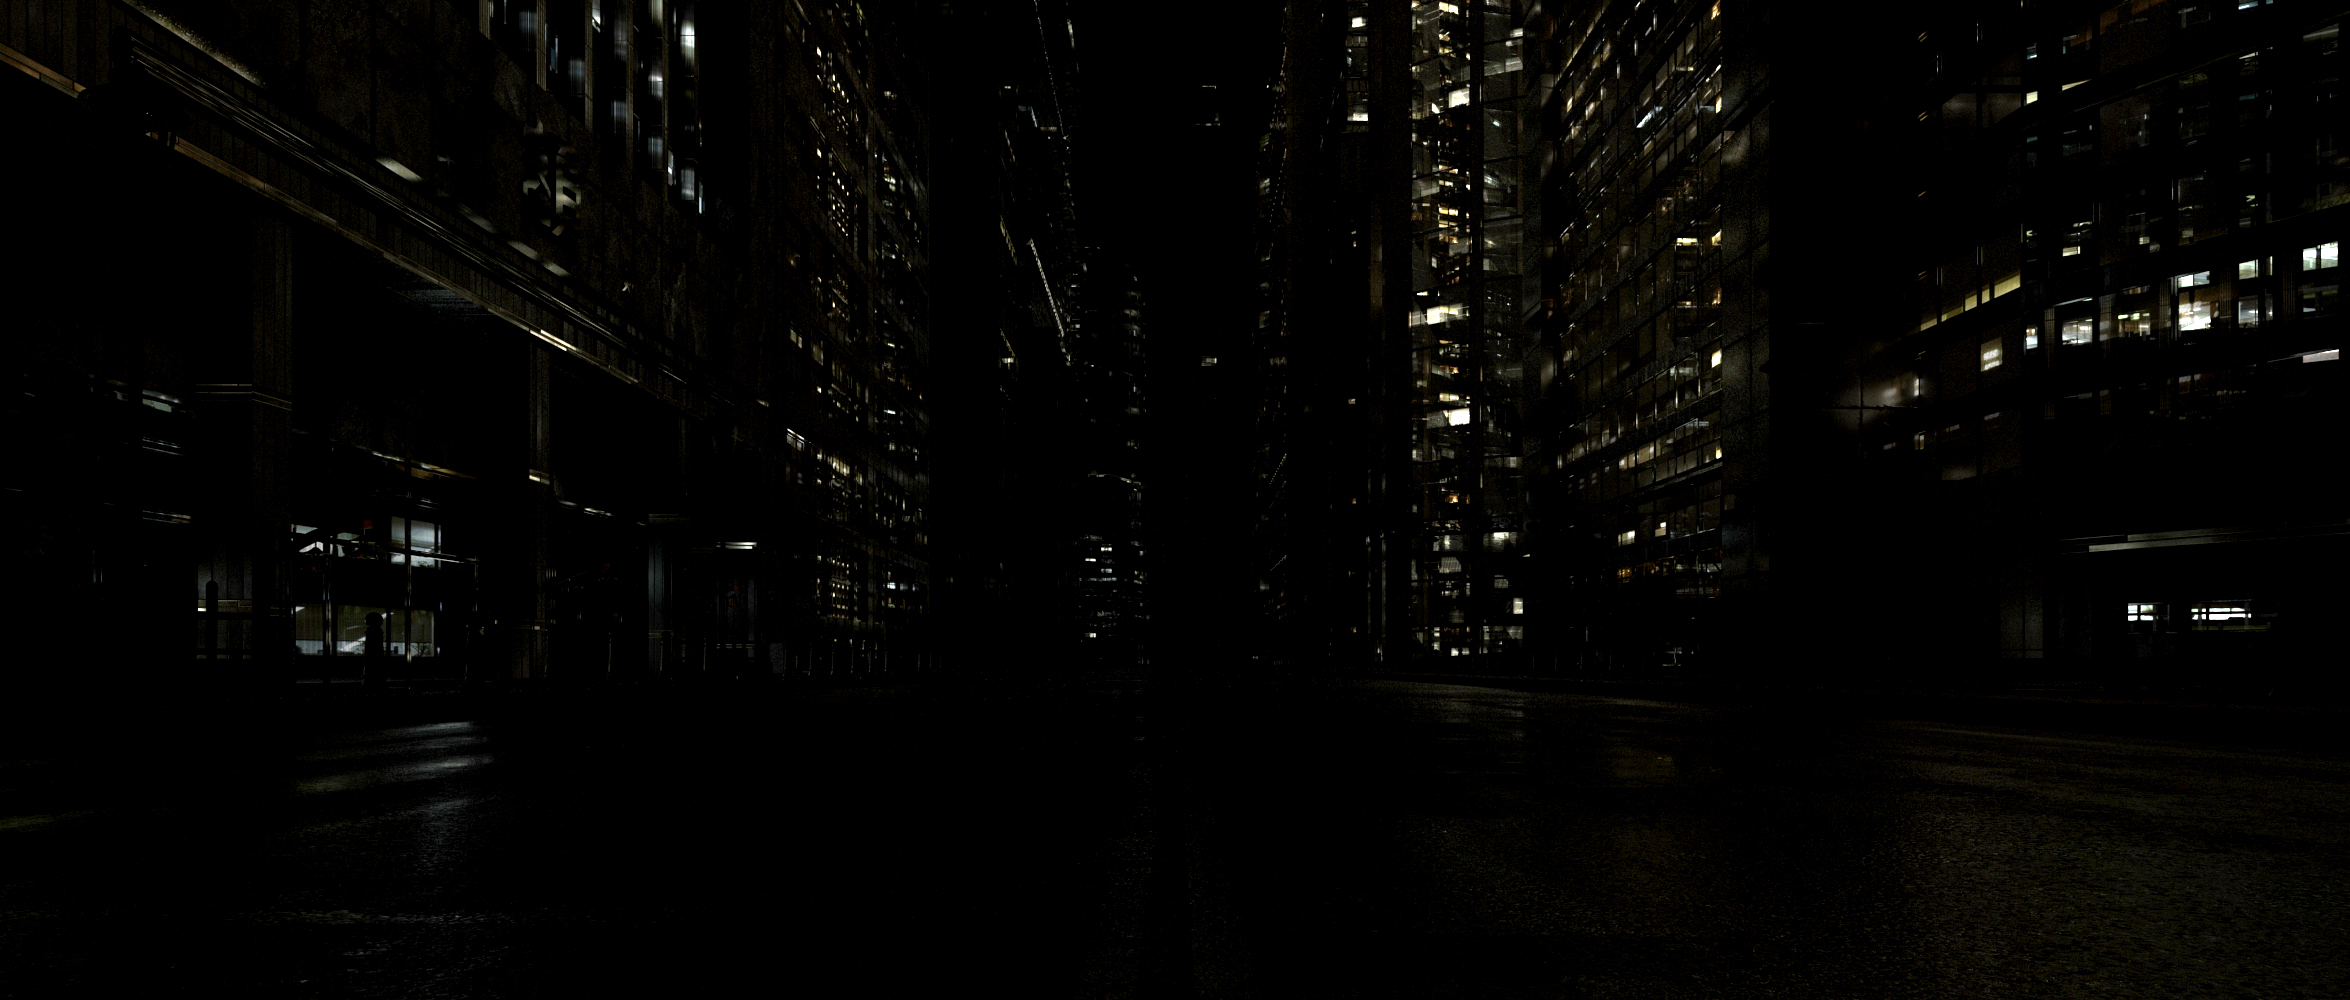
Window lights
This one is pretty straightforward. I get most of my building models from 3d model sites (loads of free ones) and of course from Kitbash3d.
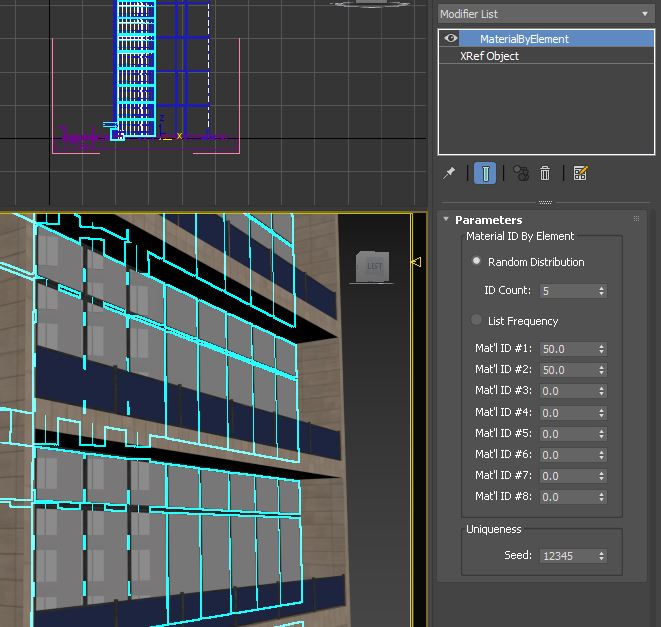
I always split each building into a minimum of 2 objects, glass and the rest. This way I could have a different ID for the glass and more importantly use a MaterialByElement modifier to randomize the glass IDs by different polygon sets.
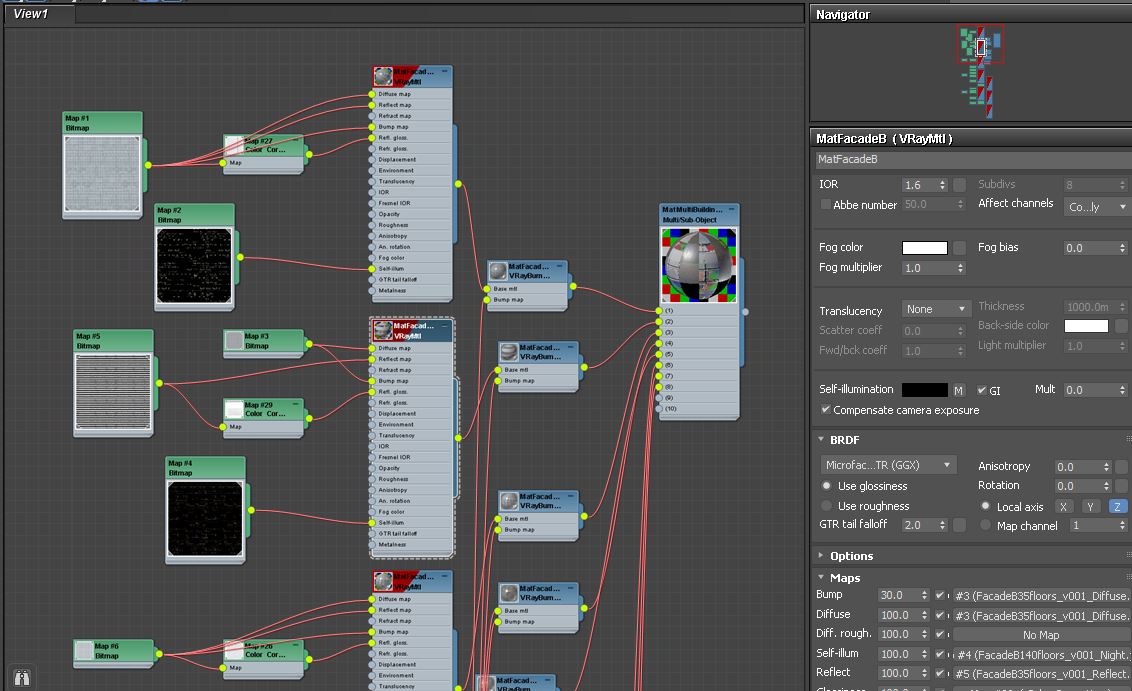
Then I put a multi-sub material on it with different window lights variations. I plug the night lights textures into the self-illumination node and put the value at 0 by default. This way if I want the lights on I can just turn the value to 1 or higher without having to plug-in extra maps for the next scene; it’s already in the material editor.
Depth
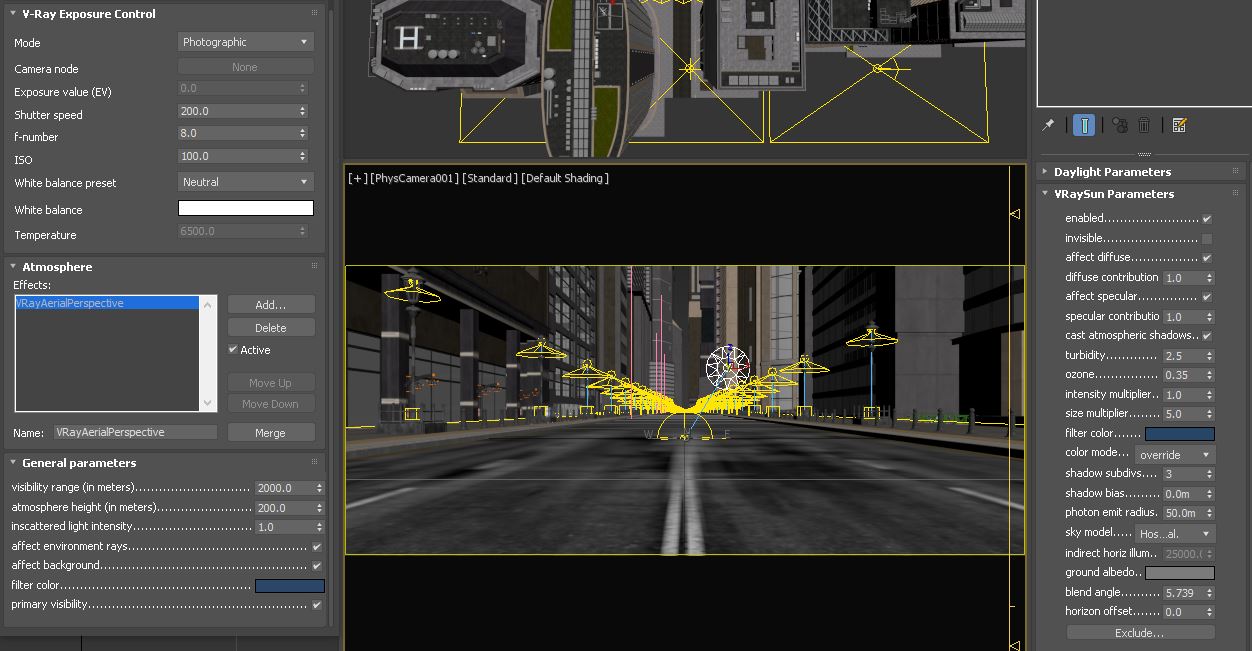
Perhaps another ‘wrong’ method. The correct way to do it is to render out a Zdepth pass and play with it in compositing to create fog and depth. But what I do is change the filter colour of the VrayAerialPerspective atmosphere instead. For night scenes, the default white doesn’t work as it’ll just follow the sunrise / sunset orange tint. So I tweak the VraySun colour to dark blue / dark grey (depending on the night tone you’re going for) and I put the same colour in the environment parameters.
The VrayAerialPerspective is generated by the sun position, so you'll need to keep it in the scene; just not renderable.
This way I don’t need to worry about compositing depth in Nuke.
The VrayAerialPerspective is generated by the sun position, so you'll need to keep it in the scene; just not renderable.
This way I don’t need to worry about compositing depth in Nuke.
Light Select and MIDI
The LightSelect feature has been around for a long time and I’ve been having loads of fun using it as a form of automated lighting animations.
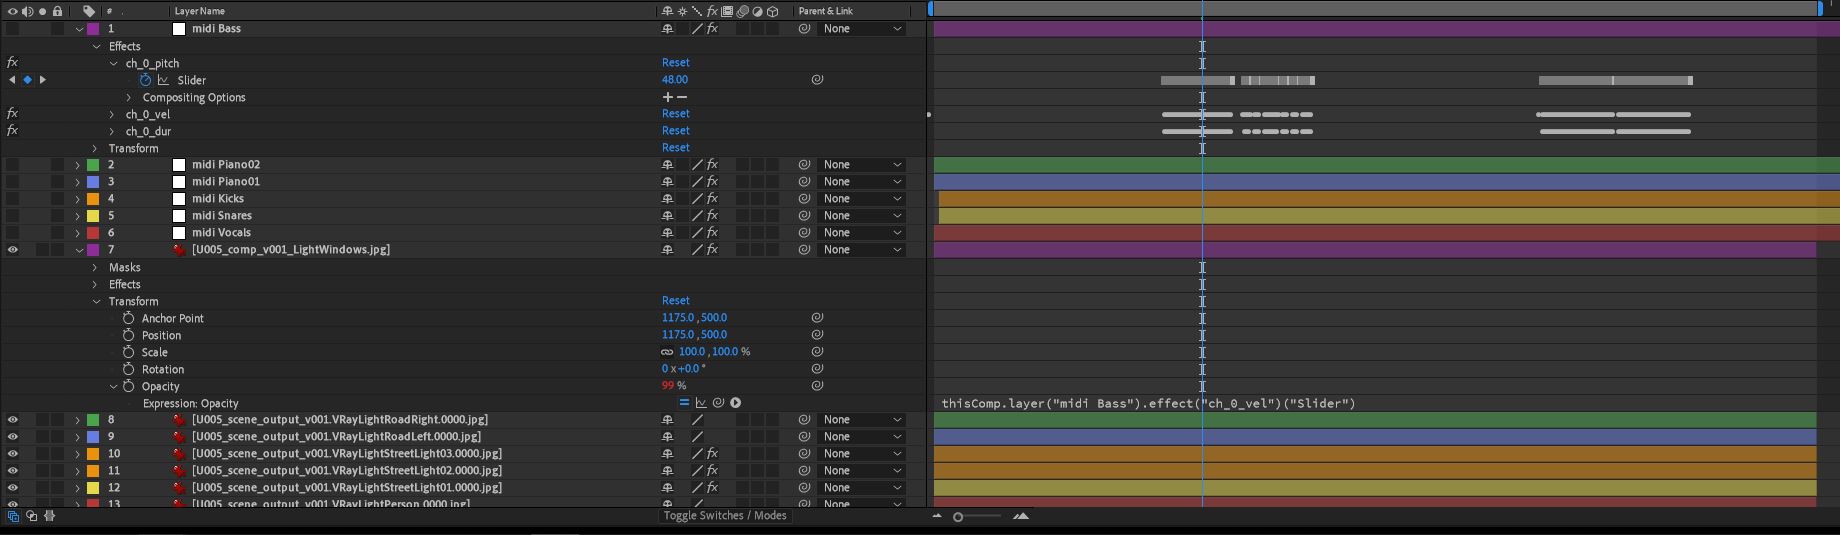
I create multiple lighting passes from different sources; then use a script in After Effects to automate them turning on and off according to different instruments from a song.
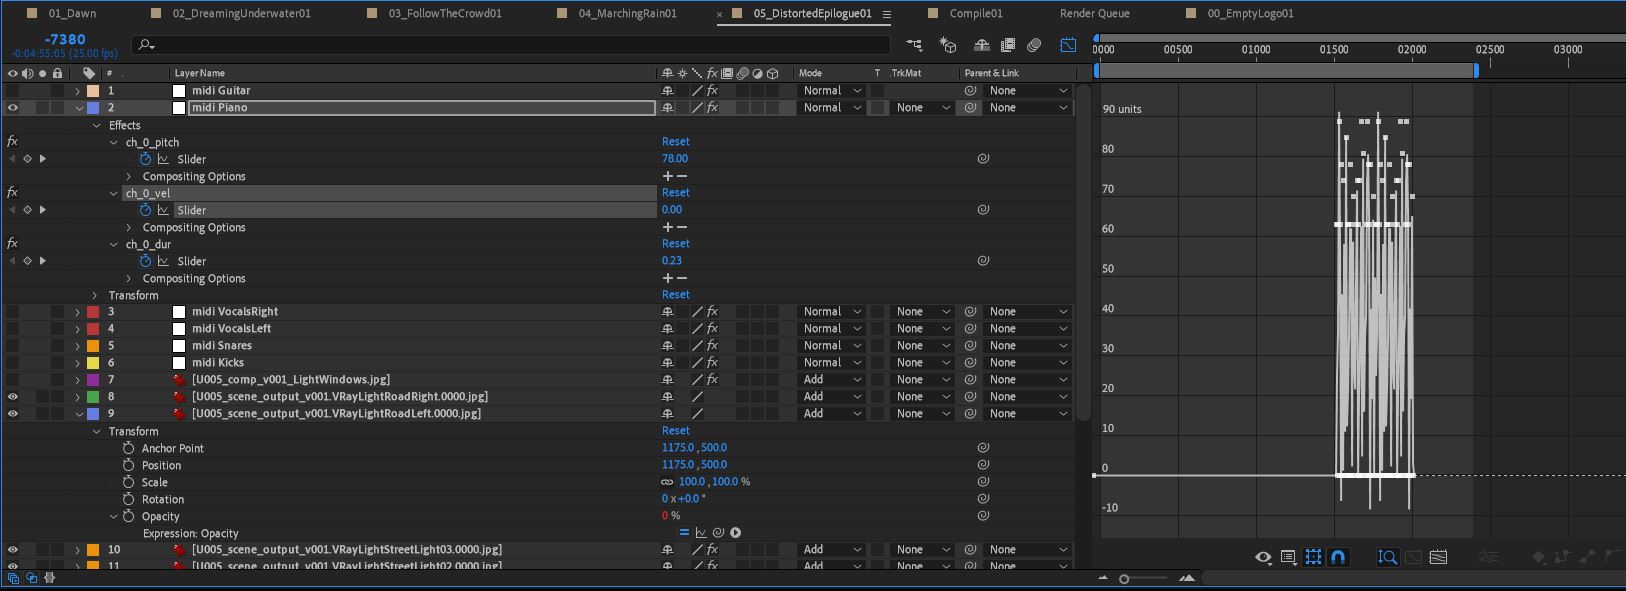
This can be done if you have the work files of the song to export each instrument as a MIDI file.
With more masterplans having theatres, music venues and concert halls, maybe this could be of use in the future?
Outro
You can check out my music video with the examples above in this video here.
The automated lighting animations by Midi can be seen in the videos below.
Happy 2021, let’s hope it’s a better year and I really look forward to seeing everyone in person at events again. I miss Truckles.
Ry
Ry
You must be logged in to post a comment. Login here.
About this article
My personal workflow of building cities and streets at night. Using 3ds Max and VRay.
visibility2.12 k
favorite_border11
mode_comment0