Making Of
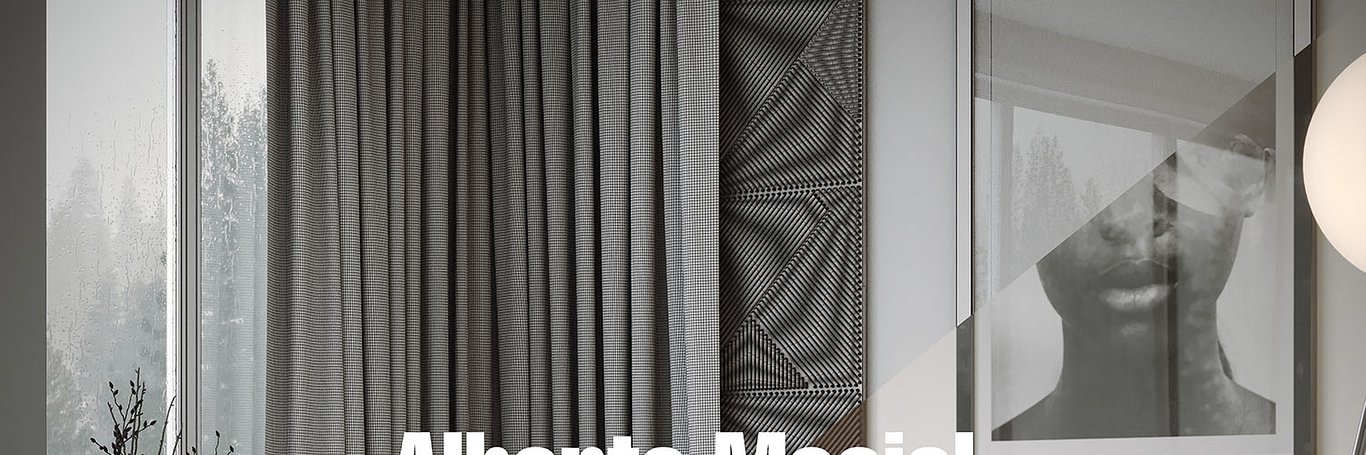
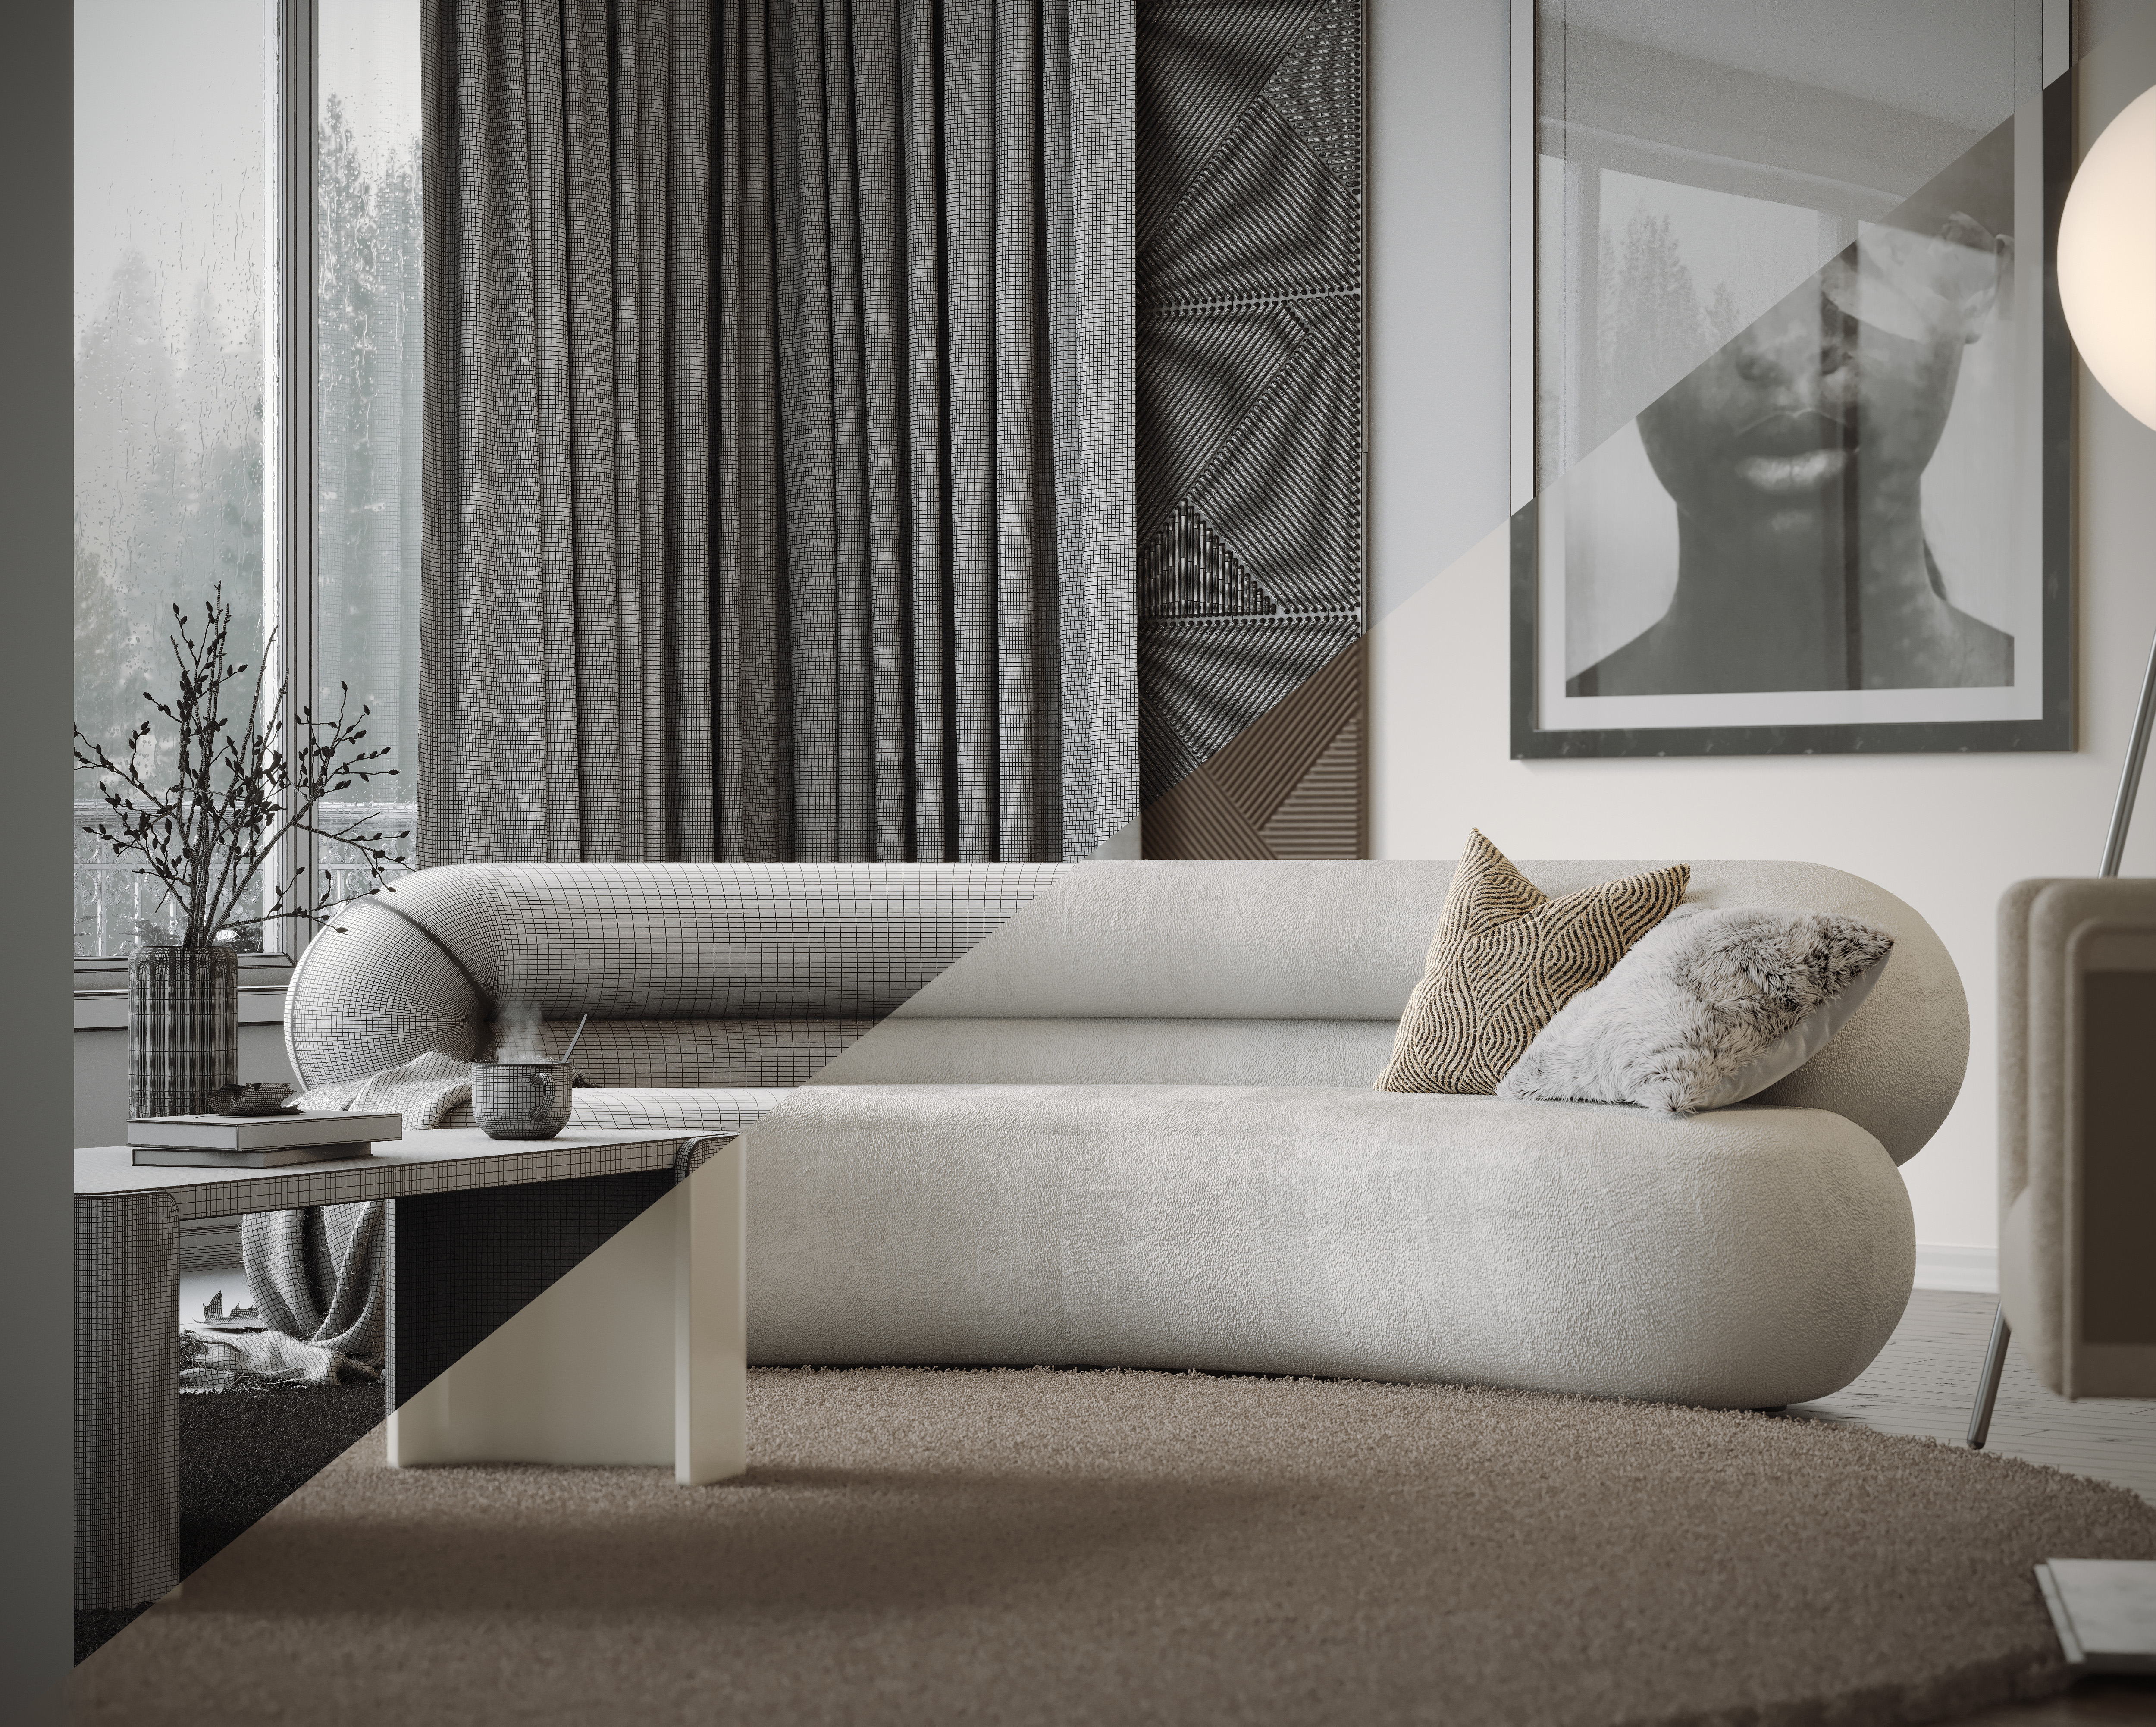
Making of 3D interior scene - Zelda Sofa
Hi, my name is Alberto Maciel. I'm a 3D artist originally from Brazil.
I was interested in computer graphics from an early age, in 2004 I started to venture into photoshop and illustrator, because of magazines I bought at the neighborhood store.
I started in the digital world by making vectors and montages in photoshop. I spent so much time doing this that soon 2D lost its fun for me and I started to venture into 3D.
In 2006 I was already immersed in 3D.
My dream initially was to be a digital artist at Pixar but the character and animation business in my country was extremely limited in season. My access to study content also prevented me from studying because I only had access to the internet on weekends and the content was not found as it is today. These limitations made me shift my attention and focus to a developing market in Brazil: Archviz.
In 2008, at the age of 18, I started working at Autodesk Brazil as a 3ds max instructor and since then, I haven't done anything else with my life and I intend to continue following my passion every day. I'm so addicted to 3D that when I'm bored, I do modeling and scenes just for the fun of doing them. In the places where I worked, they called me 3DAddict.
Design and computer graphics have always been present in my life, I've done many, many projects for free just for the passion to do.
Design is my life today is like music in a singer's life. I just can't imagine my life without it.
My main software is 3DS Max and Corona render for archviz and I have a bit distinguished methodology for creating 3D where I’m almost against post-production. Everything you see in my scenes is pure 3D. Direct from the frame buffer. I try to avoid post-production because I believe it’s a destructive workflow and it closes the doors (or makes it harder) to the possibility of animations afterward.
In this breakdown, I'm going to share some techniques I use in my visualizations and some of my thinking methodology.
In this breakdown, I'm going to share some techniques I use in my visualizations and some of my thinking methodology.
1- The Soul of the Project
Connecting myself with the project is what makes me want to evolve and be better every day. From the moment we do things just out of obligation and we lose passion for it, we stop evolving.
So from time to time, I create projects that have a story to tell, that means something to me, that I feel connected to and keep the flame burning. And usually, those are the ones that result in the best images. So, GIVE MEANING TO YOUR PROJECTS! Tell a story, and transmit feelings.
So from time to time, I create projects that have a story to tell, that means something to me, that I feel connected to and keep the flame burning. And usually, those are the ones that result in the best images. So, GIVE MEANING TO YOUR PROJECTS! Tell a story, and transmit feelings.

2- Preparation and References.
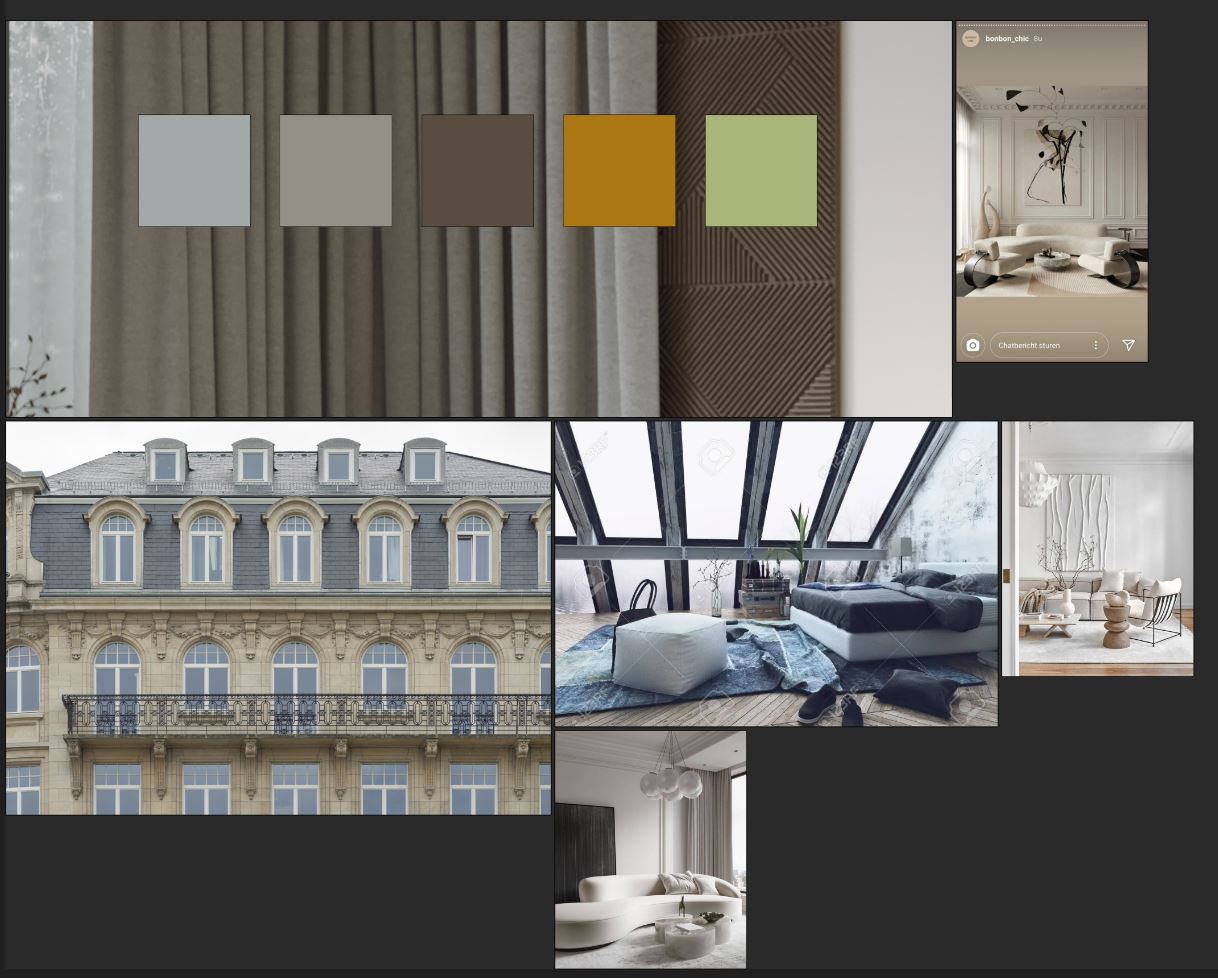
One of the most important things for the development of a project is to have good references. Real-world references and real photos mostly. I see many projects where the rendering quality is not very good but the whole ambiance, the mood, and the colors, talk to each other and have such a great harmony that the final render becomes a beautiful piece of art, despite some limitations. The same way I see extremely composite renders, with thousands of objects, many things happening at the same time, and at the end of the day nothing talks to each other and there is no connection. It ends up being a beautiful render but an empty shell.
So, accumulating information and references, helps you stay on the initial idea, in the ideal mood, and balance the project as a whole. It is also at this stage where I define the color palette that will be used in the project.
3- Modeling
Despite keeping things simple here, I'm very grumpy and picky about modeling everything I use in my scenes.
Sometimes when I have to use specific models of some brand and they provide the 3D model but the modeling is with a bad topology, I simply model all from scratch, maintaining a good and acceptable edge-flow because although it may not make much difference in the final image, a project with topology is much healthier and makes rendering calculations much easier.

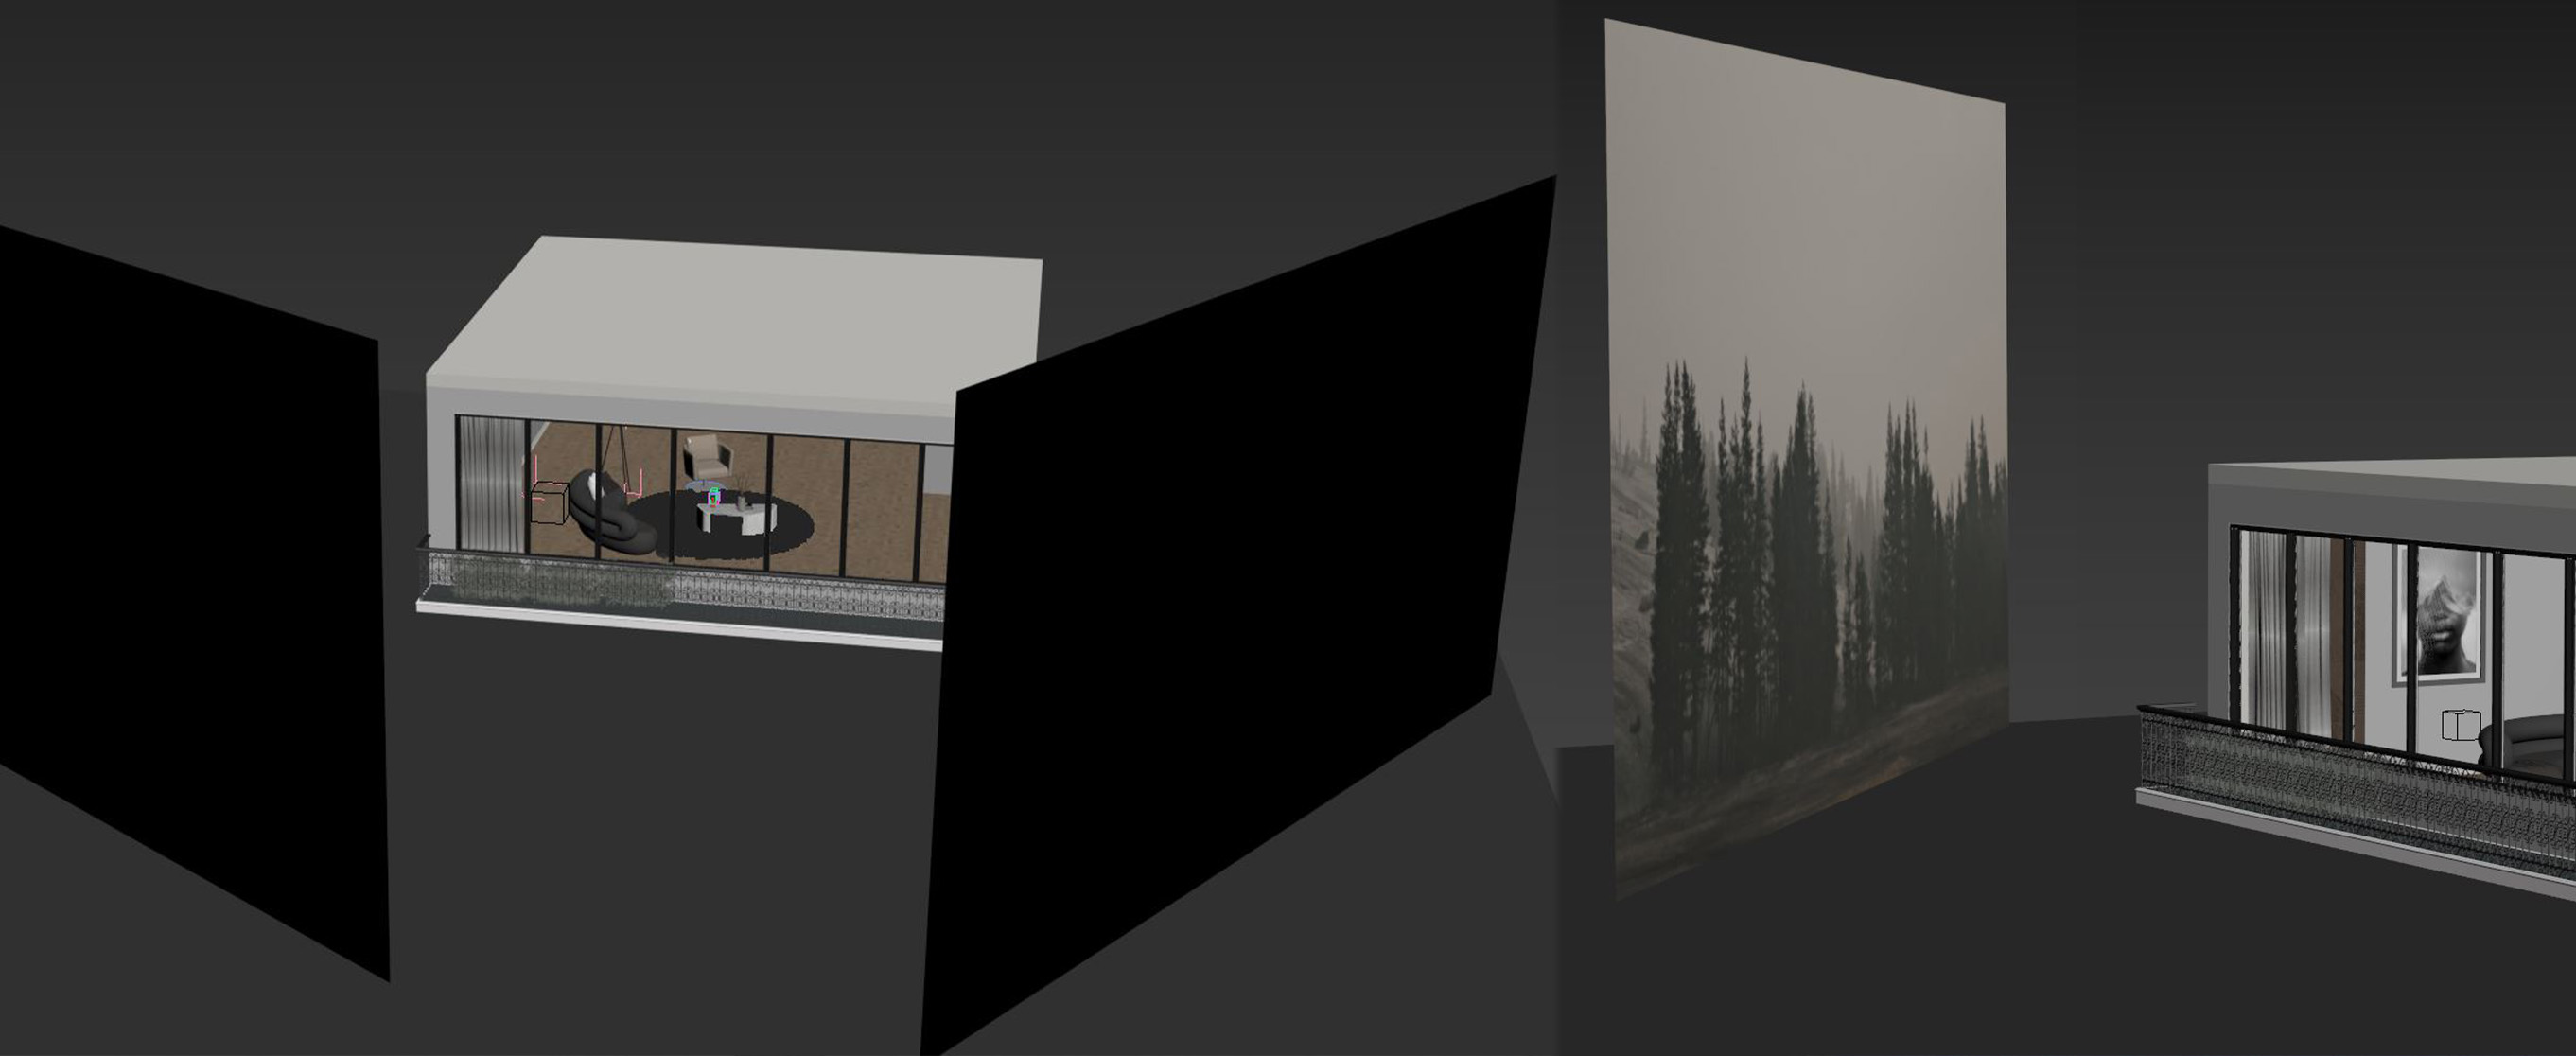
The environment itself is nothing special, just boxes for the walls and a large side window as the main light input. As the objective of this project was to focus on the environment around the sofa with a more artistic approach, the rest of the scene did not need to be modeled. Usually, I model in 3D the outside, using 3D trees, buildings, etc rather than images on plans but in this particular project, as the windows would be condensed with water and splashes, it would be a vain effort and waste of work and time to put all the trees outside the window. That's why I chose planes with an image.
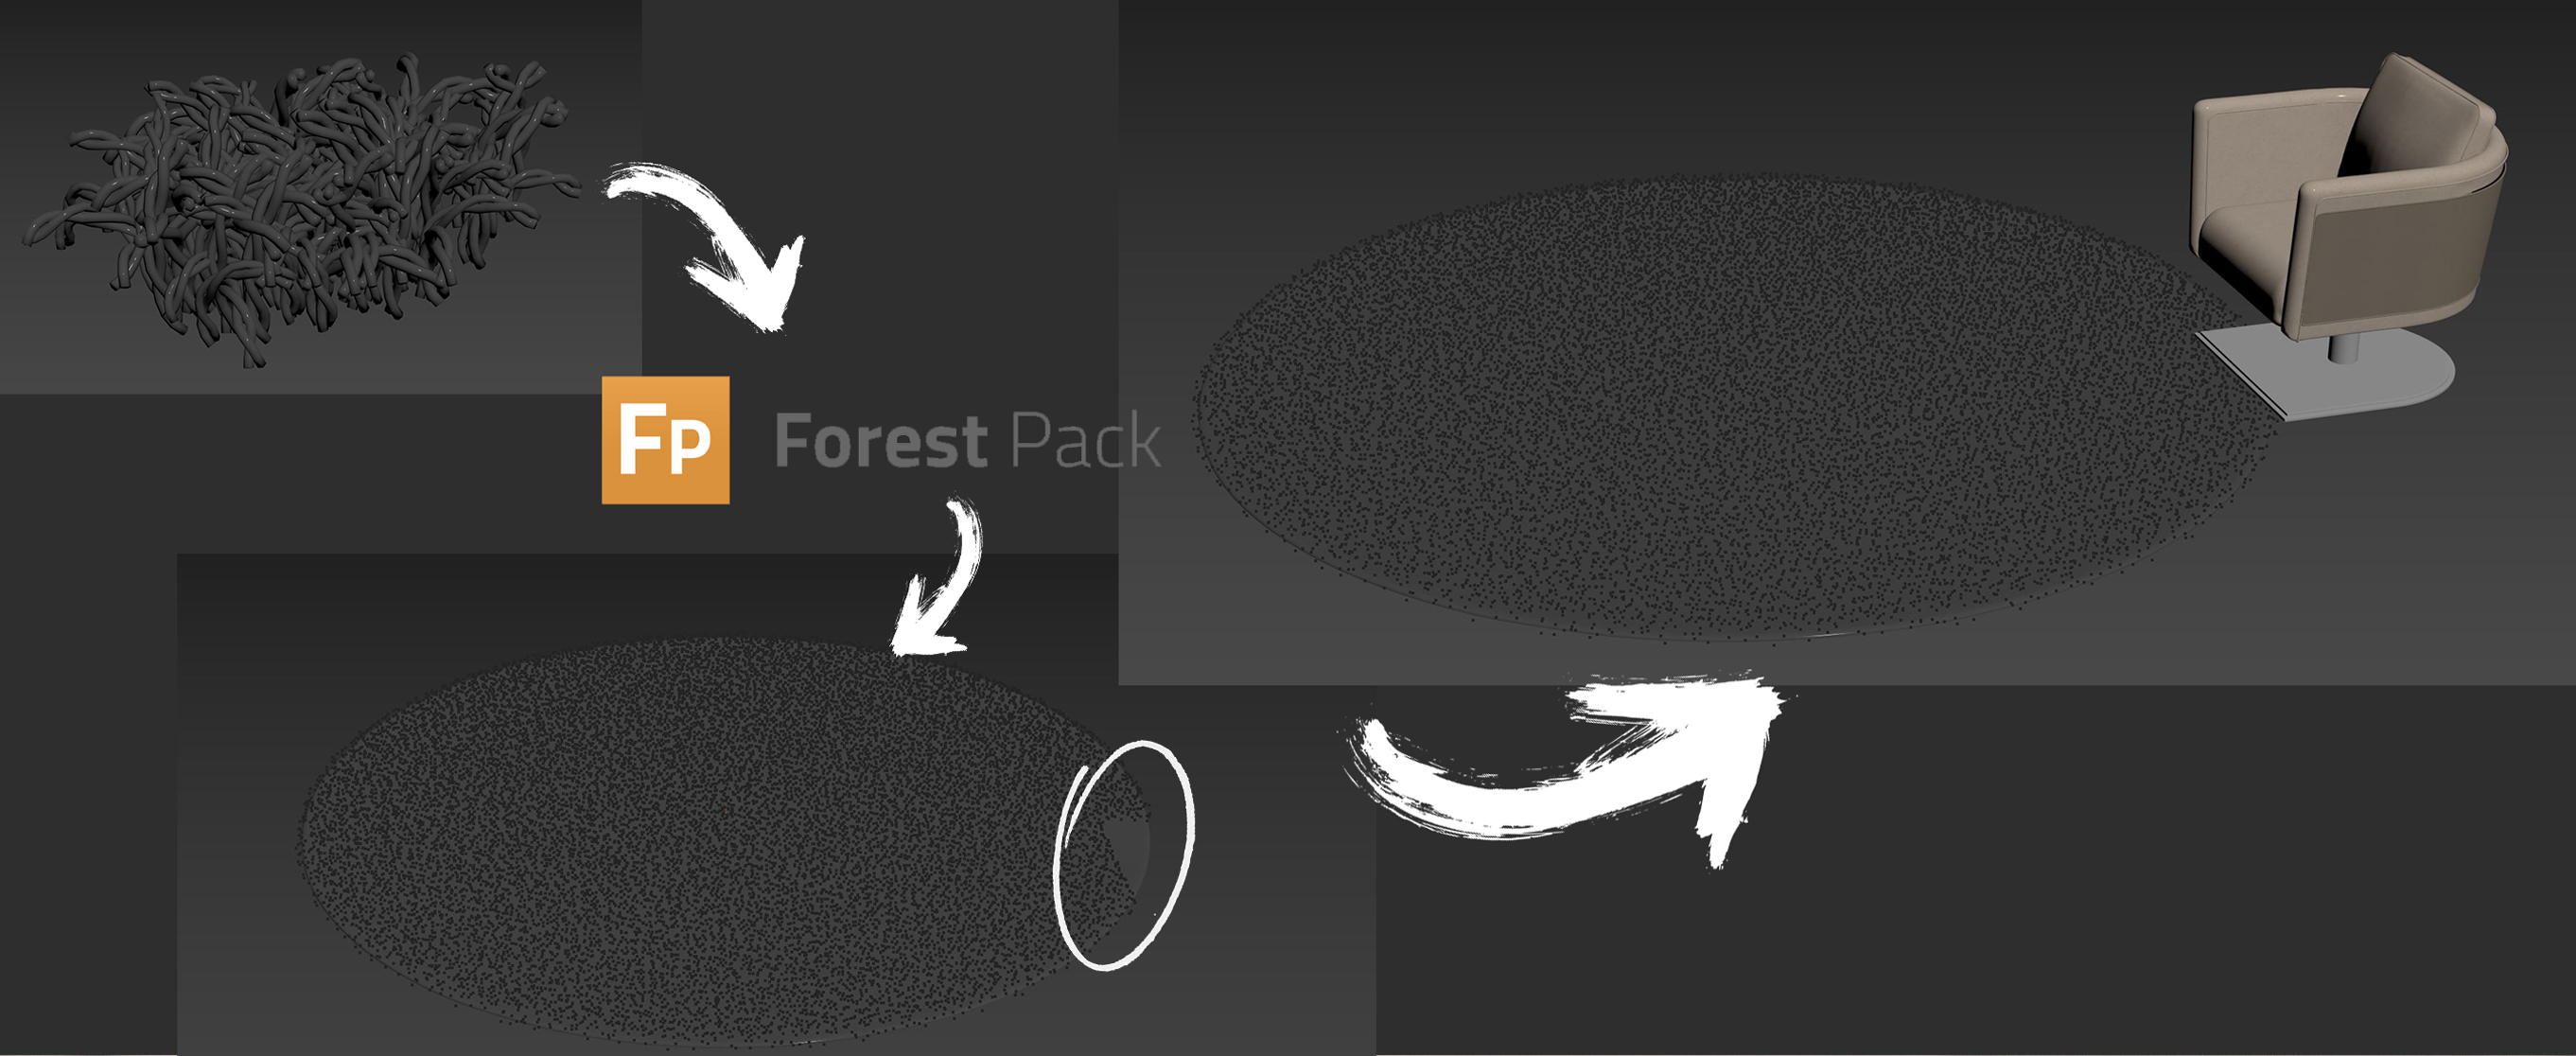
For the rug I decided to do with an older method (Thanks, BBB3viz), where I use ForestPack to spread a patch of model hairs all over the rug area. Using this method I have more control of all aspects of the strands. Often you will need to eliminate, in ForestPack, the geometries that are on top of the rug, so that the threads do not go through the mesh of the objects that are on top of it.
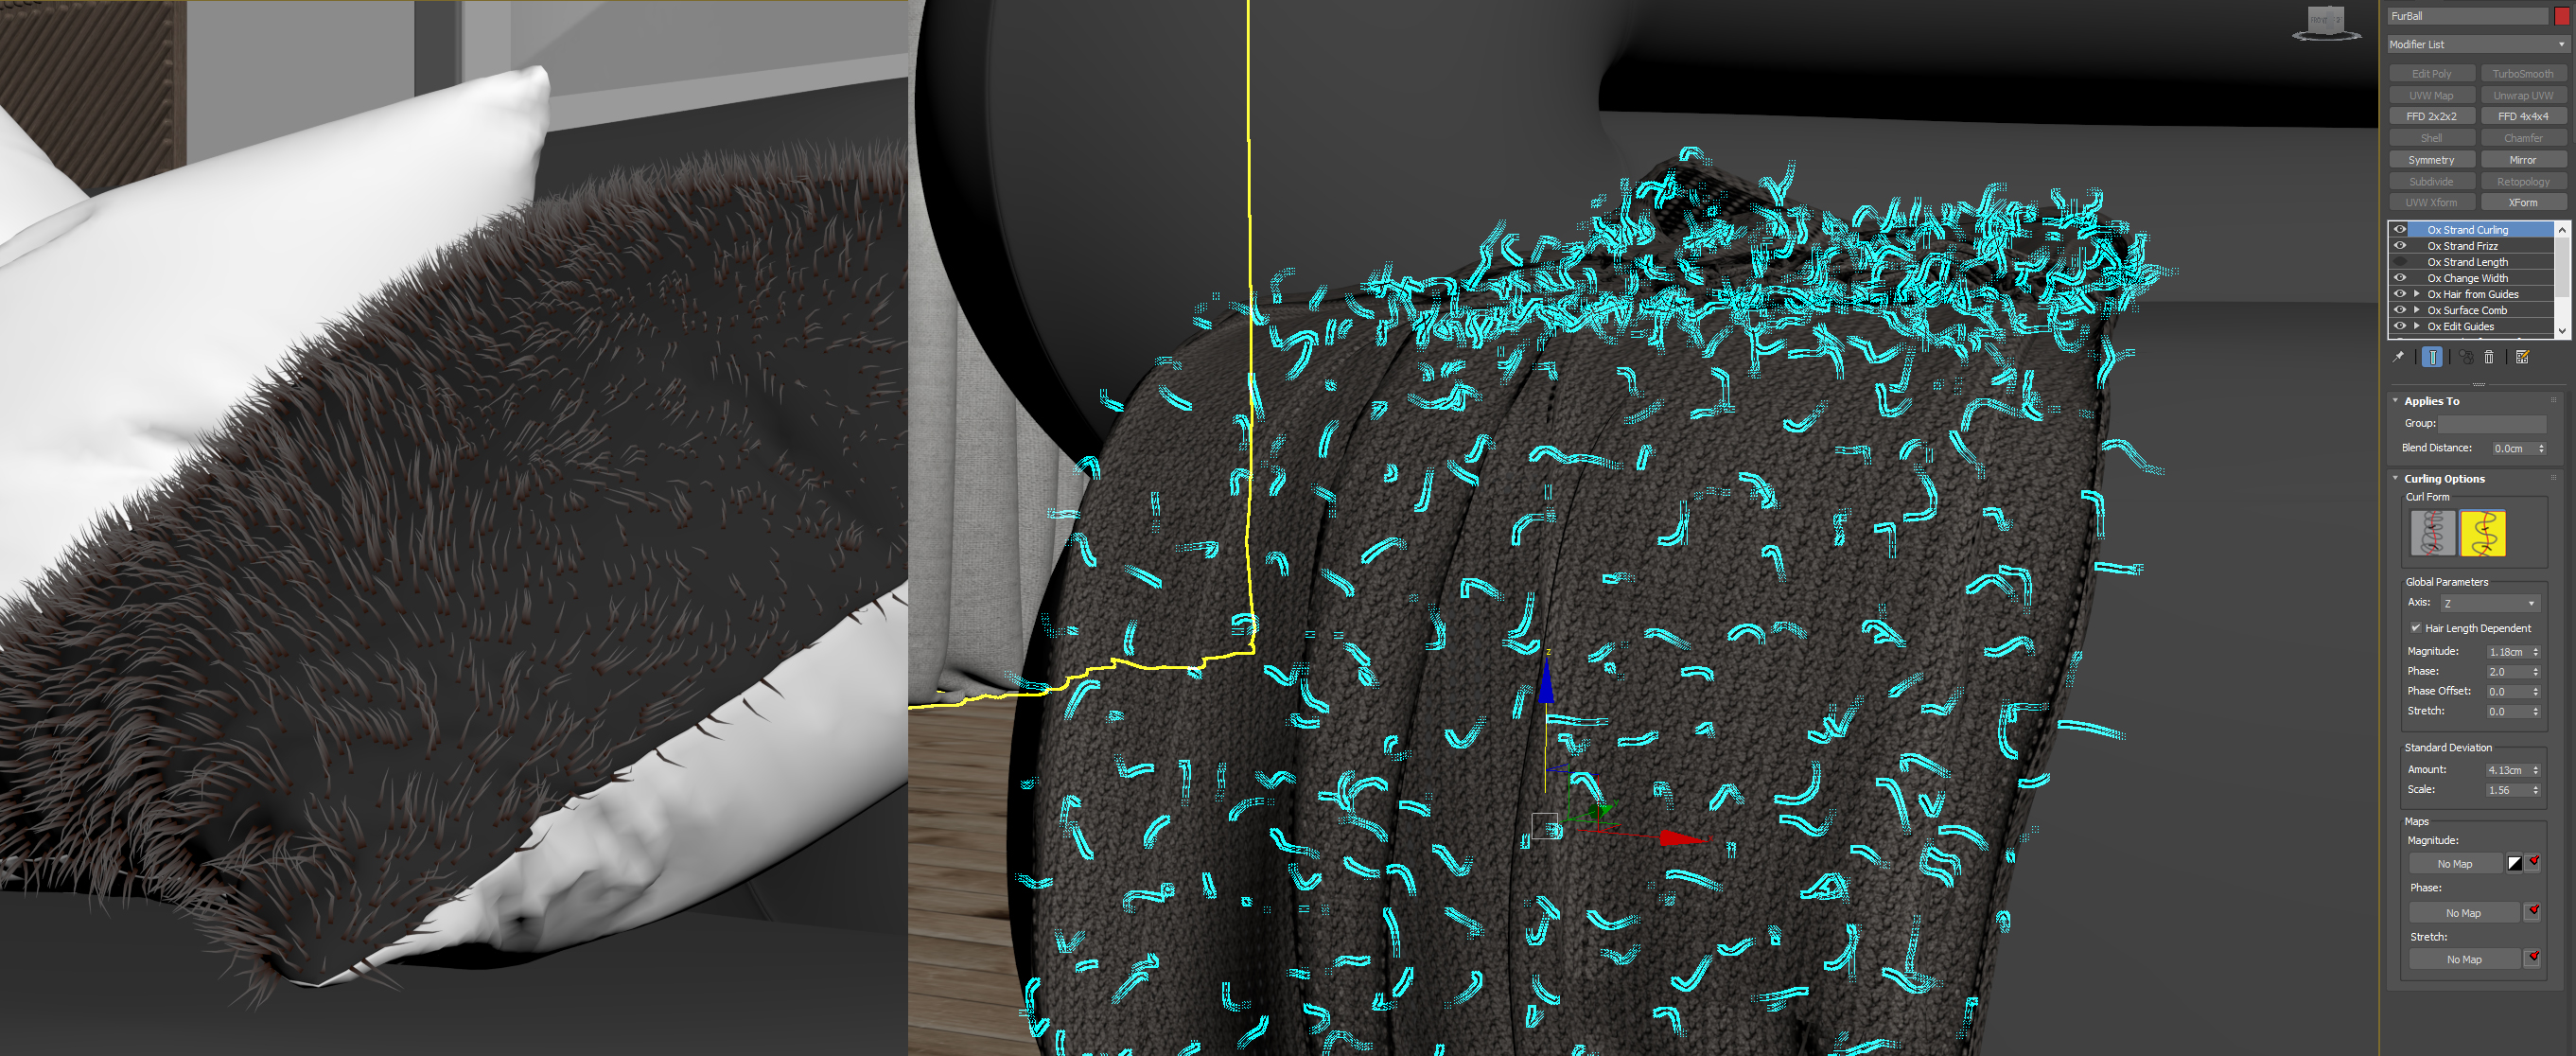
For strands, hair, and fur simulations I always choose to use Ornatrix. It is a powerful hair creation plugin that replaces the old and archaic Native Hair&Fur. Ornatrix requires a fair amount of study and trial & error to understand how it works, but in the end, it's worth it.
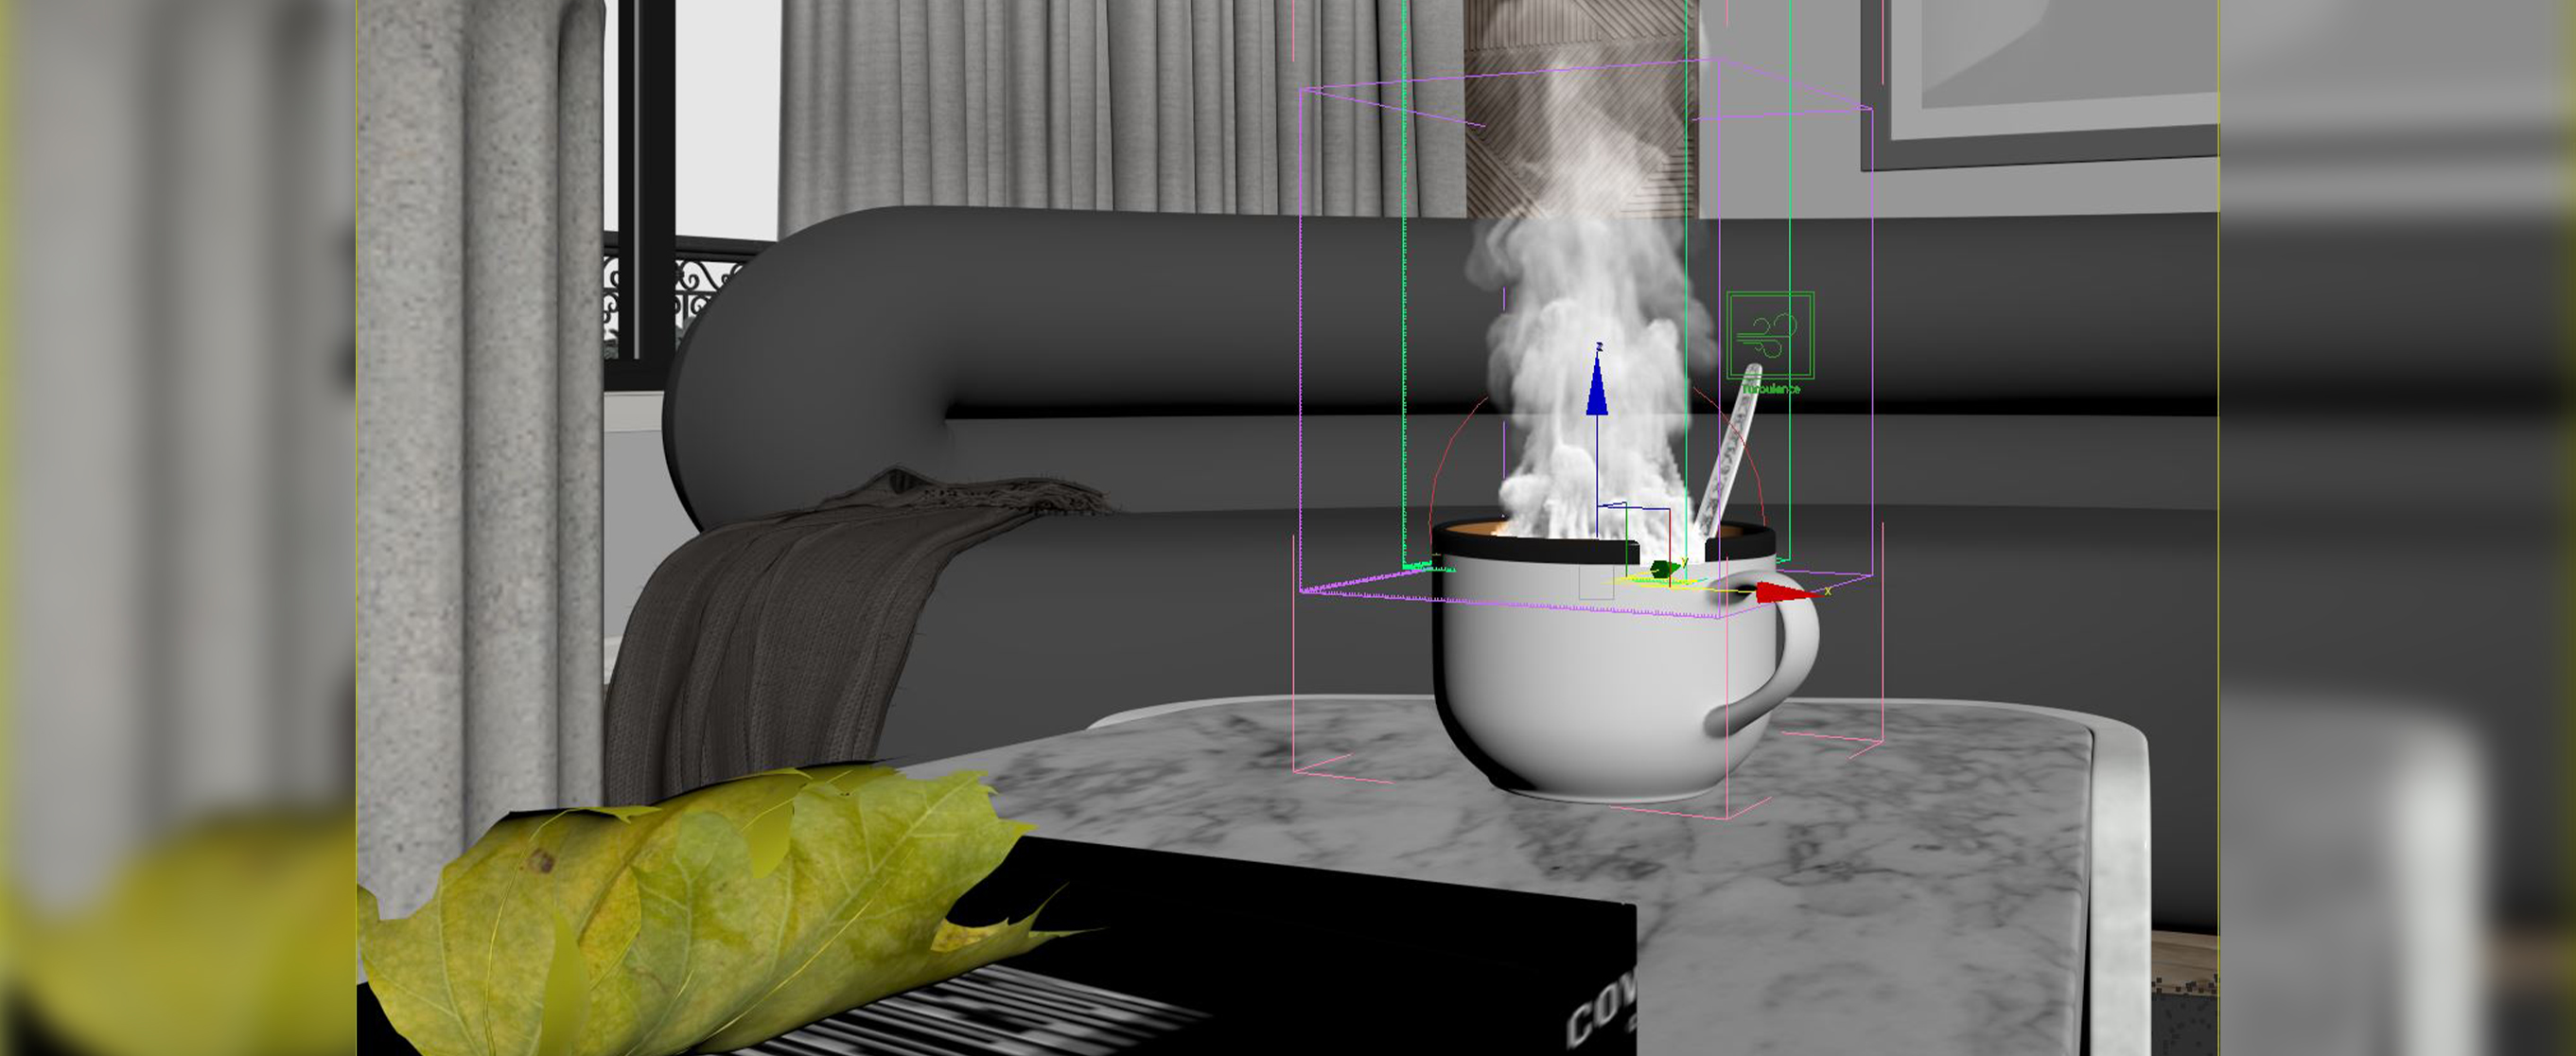
The steam is also done in 3D (PhoenixFD plug-in). I avoid post-production as much as possible, as I believe it is a destructive workflow and closes many doors to the possibility of animation, for example. If you do everything within the 3D software, the doors are opened more easily for animation, because the final result will be right there under your nose, in the virtual frame buffer!
4 - Textures / Materials
With the ease we have nowadays of getting models for everything anywhere, in my view, texturing and materials are where you can still really shine and do something different. In each scene, each lighting behaves in a different way, and according to the story you want to tell through your project, the materials take a big responsibility here. This is probably the stage I spend the most time on. No surface is perfect in the real world and as we can't convey all the micro details in modeling, this function is at the expense of materials and textures. For each close-up, I take special time to add surface imperfections to the materials, such as scratches, wear, water droplets, and dirt, which initially don't seem to make much of a difference. But in a general context, they add a lot of value to the final result of the scene.
With the ease we have nowadays of getting models for everything anywhere, in my view, texturing and materials are where you can still really shine and do something different. In each scene, each lighting behaves in a different way, and according to the story you want to tell through your project, the materials take a big responsibility here. This is probably the stage I spend the most time on. No surface is perfect in the real world and as we can't convey all the micro details in modeling, this function is at the expense of materials and textures. For each close-up, I take special time to add surface imperfections to the materials, such as scratches, wear, water droplets, and dirt, which initially don't seem to make much of a difference. But in a general context, they add a lot of value to the final result of the scene.

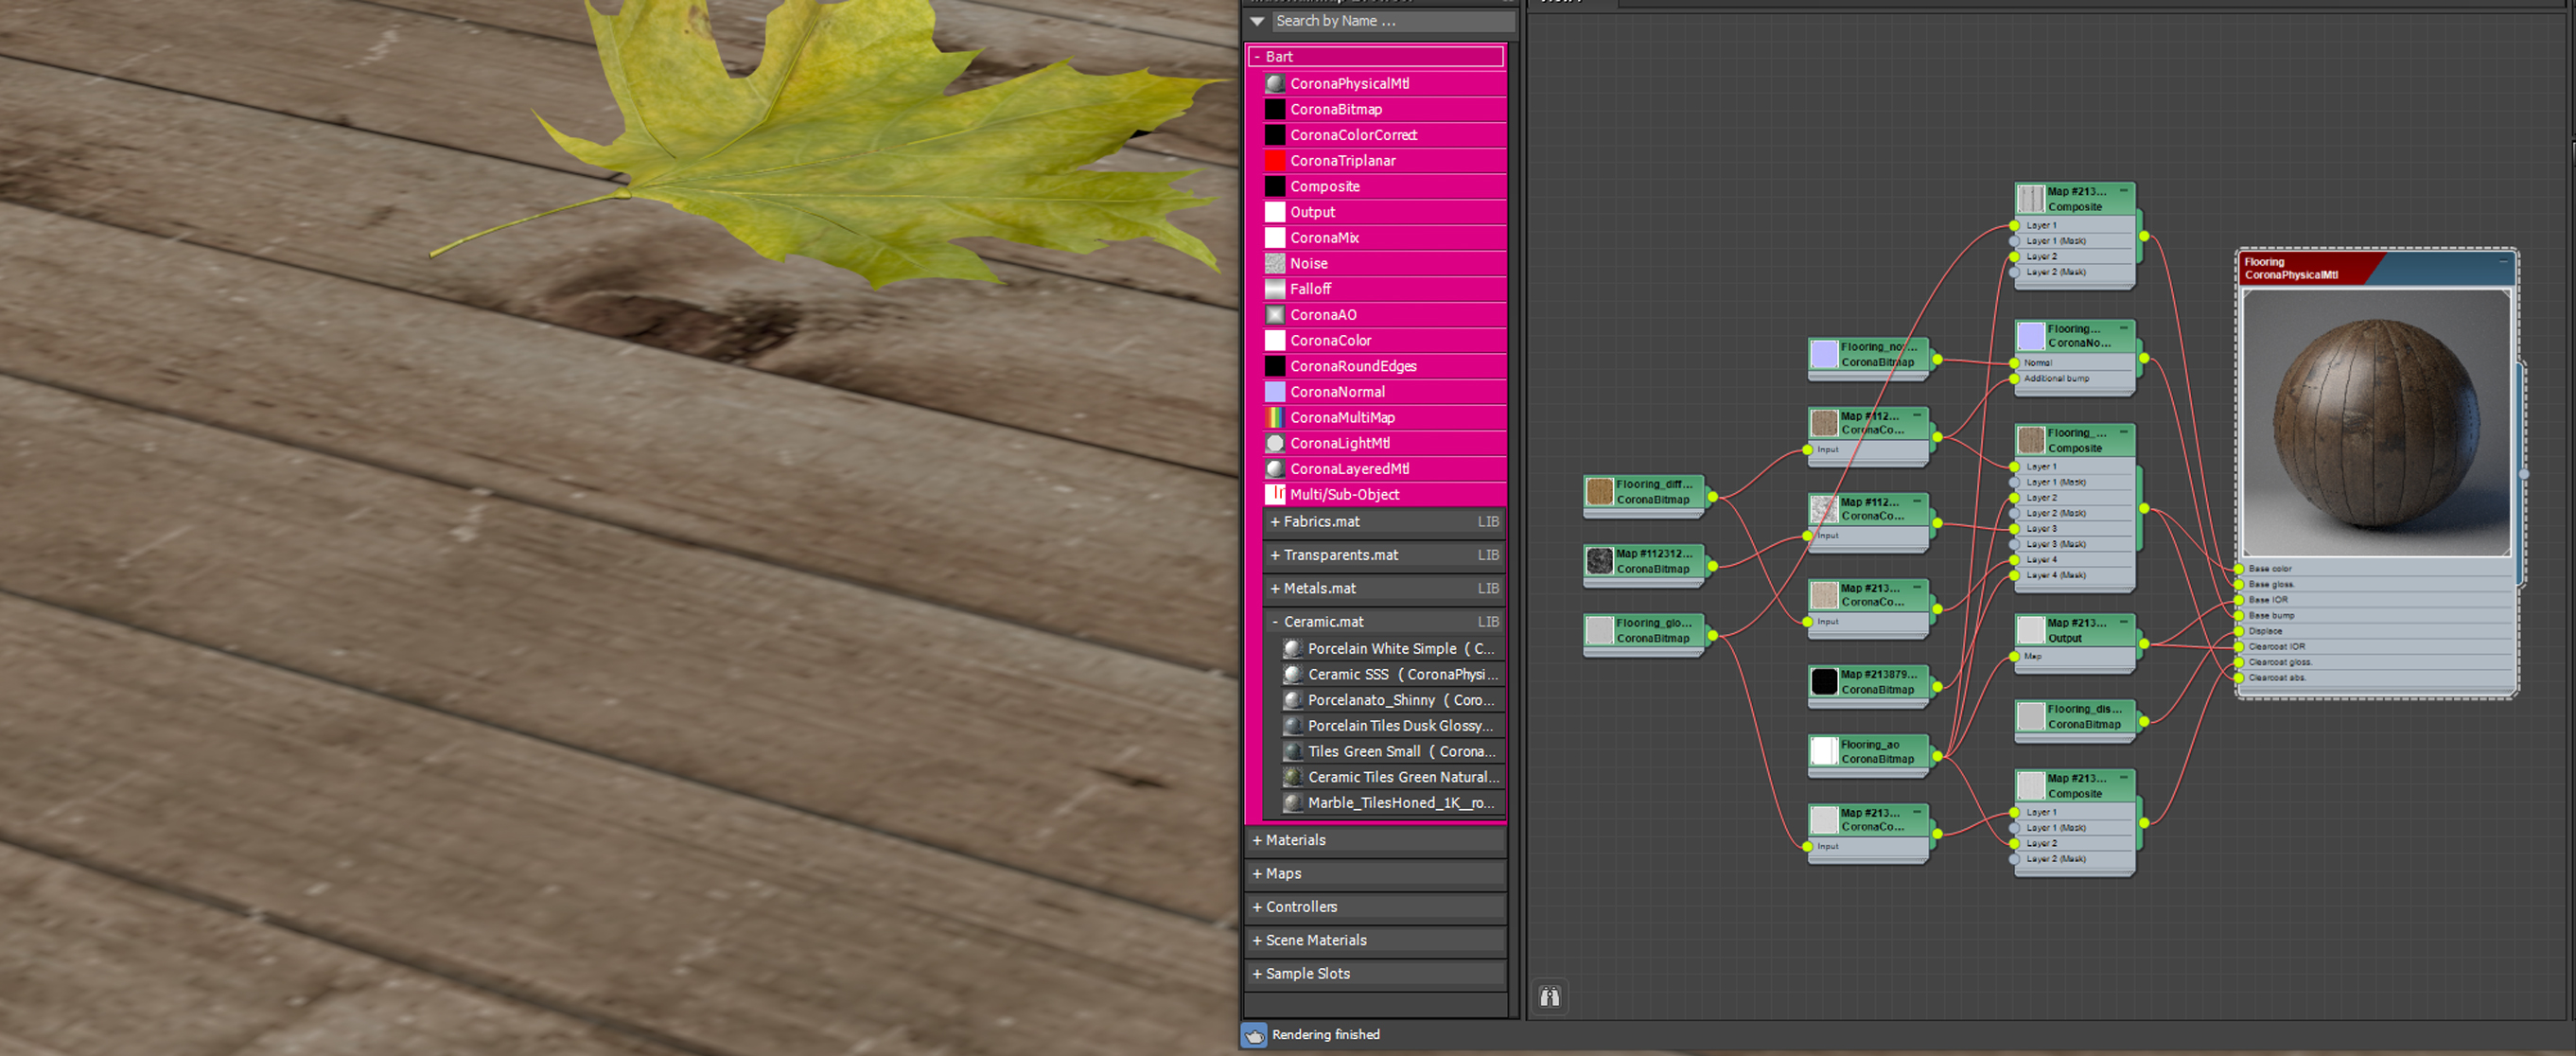
Here is a specific breakdown of the wooden floor, where I use a composite node to have control over each aspect of the material, as the composition often behaves in a unique and different way for roughness, displacement, bump and diffuse. Each has unique features and the more you explore each one, the more unique results you will get.
As I referred earlier to project references, I hit the same key on material references. Many of the materials we use are around us. Instead looking for images on the internet, step away from the front of the screen, see the concrete with your own eyes, extract the materials yourself, touch, and feel how the relief behaves, and how reacts to light. As I mentioned initially, I didn't have internet access at the beginning of my career so I had to extract the materials myself, taking pictures with 1080p digital cameras, or paid to use the scanner from the neighborhood store, to scan a leaf from a tree and extract the texture. As I am old-school, I still use this methodology of extracting my own materials whenever possible. I avoid using ready-made materials as much as possible because by extracting it myself, I learn how the material should behave.

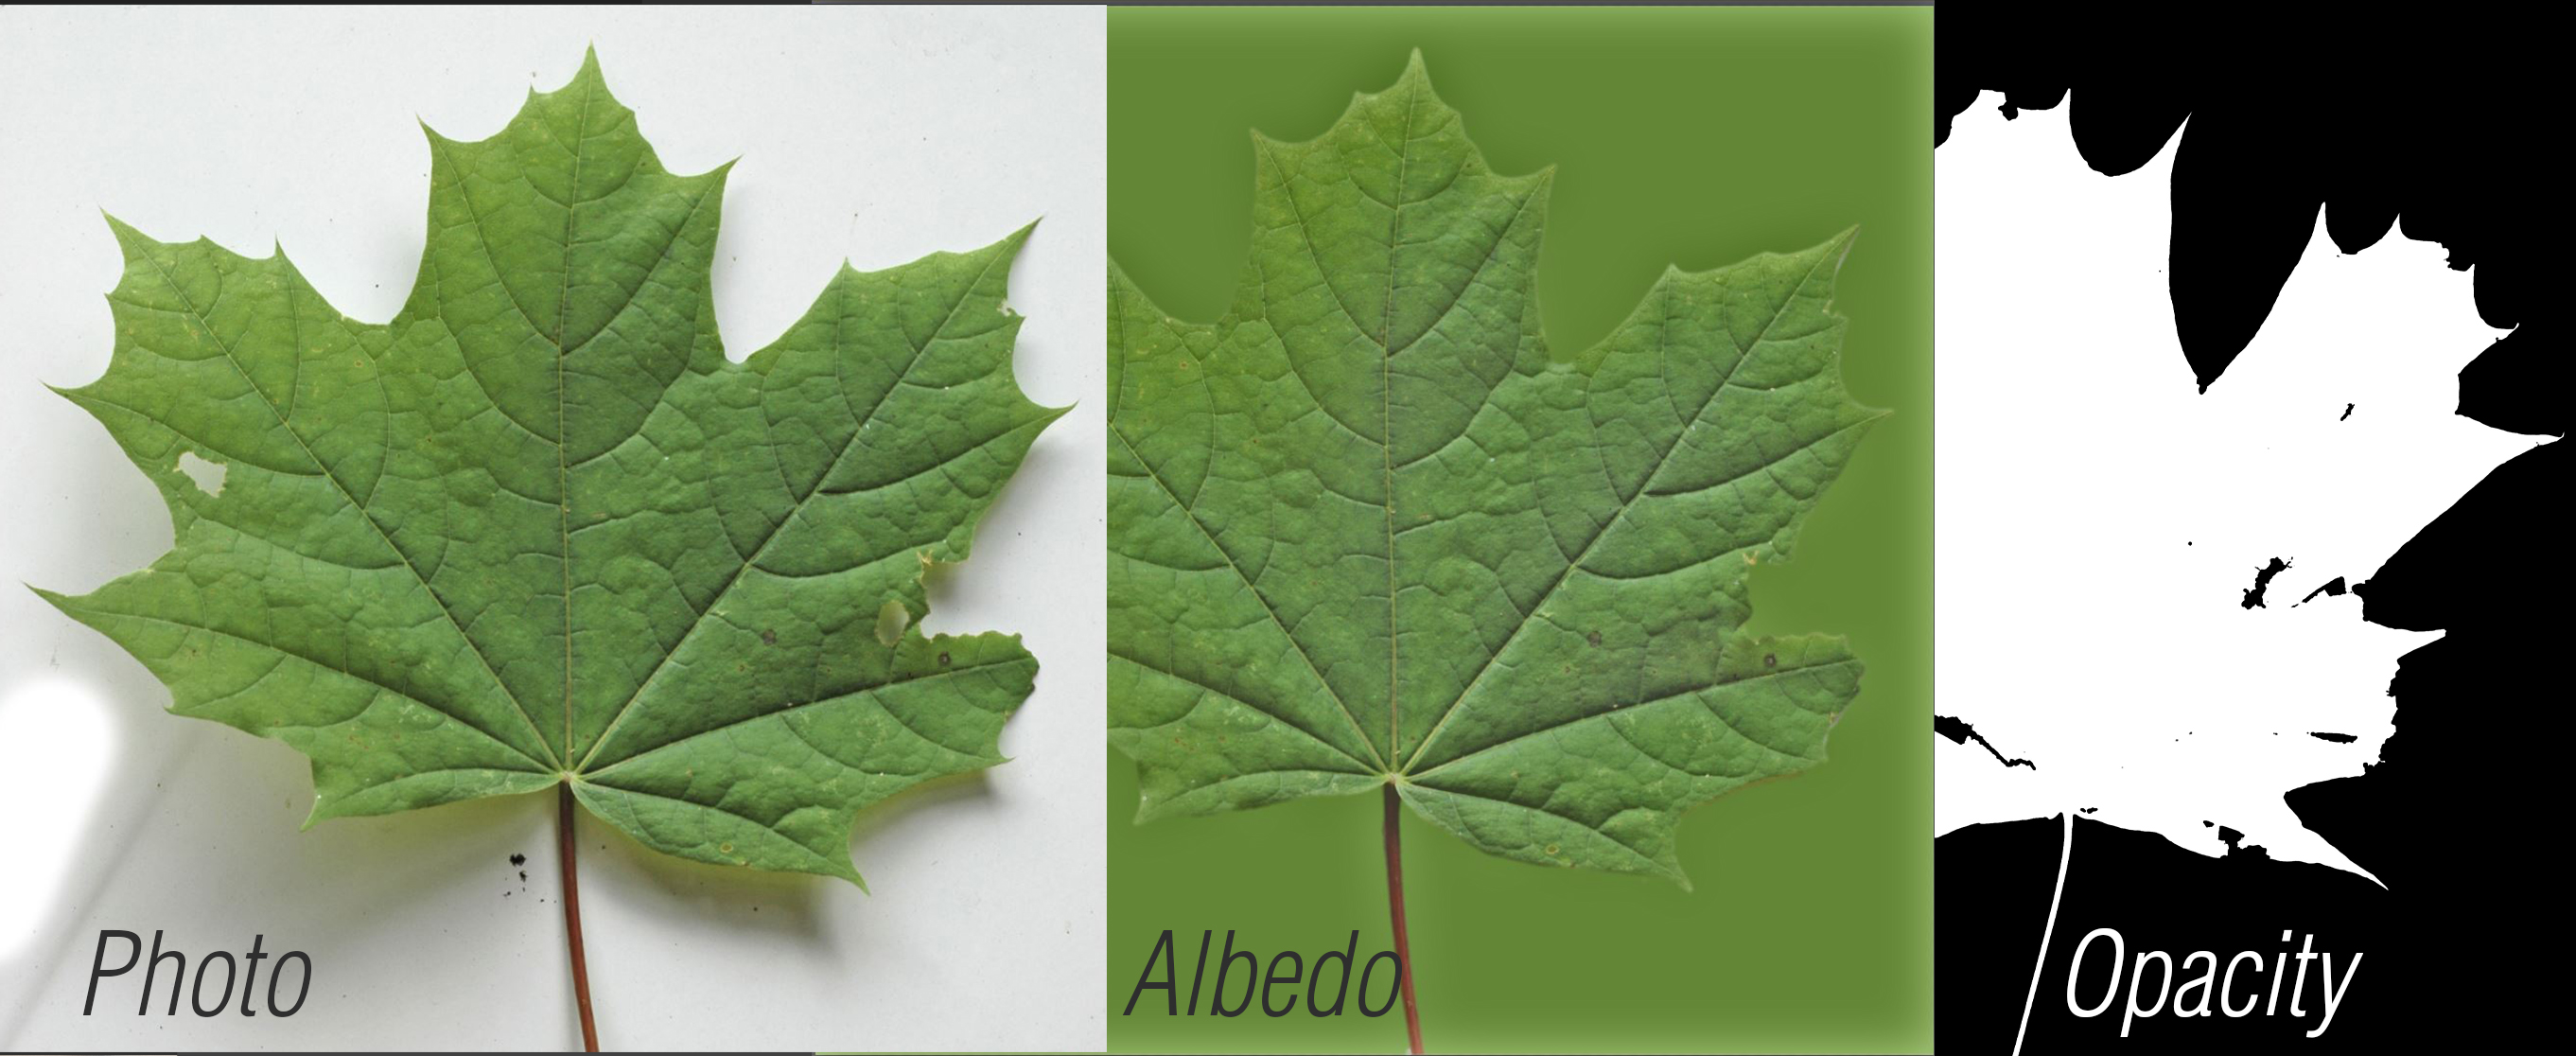
Here is an example of the Zelda sofa material, where I didn't have something similar in my personal library so I looked around and saw that my dog's bed resembled a lot of the sofa references.
With her permission, I photographed her bed fur, processed the maps, extracted displacement, bump, normal and albedo and VOALÁ.
With her permission, I photographed her bed fur, processed the maps, extracted displacement, bump, normal and albedo and VOALÁ.
5 - Lighting
There's not much of a secret here, because of the advanced technology we have today, everything is calculated the way it should be.
I always try to use the lights in exactly the same way we use them in the real world. I use lights only where they would be in real life, with no additions to black planes to absorb light or additional invisible lights to highlight reflections.
For general lighting, I start with an HDR on the environment map but if I need more control of the angle of the lights, colors, softness, etc, I use CoronaSun+Sky.
In this scene, only two lights were used. HDR + the lampshade light.
I always use a CoronaColorCorrect node to control the exposure, gamma, and saturation of the HDR map, and in this scene an overcast image was used.


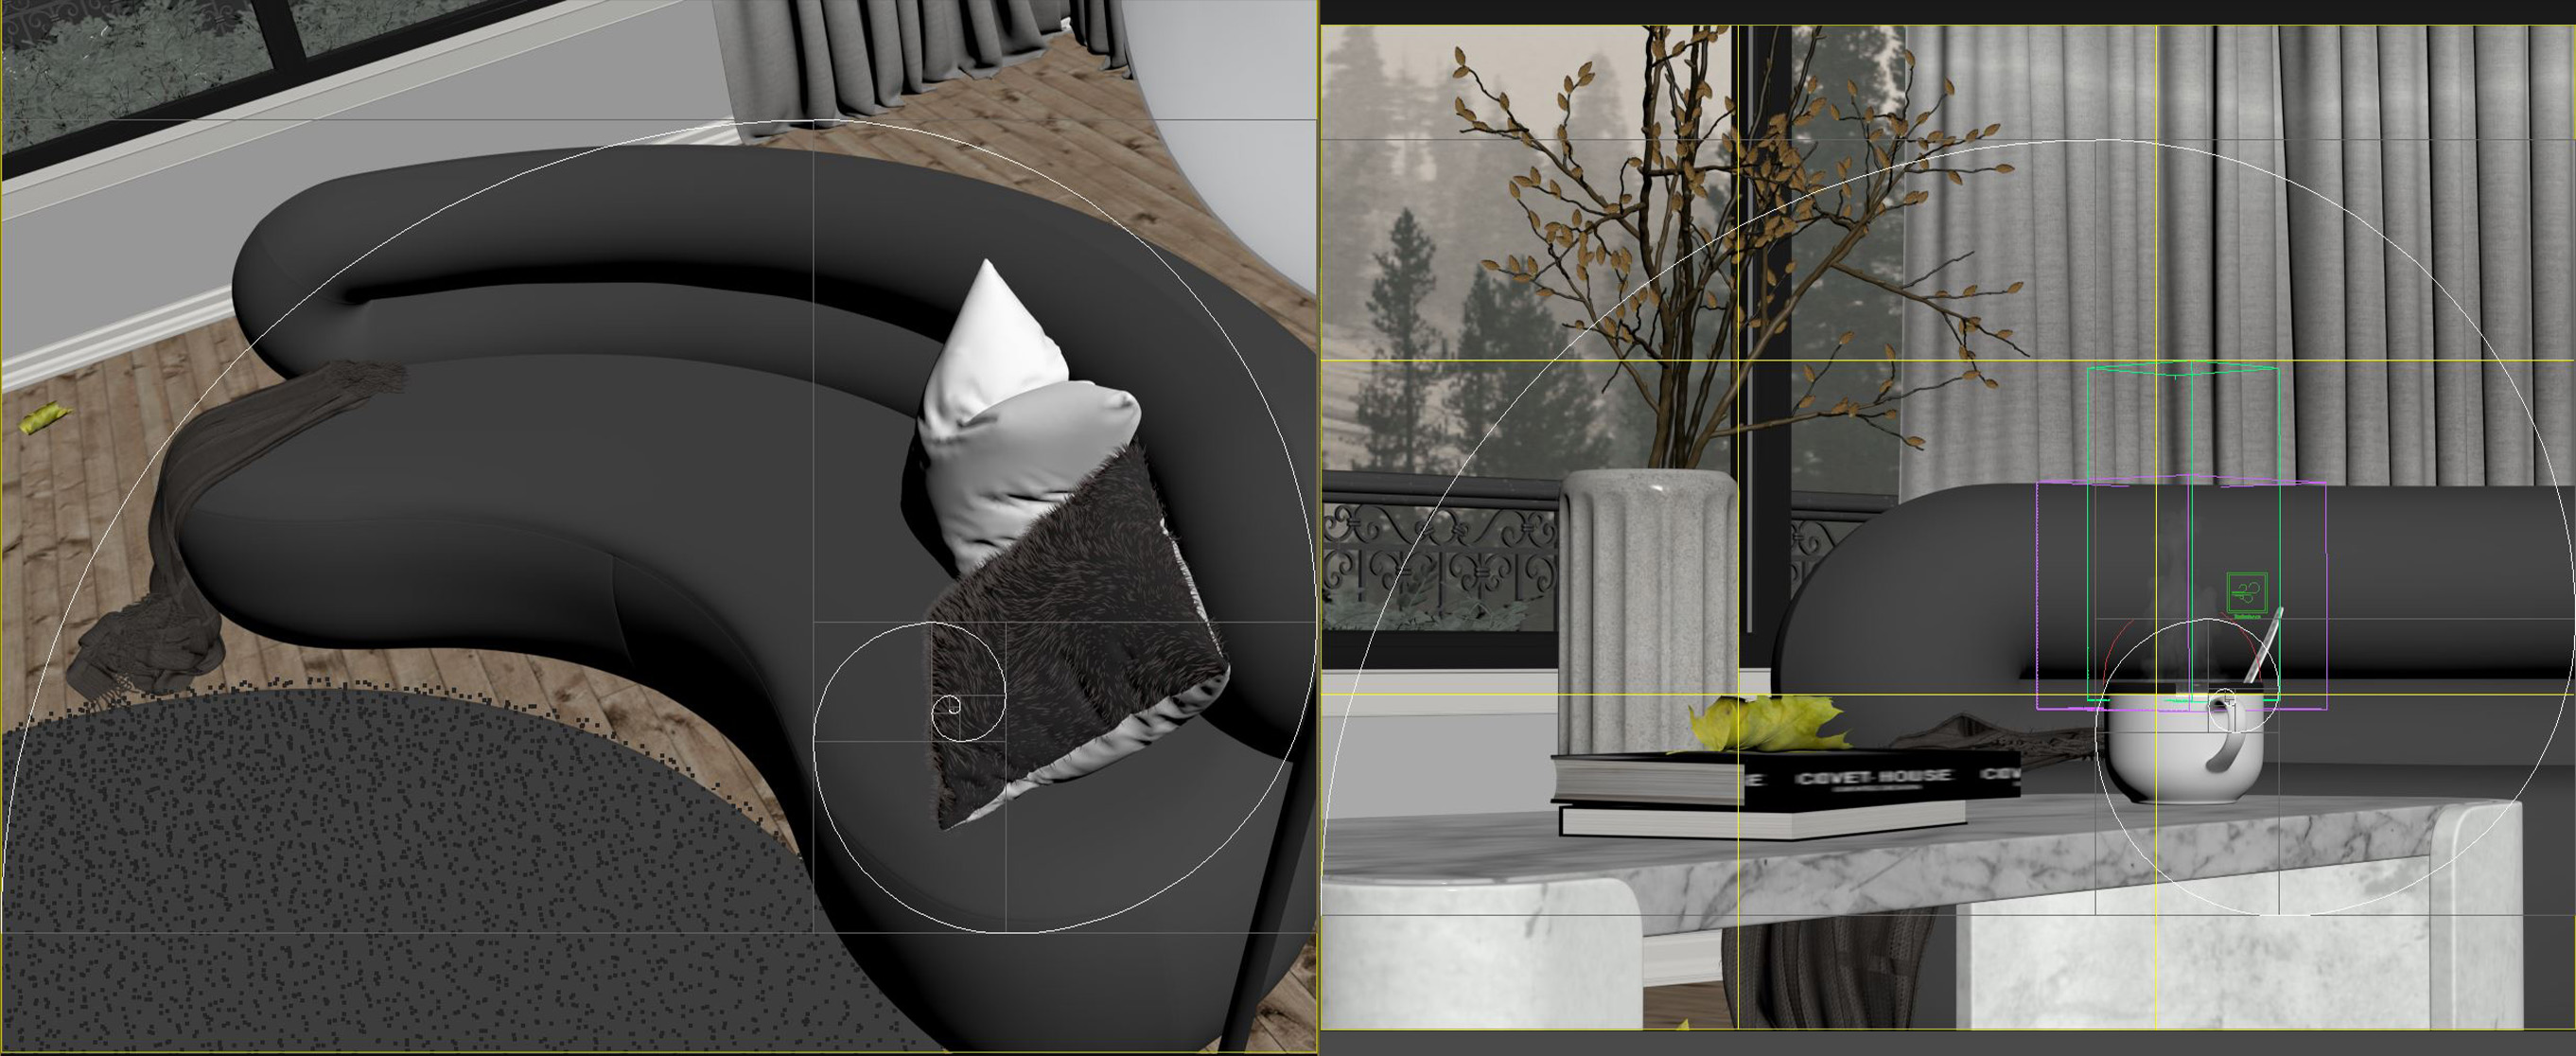
6 - Composition
Placing your cameras and objects in advantageous positions will give you extra realism.
Using the ImageCompHelper script, I align the items I want to give more relevance, drawing the eye to them.
Also always move objects, drag, and place things between the camera and the subject to give the feeling of depth, as I did here with the coffee table.
7 - Post Production
Post-production is very simple: I open my image editor, put a PNG of my signature and that's it! It's done.
I don't use post-production on any of my images. I like to leave post-production for last resort, as a last resort.
I hope this breakdown has helped you in some way. It was a pleasure to share with you some of my processes and methodology.
Any questions about anything related to it, don't hesitate to contact me! I will be happy to answer them. Thank you!
You must be logged in to post a comment. Login here.
About this article
Making of an interior scene - Zelda Sofa (Covet House)
visibility2.18 k
favorite_border15
mode_comment3

Obrigado, bastante explicativo, e de simples leitura
great work!
Thank you!