help increasing exterior MR realism
You must be logged in to post a comment. Login here.
C
Chris MacDonald
Report Abuse
You could subdivide the mesh and add a displacement modifier, use a noise map to generate a slightly less even surface. The blend material could work nicely, but that's something I've not done before and come to think of it I might have a go at it now.
J
Javier Oropeza
Report Abuse
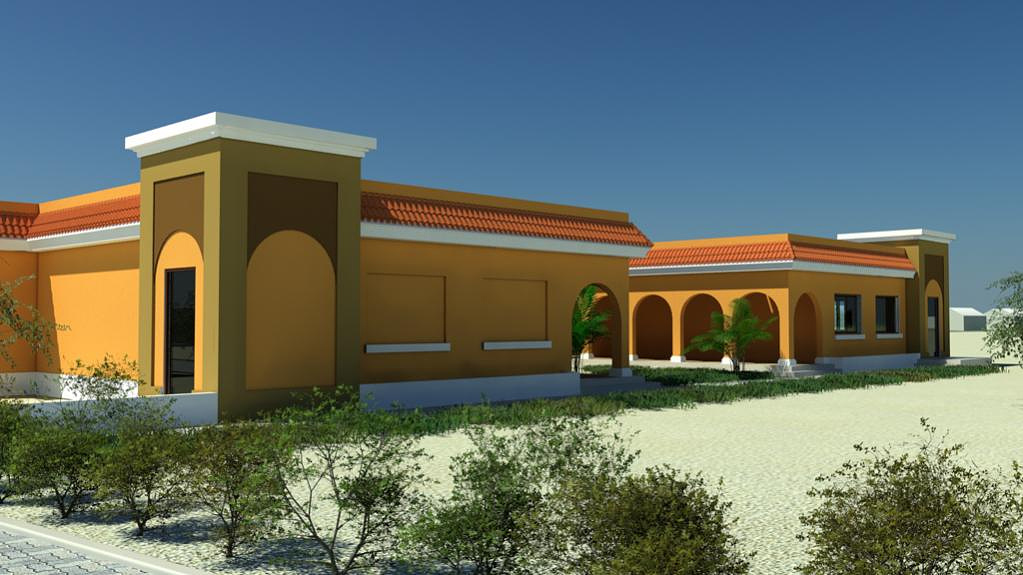
yeah i know that the roof tiles are too small, its just a PITA to fix those, anyways, the client approved the design, ill probably just make some final adjustments to the glass and something to break up the wall edge/floor condition, i am thinking maybe some mulch with small bushes/flowers.
right now the sand is just 1 big plane, anyone know waht the best way would be to add the mulch to these areas and have it fade into the sand? I was thinking about using a blend material and using vertex colors, although i have never worked with vertex color,
Any one have any suggestions to make this MSO with a blend/transition between mulch to sand?
K
Kyle Denny
Report Abuse
Definitely adding some form of a bump map to the walls will help out. Also I would add the landscaping closer to the building walls to break up the area between the walls and the floor. Maybe its just me but the scaling on the roof looks a bit small as well.
J
Javier Oropeza
Report Abuse
thanks for the tips macker, I will try these settings on my glass, as well as see what kind if dirt I could intoduce to break up the plainness of the walls, I added a bump map but maybe it is too subtle...
C
Chris MacDonald
Report Abuse
I think the glass looks more like mirrors now.
Generally a good (and physically accurate) glass setup is an Arch & Design material with an IOR of 1.5 (fresnel reflections/refractions enabled) and 100% white on both the reflection and refraction. Then expand the advanced rendering options dialogue and use the "colour at max distance" on the refractions to give your glass a colour tint. Though keep in mind that this will produce glass that in some shots will allow you to see into the building.
I'd also say you need to work on producing some materials that don't look so flat & lifeless. For example the roof tiles you could use a script to assign a unique material ID to each tile ( http://www.cg-source.com/uniquematerialids.php ), then use the "Multi-Sub Map" in the diffuse slot to create some subtle colour variations in your tiles.
If you unwrap your textures and in photoshop try "painting" some dirt to specific areas (beneath windows, eaves overhangs, etc) it could help - especially when used subtly. Also make sure ambient occlusion is turned on in all of your materials.
Next I'd work on the staging of the scene, such as foaliage and street furniture. I'd give serious thought into either purchasing some high res plants/trees or alternatively model your own in a program such as onyxtree. However currently you could make your foliage work much better by adding a random rotation/scale to each plant, thus breaking up the monotony of seeing the same one over and over.
The mental ray photographic exposure is also worth looking into for adding vignetting which will draw your eye into the centre of the image; plus there is no additional render time incurred. Alternatively you could do this in photoshop.
On wide angle shots you could perhaps introduce some barrel distortion with the "distortion" output shader, though do make sure it's set to barrel, not pincushion (pincushion is introduced when using a large zoom lens, not wide angle).
J
Javier Oropeza
Report Abuse
Here is an updated rendering, Added a mrsky multiplier of 2, added clouds in Ps, I think it looks a little better, but still missing that photorealism...
[ATTACH=CONFIG]37788[/ATTACH]
J
Javier Oropeza
Report Abuse
Thank you all for the comments. Generally speaking, i need to add more maps to my materials.
@ilija
i tried the settings you recomended as far as adding GI goes, i really couldnt see a notable difference.
I am still experimenting on the glass material. I think part of the problem is that i was using the AEC Extended windows and doors, I am doing some research on these, looks like they create unnessary geometries that may be causing some of the artifacts i was noticing.
@mattclinch
threw all the readings and tutorials i have seen, i believe that you are right about not needing to use GI with FG for exterior daylight scenes.
I will increasing the sky output: When you say this are you refering to the multiplier (default 1) in the Mr Sky Parameters rollout? If not please let me know which setting you are refering to.
Now about the filter, are you refering to the Sampling quality filter? I use the default box with 1/1, which filter do you use?If this isnt the filter setting you refering to please let me know which is the one your refering to.
I will post updated renderings soon.

Matt Vernon-Clinch
Report Abuse
i'm sorry, i dont agree with this at all. as a personal rule of thumb, i say that if 50% of your scene is in direct sunlight, there is no benefit whatsoever from using GI+FG as opposed to FG alone with multiple bounces.
i would say to increase realism you should adjust the output of the sky to brighten it up a bit. add some texture to the walls etc and perhaps change your filter for some slight sharpening.

Stan Zaslavsky
Report Abuse
to decrease transparency in the mr glass - just reduce the transparency from 0.9 to 0.6-0.7 ..
but for best realism - add some objects behind the glass .. and maybe some lights inside to give the image more depth
keep going - the modelling looks good, but certainly textures need more work...
to your general renders - you can add a bump - small noise map (size 5-20) - this will add texture variation on the surface
good luck
i
ilija todorovic
Report Abuse
Also you need better sky map than the MR default sky, and you should add some better materials and maps to be more realistic
i
ilija todorovic
Report Abuse
ok first for better render quality you must use GI. Try this adjustments: FG point dens: 0.4-0.8; Rays per FG: max 150; INterpolate over...-30; Diff bounces 3. Noise filtering: High; Trace depth 10;3;3
GI Max No Photons per... 2000-5000; Trace depth 10;3;3
Average GI photons per light 150000 if you had only one light source(Sun), and check All objects recive and... But I can't help you about glass because I have the same problem