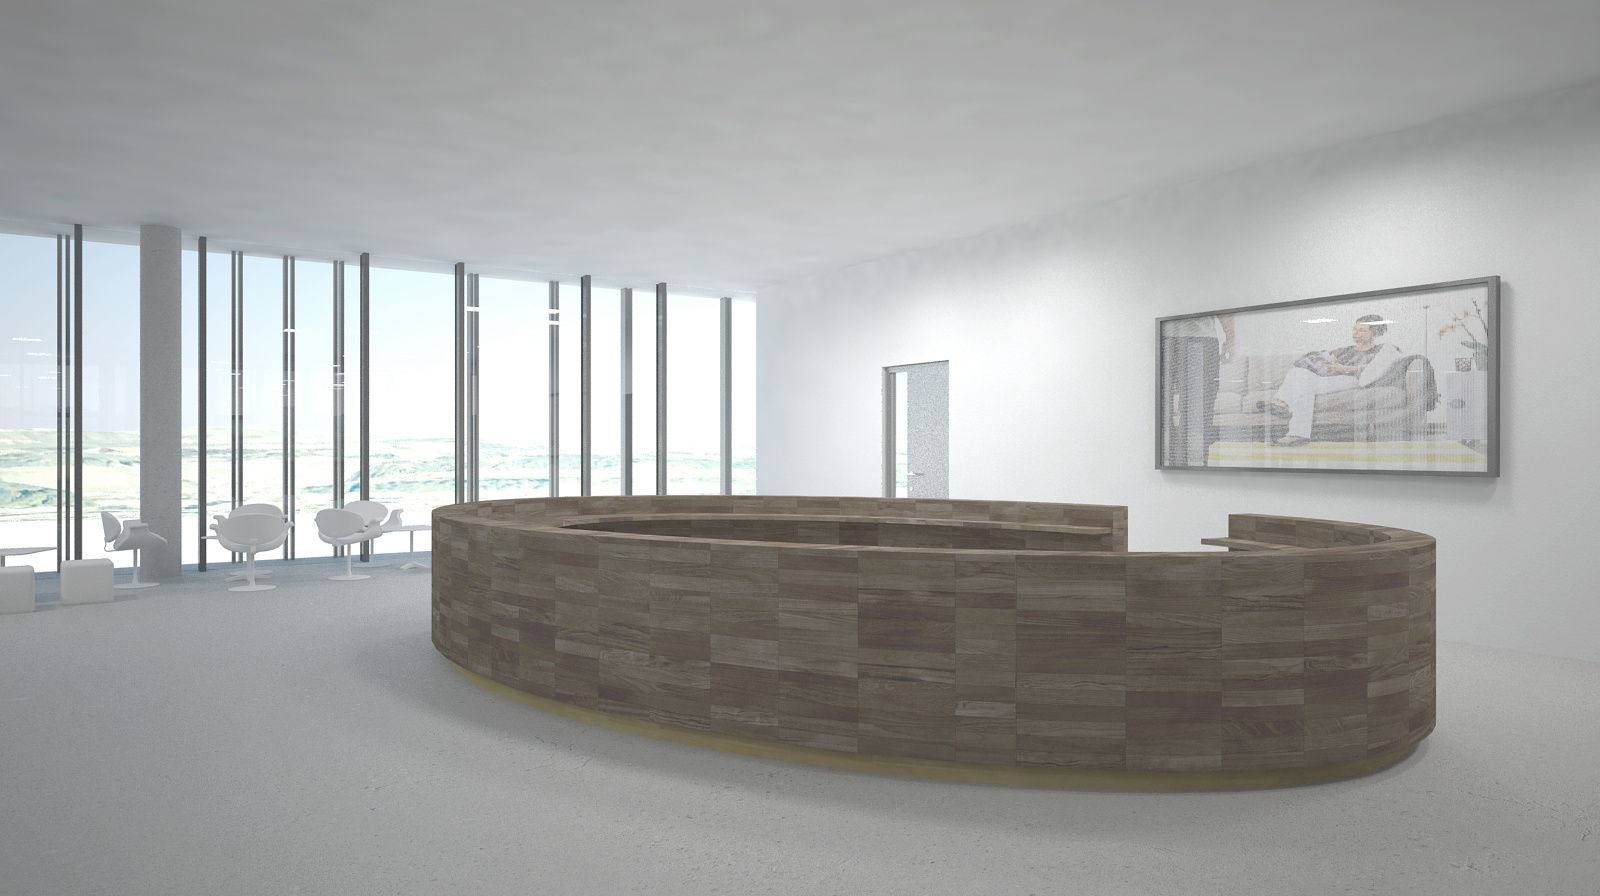
Post Finance Headquarters
You must be logged in to post a comment. Login here.
J
Justin Traylor
Report Abuse
I think that a few people in the scene would help add some life to the image. Also, the ceiling doesn't make much sense because there are reflections of ceiling lights in the wall picture and window, and obviously light is being cast from somewhere in the scene, but the ceiling is empty.
Adrien Binet
Report Abuse
It's not bad, I personally think you should add a little bit more warmth to the image. A little bit more red and yellow perhaps, it'll help make the office more inviting. Have you thought about adding people? If you are making this a portfolio piece, I would spend some time and really make it outstanding. A couple people might help scale the very large reception desk. Also, the ceiling should be redone to include lights and the map you used is too large of a scale, it's blotchy. Same for the ground. Hope I'm not being too harsh. The image looks good, just spend some more time with it in max.
marco kappert
Report Abuse
[ATTACH=CONFIG]45463[/ATTACH]
cheers man, what do u think?
marco kappert
Report Abuse
[ATTACH=CONFIG]45462[/ATTACH]
Cheers man,
yeah i had a go at changing colour levels and adding multiplyed images to get more contrast,
but it looks like the client wants different angles so... il just use this shot for my portfolio...
thanks for your help anyway...
peace...
Adrien Binet
Report Abuse
[ATTACH=CONFIG]45460[/ATTACH]
You can use a few simple filters to add a little depth and color to the image. This took me about 1 minute to do so if you need to do it to many images, this might be a good way to go about it.
Make sure you only have one layer - your image. Copy it twice. To the first copy, go to Filter-Artistic-Neon Glow. Make the glow yellow or orange, and glow size 8, brightness 16. Change the layer to an overlay and adjust opacity if you want. To the second copy, go to Filter-Blur-Gaussian Blur. Make the blur big enough so that you start to lose the details in the scene but not completely blurred. Also make this layer an overlay and adjust the opacity accordingly.
Once you get something you like, you can flatten the image and apply some vignetting to the corners. Filter-Distort-Lens Correction, change vignette settings.
You can also adjust the color balance under Image-Adjustments-Color Balance.
Good luck!